Free Practice Workbook
Key Takeaways
- Excel Data Entry Forms make entering data faster and easier.
- Your data must be in an Excel Table before using the form.
- You can add, edit, search, and delete records from the form.
- Data Validation rules on the worksheet also work in the form.
- Keyboard shortcuts help speed up data entry and navigation.
Make sure to download the Excel Workbook below and follow along:
Download excel workbookTop-11-Data-Entry-Form-Tips-and-Tricks.xlsx
Want to know how to use the Data Entry Form?
*** Watch our video and step by step guide below with free downloadable Excel workbook to practice ***
Watch it on YouTube and give it a thumbs-up!
Watch it on YouTube and give it a thumbs-up!
Watch it on YouTube and give it a thumbs-up!
Table of Contents
1. Create Form in Excel
I will show you how easy it is to create a form in Excel for Data Entry with the following quick video below.
*** Watch our video below on How to Create Form in Excel in 5 minutes!***

–
In this tutorial, you have learned how to create form in Excel with minutes without using VBA!!
Follow the steps below:
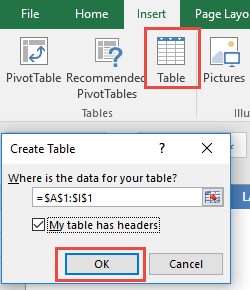
STEP 1: Convert your Column names into a Table, go to Insert> Table

Make sure My table has headers is also checked.
STEP 2:Let us add the Form Creation functionality to understand how to make a fillable form in Excel.
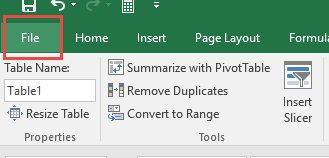
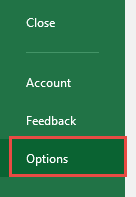
Go to File > Options
STEP 3:Go to Customize Ribbon.
Select Commands Not in the Ribbon and Form. This is the functionality we need.
Click New Tab.
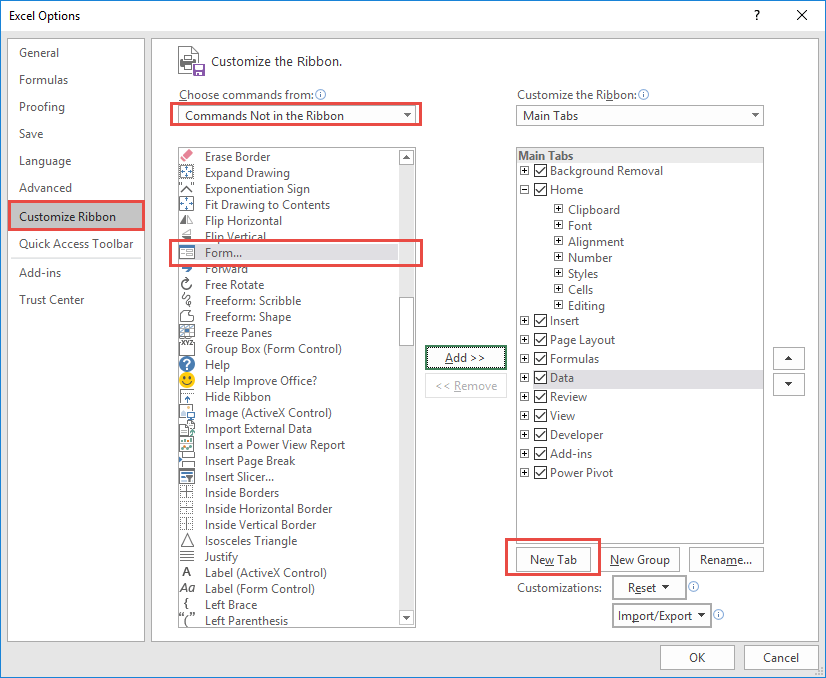
STEP 4:Under the New Tab, select New Group, and click Add.
This will add Forms to a New Tab in our Ribbon.
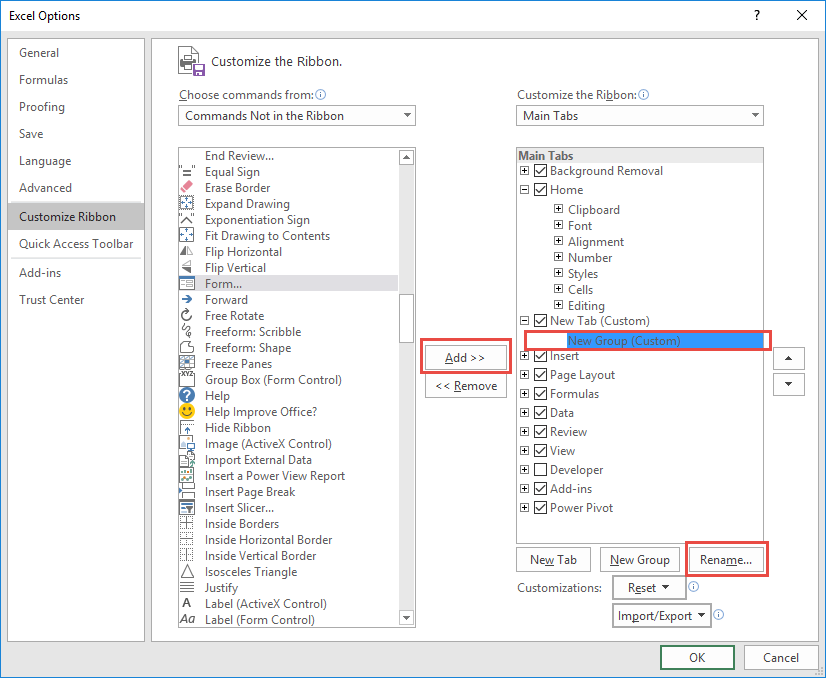
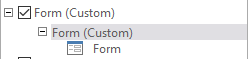
Notice that there is also a Rename button, you can use it to rename the New Tab and New Group into something more descriptive, like Form:
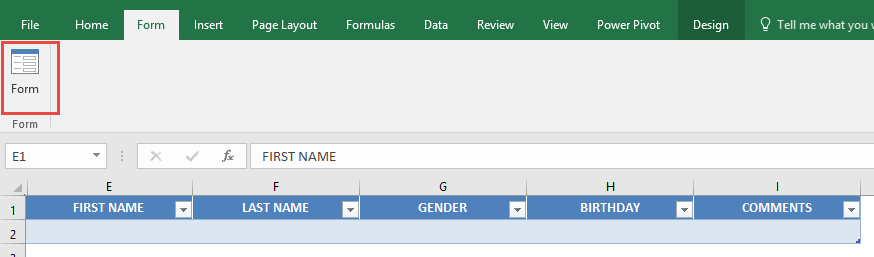
STEP 5:Select your Table, and on your new Form tab, select Form.
STEP 6: A new Form dialogue box will pop up!
Input your data into each section.
Click New to save it. Repeat this process for all the records you want to add.
Press Close to get out of this screen and see the data in your Excel Table.
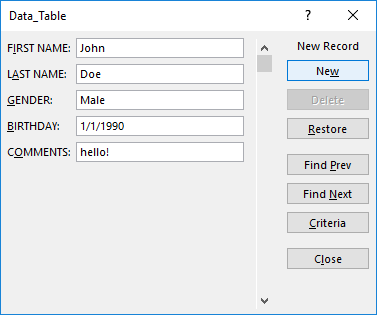
You can now use this new form to continually input data into your Excel Table!

2. Add to Quick Access Toolbar (QAT)
To add to the quick access toolbar, follow the steps below:
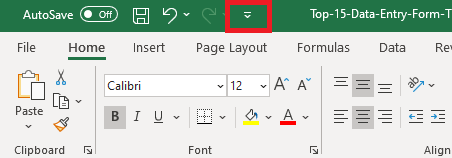
STEP 1: Click on the small arrow right next to QAT.
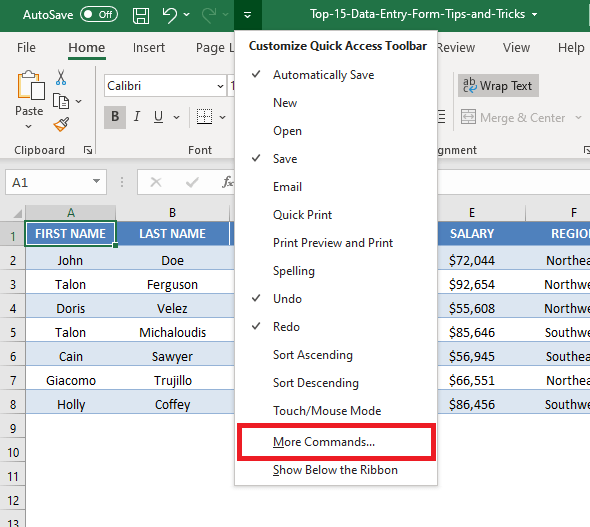
STEP 2: Click on More Commands from the dropdown list.
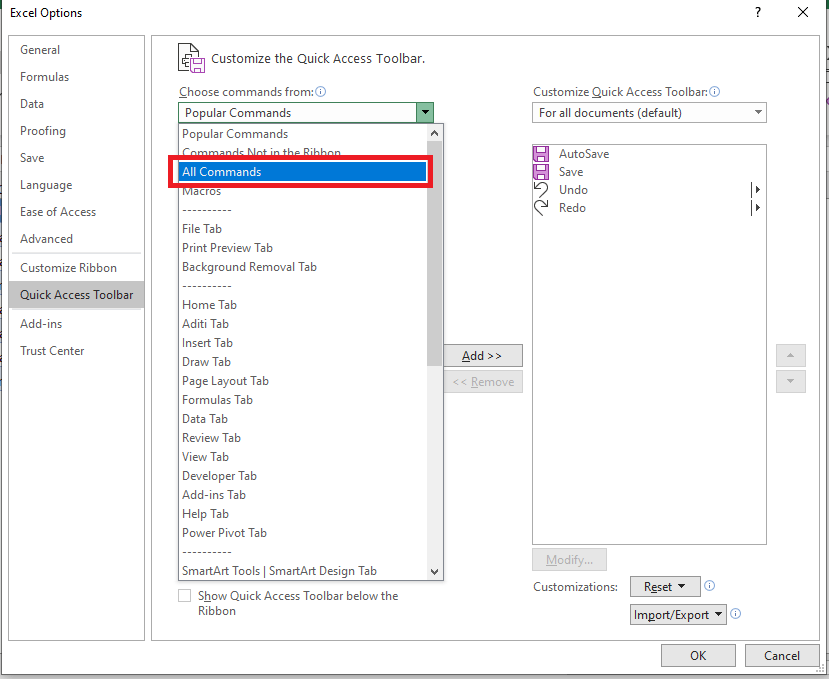
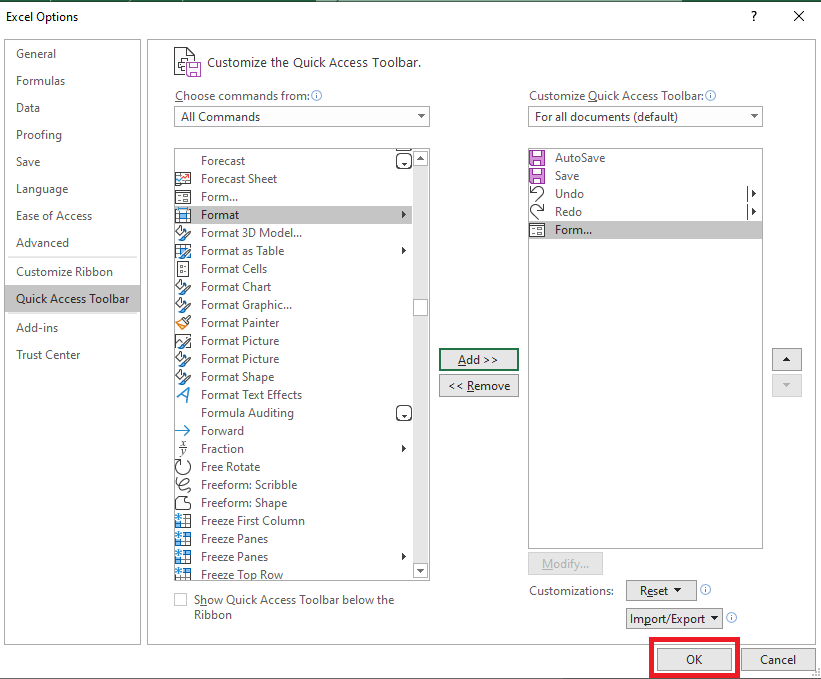
STEP 3: In the Excel Options dialog box, select All Commands from Choose commands from list.
STEP 4: Select Form from the list and then click on Add>>.
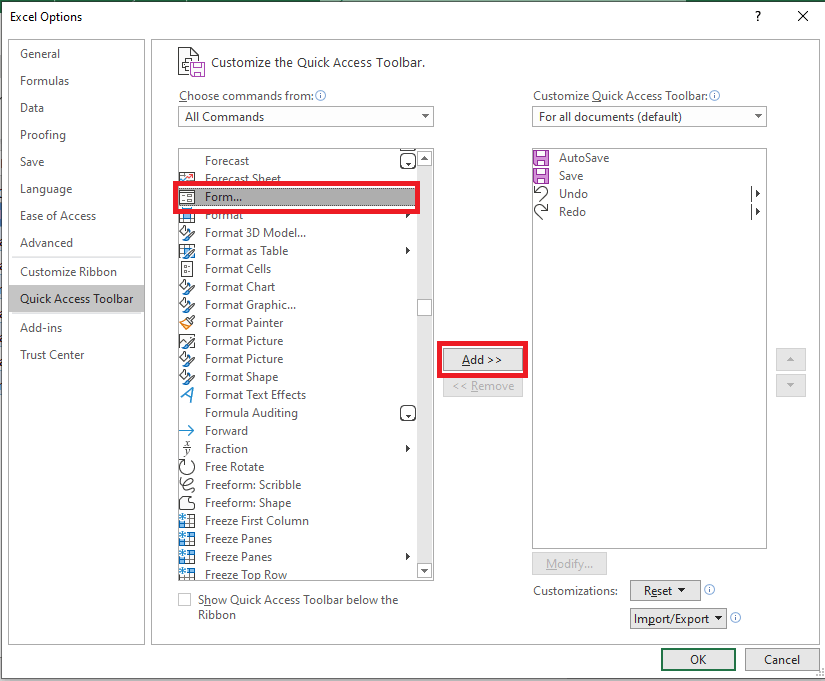
STEP 5: Form is now available in the Customize Quick Access Toolbar. Click OK.
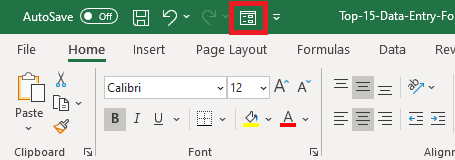
Data Entry Form is now part of your Quick Access Toolbar.
3. Access the Form anytime
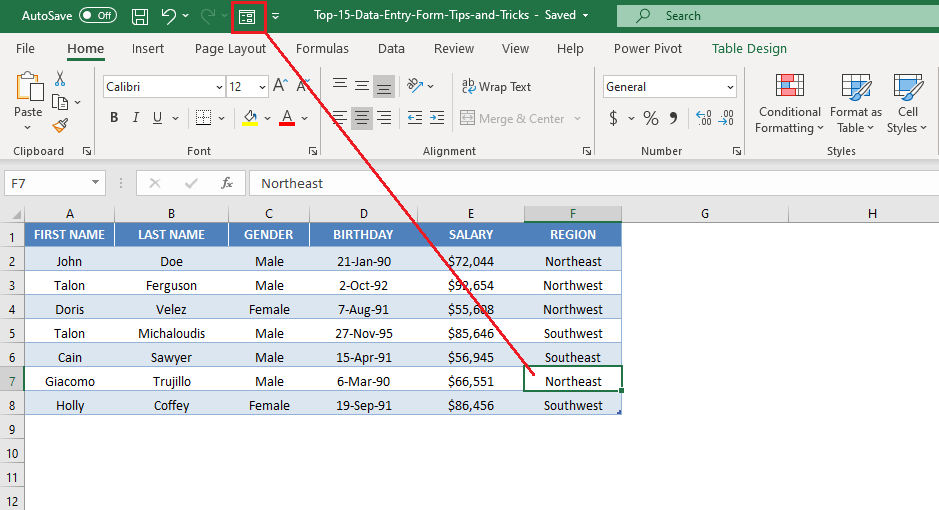
To access the Excel Data Entry Form, click on any cell in the table and click on the Form icon in Quick Access Toolbar.
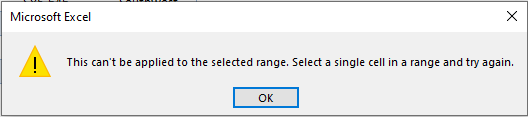
If you try to access the form when you haven’t selected a cell within the data table, you will receive an error message like the one shown below:
4. Browse through Records
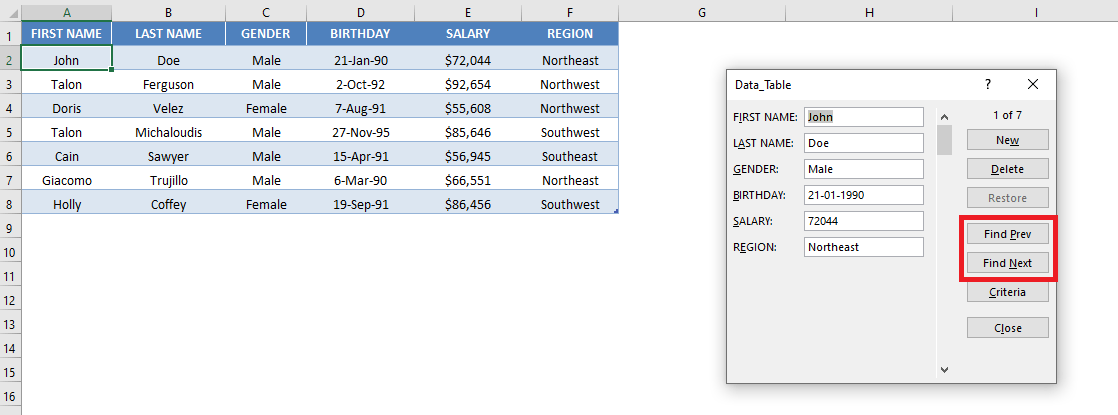
To go through the existing records, simply use the Find Previous and Find Next buttons available on the Data Entry Form.
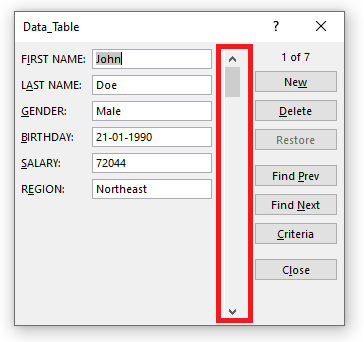
You can also use the scroll bar to go through the records one after the other.
5. Edit Existing Record
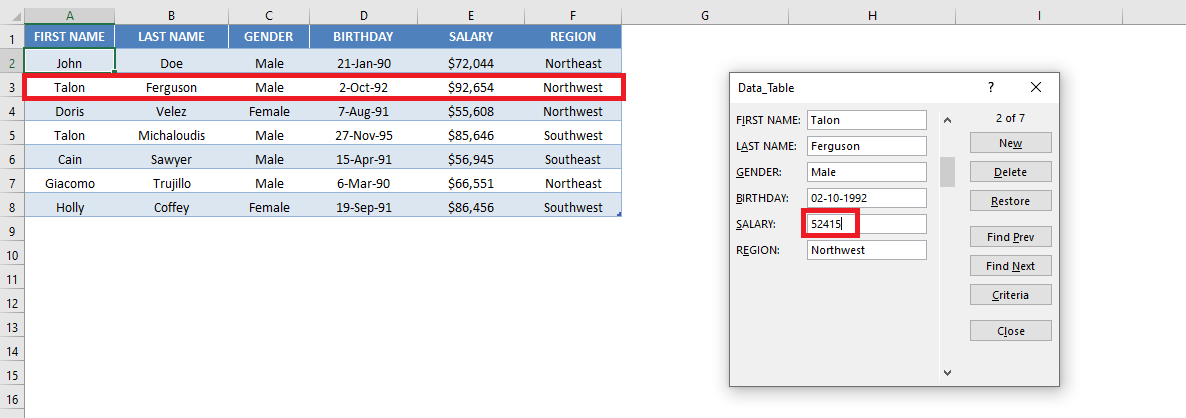
Use the Find Previous and Find Next buttons to search for the record to want to edit.
Once you find the desired record, simply make the necessary edit and hit Enter in Excel.
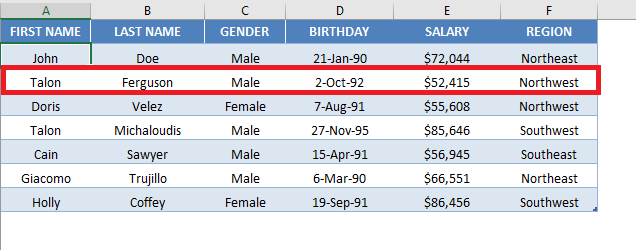
The data table will be updated with the changes made.
6. Search Criteria
Using Wildcards
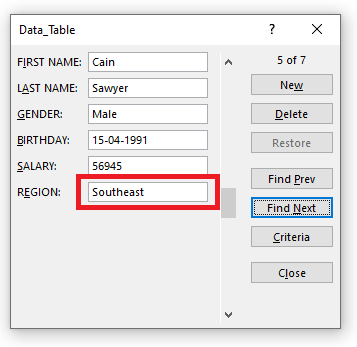
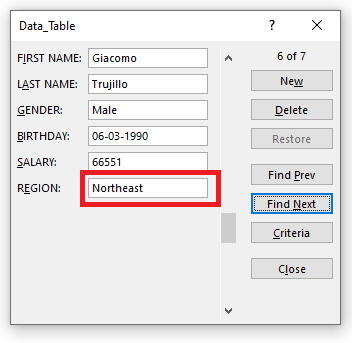
If you wish to search all entries containing the word “east” in the Region Column, you can do that by using the wildcard asterisk (*).
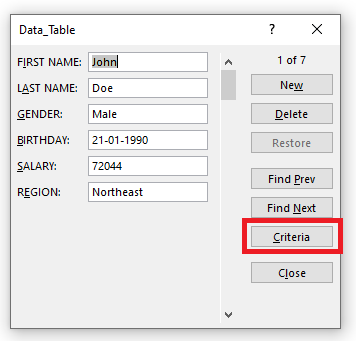
STEP 1: In the Data Entry Form, click on the Criteria button
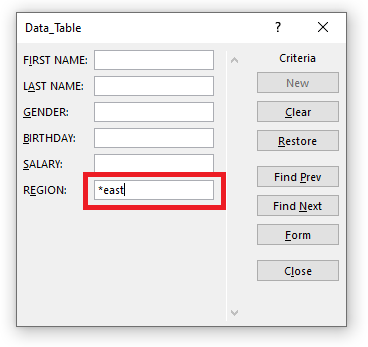
STEP 2: In the Region field, type *east (to search all-region containing the word east)
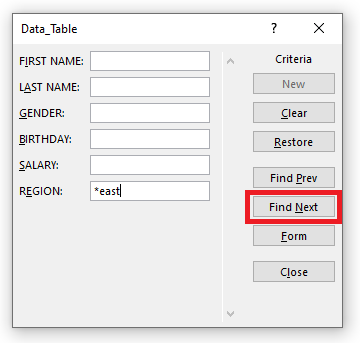
STEP 3: Click Find Next to find the entries containing the word east.
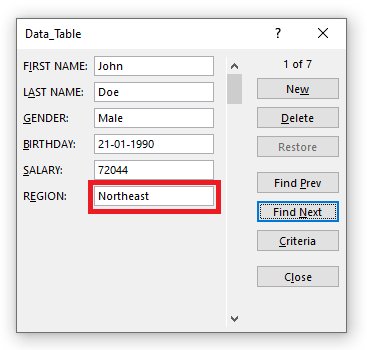
Excel Data Entry Form will find the three entries for you in this scenario!
Using the greater or less than sign
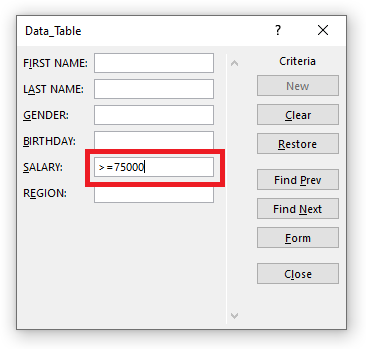
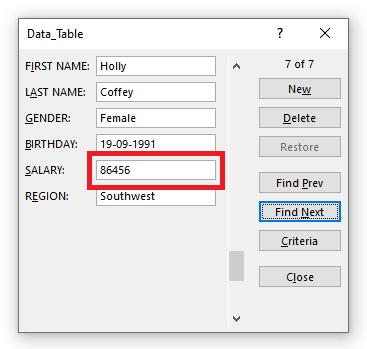
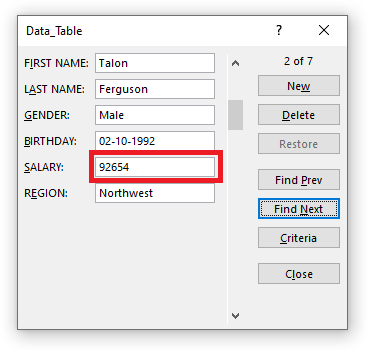
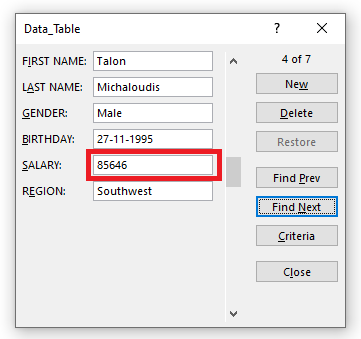
If you want to search for persons having a salary greater than or equal to $75,000, you can do so by following the steps below:
STEP 1: In the Data Entry Form, click on the Criteria button
STEP 2: In the Salary field, type >=75000.
STEP 3: Click Find Next to find all entries with a salary greater than or equal to $75,000.
7. Restore a Record
Suppose you have accidentally deleted the first name of a record.
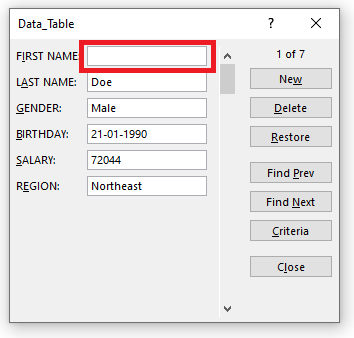
And you don’t remember what was written in that field! Don’t panic.
You can use the Restore button in the Excel Data Entry Form and retrieve the data lost accidentally.
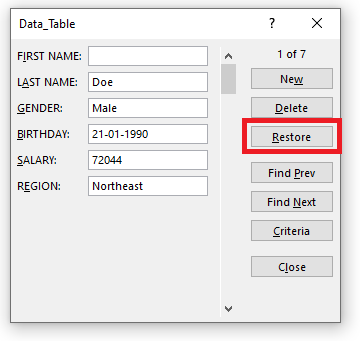
The data will reappear in the respective field.
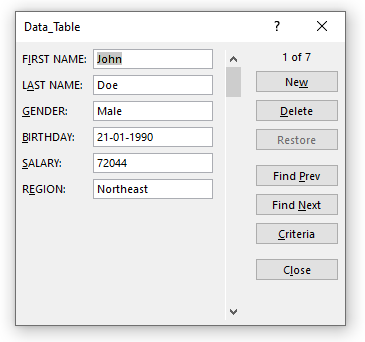
One thing you need to keep in mind is that the Restore button is only useful if you haven’t hit Enter.
The moment you press the Enter button, the Restore button will become inactive and you won’t be able to revert back to the original data.
8. Data Validation in Forms
Even though you cannot directly add any data validation to the form. Any restriction created on the data table will still be in effect in the Forms.
Let’s see how!
Say, you add a list rule to the Region Column using Data Validation.
STEP 1: Select the Region Column.
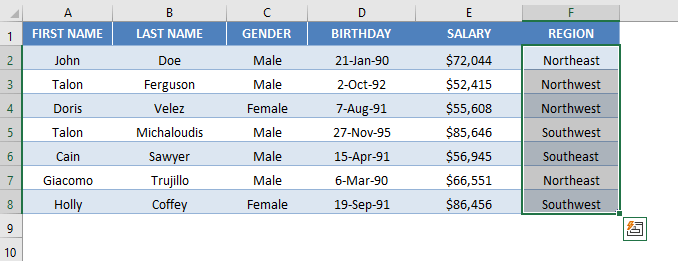
STEP 2: Go to Data Tab > Data Tools (Group) > Data Validation.

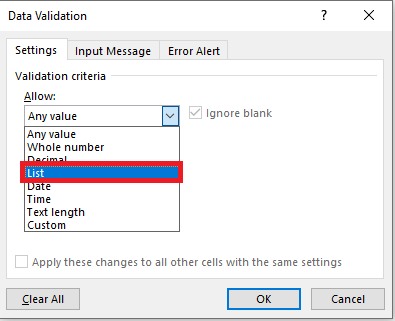
STEP 3: In the Data Validation dialog box, click on the Allow dropdown and select List.
STEP 4: In the Source field, type Northeast, Northwest, Southeast, Southwest, and click OK.
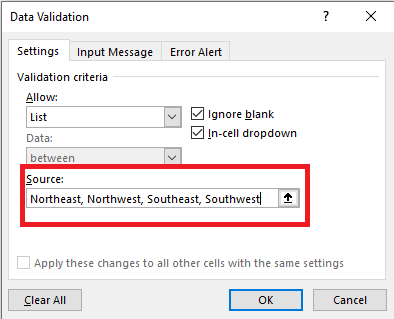
Data Validation has now been inserted in the Region Column.
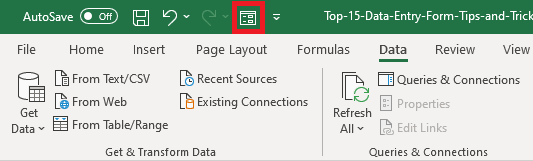
STEP 5: Click on the Forms icon in QAT.
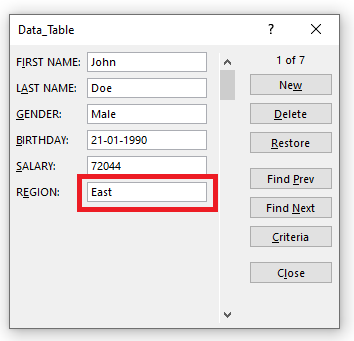
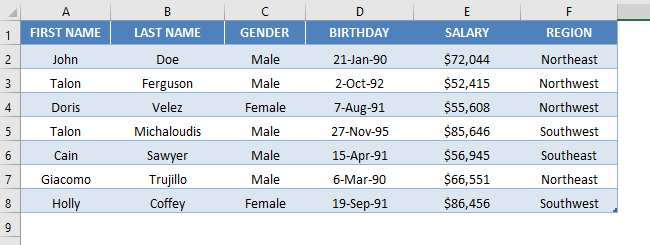
STEP 6: Change the Region for Record 1 from Northeast to East and Click OK.
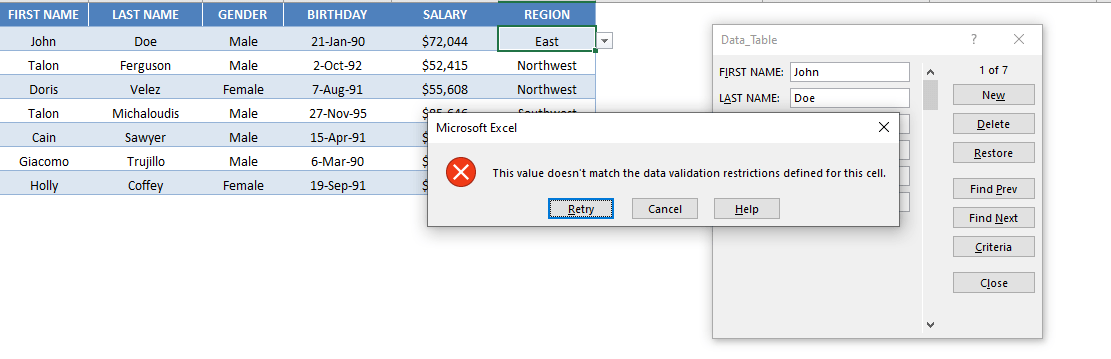
Once you click OK, you will see an error message as below:
9. Delete a Record
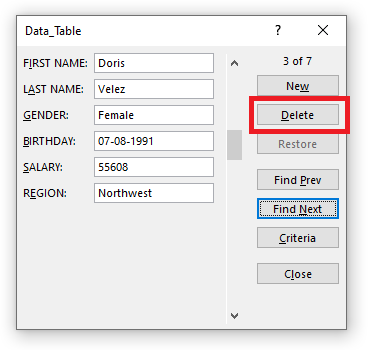
STEP 1: Use the Scroll Bar to navigate to find the entry you want to delete.
STEP 2: Click on the Delete button.
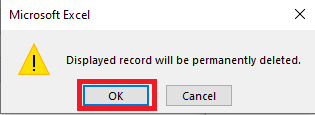
STEP 3: A confirmation message will appear on your screen, Click OK.
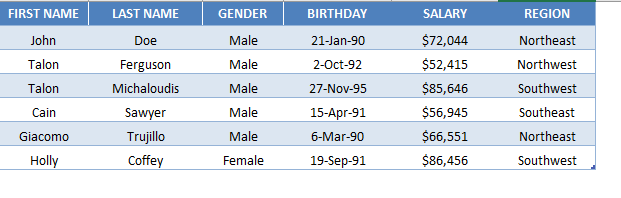
The desired entry will be removed from the data table.
10. Close the Form
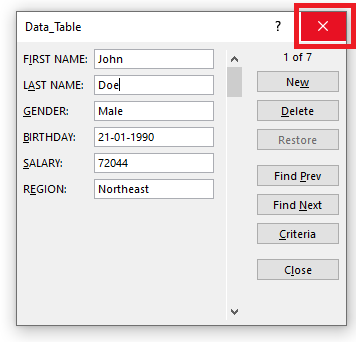
To close the dialog box for Data Forms, click on the Close button (X) on the top-right corner of the box.
11. Keyboard Shortcuts for Data Entry Forms
- Press Tab to go to the next field in the Excel Forms.
- Press Enter to go to the next record in the Excel Forms.
- Hit the Esc button on your keyboard to close the Excel Form.
Advanced Techniques for Experienced Users
Creating Drop-Down Lists and Data Validation
To handle data effectively in Excel, creating drop-down lists and implementing data validation are vital steps that can streamline processes and reduce errors. When you incorporate a drop-down menu in a cell, users can simply select from a predefined list, ensuring uniformity and speed in data entry.
Imagine you’re creating a spreadsheet to capture regional sales data. By utilizing a drop-down list for the regions, errors like typing “Nort” instead of “North” become a thing of the past. To create such a list, find the ‘Data Validation’ dialogue box, select ‘List’ from the ‘Allow’ drop-down, and input your values, like “North, South, East, West” in the ‘Source’ box. Every time you select a cell within the specified range, you’ll be greeted with a convenient drop-down menu containing your predefined options.
Bear in mind, though, that while the drop-down lists are amazing for data integrity, they have a quirk within forms—while the list itself doesn’t show in the form field, rest assured its constraints are enforced. If a user tries entering an off-list value, it will be rejected. So users can’t mistakenly enter “Weast” when the options include only cardinal directions.
To set this up, add a new sheet and smartly rename it to something descriptive, like “data.” List your options in a column, changing sheets as per the needs of multiple fields requiring lists. Returning to your main data worksheet, select the column due for a drop-down list, head over to the ‘Data’ ribbon, click on ‘Data Validation’, and select ‘List.’ Make sure the ‘In-cell dropdown’ is ticked before navigating to your list’s location.
Employing Formulas within Data Entry Forms
While Excel Data Entry Forms offer an array of benefits, they also present a vexing limitation: you can’t directly input formulas into form fields. But don’t let this discourage you. Instead, look at the glass half full; there’s a nifty workaround that can help you maintain the power of Excel’s calculations within the confines of data entry forms.
The key is to use worksheet formulas that reference the cells populated by the form. For example, say you need to calculate the total cost of items ordered, you could set up a formula in a cell adjacent to where the form entries are that multiplies the ‘Quantity’ by the ‘Unit Price’. The form will handle the raw data entry, while the worksheet keeps track of the totals.
Here’s what you could do: create a new column outside your form’s field range—name it something like ‘Total Cost’. In the first cell under this heading, enter your formula, =C2*D2, assuming C2 holds ‘Quantity’ and D2 holds ‘Unit Price’. Copy this formula down the column to ensure it applies to all future records. While the form won’t show this calculation, it updates dynamically on the main worksheet whenever you add a new entry through the form.
Simply put, the form and the worksheet collaborate like a tag team—while one collects the data, the other calculates and presents it neatly.
Overcoming Limitations of Excel Data Entry Forms
Ever found yourself trying to squeeze a square peg in a round hole while managing data in Excel? Field restrictions can feel just like that. Whether you’re juggling a numeric range or finessing date parameters, setting boundaries is key, but it has its challenges.
Don’t let the default cap of 32 fields curb your data aspirations. Think of it not as a barricade but as a prompt to consider alternative solutions or to optimize the structure of your data. It’s all about being strategic—can you consolidate some fields, or is it time to split your form into sections? Your decision will bring ease and order to what could otherwise be an overwhelming spreadsheet.
In your quest to tame your data, you’ll arrive at the ‘Data Validation’ tool which, when used wisely, is nothing short of a magic wand. Want to ensure entries in the ‘Start Date’ column are within a particular timeframe? Just select ‘Date’ in the ‘Data’ tab under ‘Data Validation’, and your chosen time boundaries will enforce discipline among users.
But suppose you’re not interested in walking tightropes with data constraints. In that case, consider using a bespoke Excel Data Entry Form Template. This helps you circumnavigate stringent limits and lends itself to a more nuanced approach to data management.
FAQs
1. How to create a Data Entry Form in Excel?
First, convert your data range into an Excel Table. Then add the Form command to the Ribbon or Quick Access Toolbar and click it to open the Data Entry Form.
2. Can I edit and delete records using the Data Entry Form?
Yes. You can browse through records, update existing entries, or delete records directly from the form.
3. Does the Data Entry Form work with Data Validation?
Yes. Any Data Validation rules applied to your table are enforced when data is entered through the form.
4. Can I search for specific records in the form?
Yes. Use the Criteria button to search for records using text, wildcards, or comparison operators such as >, <, or >=.
5. What are the limitations of the Excel Data Entry Form?
The form supports up to 32 fields, does not display drop-down lists, and does not allow formulas to be entered directly into form fields.

Bryan
Bryan Hong is an IT Software Developer for more than 10 years and has the following certifications: Microsoft Certified Professional Developer (MCPD): Web Developer, Microsoft Certified Technology Specialist (MCTS): Windows Applications, Microsoft Certified Systems Engineer (MCSE) and Microsoft Certified Systems Administrator (MCSA).
He is also an Amazon #1 bestselling author of 4 Microsoft Excel books and a teacher of Microsoft Excel & Office at the MyExecelOnline Academy Online Course.

 30 Days - Full Access