As someone who relies on Microsoft Outlook for daily communication, I’ve found that keeping up with emails can be a time-consuming task. Microsoft 365 Copilot in Outlook has been a game-changer for me, helping automate many parts of the email process. From drafting responses to summarizing lengthy threads, Copilot has allowed me to work smarter and faster.
In this article, I’ll walk you through how to use Copilot in Outlook, step by step. Whether you’re looking to automate your email drafts or make replying easier, I’ll cover it all in a clear, step-by-step format.
Key Takeaways:
- Copilot simplifies email creation by drafting messages based on your instructions.
- You can quickly generate responses to emails, saving time and maintaining consistent communication.
- Copilot provides clear summaries of lengthy email chains, making it easier to catch up on conversations.
- It analyzes attached documents or spreadsheets, giving you a quick overview of key details.
- Copilot can adjust the tone of emails to fit different contexts, from casual to formal.
Table of Contents
Introduction to Copilot
What is Microsoft Copilot?
Before diving into the steps, it’s important to understand what Copilot is. Microsoft Copilot is an AI-driven assistant integrated into Microsoft 365 applications like Word, Excel, and Outlook. Copilot uses machine learning to assist in drafting content, analyzing data, and providing intelligent insights, all while you focus on more critical tasks.
In Outlook, Copilot excels in drafting emails, summarizing long email threads, analyzing attachments for quick insights, and automating routine replies.
Tailoring Your Outlook to Welcome Copilot
To ensure that Copilot is a seamless fit, I like to start by preparing my Outlook environment. This involves a few steps that are crucial for smooth integration. Initially, I check my Outlook version to guarantee its compatibility with Copilot, as it’s designed to work best with the latest updates.
Next, I take the time to clean up my inbox—filing away what I no longer need, which makes it easier for Copilot to understand my current workflow and priorities.
Lastly, I assess my existing email management habits so I can set up Copilot to complement them, ensuring that the transition to AI-assisted email is as smooth as possible.
Step-by-Step Guide to Using Copilot in Outlook
Accessing Copilot in Outlook
The first step in using Copilot is accessing it. Copilot is available directly within the Outlook interface, but depending on your settings, you might need to enable it first.
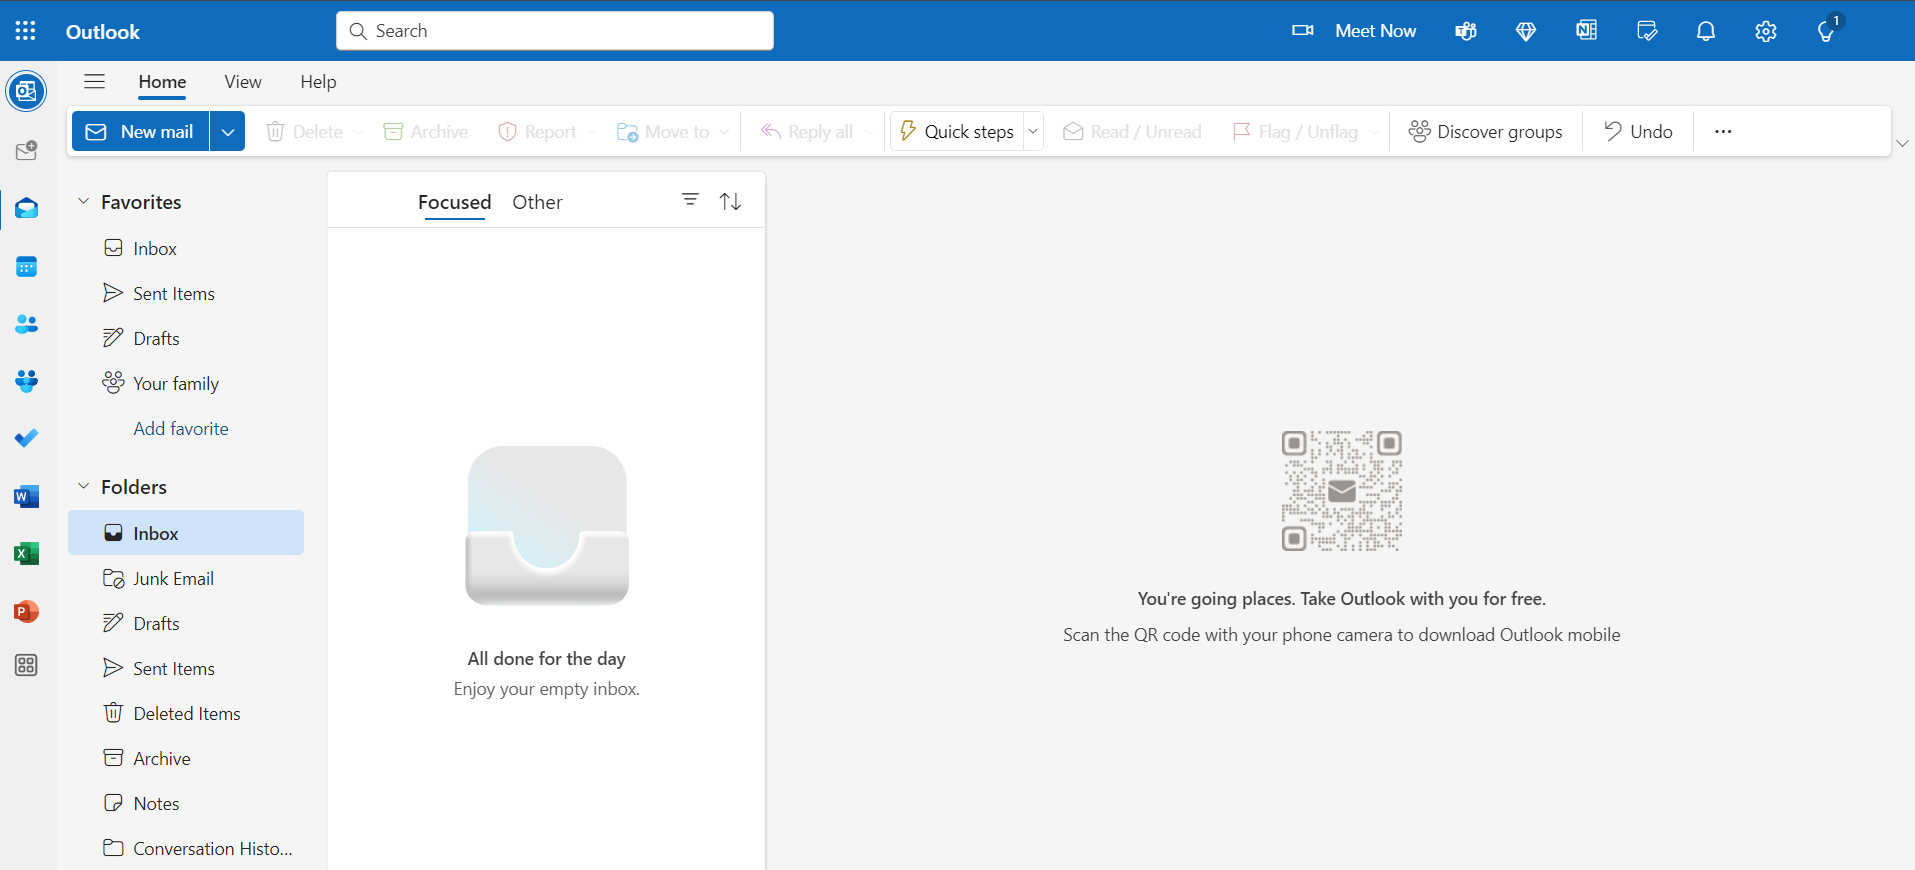
STEP 1: Open Outlook on your desktop or web browser.
STEP 2: Navigate to the Message tab on the ribbon.
STEP 3: Look for the Copilot icon. It’s typically represented by a small robot icon.
If you don’t see the Copilot icon, make sure your Outlook is updated to the latest version of Microsoft 365. You may also need administrative permissions to enable it.
Drafting a New Email with Copilot
Now that Copilot is enabled, let’s create a new email and let Copilot draft it for us.
STEP 1: Click New Mail from the top-left of the Outlook window.
STEP 2: When the email draft window opens, look for the Copilot button (located either in the toolbar or as a pop-up).
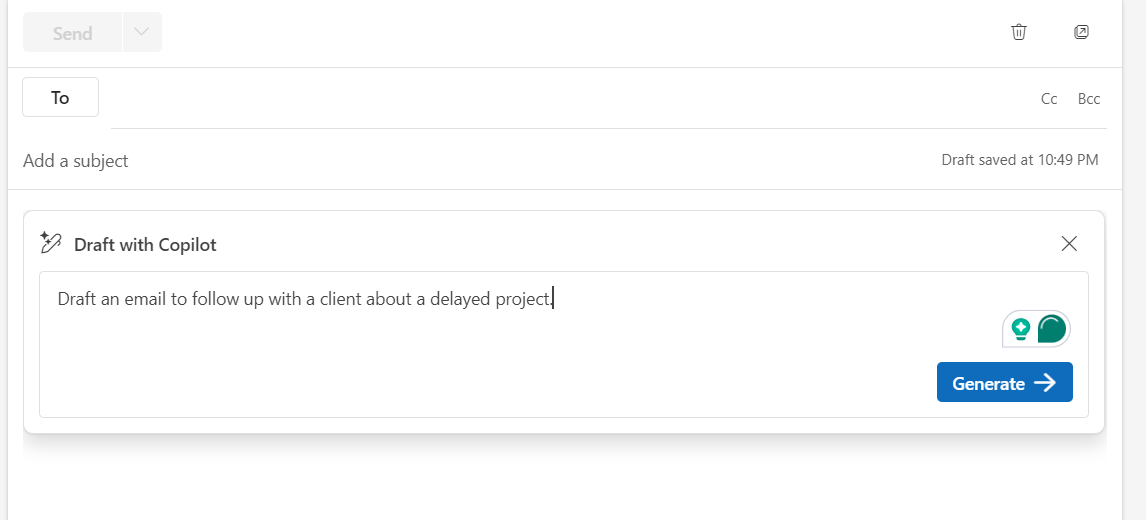
STEP 3: Click Draft with Copilot. A panel will appear on the right side of the email draft.
STEP 4: In the Copilot panel, type the instructions or context for the email you want drafted. For example, you can write: “Draft an email to follow up with a client about a delayed project.”
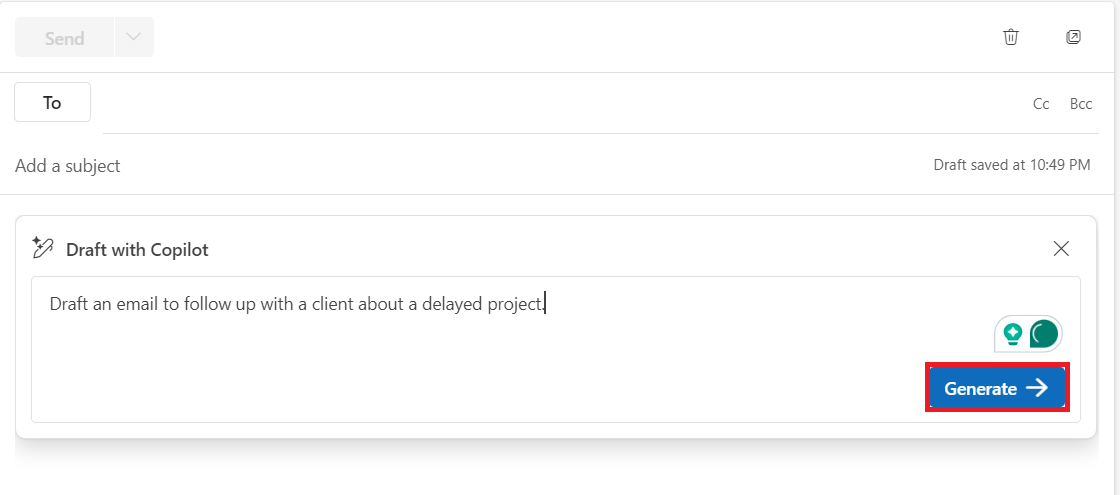
STEP 5: Click Generate, and Copilot will create a draft email for you, incorporating your instructions.
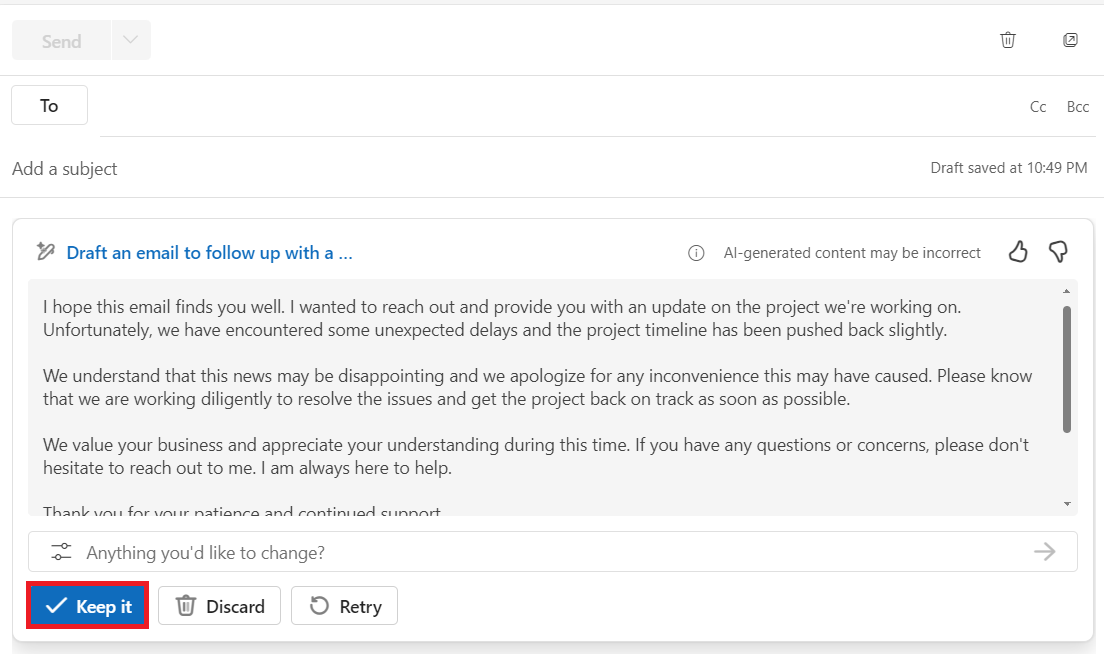
STEP 6: Click Keep it.
If you’re not satisfied with the first draft, you can provide additional instructions or regenerate it until it meets your requirements. I often tweak the tone or specifics this way.
Summarizing Long Email Threads
We’ve all experienced the dread of opening a lengthy email chain and not knowing where to begin. Luckily, Copilot can summarize entire threads to give you a clear overview of the conversation.
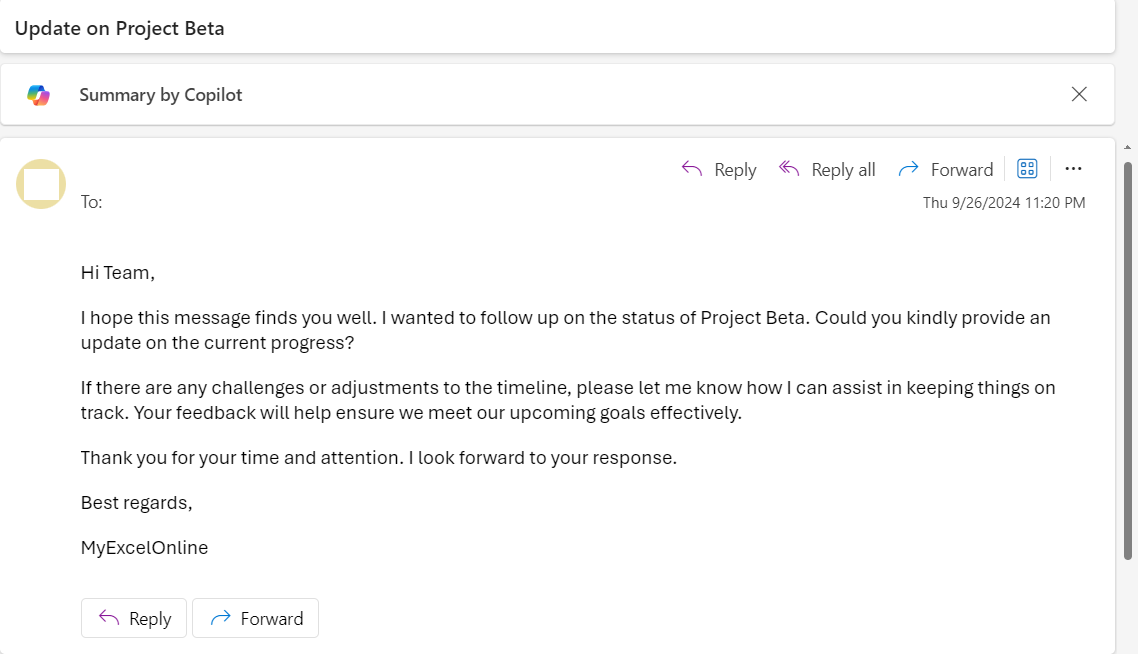
STEP 1: Open a long email thread in your inbox.
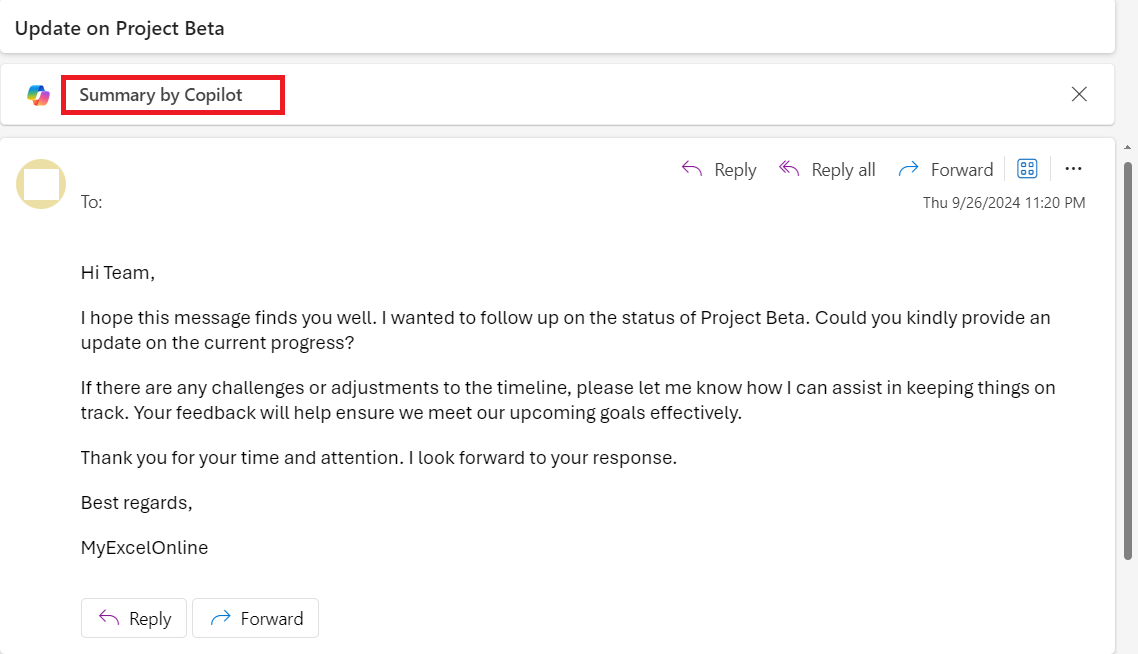
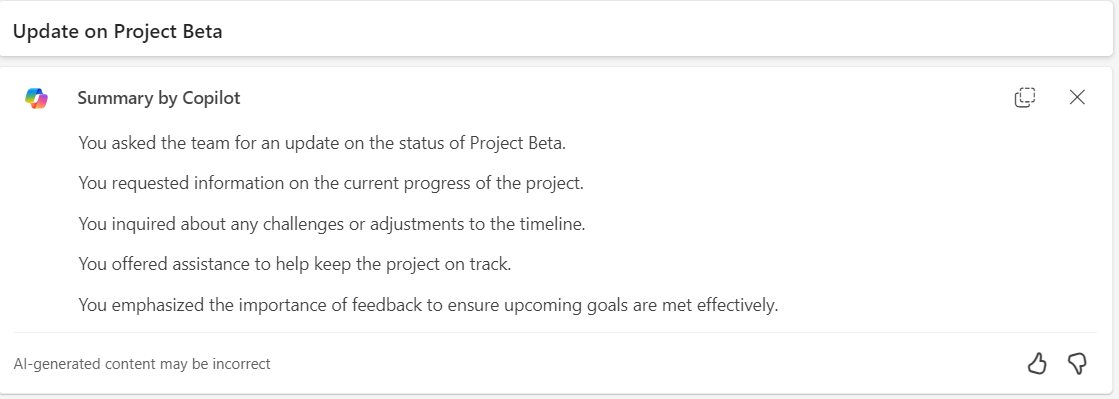
STEP 2: Click on the Summary by Copilot button at the top of the email thread.
Copilot will provide a concise summary of the conversation, highlighting key points, decisions made, and any action items.
I use this feature daily when catching up on project discussions or lengthy client emails. It saves time and reduces the risk of missing important details.
Personalizing Your Emails with Copilot
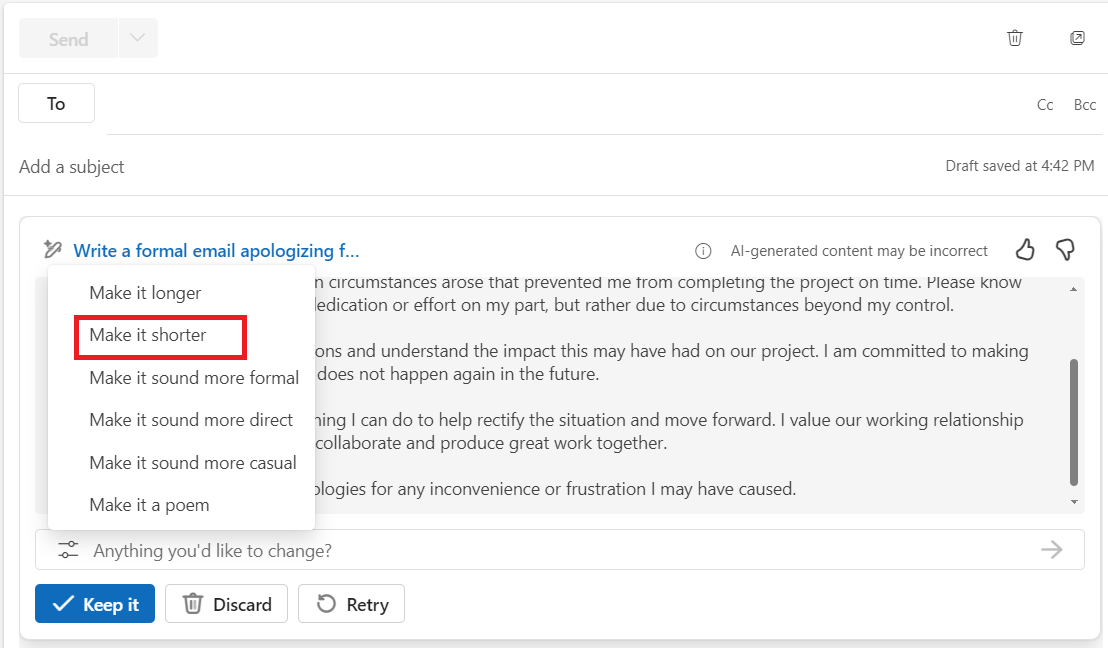
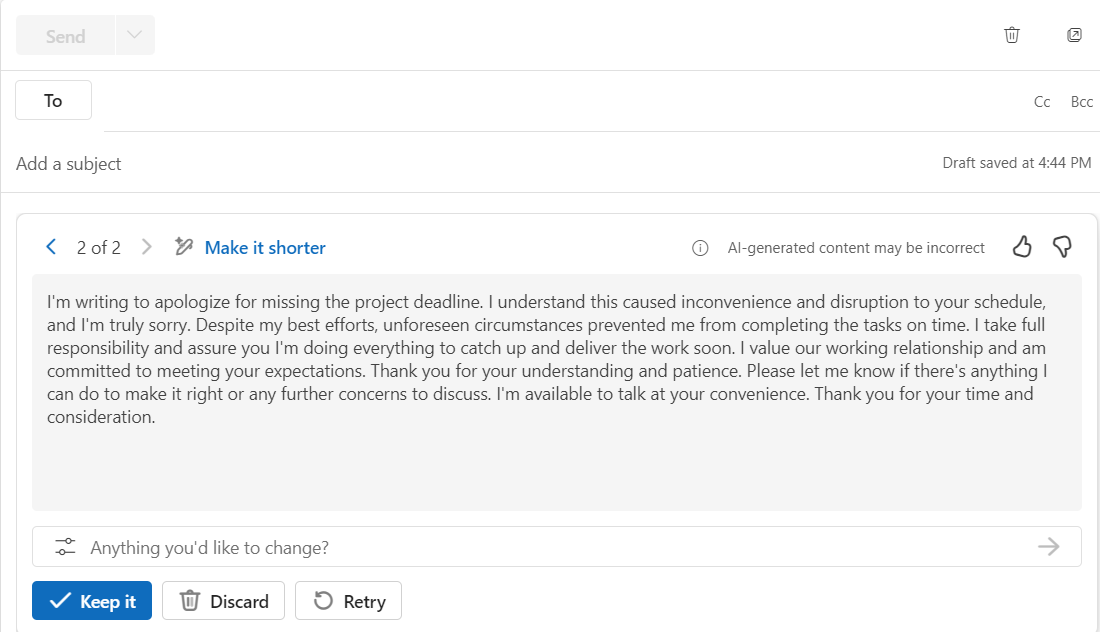
Copilot isn’t just about automation; it also helps personalize your emails. For example, you can instruct Copilot to use a more casual tone when replying to a close colleague or a more formal tone when drafting a client-facing email.
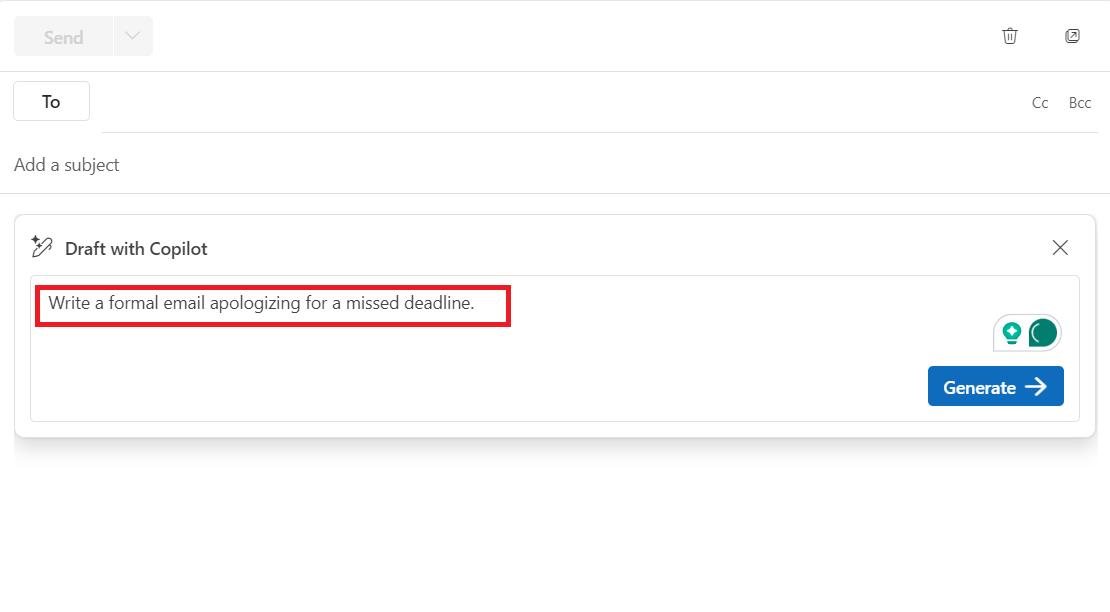
STEP 1: While drafting or replying to an email using Copilot, provide context on the tone. For example, you could say: “Write a formal email apologizing for a missed deadline.”
STEP 2: Copilot will adjust the language, ensuring the tone matches your instructions.
You can review and make any additional changes before sending.
I find this useful when shifting between different types of communication. It ensures my professional emails stay polished while my internal emails remain conversational.
FAQ
Is Copilot available in Outlook?
Yes, Copilot is available in Outlook for users with Microsoft 365 subscriptions. It has been integrated into the new Outlook on both Windows and Mac, and also in Outlook on the web. For those using the classic Outlook for Windows, Copilot became available to users in the Current Channel or Monthly Enterprise Channel starting in June 2024.
How do I activate Microsoft Office Copilot?
To activate Microsoft Office Copilot, you need to first ensure that you have a Microsoft 365 subscription. Launch Outlook, go to the settings or gear icon, and search for Copilot or related AI features in the settings menu. Follow the on-screen instructions to enable Copilot, which may include accepting terms or completing a tutorial. Once activated, Copilot’s features become available as you draft emails.
Can You Employ Copilot in Outlook for Free?
While basic versions of Copilot may be available for use without charge, employing Copilot’s full suite of features within Outlook requires a paid Microsoft 365 subscription. There is a cost to unlock these advanced capabilities designed to enhance productivity and email management.
Why can’t I access Copilot in Outlook?
If you can’t access Copilot in Outlook, it may be due to a non-compatible email account, an outdated version of Outlook, or not having the right Microsoft 365 subscription. Ensure your account is tied to outlook.com, hotmail.com, live.com, or msn.com and that your version of Outlook is updated to the Current Channel or Monthly Enterprise Channel.
Is Copilot Available for All Outlook Versions and Languages?
Copilot is not universally available for all Outlook versions and languages. It currently supports the new Outlook for Windows and Mac, Outlook on the web, and the classic Outlook for Windows in specific update channels. The availability of languages is also limited, so it’s best to check Microsoft’s official documentation for detailed compatibility information.
John Michaloudis is a former accountant and finance analyst at General Electric, a Microsoft MVP since 2020, an Amazon #1 bestselling author of 4 Microsoft Excel books and teacher of Microsoft Excel & Office over at his flagship MyExcelOnline Academy Online Course.

