Adding 3 months from today in Microsoft Excel can be accomplished effortlessly with the application’s robust suite of functions and features. Whether you’re extending a subscription reminder or planning a future event, Excel’s date manipulation tools, such as the EDATE function, allow for quick and accurate adjustments to your timelines. This guide will walk you through several straightforward methods to seamlessly advance a given date by three months in Excel.
Key Takeaways
- EDATE in Excel makes adding or subtracting months from a date quick and simple.
- EDATE works seamlessly with various date formats like “MM/DD/YYYY” or “DD/MM/YYYY”.
- It’s not just about adding 3 months; EDATE allows for adjusting dates by any number of months.
- Combine EDATE with functions like TODAY() or IF() for enhanced date management.
Download the spreadsheet and follow along with the blog on How to calculate 3 months from today in Excel – Download excel workbookAdd-3-months-from-today-in-Excel.xlsx
Introduction to Excel’s EDATE Function
What Is EDATE and When to Use It?
When juggling dates in Excel—whether they’re expiration dates, due dates, or anniversary dates—EDATE is your go-to function. It stands for “Excel Date” and is incredibly handy for adding or subtracting months with ease. So whenever you need to project dates into the future or look back into the past with monthly precision, EDATE has you covered.
The Basics of Using EDATE in Excel
Understanding the basics of the EDATE function in Excel is akin to learning a magic trick with dates. It allows you to effortlessly hop months in the calendar without counting days manually. Just provide EDATE with a start date and an integer representing the number of months you wish to add or subtract. Voilà! Excel does the rest, and you see a new date reflecting the exact month adjustment you desired.
Step-by-Step Guide to Adding 3 Months with EDATE
Entering the EDATE Formula in Excel
To wield the time-shifting powers of the EDATE function in Excel, begin by formatting your cell to Date—this ensures that Excel recognizes your inputs correctly. Once your date cells are ready, here’s how to cast the EDATE spell:
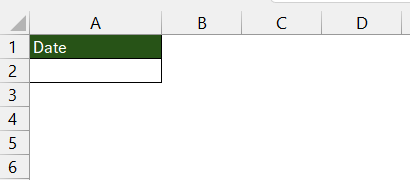
STEP 1: Place your cursor in the cell where you desire the resulting date to appear.
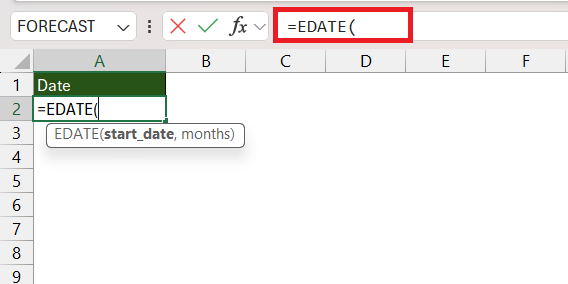
STEP 2: Type in =EDATE function.
=EDATE(
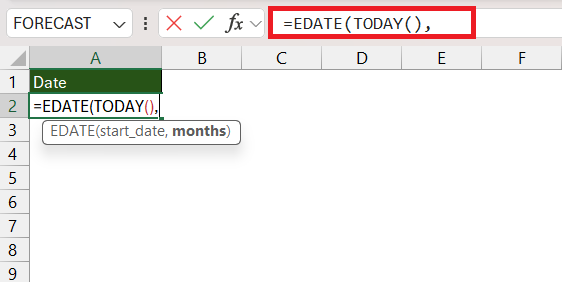
STEP 3: Enter the TODAY function to get the start date.
=EDATE(TODAY()
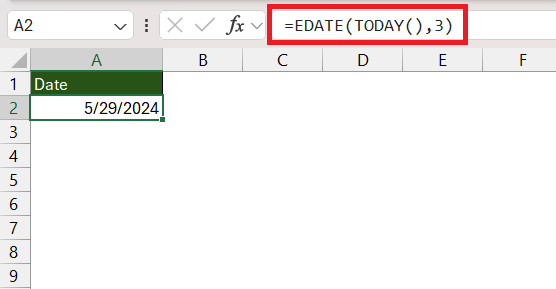
STEP 4: Input the number of months you want to add (positive number) or subtract (negative number). Complete the formula with a closing parenthesis and hit Enter.
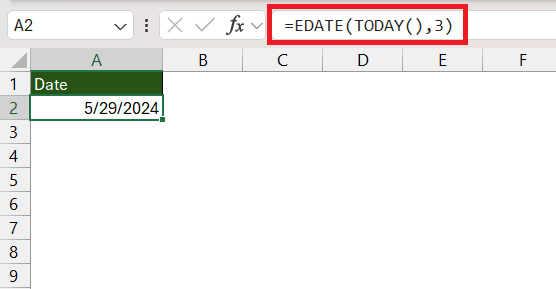
=EDATE(TODAY(),3)
To add 3 months to a date in cell C5, you’d conjure up the formula =EDATE(C5, 3). Pressing Enter will reveal the date that lies precisely 3 months ahead.
Examples of Adding 3 Months to Various Date Formats
Excel’s EDATE feature is quite adaptable, handling a variety of date formats with relative ease. Whether you have dates in the classic “MM/DD/YYYY”, the international “DD/MM/YYYY”, or even if they’re formatted with textual months like “March 15, 2023”, EDATE is unfazed.
For example, if you want to add 3 months to February 15, 2024:
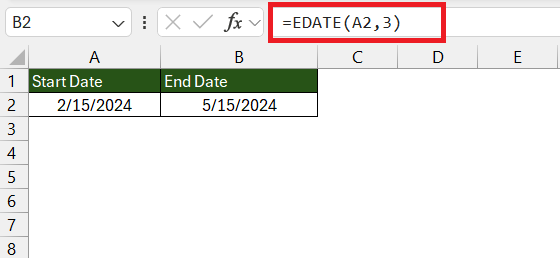
- With a date in “MM/DD/YYYY” format (
2/15/2024), the formula=EDATE(A2, 3)in an adjacent cell would yield5/15/2024.
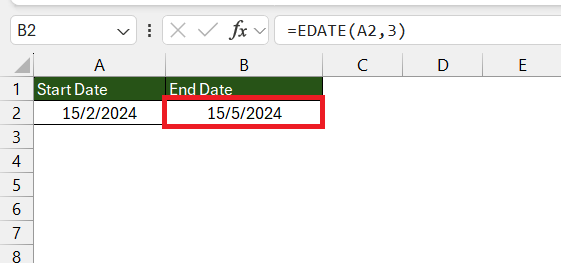
- If your date is in “DD/MM/YYYY” format (
15/2/2024), the formula doesn’t change; it adapts to the cell’s format and would still result in15/5/2024post-addition.
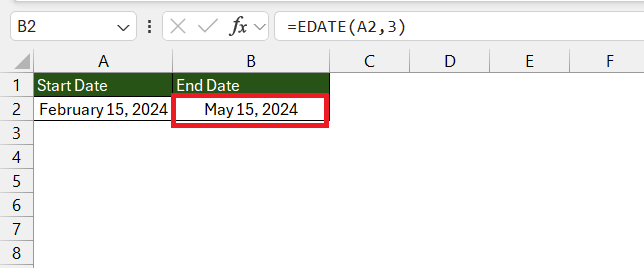
- For a textual date like “February 15, 2024”, the formula remains
=EDATE(A2, 3), translating to “May 15, 2024” in the output cell.
Excel is smart enough to understand different date formats and update them accordingly when you use the EDATE function, saving you from unnecessary date format conversions.
Tips for Maximizing Efficiency with EDATE
Quick Adjustments: Beyond Just 3 Months
The EDATE function isn’t limited to just adding a quarter of a year. Whether you’re planning ahead for a full year, half a year, or just a single month, EDATE can swiftly adjust your dates accordingly. Simply replace the ‘3’ in your formula with the desired number of months for the job.
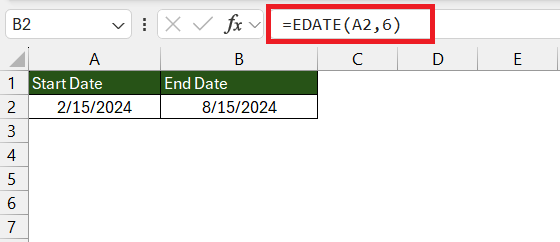
Want to leap 6 months into the future? Easy! The formula =EDATE(A2, 6) have you covered?
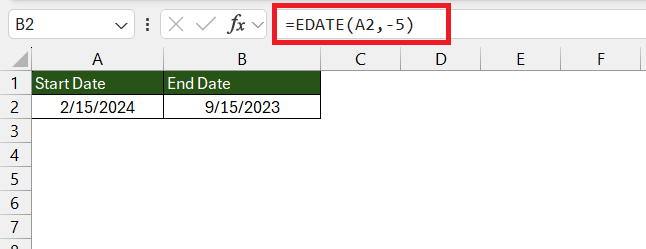
Or, if you’re reminiscing and need to look back 5 months, =EDATE(A2, -5) will take you on that journey.
The flexibility of EDATE opens up a world of date calculations at your fingertips—experimenting with different numbers will quickly become second nature.
Combining EDATE with Other Excel Functions
Marrying EDATE with other Excel functions unlocks a trove of productivity hacks. For instance:
- Pair it with TODAY() to automatically calculate a date in the future or past from the current date.
=EDATE(TODAY(), months)
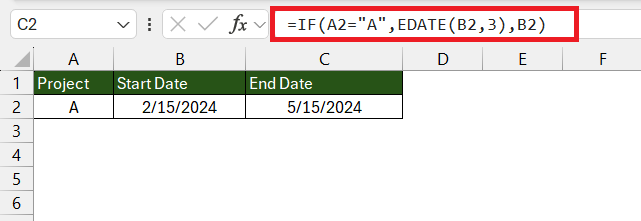
- Collaborate it with IF() to create conditional date operations, like extending a deadline based on a certain condition.
=IF(condition, EDATE(start_date, months), alternative_result)
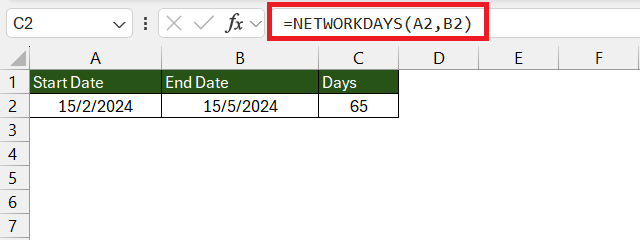
- Use it alongside NETWORKDAYS() to calculate workdays between two dates while skipping weekends and holidays.
Combining functions with EDATE can transform the way you manage and manipulate dates, turning complex tasks into simple, elegant solutions.
Avoiding Common Pitfalls When Using EDATE
Dealing with Errors in EDATE
Excel is generally very forgiving, but errors do crop up. When using EDATE, if you face an error like #VALUE! or #NUM!, it’s time to put on your detective hat. Common causes include non-date values or a start date that Excel doesn’t recognize as valid. Double-check that your start date is indeed in date format and that it’s reasonable (not mistakenly set in the year 5000, for example).
To troubleshoot, ensure:
- Your dates are actual dates and not text-impersonating as dates.
- The cells referenced in the formula are free from typos or incorrect cell references.
- The months argument isn’t too large, leading to dates that Excel can’t handle (beyond 12/31/9999).
For error-proofing your formulas, consider using ISERROR or IFERROR functions alongside EDATE to manage any undesired or unexpected results gracefully.
Advanced EDATE Techniques
Using EDATE to Calculate Deadlines and Expiry Dates
The EDATE function is a savior when plotting deadlines and expiration dates, letting you easily calculate the future date when a particular task or contract is due. Say there’s a three-month deadline from a project’s start date; simply use =EDATE(start_date, 3) to get the finish line stamped on your calendar.
Moreover, for expiration dates—such as those for subscriptions or warranties—EDATE reliably forecasts the exact day when a period concludes. Just plug in the initial date and term duration, and EDATE delivers the ultimate expiration alert.
Keep Tabs on Deadlines and Expiries with EDATE:
- Forecast project due dates by calculating future benchmarks.
- Automate expiration date tracking for efficient contract management.
- Prevent missed deadlines with EDATE-generated alerts.
Keyboard Shortcuts for Quick Date Additions
While EDATE is magic for dates, knowing a few keyboard shortcuts can streamline your Excel workflow even more. Quick date additions become a breeze with these keystrokes:
- Use
Ctrl + ;to insert today’s date into a cell instantly. - Transform a selection to the default date format with
Ctrl + Shift + #. - Jump through your date ranges quickly with
Ctrl + Shift + Arrow keys.
These shortcuts are powerful allies in the quest for efficiency, slashing the time it takes to navigate and format dates. Pair them with EDATE when you’re maneuvering through calendars, and you’ll be an Excel sorcerer in no time.
Real-world Applications of EDATE for Business and Finance
In the business and finance realms, EDATE becomes instrumental in planning, forecasting, and compliance. It streamlines calculating maturity dates for financial instruments, scheduling payment cycles, and managing quarterly reports.
Here are a few real-world applications:
- Loan Amortization Schedules: Define precise payment dates, adding a monthly increment to the start date with
=EDATE(start_date, period) - Project Milestones: Schedule and track periodic review dates by adding months to project initiation dates.
- Compliance Reporting: Ensure statutory reports are prepared by setting alerts using EDATE to signify due dates well in advance.
Harnessing EDATE for these applications enables professionals to stay ahead of deadlines, maintain clear timelines, and optimize financial planning.
FAQs: Excel’s EDATE at Your Fingertips
How can I add a different number of months using EDATE?
To add a different number of months using EDATE function, simply replace the second argument with the desired number. For example, =EDATE(A1, 5) would add 5 months to the date in A1. Adjust the number to match your specific requirements, whether it’s 1 month or 24 months.
Can EDATE handle dates across years?
Absolutely! EDATE seamlessly crosses over years while adding or subtracting months. Use it to project dates across multiple year transitions without worry—EDATE simplifies time travel on your Excel calendar.
What should I do if EDATE returns an error?
If EDATE returns an error, check the date format and ensure it’s valid. Also, verify that the months’ argument is a number. If issues persist, use error-checking functions like ISERROR to identify the problem.
Is there a way to subtract months instead of adding using EDATE?
Yes, to subtract months with EDATE, input a negative number as the second argument. For example, =EDATE("9/15/19", -5) will subtract 5 months from September 15, 2019.
How do I calculate months between today and date in Excel?
To calculate months between today and a past date, use =DATEDIF(A1, TODAY(), "m") where A1 contains the past date. This will return the number of complete months between the dates.
John Michaloudis is a former accountant and finance analyst at General Electric, a Microsoft MVP since 2020, an Amazon #1 bestselling author of 4 Microsoft Excel books and teacher of Microsoft Excel & Office over at his flagship MyExcelOnline Academy Online Course.

