Want to quickly attach your Excel workbook into an email message with a single click? You can do this with Excel Macros. I explain how you can do this below step by step.
Table of Contents
Key Takeaways:
- Automates Emailing Process: Using a macro, you can automate the process of attaching the current workbook to an email, saving time and effort compared to manual file attachment.
- Integration with Outlook: Macros allow seamless integration between Excel and Outlook, enabling you to create and send emails directly from Excel with the workbook already attached.
- Customizable Email Content: The macro can be tailored to include a predefined subject, recipient list, and message body, ensuring that emails are consistent and professional.
- No Manual Errors: Automation reduces the risk of forgetting to attach the file or selecting the wrong version of the workbook, improving efficiency and accuracy.
- Reusable Code: Once created, the macro can be reused across multiple workbooks, making it a versatile tool for frequent email communication involving Excel files.
Overview and Source Code:
What does it do?
Attach your current workbook into an Outlook email message
Copy Source Code:
Sub AttachWorkbookIntoEmailMessage()

Dim OutlookApp As Object
Dim OutlookMail As Object
Set OutlookApp = CreateObject("Outlook.Application")
Set OutlookMail = OutlookApp.CreateItem(0)

'Let us create the email message and display it
'Make sure to change the parameters below
With OutlookMail
.To = "[email protected]"
.Subject = "Have a look at this workbook"
.Body = "Hey John, Could you help out on this?"
.Attachments.Add ActiveWorkbook.FullName
.Display
End With

Set OutlookMail = Nothing
Set OutlookApp = Nothing

End Sub
Final Result:
How to Attach Current Workbook into an Email Message
STEP 1: Go to Developer > Code > Visual Basic
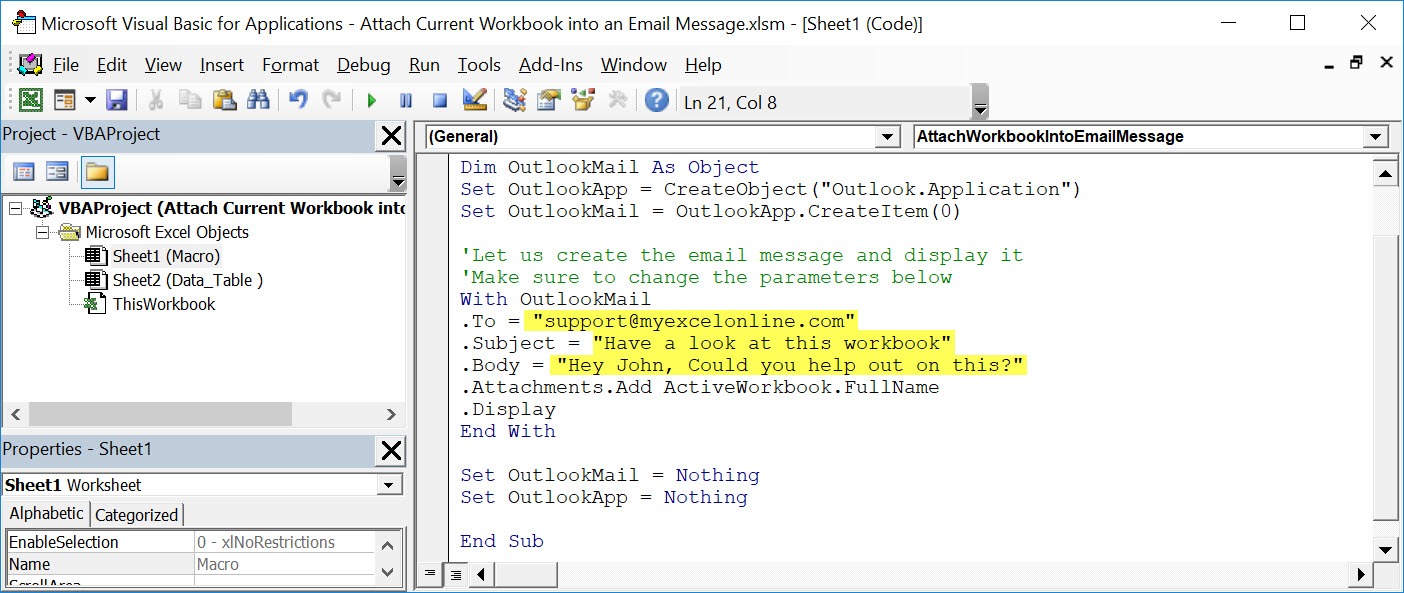
STEP 2: Paste in your code and Select Save.
You can change the following fields – To, Subject and Body depending on your preferences. These are marked in yellow.
Close the window afterwards.
STEP 3: Let us test it out!
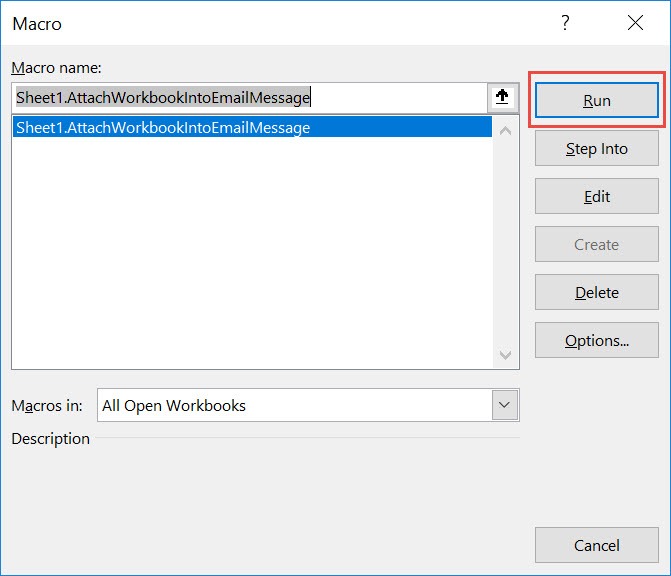
Go to Developer > Code > Macros
Make sure your macro is selected. Click Run.
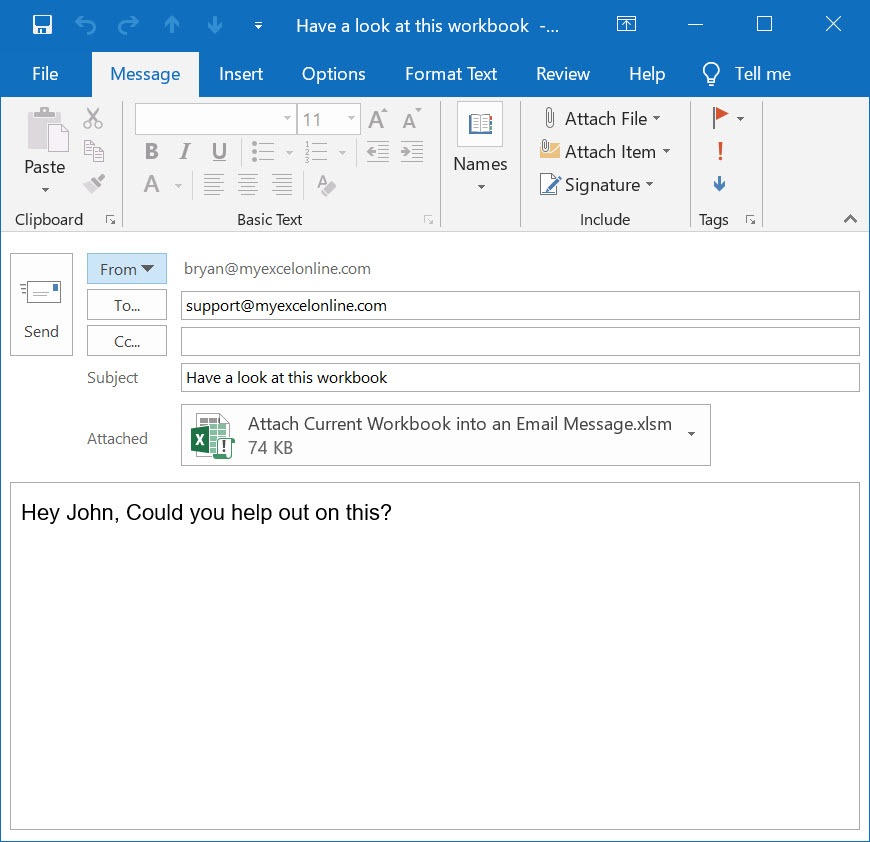
With just one click, your Excel Workbook is now attached to the email message!
Troubleshooting Common Issues
Solutions to Frequent VBA Emailing Problems
When you’re getting to grips with automating your emails from Excel using VBA, you might encounter a few hiccups along the way. One common issue arises when VBA code isn’t executing as expected. This can often be resolved by ensuring that macros are enabled in your Excel settings. If they’re not, your code will sit idle without any action.
Another frequent roadblock involves authentication errors when connecting to your email server. Navigate this by confirming that your server settings, including the SMTP server, port number, and login credentials, are accurate within your code. If attachments aren’t getting sent, double-check the file paths for accuracy and existence.
Remember, being meticulous in your VBA setup pays off in the long run. Should you hit a wall, debug mode can be your best friend. Step through the code line by line, and watch out for any anomalies or unexpected values.
Ensuring Compatibility Across Different Excel Versions
Navigating compatibility across different versions of Excel can be akin to walking through a maze. However, with VBA, it’s important to code with versatility in mind. To ensure your email macro works seamlessly from Excel 2010 to Excel 365, steer clear of features exclusive to newer versions if the workbook needs to operate in older environments.
Keep in mind that certain properties, methods, or objects may not exist in earlier versions. For example, using the .Sort method in Excel 2010 differs from newer versions. To address such issues, turn on ‘Late Binding’ in your VBA code, sacrificing early binding’s autocomplete benefits for wider compatibility.
Additionally, test your macro across different versions to pinpoint potential discrepancies and brush up on the documentation covering version-specific features. This can guide you in creating a macro that’s adaptable and reliable, regardless of the Excel version on which it’s run.
Finally, be transparent with the intended users about your macro’s version compatibility and provide clear guidance on how to adjust their Excel settings, if necessary. After all, your goal is to craft a user-friendly experience that stands the test of time and technology upgrades.
Frequently Asked Questions
Can I customize the subject and body of the email in the macro?
Yes, you can customize the subject and body by modifying the OutlookMail.Subject and OutlookMail.Body lines in the macro. Simply replace "Your Subject" and "Your message body" with your desired content.
Does the macro work with email clients other than Outlook?
The macro is designed for Outlook, but you can modify the code to work with other email clients. However, this may require additional setup or using different libraries for email integration.
Do I need to have Outlook open for the macro to work?
Yes, Outlook must be installed and running for the macro to send the email. The macro uses Outlook’s automation interface to create and send the email, so it requires Outlook to be active.

Bryan
Bryan Hong is an IT Software Developer for more than 10 years and has the following certifications: Microsoft Certified Professional Developer (MCPD): Web Developer, Microsoft Certified Technology Specialist (MCTS): Windows Applications, Microsoft Certified Systems Engineer (MCSE) and Microsoft Certified Systems Administrator (MCSA).
He is also an Amazon #1 bestselling author of 4 Microsoft Excel books and a teacher of Microsoft Excel & Office at the MyExecelOnline Academy Online Course.


