Learn about Excel with our Free Microsoft Excel Online Course!
Key Takeaways
- To check attendee responses for Outlook meeting invites on the desktop app, use the Calendar feature, click on the meeting, and select “Tracking” under “Attendees” in the top ribbon to see a list of invitees and their replies (Accepted, Declined, Tentative, or None).
- For checking responses within the Outlook web platform, after selecting the calendar icon, double-click the relevant meeting to view attendee responses on the right side of the window, which will display as Yes, No, Maybe, or Didn’t respond.
- If you’re the organizer and want to transfer attendee status information into a spreadsheet, within the desktop app, you can select the “Tracking” dropdown, choose “Copy Status to Clipboard,” and then paste it into Excel to get a list of attendees and their responses in three columns.
Tracking on Mac and Windows: Navigating the Differences
When using Outlook to track meeting responses, the experience differs on Mac versus Windows. Here’s a quick look at what you might encounter:
- On Mac: The tracking feature is integrated seamlessly within the Outlook app. Acceptances and rejections surface in the right pane for a meeting, providing quick visual feedback on your invitee list.
- On Windows: Review meeting responses by opening the specific invite and navigating to the ‘Tracking’ section. Look for the ‘Tracking’ button under the ‘Meeting Occurrence’ tab to see who’s coming.
Keep in mind that Microsoft is constantly updating Outlook, so newer versions might offer more similarities between both platforms with time.
Tips for Efficient Tracking and Following Up
To make the most of Outlook’s tracking capabilities, keep these handy tips in mind:
- Regular Checks: Frequently check the RSVP status to stay updated on attendee counts.
- Direct Reminders: For those who haven’t responded, consider sending a gentle reminder email.
- Copy Status: Utilize the feature to copy statuses to clipboard for an organized list that you can use for follow-ups.
- Print the List: For ease of access during meetings, print out the attendance list.
- Use Categories: Categorize attendees (e.g., confirmed, tentative, declined) for simpler follow-up actions.
Remember, efficient tracking leads to better-managed meetings and ensures that all necessary participants are informed and present.
Table of Contents
Advanced Insights with Outlook Meeting Tracking
What to Do When Responses Aren’t Visible
If you’re the meeting organizer and find that responses aren’t visible in Outlook, don’t worry—there are a few steps you can take to resolve this issue:
- Check Your Role: Ensure you’re the meeting organizer. Only organizers have the privilege to view all responses.
- Refresh Your Inbox: Sometimes, Outlook needs a little nudge. Try refreshing your inbox or restarting the app.
- Verify the Outlook Version: If you’re not seeing responses, verify that you’re using a supported Outlook version where tracking is available.
- Review Meeting Settings: Double-check if you’ve set up the meeting invitation correctly to allow responses.
- Reach Out Directly: When all else fails, directly contact attendees for confirmation.
Keep in mind, tracking availability may differ across devices and versions of Outlook, so make sure you’re up-to-date with the latest features.
Comparing Responses Across Devices
Checking Acceptances on Mobile: Android and iPhone
For those on the move, checking acceptances on your mobile device is a breeze with Outlook for Android and iPhone. Here’s how to stay on top of your meeting invites:
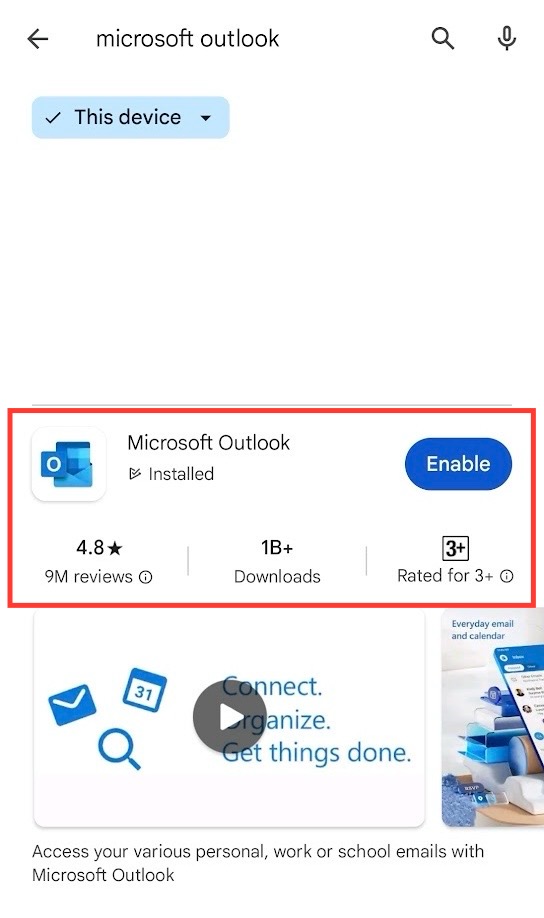
- Download and sync the Microsoft Outlook app from the Google Play Store.
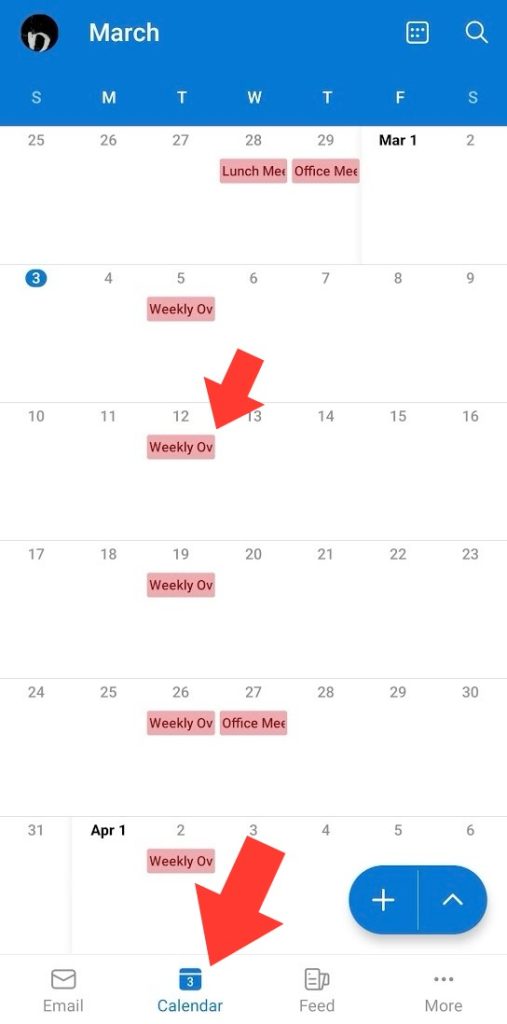
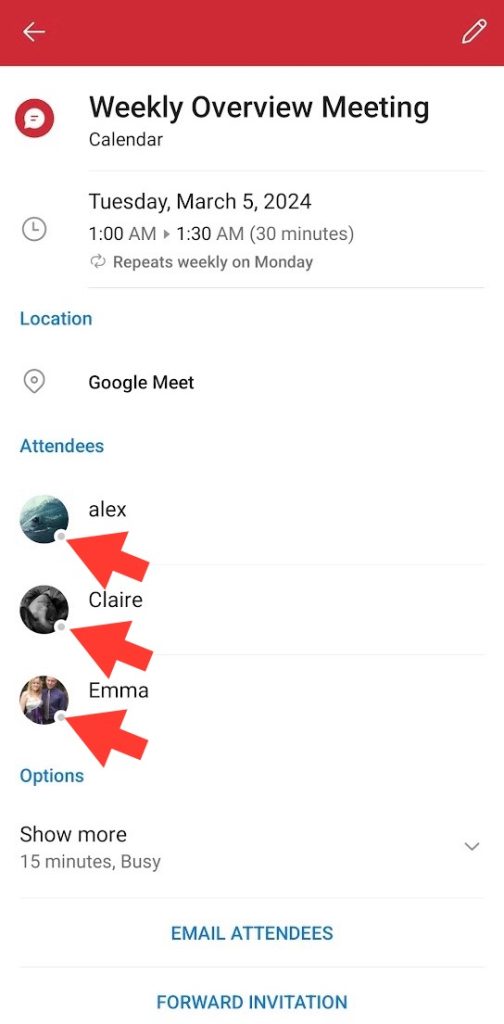
- Tap the calendar icon and select your meeting to see the responses.
- Look for the green check (Accepted), red cross (Declined), gray question mark (Tentative), or white/gray dot (No Response) next to names.
- Get Outlook from the Apple App Store and sync it with your account.
- Access your calendar and select the meeting to view attendee status.
- Responses are indicated by similar icons used in the Android app for quick recognition.
- By keeping tabs this way, you can manage your meetings efficiently, no matter where you are.
Sending Invites & Handling Responses: Best Practices
To Send or Not to Send a Response?
Deciding whether to send a response when you’ve been invited to a meeting in Outlook is straightforward but warrants consideration. Here’s the lowdown:
- Send the Response Now: This immediately informs the organizer of your decision, showing professionalism and responsiveness. It’s particularly crucial for important meetings requiring tight headcounts.
- Edit the Response before Sending: If you have additional information to provide or need to communicate a conditional acceptance, take a moment to edit your response. This personal touch can be valuable for context.
- Do Not Send a Response: This might be suitable for casual or informative meetings where attendance isn’t critical. However, even if you choose this option, Outlook might still track your response depending on the platform (except for Outlook for Windows).
Considering the impact of your presence on the meeting’s success and the organizer’s planning needs will guide your decision.
Managing No-Response Attendees
Encountering attendees who haven’t responded to your Outlook invite can be challenging. Here’s what you can do to manage these situations effectively:
- Follow-up Email: Send a reminder to those who haven’t responded, asking if they can attend. Make it friendly and understanding of their potentially busy schedule.
- Direct Contact: If email isn’t effective, try reaching out directly via a phone call or messaging platform, especially if their presence is critical.
Handling no-responses with tact encourages attendees to reply without feeling pressured, making your meeting planning smoother.
FAQs
How can I confirm if someone has accepted my Outlook invitation?
To confirm if someone has accepted your Outlook invitation, open your Outlook calendar, double-click on the meeting, and look for the attendee’s response next to their name under the meeting details. Accepted responses will typically show as ‘Accepted’ or be indicated with a checkmark.
How do I see who forwarded a meeting in Outlook?
In Outlook, to see who forwarded your meeting, open the meeting invitation, go to the “Tracking” button, and then select “Forwarded By.” Here you will see a list of invitees who have forwarded your meeting.
Is it possible to know who attended a meeting without sending responses?
Yes, if you’re the meeting organizer and have access to the meeting room, you can manually note who attends. For virtual meetings, you may review the attendee log if the platform provides one. However, for their response status, Outlook will only track those who have responded to the invite.
John Michaloudis is a former accountant and finance analyst at General Electric, a Microsoft MVP since 2020, an Amazon #1 bestselling author of 4 Microsoft Excel books and teacher of Microsoft Excel & Office over at his flagship MyExcelOnline Academy Online Course.


