Convert date to text in Microsoft Excel is a valuable skill that streamlines data analysis and reporting, ensuring uniformity across spreadsheets. This process allows for more accurate and effective decision-making by maintaining consistent data formats. Mastering this technique saves time and prevents common formatting errors that can skew data interpretation.
Key Takeaways
- The TEXT function is a straightforward way to convert dates into any desired text format, enhancing data readability and consistency.
- Excel’s Text-to-Columns feature provides an easy method to change date formats without using formulas, ideal for quick adjustments.
- Utilize VBA scripts to automate the conversion process, saving time and ensuring uniformity across large datasets.
- Adopt tips from experienced users, like utilizing keyboard shortcuts and dynamic arrays, to enhance your Excel proficiency and efficiency in handling dates.
Download the spreadsheet and follow along the tutorial on How to Convert Date to Text in Excel – Download excel workbookConvert-date-to-text.xlsx
Unlocking Excel’s Time-Saving Secrets
The simplicity of converting dates to text
Converting dates to text in Excel might seem like a small trick, but it’s a powerful one that can save you from a world of trouble. Imagine never having to worry about date formats tripping up your data analysis again. With the right know-how, transforming dates to text is both fast and effortless.
Why mastering this skill matters
Mastering the conversion of dates to text in Excel is invaluable for various reasons. It ensures you have consistent data formats for reporting and analysis, preventing common mishaps that occur due to date format discrepancies. Moreover, it enables you to craft visually appealing and uniform spreadsheets that communicate information clearly and effectively, thus empowering you to make more informed decisions based on accurately processed data.
Step-by-Step Conversion Techniques
Instant Magic with Excel’s TEXT Function
The TEXT function in Excel is like a magic wand for your data formatting needs. It’s incredibly straightforward to use and instantly transforms your dates into any text format with precision. Just apply the simple formula =TEXT(date_value, "format_code"), and watch as Excel does all the heavy lifting, rendering your numbers in the chosen format – from standard date representations to custom styles tailored to your special requirements.
By mastering this function, you’ll unlock a versatile tool that’s perfect for tasks like organizing deadlines, preparing reports, or creating personalized date-based communications.
Convert with Text-to-Columns
Harness the power of Excel’s Text-to-Columns feature for cutting-edge data transformation, especially when you need to convert date formats without formulas. Traversing through the Data tab, you’ll discover this gem within the Data Tools. Here’s how you unfold the magic:
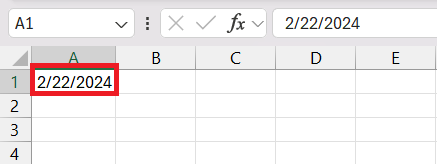
STEP 1: Choose the dates you wish to convert.
STEP 2: Click Data > Data Tools > Text to Columns.
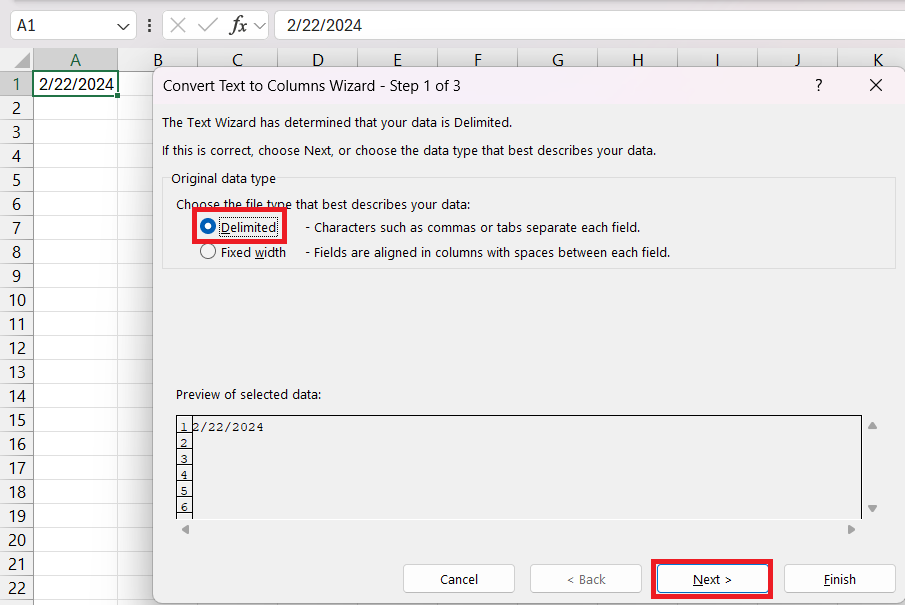
STEP 3: In the wizard, select Delimited, then click Next.
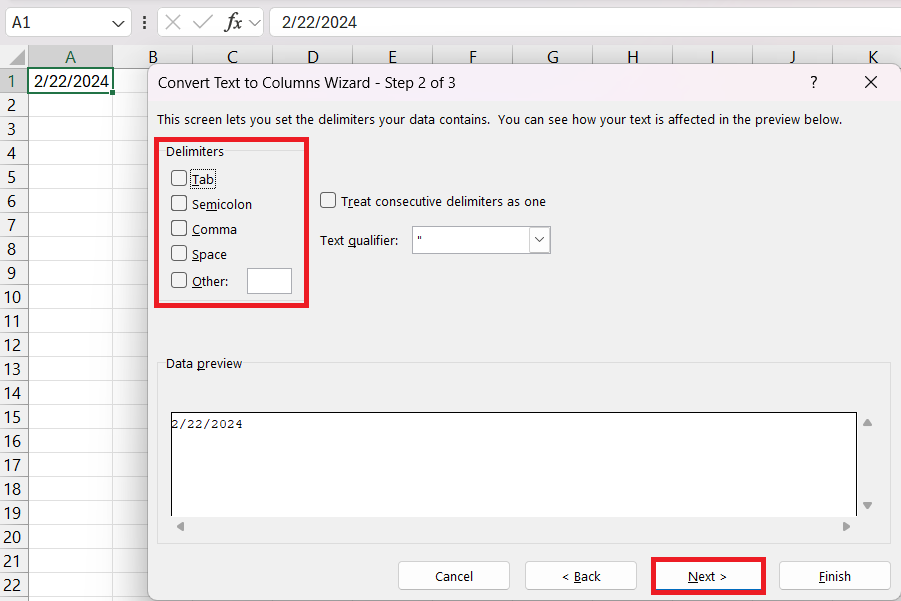
STEP 4: Skip delimiters by unchecking all options and proceed by clicking Next again.
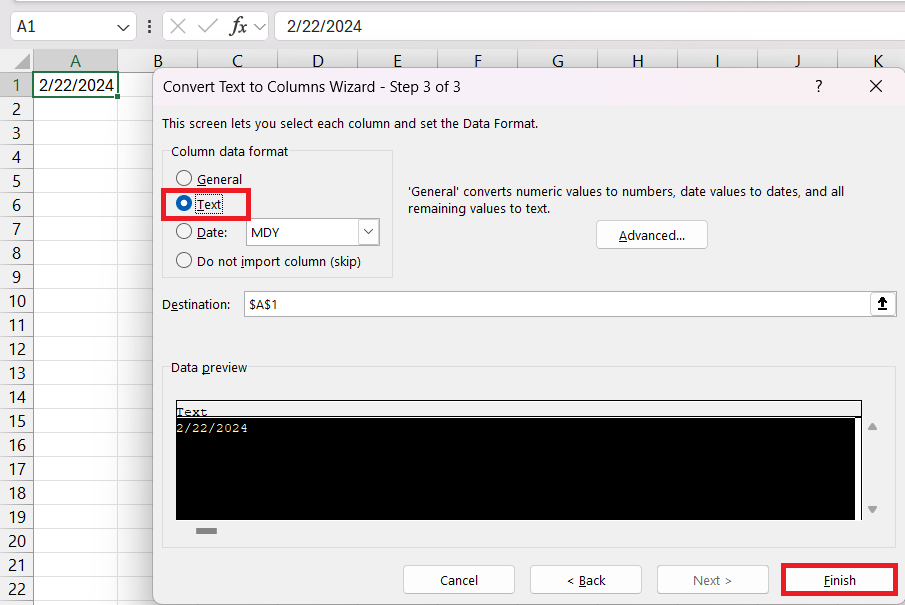
STEP 5: Set the Column Data Format to Text, pick where to output your transformed data, and hit Finish.
Voilà! Your dates now gleam in the text format, immune to Excel’s date and time dynamics, perfect for consistent data representation.
Automating With VBA Scripts
For those who crave an even higher level of automation, VBA (Visual Basic for Applications) scripts in Excel are your ticket to efficiency. By automating the date to text conversion process, VBA scripts save chunks of time and guarantee consistency across your datasets.
Here’s an easy-to-follow guide on harnessing VBA for this purpose:
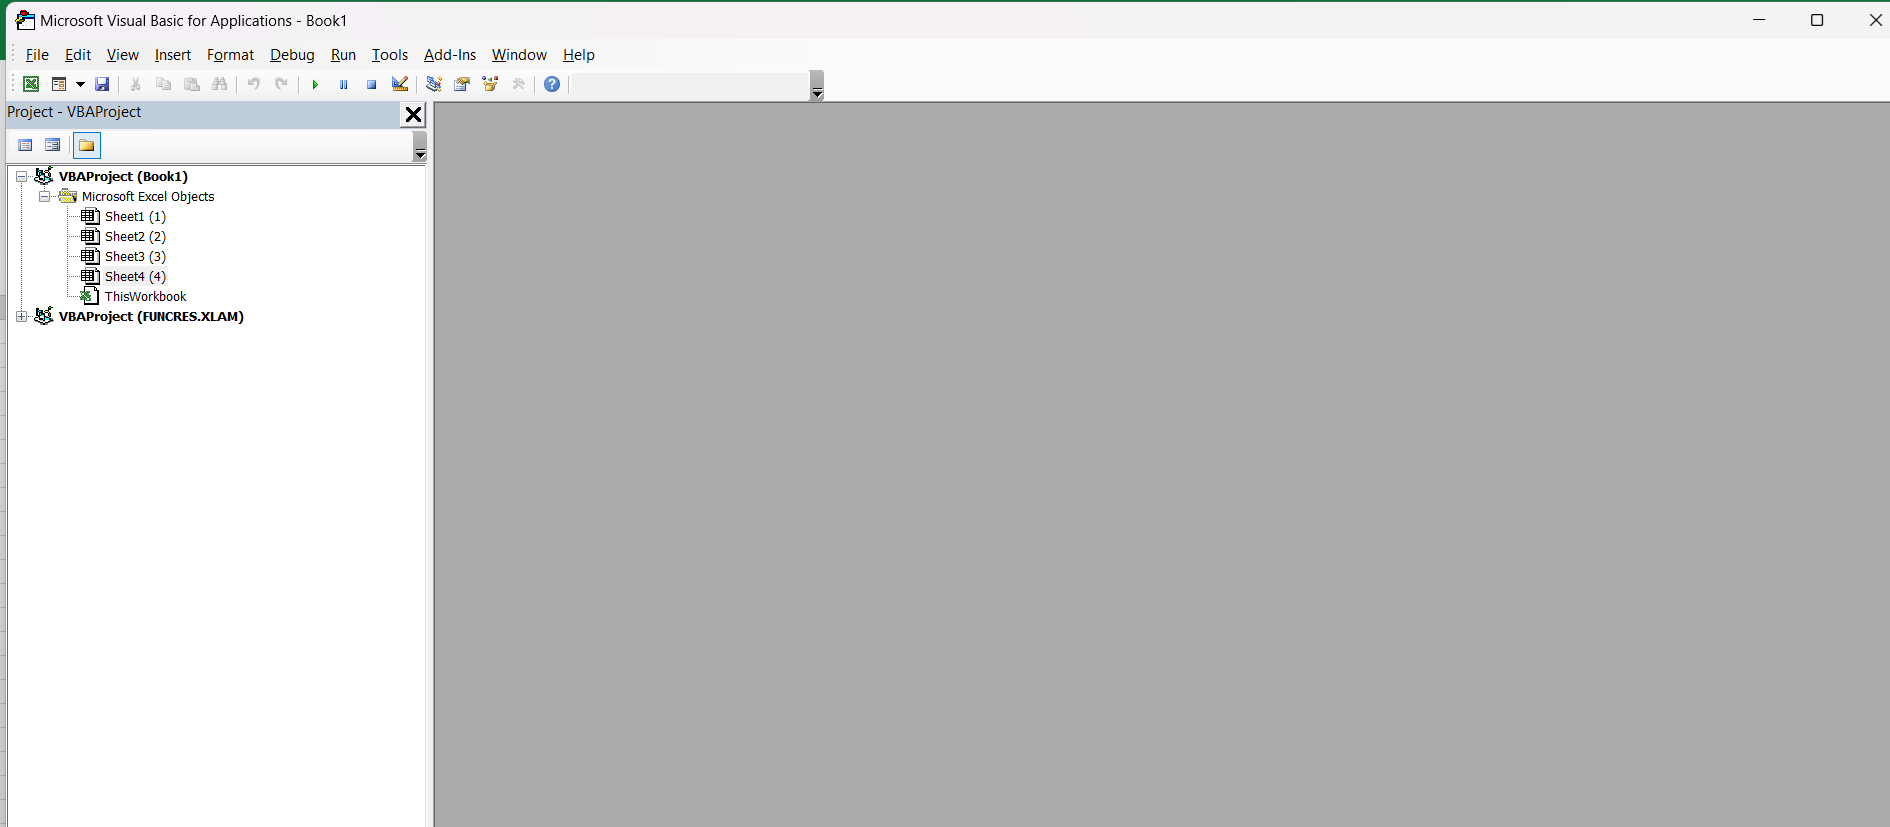
STEP 1: Open Excel and hit ALT + F11 to jump into the VBA editor.
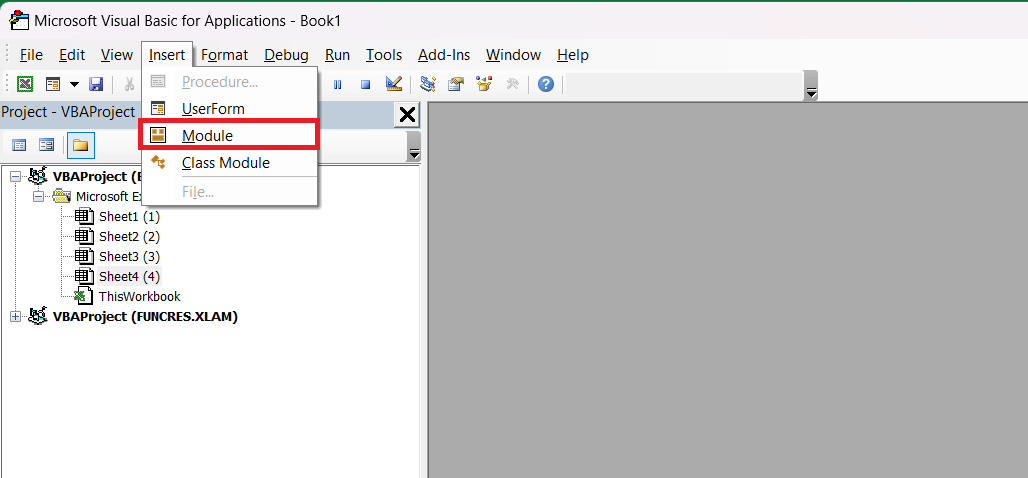
STEP 2: Navigate to “Insert” and then select “Module” to open a new module.
STEP 3: Use the following script:
Sub Convert_Date_to_Text()
Dim c As Range
For Each c In Selection
c.Value = Format(c.Value, "dd-mm-yyyy")
Next c
End Sub
STEP 4: Close the editor and return to your spreadsheet.
STEP 5: Select the date cells you want to convert, go back to the VBA editor, and run the script.
Your selected dates are now formatted as text, and this code can be modified to match any date format you need. Attach this script to a button, and with a single click, you’ll perform what once took several manual steps.
Navigating Common Date Format Challenges
Overcoming Year Formatting Issues
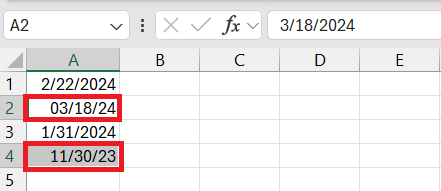
When working with Excel, you might bump into a snag with how years are displayed — those tricky issues often arise due to differences between two-digit and four-digit year formats. To overcome these year formatting problems, a keen eye on the cell’s year format is essential. If you see something isn’t matching up, here’s how to tackle it:
STEP 1: Select the date cells with problematic year formatting.
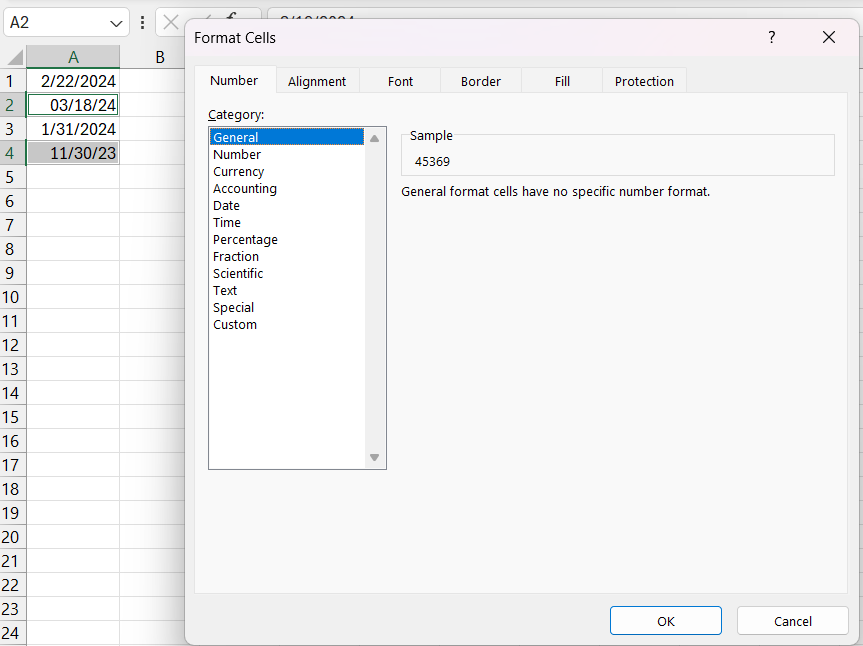
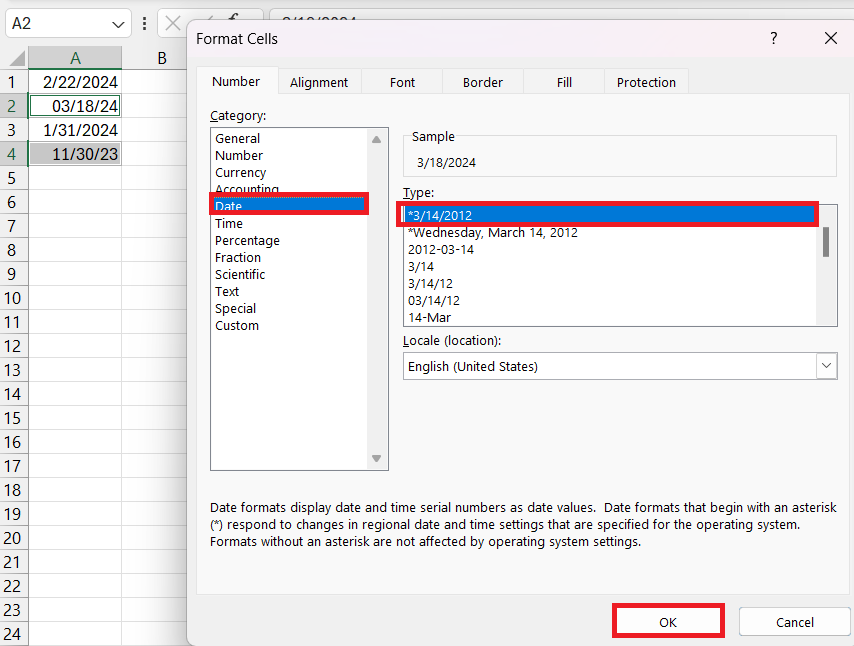
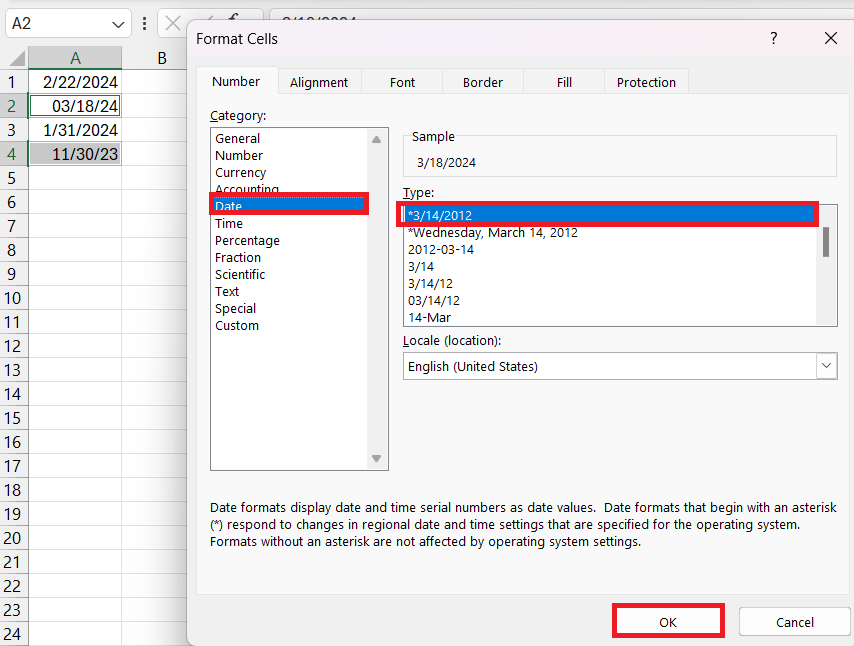
STEP 2: Right-click and choose ‘Format Cells‘ or press Control + 1 to pull up the dialog box directly.
STEP 3: Under the ‘Category’ tab, click ‘Date’ and peek at the variety of formats.
STEP 4: Select a format that suits your preference for two-digit or four-digit years.
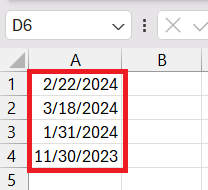
STEP 5: Click ‘OK’ to apply the changes and observe as Excel aligns the years to your desired format.
It’s a snap! With this technique, you can make your dates appear consistently throughout your spreadsheet, facilitating clearer communication and avoiding potential misinterpretations of your data due to year formatting discrepancies.
Taking Your Skills to the Next Level
Exclusive Tips from Excel Pros
Excel pros have their secret arsenal of tips that can take your spreadsheet game from proficient to outstanding. Here are some select nuggets of wisdom:
- Embrace keyboard shortcuts — they can dramatically speed up your work. For instance, use
Ctrl+;to insert the current date into a selected cell quickly. - Don’t shun the ‘Name Manager’ for complex formulas. Naming your ranges can simplify formula creation and make them more readable.
- Take advantage of dynamic arrays if you have access to the latest Excel versions. Functions like
FILTERandSORTcan revolutionize how you manipulate data sets.
These are just a taste of the multitude of techniques that seasoned Excel users apply for optimal performance.
Efficiency and Precision Combined
In the world of Excel, efficiency and precision are your power duo. Combining these two elements means not only getting things done faster but also with the exactitude that leaves no room for errors. Here’s how you can master both:
For efficiency, learn to use Excel’s array formulas and pivot tables. These tools help process large data sets and produce summaries without manual intervention. Keyboard shortcuts, like Ctrl+Shift+L to toggle filters, also expedite your workflow.
In terms of precision, always double-check your formula references and use absolute cell references (with $) when needed to avoid mistakes during copying. Validating your data with Excel’s Data Validation feature can also prevent incorrect data entries from the get-go.
FAQs on Convert Date To Text In Excel
How can I retain date formatting when converting to text?
To retain date formatting when converting to text in Excel, use the TEXT function with your desired format code, like =TEXT(A2,"mm/dd/yyyy"), where A1 is the date cell. This will keep the format intact when the date becomes text.
What if Excel doesn’t recognize my text as a date?
If Excel doesn’t recognize text as a date, try the DATEVALUE function, like =DATEVALUE("01/01/2023"), or adjust the cell format to ‘Date’ through the Format Cells dialog. If needed, Text to Columns can help convert bulk text to date format.
How do you convert dates to text without changing format in Excel?
To convert dates to text without changing the format in Excel, use the TEXT function with a format code that matches the current date format, like =TEXT(A2, "dd/mm/yyyy"), ensuring it mimics the existing scheme.
How do I convert text to date format?
Convert text to date format in Excel using the DATEVALUE function for simple dates or the Text to Columns feature for more complex conversions, ensuring you select the correct date format during the process.
How do I parse a date into a string?
Use the TEXT function to parse a date into a string in Excel. The syntax is =TEXT(A2,"format_code"), where A1 is the cell with the date and “format_code” is how you want the date to appear as text.
John Michaloudis is a former accountant and finance analyst at General Electric, a Microsoft MVP since 2020, an Amazon #1 bestselling author of 4 Microsoft Excel books and teacher of Microsoft Excel & Office over at his flagship MyExcelOnline Academy Online Course.


