Working with imported data in Excel often means dealing with strings that represent dates and times. One of the most straightforward ways to convert these strings into a usable DateTime format is by using the Text to Columns feature. I’ve found this method particularly useful when dealing with consistent formats, and here’s how to convert String to DateTime in Excel!
Key Takeaways:
- Master Text to Columns: Use the Text to Columns wizard for quick and formula-free conversion of string data to DateTime formats.
- Leverage Built-in Functions: Functions like
DATEVALUE,TIMEVALUE, andTEXTcan help streamline conversions for consistent and standardized data. - Prepare Data First: Clean your dataset using tools like
TRIMandSUBSTITUTEto ensure smooth conversions without errors. - Follow Best Practices: Standardize input formats, test changes on a small sample, and always back up your data for secure and efficient handling.
Table of Contents
Unveiling the Excel Magic: Quick Conversion Overview
Importance of Efficient DateTime Conversions in Excel
As a data enthusiast myself, I have often found that DateTime conversions in Excel are not just a matter of data entry but a critical step in data analysis. After all, DateTime formats pave the way for accurate time series analysis, sorting events chronologically, and crucially, they ensure that data remains consistent and comparable across different reports and datasets.
A well-converted DateTime can mean the difference between an insightful report and a confusing mess of numbers and text.
What You’ll Learn: Key Techniques Explored
In this exploration of Excel’s capabilities, I’ll guide you through the fundamental techniques that every data aficionado should know. You’ll learn various methods to convert strings to DateTime formats, each with its own advantages for different types of data scenarios.
You’ll discover how to prepare your data to avoid common issues and the formulas that can achieve instantaneous conversion results. Furthermore, we’ll delve into advanced techniques like Power Query and VBA for automating and customizing these conversions for bulk data, and I’ll share best practices to keep your data management streamlined and effective.
Different Methods to Convert String to DateTime
Method 1: Excel’s DATEVALUE and TIMEVALUE Functions
Diving into Excel’s invaluable toolbox, I find the DATEVALUE and TIMEVALUE functions to be essential for data manipulators like us. DATEVALUE is specifically designed to cast text strings representing dates into Excel’s native date serial numbers, which the program understands and can work with seamlessly. Similarly, TIMEVALUE tackles time strings, encapsulating times into serial numbers proportionate to a 24-hour clock.
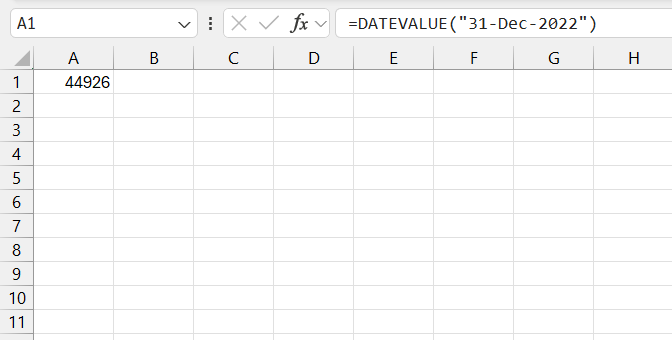
For instance, if I type =DATEVALUE(“31-Dec-2022”), Excel doesn’t just read it as text anymore but as the serial date 44926, which corresponds to that particular date.
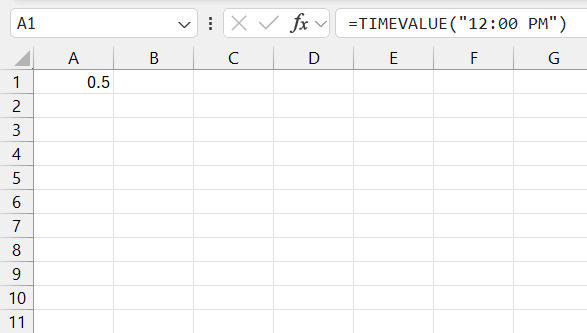
TIMEVALUE performs similarly, turning something like “12:00 PM” into 0.5, representing the halfway point of a day in Excel’s system.
The beauty of these functions lies in their simplicity and specificity. With them, I can turn seemingly incompatible text entries into data points ready for calculation, comparison, and integration into larger sets of analyses.
Method 2: Text to Columns
The Text to Columns feature in Excel is nothing short of transformative when it comes to parsing and converting textual data into a more structured format. Especially when we talk about dates. This wizard is a go-to tool that can swiftly change strings to DateTime formats without a single formula in sight.
Here’s a quick rundown of how powerful this tool can be:
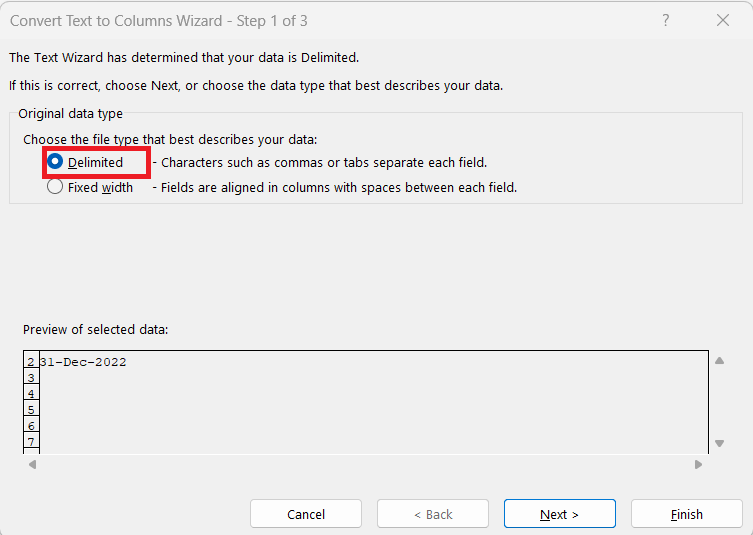
STEP 1: Select a column filled with date strings, navigate to the Data tab, and launch the Text to Columns wizard.
STEP 2: Depending on my data’s layout, I can choose between Delimited.
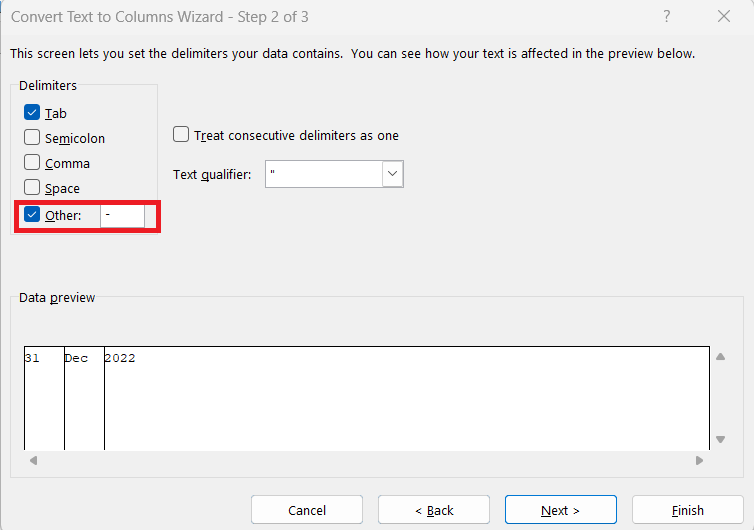
STEP 3: Select or type a delimiter in ‘Other’ option.
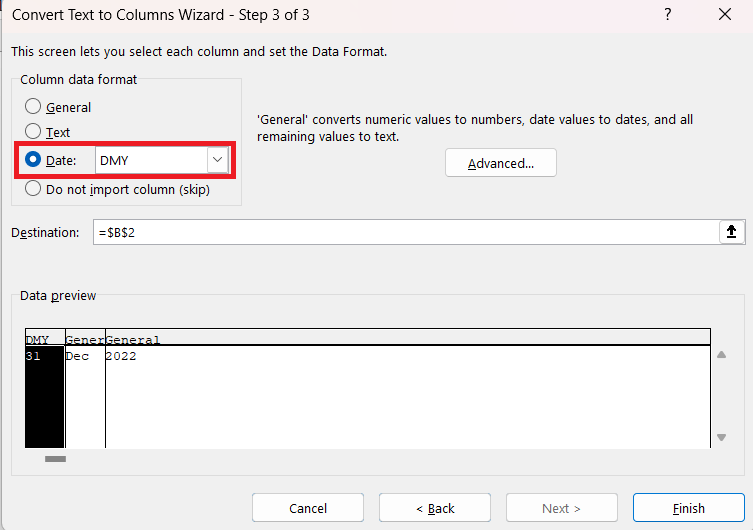
STEP 4: Choose Date and match the format (e.g., MDY, DMY).
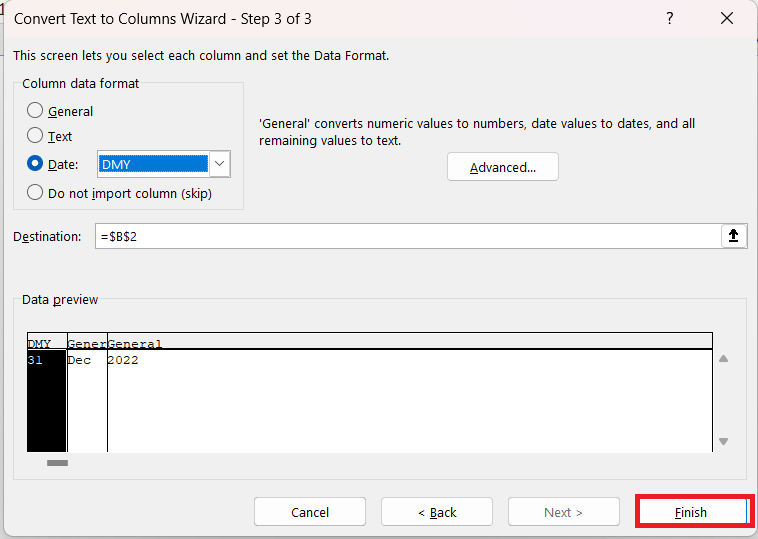
STEP 5: Choose where you want to place the converted data. Click Finish.
Method 3: TEXT Function
If the date and time strings follow a consistent pattern, the TEXT function can reformat them into something Excel recognizes.
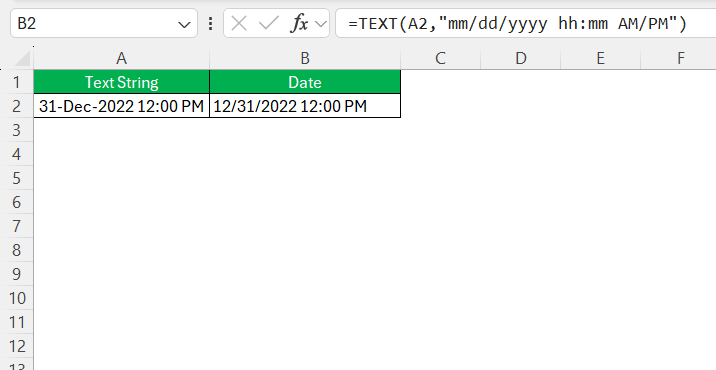
For the string "12-31-2022 12:00 PM", use:
=TEXT(A2, “mm/dd/yyyy hh:mm AM/PM”)
This approach is helpful for standardizing inconsistent formats before conversion.
Best Practices to Elevate Your Excel Data Handling
Best Practices to Elevate Your Excel Data Handling
Converting strings to DateTime is a vital skill, but there’s more you can do to refine your data handling. Here are some best practices I follow to make my Excel workflows efficient and reliable:
- Standardize Data Input – Always ensure your raw data uses a consistent format, like YYYY-MM-DD or MM/DD/YYYY. Consistency reduces conversion errors.
- Clean Your Data First – Use functions like TRIM to remove extra spaces and SUBSTITUTE to replace inconsistent delimiters. Clean data makes the conversion smoother.
- Leverage Named Ranges – Assign a named range to your raw data. It makes formulas easier to understand and ensures scalability.
- Test on a Small Sample – Before applying transformations to large datasets, test your steps on a small sample to avoid errors and unexpected results.
- Document Your Process – Keep notes on the steps you followed or create a guide within your workbook. This is invaluable if you need to repeat the process or share your work with colleagues.
- Use Keyboard Shortcuts – Master shortcuts like Alt + A + E to quickly access the Text to Columns wizard. Speed up repetitive tasks and boost productivity.
- Back Up Your Data – Before making bulk changes, create a backup copy of your workbook. It’s a simple step that can save hours of recovery work.
FAQs on Excel DateTime Conversions
How do I convert a string to a date in Excel without using formulas?
To convert a string to a date in Excel without formulas, you can use the Text to Columns feature. Here’s a brief guide: first, select the column with the strings. Then, go to the Data tab and click on ‘Text to Columns’. Choose ‘Delimited’, click Next, uncheck all delimiters, and hit Next again. Select ‘Date’ in the Column data format, choose the format that matches your strings, and finish by clicking ‘Finish’. Excel will convert them to dates.
Can I automate DateTime conversion for recurring tasks in Excel?
Yes, you can automate DateTime conversion for recurring tasks in Excel by creating VBA macros. Once set up, a macro will convert data at the click of a button every time you need to perform the task. This is ideal for workflows with frequent need for consistent date format conversions.
What is the easiest way to fix incorrect DateTime formats in imported data?
The easiest way to fix incorrect DateTime formats in imported data is to use Excel’s ‘Text to Columns’ wizard with the ‘Delimited’ option. This allows you to specify the format of your imported dates and have Excel recognize them correctly, converting them to a standard DateTime format without formulas.
How to convert dd mm yyyy to date in Excel?
To convert ‘dd mm yyyy’ to date in Excel, use the ‘Text to Columns’ wizard. Select the data, navigate to the Data tab, and click ‘Text to Columns’. Choose ‘Delimited’, click ‘Next’, then deselect all delimiters and click ‘Next’ again. Choose ‘Date’ under ‘Column data format’, select the ‘DMY’ option, and hit ‘Finish’. Excel converts it to the date format.
What is datetime format?
Datetime format in Excel refers to the representation of dates and times as serial numbers, allowing for chronological data management and analysis. This format is crucial for sorting, filtering, and time-sensitive calculations within Excel worksheets.
John Michaloudis is a former accountant and finance analyst at General Electric, a Microsoft MVP since 2020, an Amazon #1 bestselling author of 4 Microsoft Excel books and teacher of Microsoft Excel & Office over at his flagship MyExcelOnline Academy Online Course.

