If data is presented aesthetically, it will be easily interpreted by the users. When you present your data in a clean as well as visually pleasing way, it makes the report more attractive and easier to read. One of the best methods of presenting data is through Excel Pivot Tables and Slicers. A Pivot Table can have custom styles applied to them to correspond with the general theme and color of the entire worksheet. You can copy a custom style applied to a slicer and paste it to another slicer in another workbook. Companies usually follow a certain color pattern, so a custom-made slicer style must be mimicked so that the color palette matches all their worksheets. This custom style can be copied and applied in different workbooks as well.
Key Takeaways
-
Custom Styles Save Time – Define formatting (fonts, colors, borders) once and reuse it across multiple Excel files to maintain consistency.
-
Excel Doesn’t Copy Styles by Default – When copying sheets or data between workbooks, custom styles aren’t automatically transferred.
-
Copy a Sheet with the Style – To bring a custom style into a new workbook, copy an entire sheet that uses the style. The style comes with it.
-
Merge Styles with ‘Merge Styles’ Option – Use the Home > Cell Styles > Merge Styles option in the destination workbook to import styles from another file.
-
Name Your Styles Clearly – Use descriptive names for your custom styles so they’re easy to identify and apply across workbooks.
Let’s see how this can be achieved.
Don’t forget to download the Exercise Workbook below and follow along with us!
download excel workbookCopy-a-custom-style-into-a-new-workbook.zip
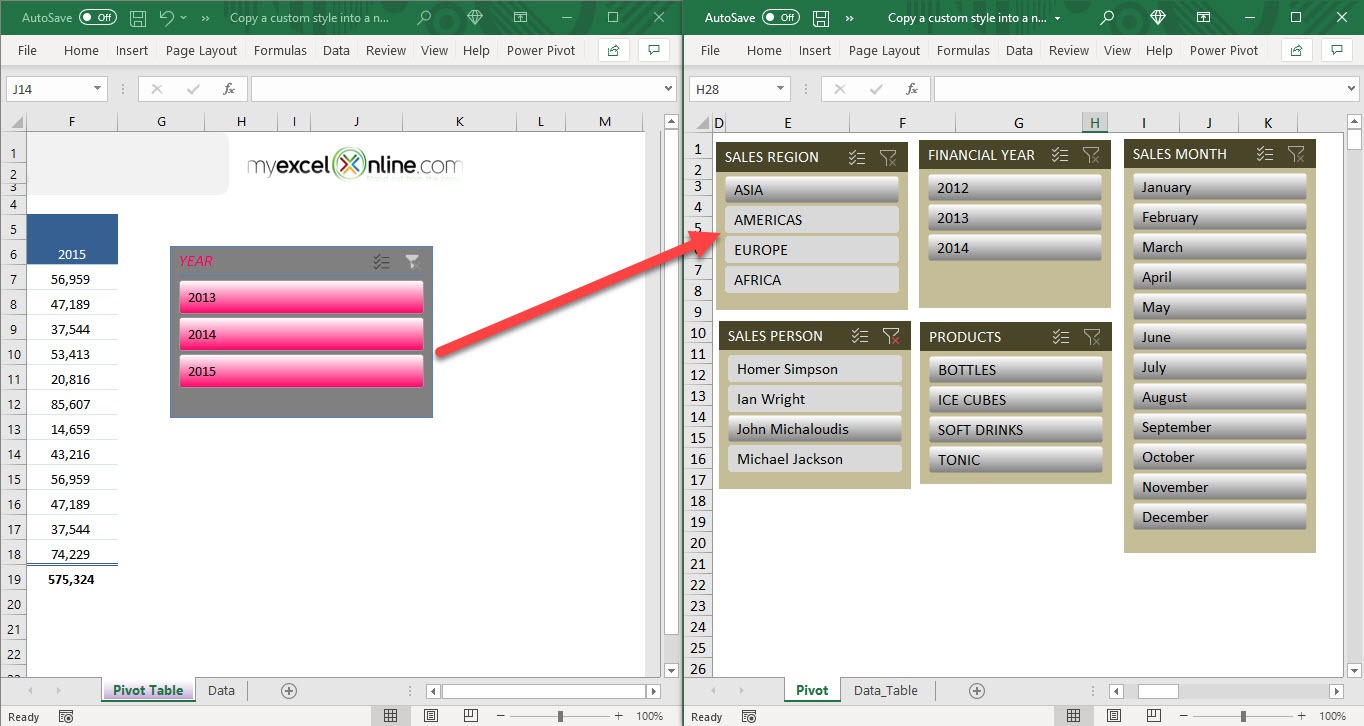
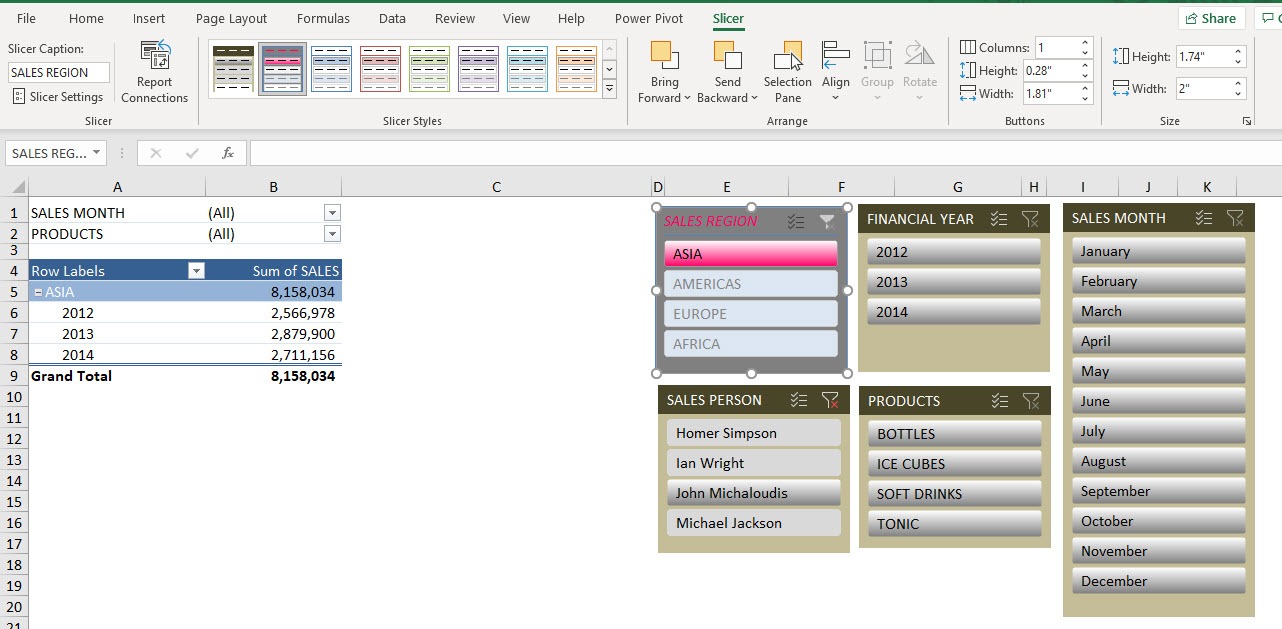
You can see two workbooks here. The workbook on the left side has the custom style that we want. Let’s say we want this style to be applied to the slicer on the right workbook.
Creating custom styles takes some work, but once done you can reuse this across multiple workbooks with just a few clicks!
Table of Contents
How to Copy a custom style into a new workbook
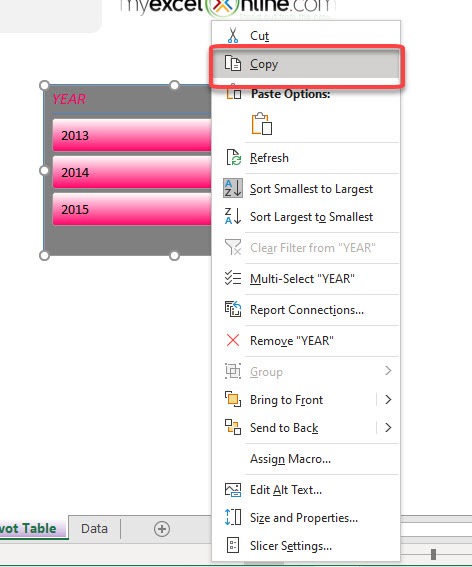
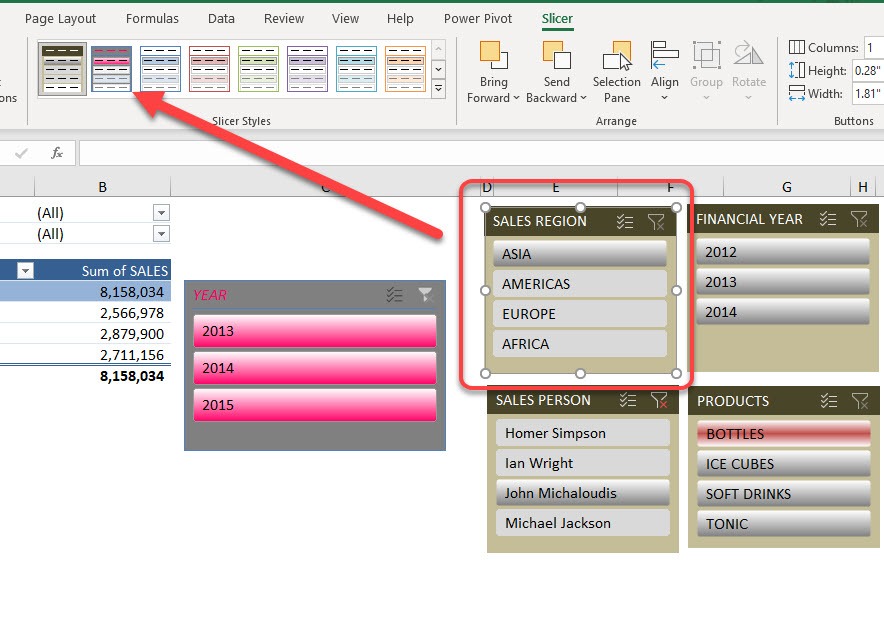
STEP 1: On the workbook that has the custom style that you want to copy, right-click on the slicer and select Copy
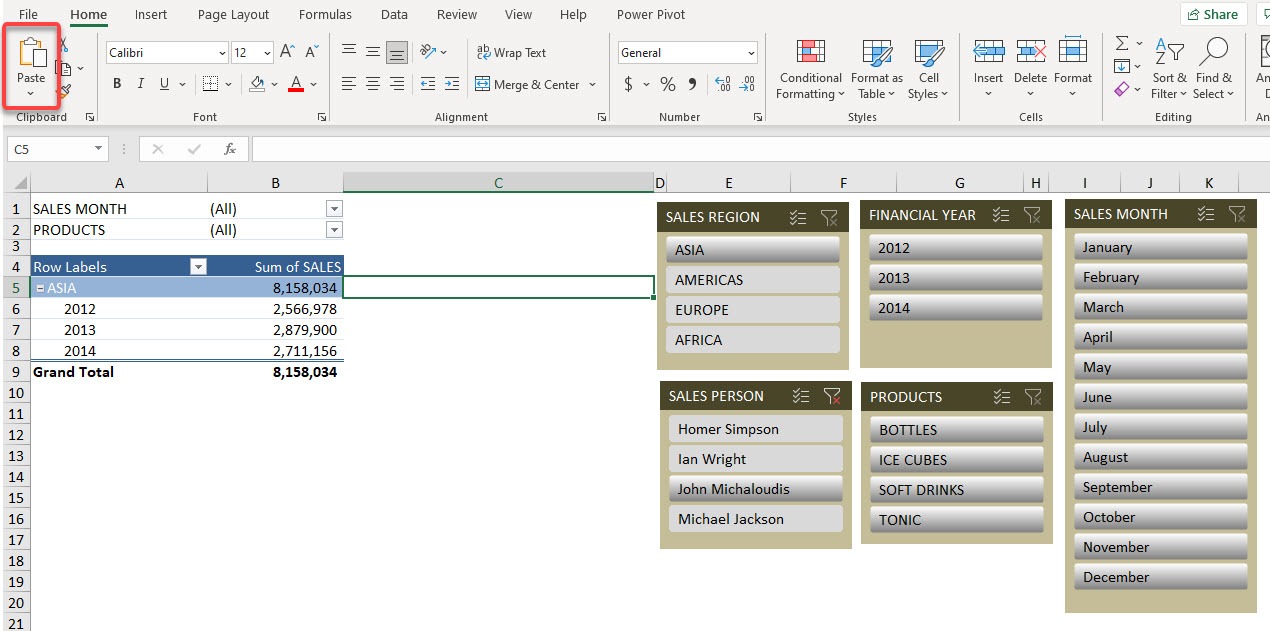
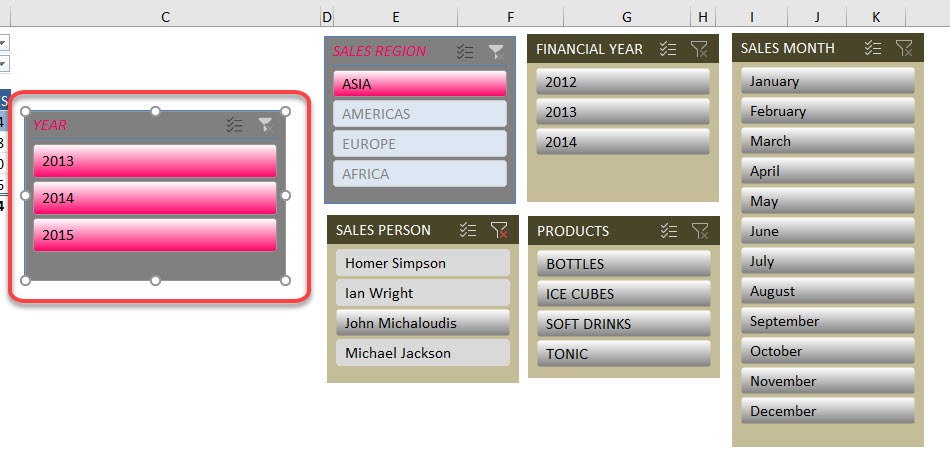
STEP 2: Let us jump over to the second workbook, on any blank space, click Home > Clipboard > Paste
You can see the slicer with the custom style show up inside the Slicer Styles
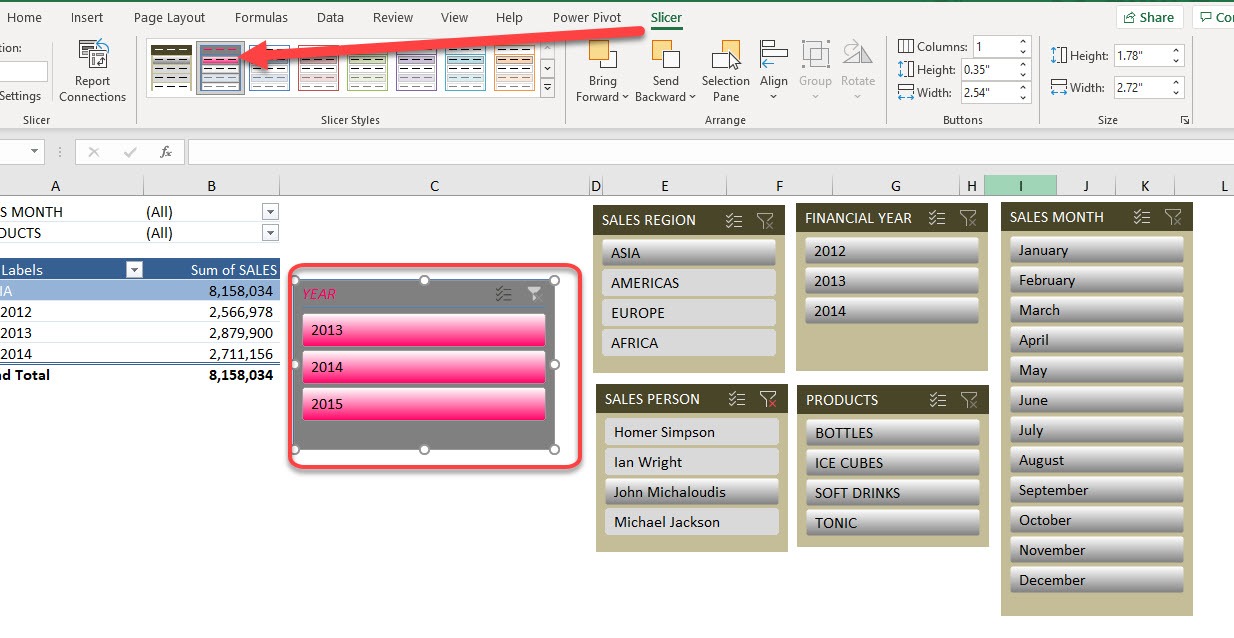
STEP 3: Now pick on the slicer that you want to apply the custom style to. Go to Slicer > Slicer Styles > Custom Style
STEP 4: Now we do not need the extra slicer that we copied anymore, select that and press Delete
This is how you can have the custom style of a Pivot Table slicer copied over into another workbook!
Frequently Asked Questions
Can I copy a cell style from one Excel workbook to another?
Yes, use Merge Styles under the Home > Cell Styles dropdown to import styles from another open workbook.
Do styles transfer when I copy/paste cells?
No, standard copy/paste does not transfer custom styles—only formatting that is directly applied to cells.
What is the fastest way to transfer a style?
Copy a worksheet that uses the style into the new workbook. The custom styles will be brought along.
Will merging styles duplicate existing ones?
No, Excel will only merge styles that don’t exist in the destination workbook. Identical names are ignored unless the style is different.
Can I export and save styles for use in future workbooks?
While you can’t export styles directly, saving a workbook template (.xltx) with custom styles is a good workaround for reuse.

Bryan
Bryan Hong is an IT Software Developer for more than 10 years and has the following certifications: Microsoft Certified Professional Developer (MCPD): Web Developer, Microsoft Certified Technology Specialist (MCTS): Windows Applications, Microsoft Certified Systems Engineer (MCSE) and Microsoft Certified Systems Administrator (MCSA).
He is also an Amazon #1 bestselling author of 4 Microsoft Excel books and a teacher of Microsoft Excel & Office at the MyExecelOnline Academy Online Course.
