Table of Contents
Essential Steps to Crop Your Picture to a Circle
Method 1: Using Crop to Shape Feature
To transform your image into a circle in PowerPoint, the ‘Crop to Shape’ feature is the perfect tool. Here’s how you can utilize it:
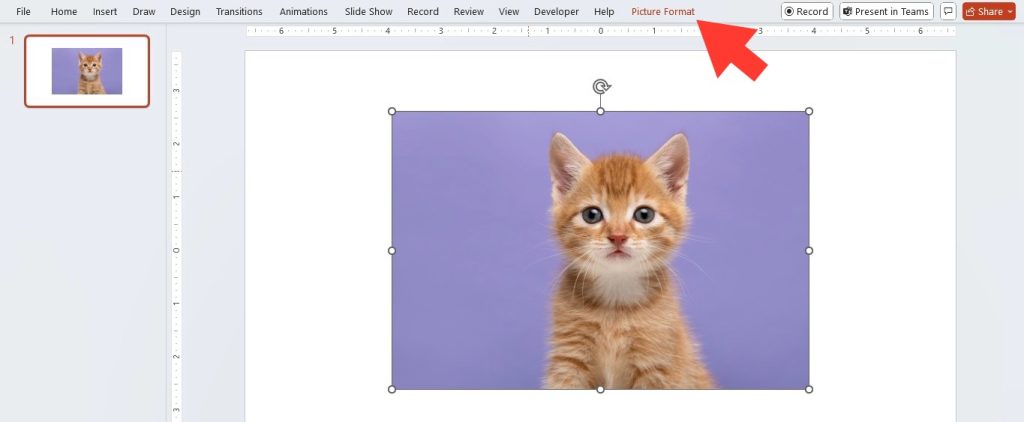
STEP 1: Select the image you wish to edit within your PowerPoint slide.
STEP 2: Navigate to the “Picture Tools” accompanied by the “Format” tab, which becomes visible upon image selection.
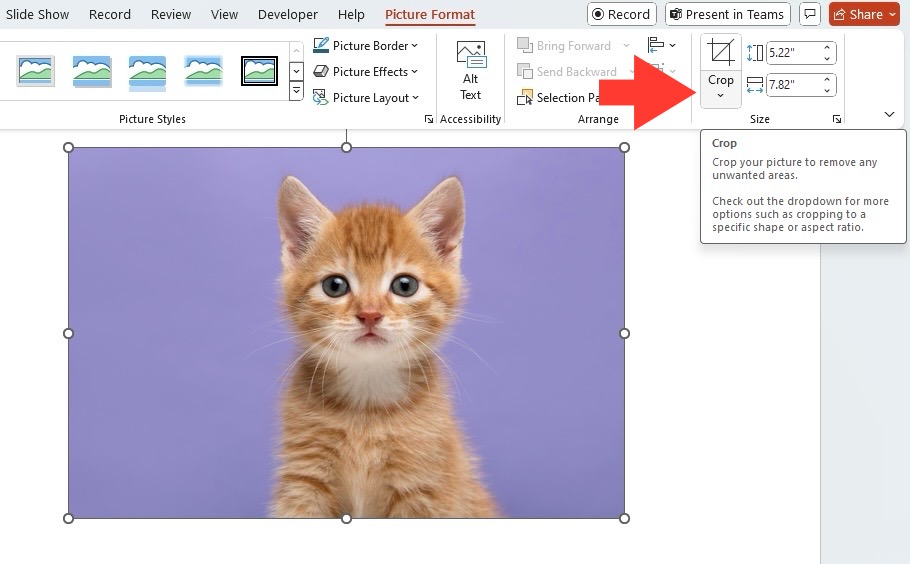
STEP 3: Within this tab, find the “Crop” button located in the “Size” group.
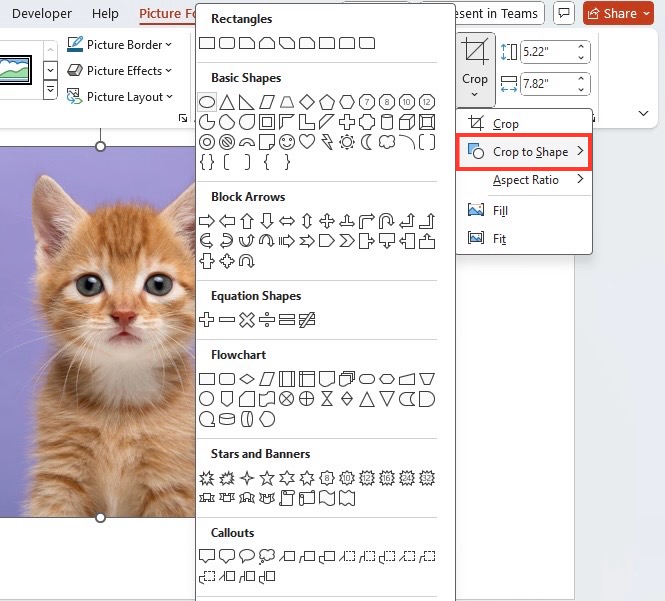
STEP 4: Click on the small arrow under “Crop”, then choose “Crop to Shape” from the dropdown menu.
STEP 5: From the range of shapes provided, select the oval or circle option.
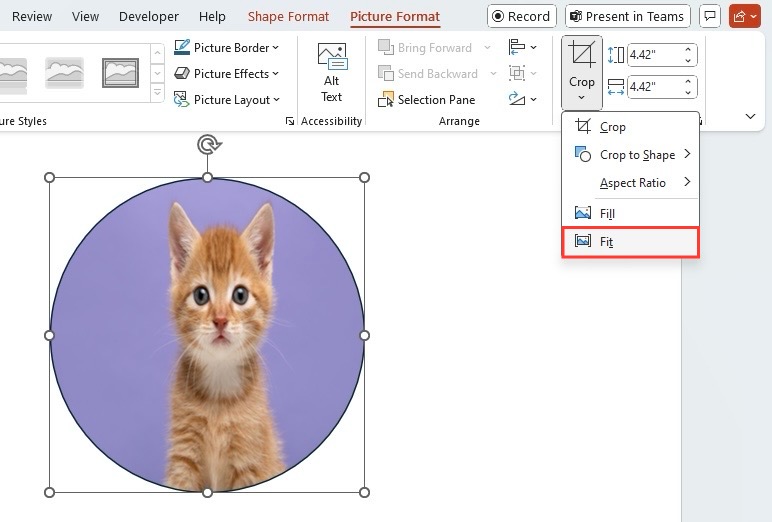
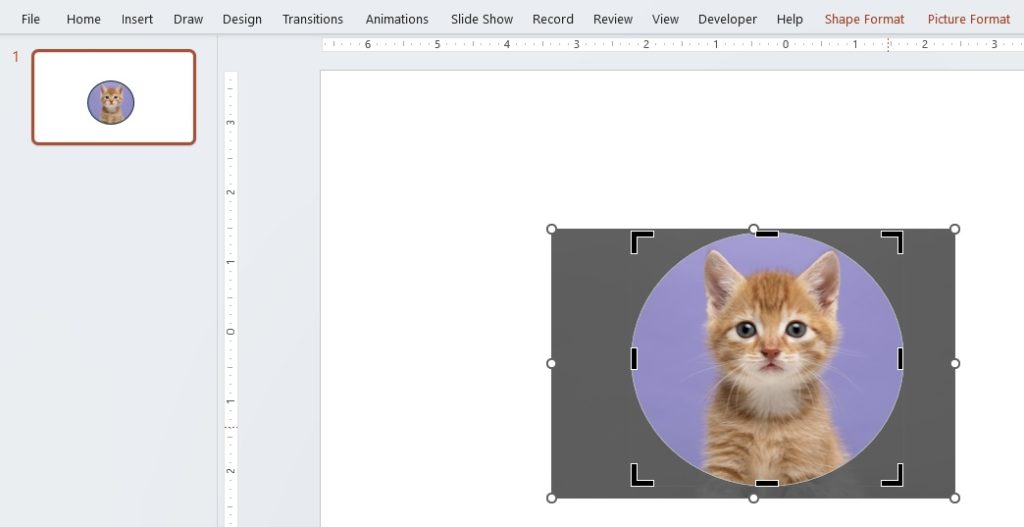
STEP 6: Click on the Picture Format tab, the Crop dropdown, then Fill.
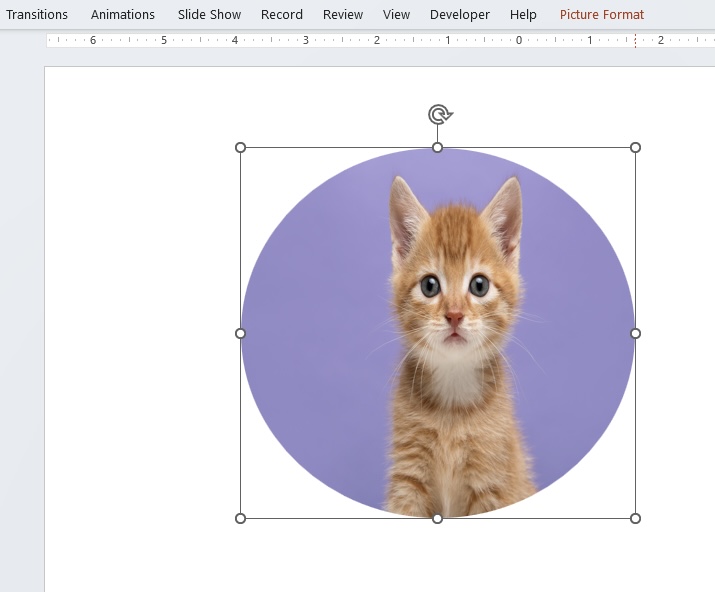
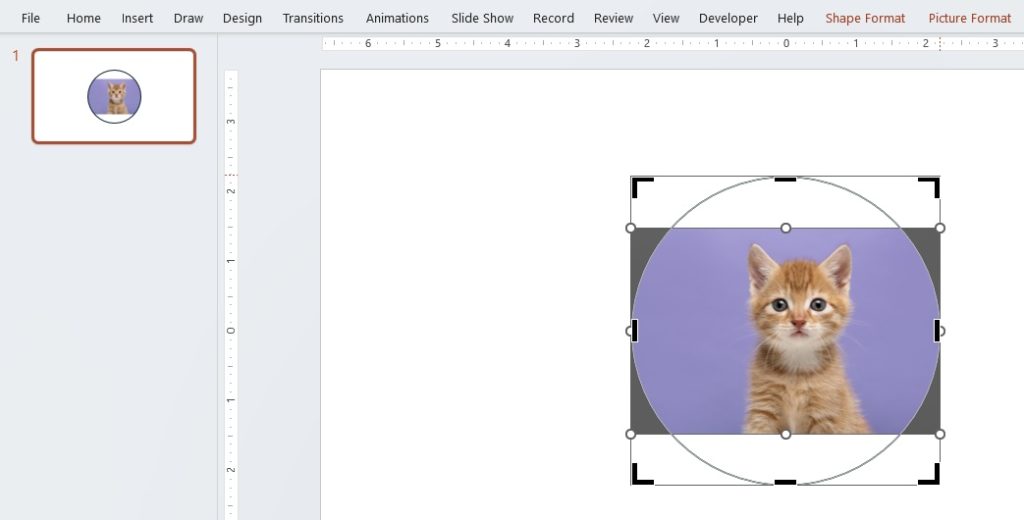
STEP 7: Adjust the image to fit the circle accordingly.
Once you’ve applied the circle crop, you can adjust the placement and the size to get it just right. It’s phenomenal how this simple technique can add a stroke of professionalism to images, leaving them looking crisp and distinctive on your slides.
Method 2: Filling a Shape with an Image
For those who prefer a bit more control over the final appearance or encounter images not conducive to simple cropping, here’s another convenient method:
STEP 1: Start with a blank slide or the area within your presentation where you want the circle image to appear.
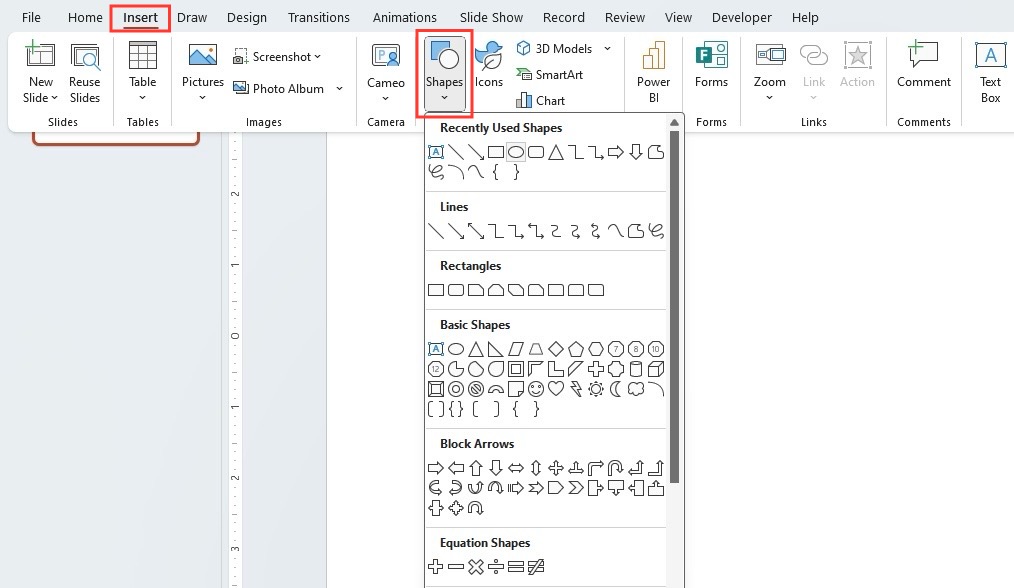
STEP 2: Choose “Insert” from the menu, then select “Shapes,” and pick the oval shape.
STEP 3: Hold down the SHIFT key while drawing to create a perfectly symmetrical circle on your slide.
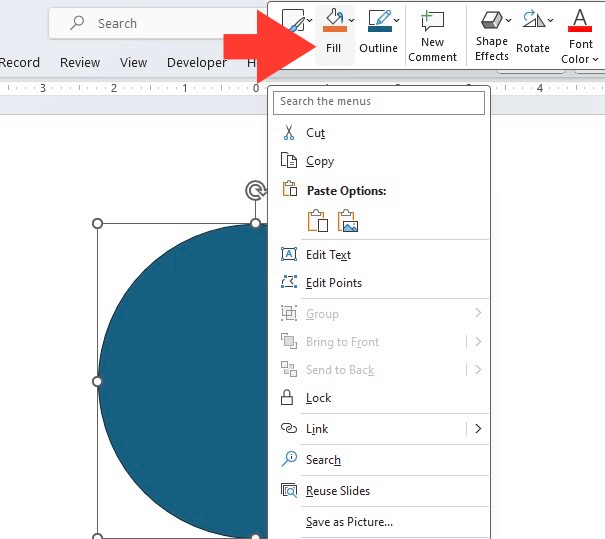
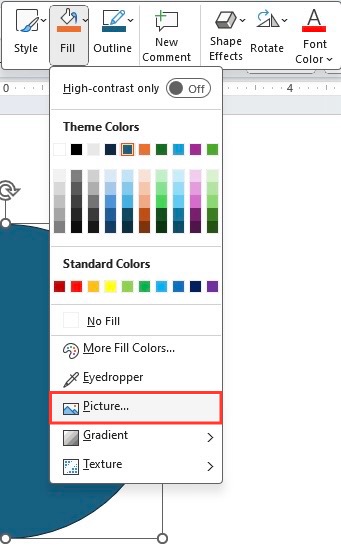
STEP 4: After drawing the shape, right-click on it, hover over “Fill” in the pop-up menu, and then click on “Picture.”
STEP 5: Upload the desired image, and it will fill the circle shape seamlessly.
STEP 6: Click on the Picture Format tab, the Crop dropdown, then Fill.
STEP 7: Adjust the image to fit the circle accordingly.
This method is invaluable when you need to ensure that your image fits just so within the context of your design. It allows for a precise selection of which part of the image is showcased within the circle.
Fine-Tuning Your Circular Image
Adjusting the Size and Position After Cropping
Once you’ve cropped your image into a circle, fine-tuning is often necessary. To adjust the size and position after cropping, select your circular image and then look for the corner handles. Click and drag these handles to resize your circle. To maintain the aspect ratio, hold the SHIFT key while dragging. If you need to move the image within the cropped area, simply select the image and drag it to the desired position.
These adjustments allow you to achieve a precise look, ensuring your circular image integrates seamlessly with the rest of your slide’s content, enhancing the overall aesthetic and conveying your message with greater impact.
Adding Flair with Borders or Outlines
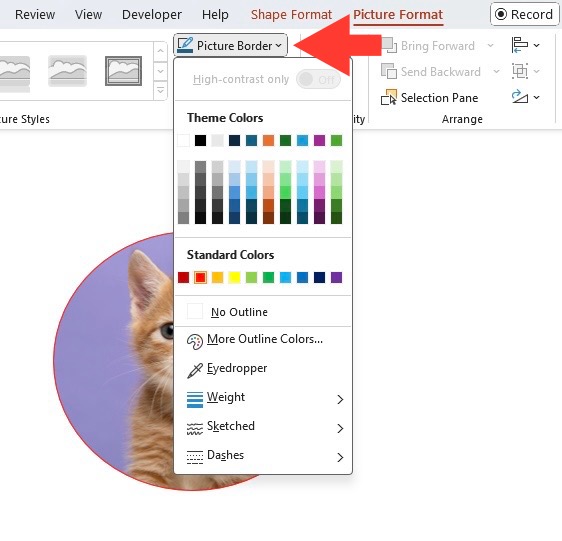
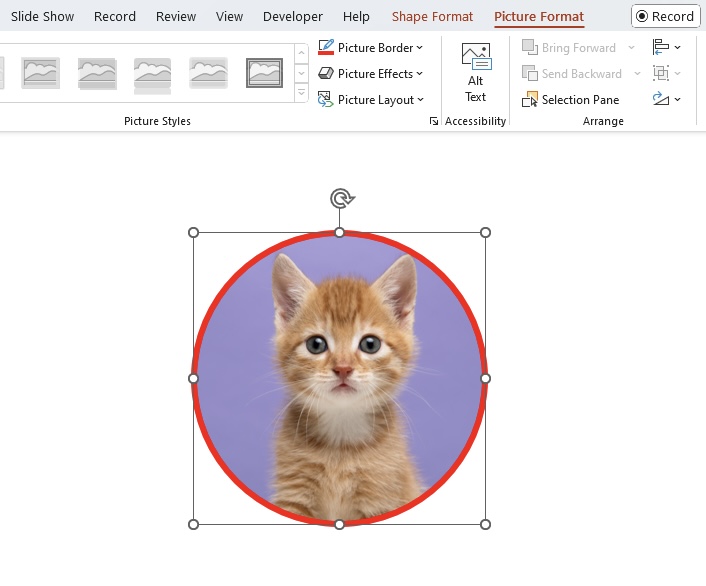
Enhancing your circular images with borders or outlines can provide that final touch of polish. To add a border in PowerPoint, select your circular image and then follow these steps:
STEP 1: Head to the “Format” tab and look for the “Picture Border” option.
STEP 2: Select a color that complements your image and slide design to give it an attractive outline.
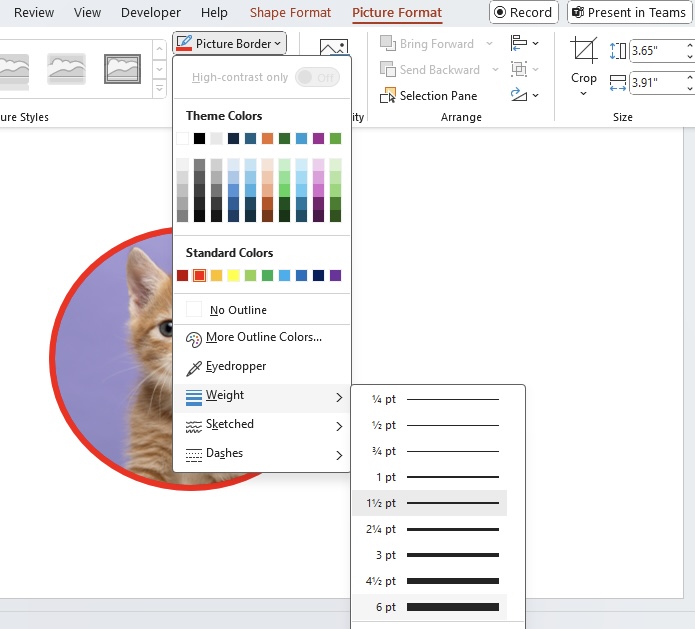
STEP 3: To make the border stand out, adjust the weight or thickness according to your preference.
Remember, the key to a successful outline is subtlety; choose a color and weight that frame your image nicely without overpowering it. This can draw attention to the image and give it a finished look that aligns with your overall slide design.
Extra Tips for Perfect Circle Cropping
Ensuring Aspect Ratios Match
To convey a professional appearance, it’s crucial that the aspect ratio of your circular images remains consistent across all slides. While PowerPoint’s ‘Crop to Shape’ feature typically locks in a 1:1 aspect ratio, manual adjustments can sometimes alter the circle’s perfection.
Here’s how to ensure your aspect ratios match:
STEP 1: After cropping your image to a circle, double-check the height and width dimensions in the “Size” group under the “Format” tab to confirm they’re equal.
STEP 2: If you’re using multiple circular images within a presentation, consider using the ‘Format Painter’ tool to replicate the correct aspect ratio across all images.
STEP 3: When resizing, use the SHIFT key to maintain the aspect ratio automatically, preventing any distortion of the circle shape.
A uniform aspect ratio not only maintains the integrity of the individual images but also creates a visually coherent presentation, demonstrating attention to detail that is sure to impress.
Saving Your Circularly Cropped Images Correctly
After refining your circular images, saving them correctly preserves your hard work. To save the edited circular image in PowerPoint:
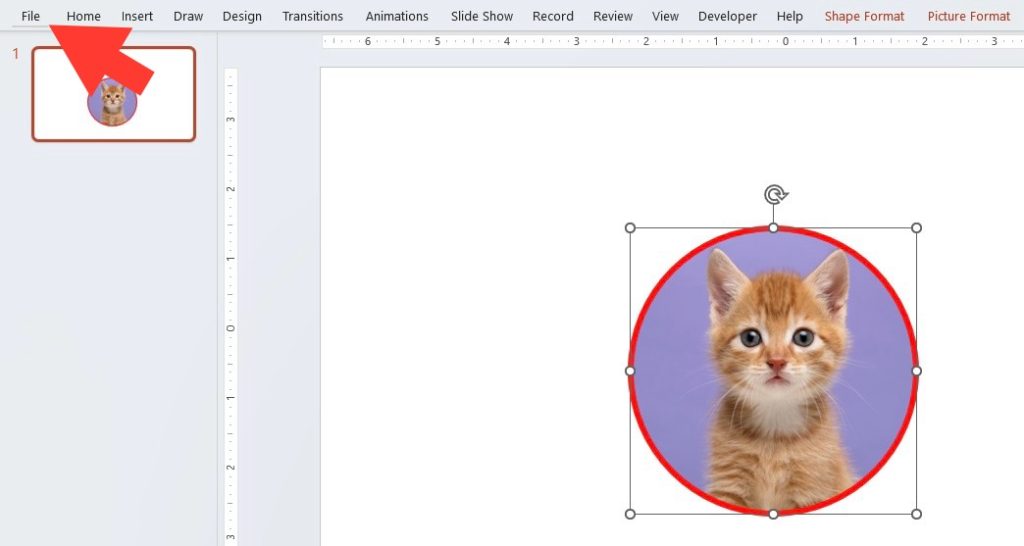
STEP 1: Go to the ‘File’ menu at the top left corner of the application window.
STEP 2: Click on ‘Save As’ and select the destination folder.
STEP 3: Enter a file name for your edited image. If you plan to use the image outside PowerPoint, save it as an image file, such as JPEG or PNG, by selecting the desired format from the ‘Save as type’ dropdown menu.
STEP 4: Hit ‘Save’ to keep the circularly cropped image, which can then be transferred, shared, or used in other documents or presentations.
By saving your images properly, you lock in the visual quality and ensure that the cropped pictures are ready for any intended use, maintaining their impact regardless of where they’re displayed.
FAQs
How do I crop a circle in PowerPoint?
To crop a circle in PowerPoint, insert the image into your slide, then select it and go to the “Picture Format” tab. Click on “Crop,” choose “Crop to Shape,” and select the oval shape. Adjust the size by dragging the corner handles. For a perfect circle, hold the SHIFT key while adjusting.
How do I make the cropped circle fit perfectly?
To make the cropped circle fit perfectly, adjust the size by dragging the available corner handles. Refine the crop points in the “Crop” dialog box to achieve the desired shape, ensuring the height and width dimensions are equal for a 1:1 aspect ratio.
Can I customize the size and shape of the cropped circle?
Yes, you can customize the size and shape of your cropped circle. Click on the image and then drag the corner handles to resize. To alter the shape, select the crop tool again and pick a new shape from the dropdown menu. Use the “Picture Format” tab to refine the aspect ratio.
How do I save the cropped circle in PowerPoint?
To save the cropped circle in PowerPoint, click on the “File” tab, then “Save As.” Give your file a name, select the location, and choose an image format like JPEG or PNG from the ‘Save as type’ dropdown. Click ‘Save’ to preserve the cropped image.
John Michaloudis is a former accountant and finance analyst at General Electric, a Microsoft MVP since 2020, an Amazon #1 bestselling author of 4 Microsoft Excel books and teacher of Microsoft Excel & Office over at his flagship MyExcelOnline Academy Online Course.

