The Importance of Curved Arrows in Presentations
Curved arrows in PowerPoint aren’t just simple design elements; they act as visual guides that direct your audience’s eyes and minds. They can show sequences, depict relationships, and emphasize transitions, making complex data digestible and presentations more dynamic. Whether you’re illustrating growth in a business chart or mapping out a storyline, curved arrows ensure your message flows effortlessly, leading to better understanding and retention.
Learn about Excel with our Free Microsoft Excel Online Course!
Key Takeaways
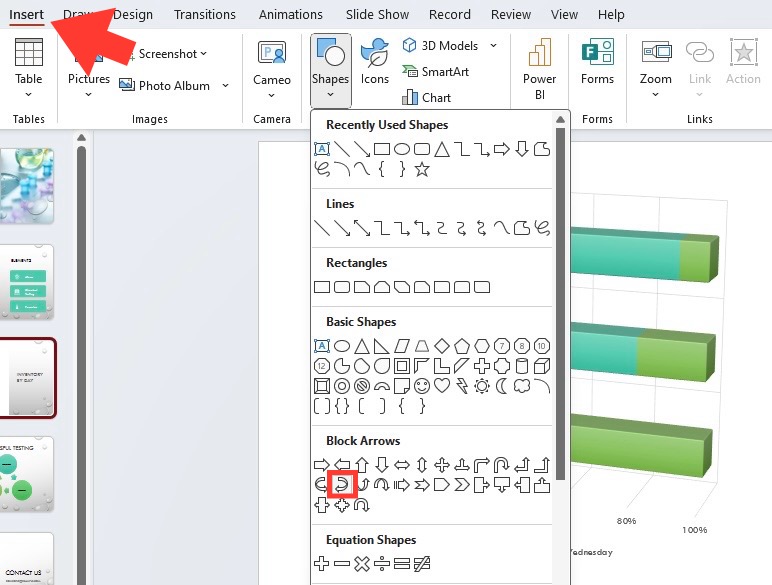
- To create a curved arrow in PowerPoint, go to the “Insert” tab, select “Shapes,” then choose one of the curved arrow options under “Block Arrows.”
- After inserting the arrow shape into the slide, utilize the yellow adjustment handles to resize and the white rotation handle to position the curved arrow as desired.
- Customize your curved arrow further using PowerPoint’s formatting options to change the color, add text labels, or incorporate images for a complete diagrammatic representation.
Table of Contents
Step-by-Step Guide to Crafting Curved Arrows
Method 1: Utilizing Curved Arrow Shapes
For those who want a straightforward approach to adding curved arrows, PowerPoint’s built-in shapes are a quick start. Here’s how:
STEP 1: Navigate to ‘Insert’ > ‘Shapes’ and choose a curved arrow from the ‘Lines’ or ‘Block Arrows’ section.
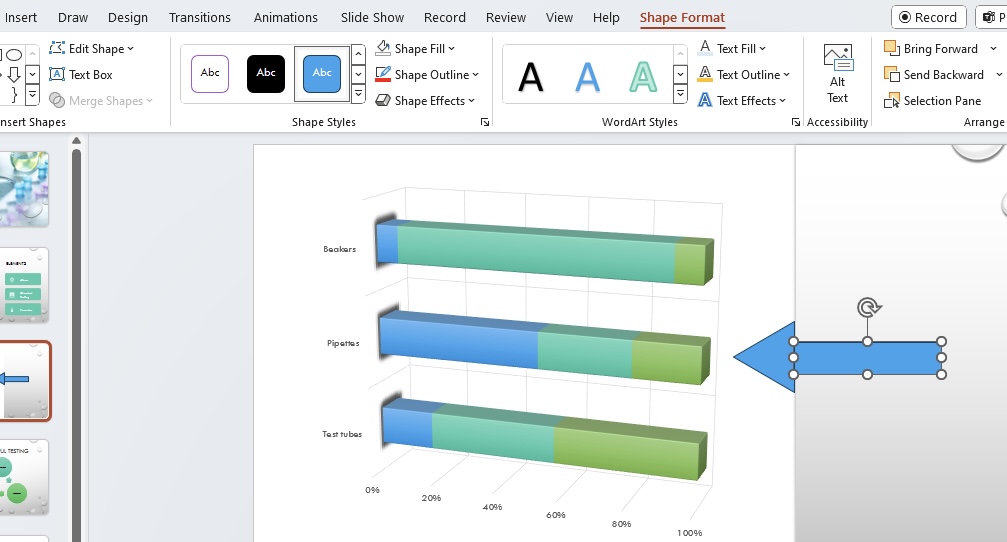
STEP 2: Click and drag on your slide to draw the arrow. Holding the ‘Shift’ key scales its size proportionally.
STEP 3: After placing the arrow, you can adjust its curvature by dragging the yellow handle.
This method is ideal for those needing to add visual cues quickly and effortlessly, without the fuss of creating something from scratch.
Method 2: Merging Shapes to Form Custom Arrows
For a more personalized touch, merging shapes allows you to design custom curved arrows that are unique to your presentation:
STEP 1: Begin by adding basic shapes to your slide from the ‘Insert’ > ‘Shapes’ menu.
STEP 2: Create the arrow by combining a rectangle and a triangle, aligning them to form an arrow shape.
STEP 3: Hold down the CTRL key to select the shapes together and use the ‘Combine’ option in the ‘Merge Shapes’ dropdown on the ‘Format’ tab to unite them into one.
This bespoke approach empowers you to manipulate the curvature, length, and style of your arrow, ensuring it aligns perfectly with your slide’s layout and theme.
Personalizing Your Arrows for Maximum Impact
Adjusting the Curve and Orientation
Personalizing the curve and orientation of arrows ensures they capture attention and direct flow where you intend. To adjust the curve:
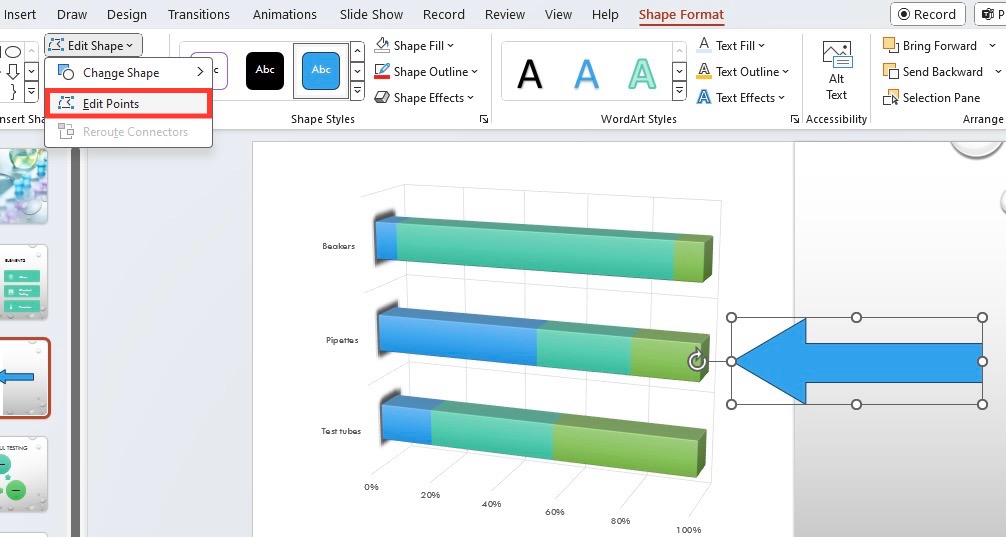
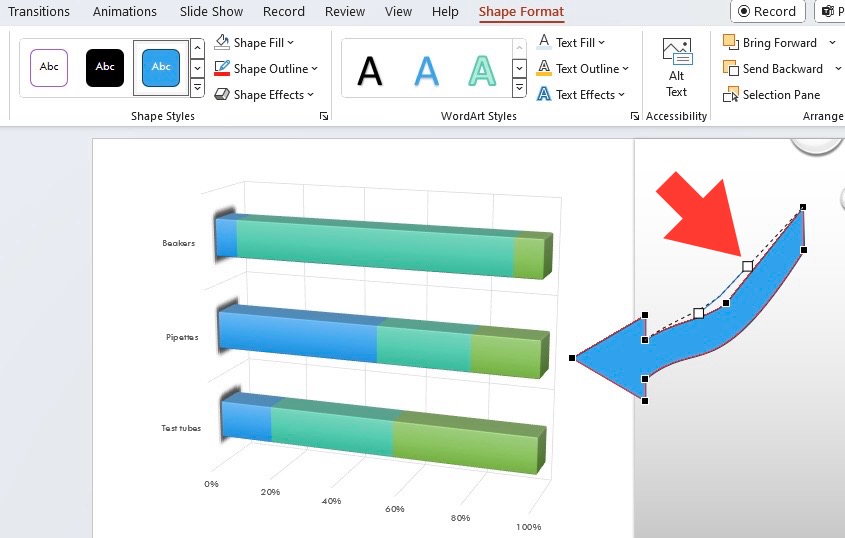
STEP 1: Select your arrow and hit ‘”Edit Points” in the ‘Edit Shapes’ dropdown. Use the blue handles to tweak the arc, aiming for smooth transitions.
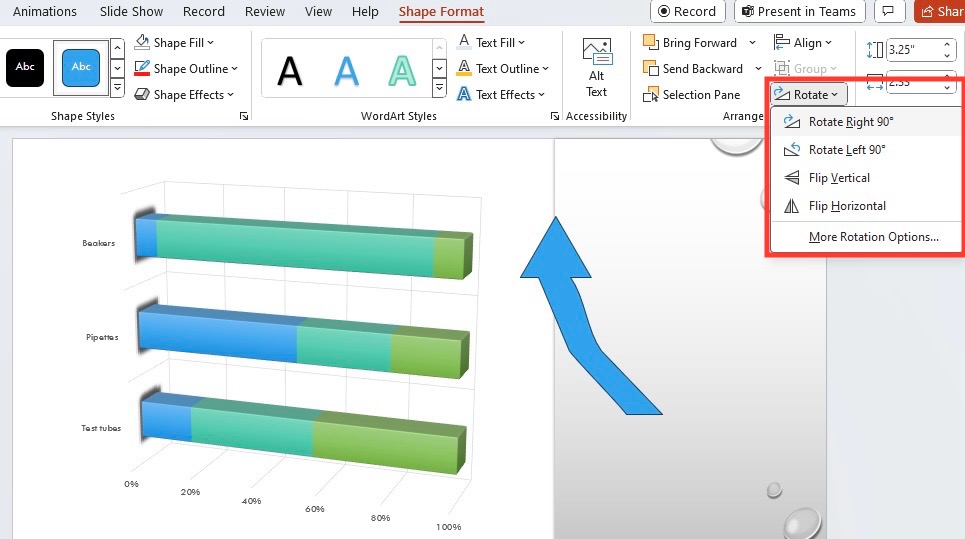
STEP 2: Rotate the arrow by selecting it and clicking “Rotate” from the “Drawing Tools” tab, or drag the rotation handle.
Remember, the key to a visually appealing arrow is subtlety in its curves and angles—less is often more.
Changing Colors, Adding Text, and Resizing
Customizing your curved arrows can make your presentation pop. Here’s what you can do:
- Changing Colors: Click the arrow, go to “Format”, and select “Shape Outline” to pick a new color that stands out or aligns with your color scheme.
- Adding Text: Double-click the arrow or click “Insert Text” to add your message directly on the arrow, which can guide your audience through the flow of your presentation.
- Resizing: Drag the arrow’s handles to resize it for the appropriate emphasis. Holding the “Shift” key while dragging maintains the arrow’s proportions.
Tailor these features to make your curved arrows not just functional but also integral to your slide’s aesthetic.
Advanced Tweaks for Curved Arrow Aesthetics
Incorporating Motion with Animated Curved Arrows
Animating your curved arrows can take your presentation to the next level, drawing attention and illustrating processes dynamically:
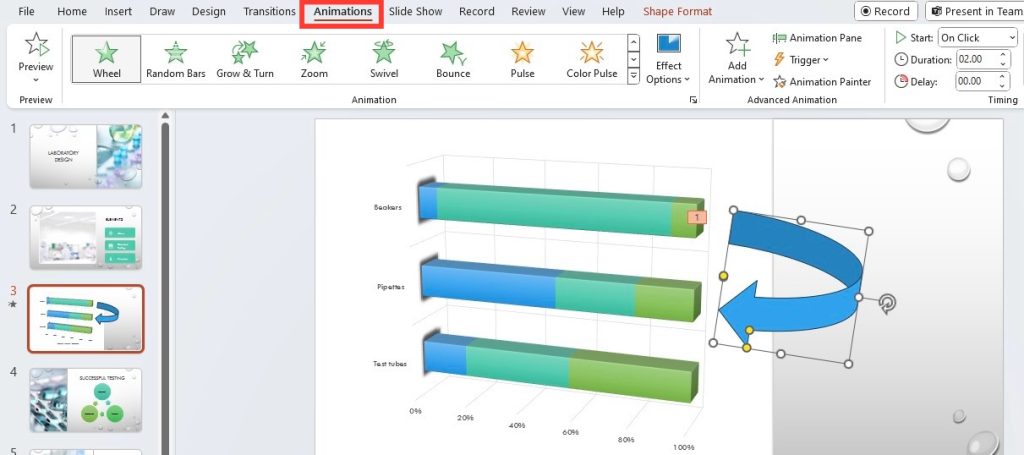
STEP 1: Simply select your curved arrow, go to the “Animations” tab, and choose an animation style.
STEP 2: Use the “Effect Options” to control the direction and nature of the animation.
STEP 3: For added control, adjust the start time and speed of the animation in the “Timing” group.
This touch of motion helps to emphasize the flow or transition your arrow represents, making your slide more interactive and engaging.
Design Techniques for Professional-Looking Slides
To ensure your slides stand out with a sleek and professional look, follow these design techniques:
- Maintain a consistent style for all your curved arrows, including color, thickness, and curvature, to establish a cohesive visual theme.
- Use contrast effectively; your arrows should be easily distinguishable from the slide background and other elements.
- Balance the slide’s composition by strategically placing arrows to guide the eye without cluttering the space.
By adhering to these principles, your presentations will not only communicate information but also do so with an air of professionalism and sophistication.
Practical Uses of Curved Arrows in PowerPoint
Enhancing Infographics with Arrows
Curved arrows can elevate the storytelling power of your infographics by:
- Clarifying the flow of steps in a process or timeline, making the sequence easy to follow.
- Highlighting connections between different data points, which can reveal trends and correlations that might otherwise go unnoticed.
Incorporating well-designed curved arrows into your infographics can turn a static image into a narrative, guiding the viewer’s journey through the information.
Building Dynamic Flowcharts and Cycle Diagrams
Curved arrows are integral to flowcharts and cycle diagrams, bringing clarity and directionality to the processes they depict:
- In flowcharts, they connect the steps smoothly, directing the viewers through the mapped process without confusion or interruptions.
- When creating cycle diagrams, curved arrows emphasize the continuous nature of processes or systems, closing the loop between the final and initial stages.
By properly employing curved arrows in these diagrams, you present a more polished, understandable representation of complex sequences and cycles.
FAQs on Mastering Curved Arrows in PowerPoint
How do I create a perfectly curved arrow?
To create a perfectly curved arrow in PowerPoint, use the “Shapes” tool to insert a curved arrow shape. Adjust the curve by clicking and dragging the yellow handles. For precise curvature, right-click the arrow, select “Edit Points,” and adjust the points manually for a smooth, perfect arch.
Can I animate a curved arrow to emphasize a process or cycle?
Yes, you can animate a curved arrow in PowerPoint to highlight a process or cycle. Select the arrow, click on the “Animations” tab, choose an animation style, and customize it with “Effect Options” to animate the arrow in a way that complements the flow of your presentation.
How do I insert a circular arrow in PowerPoint?
To insert a circular arrow in PowerPoint, go to “Insert” > “Shapes,” then select one of the circular arrow shapes from the “Block Arrows” section. Draw the shape on your slide and adjust the points to make it circular.
How do I change the shape of an arrow in PowerPoint?
To change the shape of an arrow in PowerPoint, select the arrow, then click on “Edit Shape” under the “Format” tab. Choose “Change Shape” to select a new arrow style. For more advanced adjustments, right-click the arrow, select “Edit Points,” and manually move the points to customize the shape.
John Michaloudis is a former accountant and finance analyst at General Electric, a Microsoft MVP since 2020, an Amazon #1 bestselling author of 4 Microsoft Excel books and teacher of Microsoft Excel & Office over at his flagship MyExcelOnline Academy Online Course.

