Letterheads have become an integral part of conveying information, especially in corporate situations. A company’s brand identity is shown by its letterhead. From logos and basic information to custom graphics, a letterhead grasps the attention of the recipient and creates a recognizable identity for the company. Letterhead can also have used for personal reasons. The layout of the letterhead can easily be modified for corporate or personal use.
Key Takeaways
- Design a Professional Layout – Start by setting up margins, headers, and footers to define your letterhead’s structure. Use the Header & Footer tools in Word to ensure consistency across all pages.
- Insert Your Logo and Branding – Add your company logo and branding elements by inserting images and shapes. Use Picture Tools to adjust size, position, and alignment for a polished look.
- Use Custom Fonts and Colors – Maintain brand identity by selecting specific fonts and colors. Use Themes and Styles in Word to create a cohesive design that aligns with your company’s branding.
- Save as a Template for Reuse – To streamline future use, save the letterhead as a Word Template (.dotx). This allows you to open a new document with the letterhead preloaded, ensuring consistency across all correspondence.
- Ensure Print and Digital Compatibility – Test your letterhead for both printed and digital formats. Use high-resolution images, check margins, and save as PDF if sending electronically to maintain formatting.
Letterheads can be used for various different reasons like:
- Sending invoices to clients and customers.
- Recording the minutes of a meeting.
- Sending offer letters.
- Sending personal invites like wedding invitations.
So let us see how you can make your custom letterhead in Microsoft Word!
You first need to identify what elements you need to insert into your letterhead.
Table of Contents
Watermark
Let us now explore how to insert a watermark on your letterhead. A watermark can be a sign of validity, showing confidentiality and restricting the copying of sensitive information.
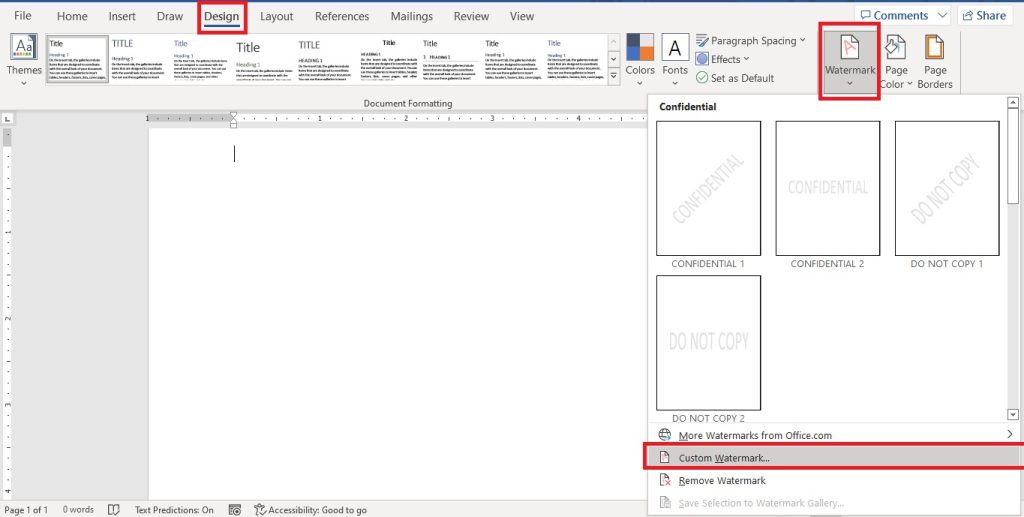
You can easily follow the steps below to insert a watermark:
- Go to Design.
- Click on Watermark.
- Here you will be presented with preset watermarks, mainly used to protect your data. You can also insert your own watermark by clicking on Custom Watermark.
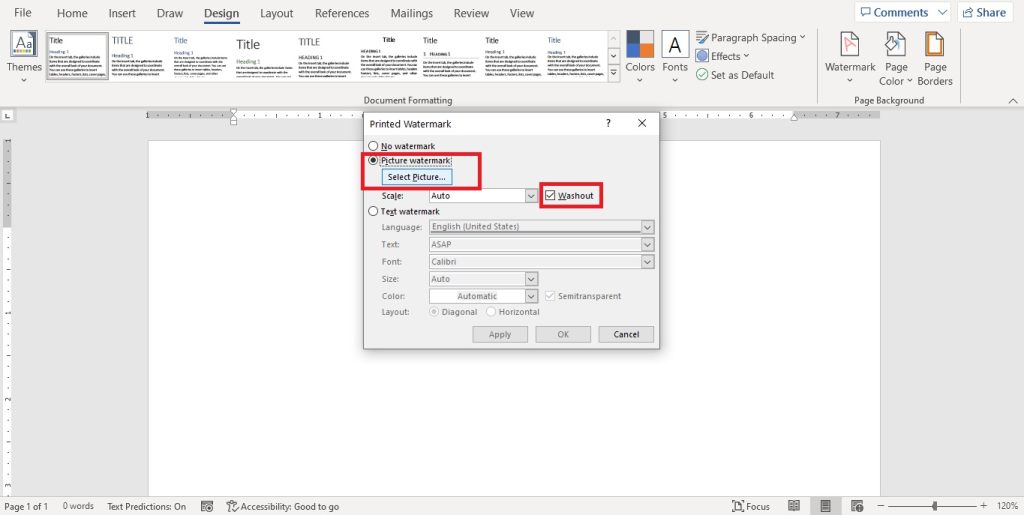
- In the pop-up window, check the Picture watermark box, and click on Select Picture.
- Browse and select the picture you want as a watermark.
- You can check the Washout box, which will give the picture a faded look in the background. Click on OK.
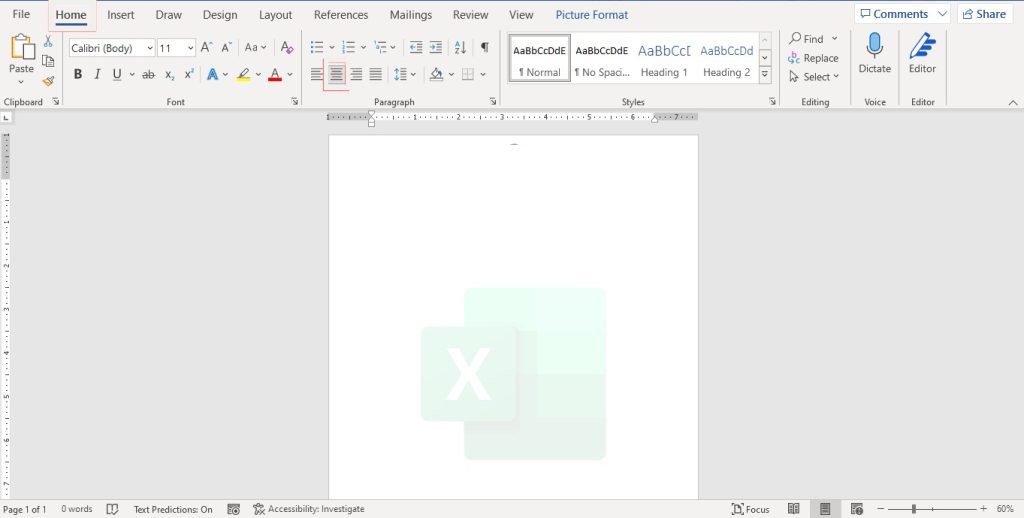
Once you have completed all the steps, you will see that your selected picture will be visible in the background of your Word document.
Logo
The logo immediately catches the eye of the recipient. It is really simple to add a logo in MS Word. Let us see how!
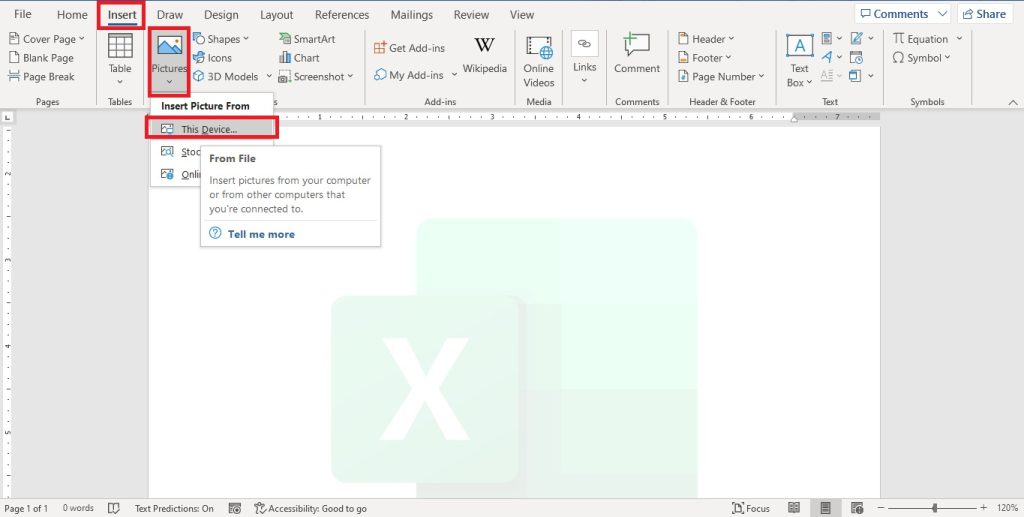
- Go to Insert.
- Click on Pictures.
- Under the “Insert Picture From” list, select This Device.
- From the pop-up window that opens, browse and select your logo.
- Now you can stretch the logo by dragging it from the corner.
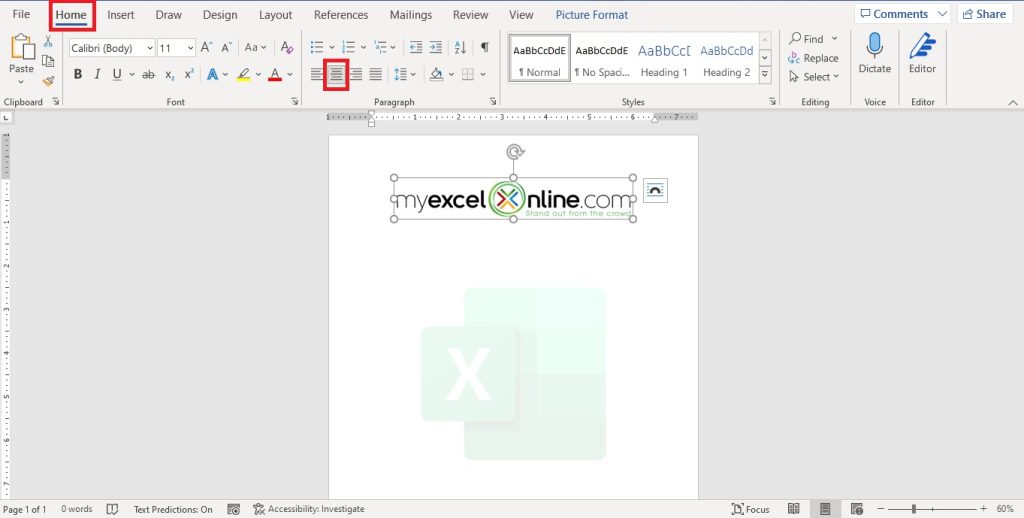
- You can also go to Home > Center Align. Now your logo will be on the center of the screen!
Graphic Elements
Aesthetics play a very important role in letterheads. You can easily grasp the attention of the reader with your letterhead by inserting a few graphic elements.
For that, it is better if you match the colors present on your letterhead to the colors present in your logo.
Let us see how you can get the exact colors in your logo:
Picking Color in Paint
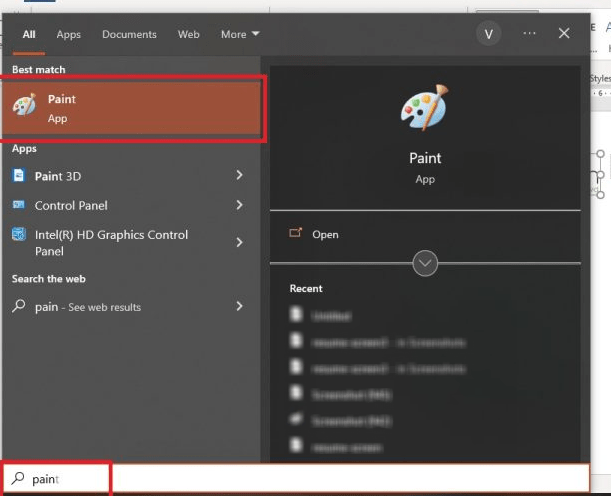
- Go to the Paint app.
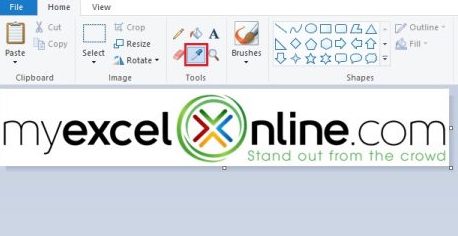
- Go to File > Open. Browse and select your logo.
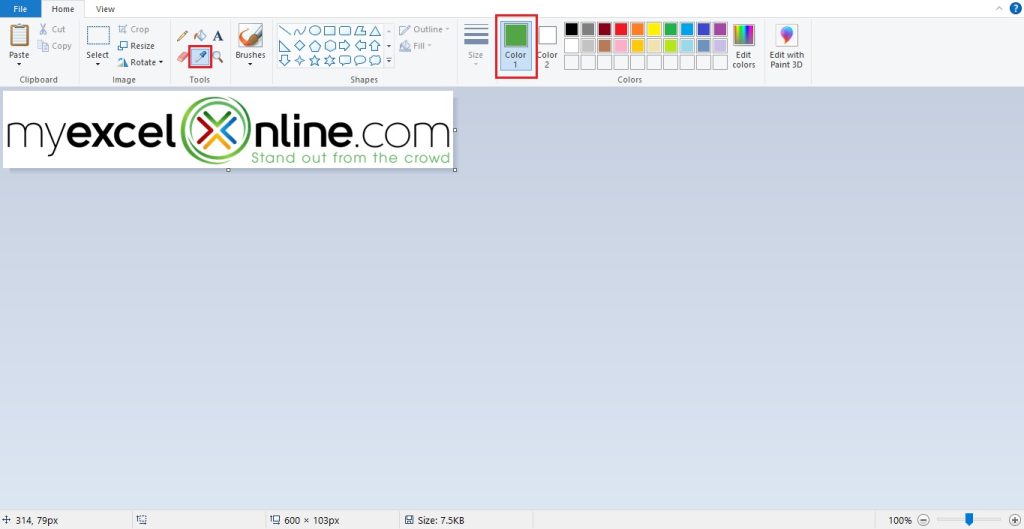
- Go to Home > Color Picker tool.
- Take the tool cursor to the color you want to pick and click on it. You will see that Color 1 is filled with the color you picked.
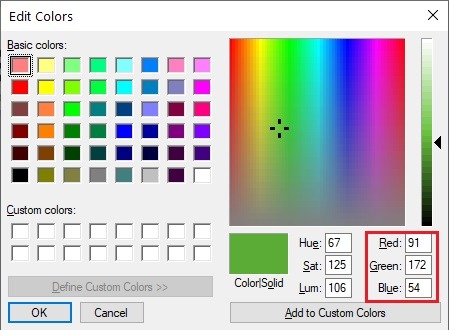
- Click on Edit Colors and note the Red, Green, and Blue values of the color on the bottom right of the pop-up box.
Now if you want to insert this exact color on your letterhead, you can easily duplicate the red, green, and blue values and get the same color.
Inserting Shapes
A simple way of adding graphic elements to your letterhead is by using shapes. MS Word offers a variety of different shapes that you can fill with color to brighten up your document. Let us see how you can insert shapes into your letterhead:
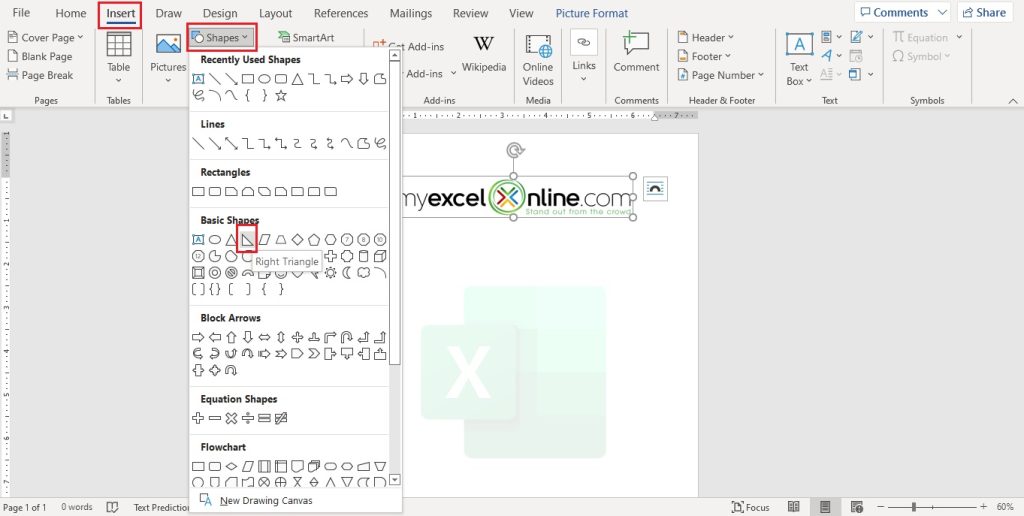
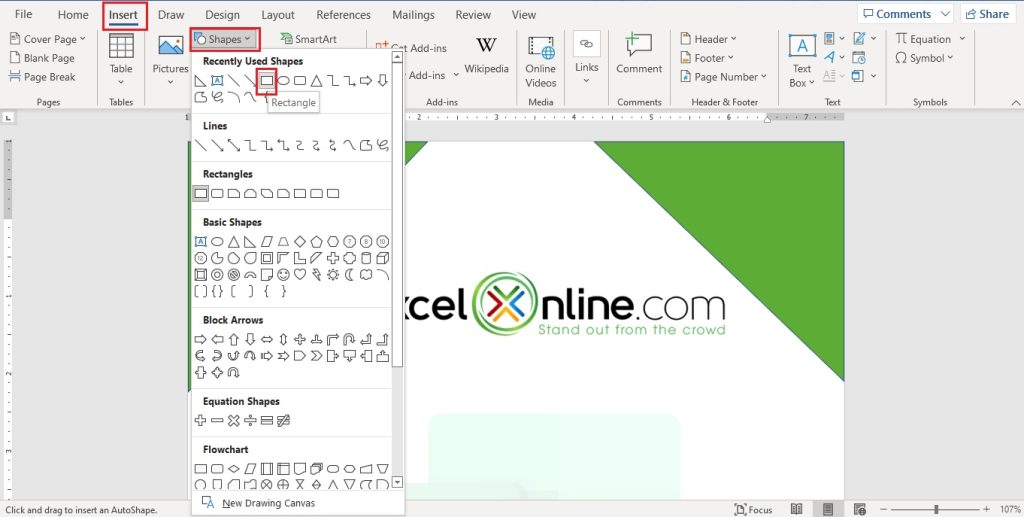
- Go to Insert > Shapes.
- Under the Shapes drop-down menu, you can select whichever shape you want. Let us go with a simple triangle.
- Click your left mouse button and drag to draw the shape. Once drawn, you can drag the shape and place it wherever you want.
Now let us see how to add color fill to our shapes.
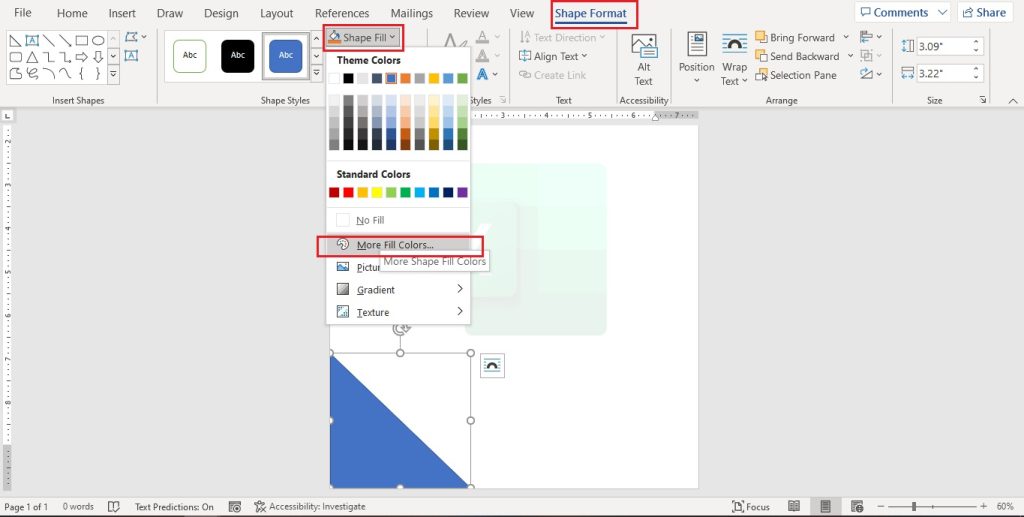
- Select your shape and go to Shape Format.
- Click on Shape Fill. Under the dropdown list, click on More Fill Colors.
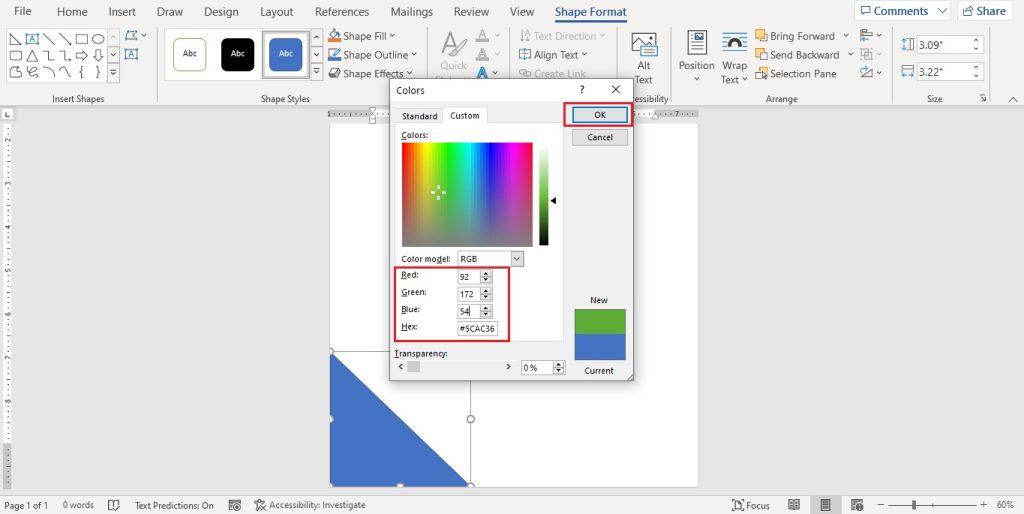
- In the pop-up box, under the Custom tab, choose the Color model as RGB.
- Now you can paste the values of red green and blue that you extracted from your logo in Paint.
- You can copy the shape by selecting it and pressing Ctrl+C. Press Ctrl+V to paste the shape.
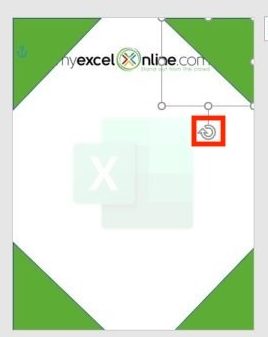
- You can also rotate the shape by clicking, on the circular arrow on top of the shape, and dragging it. Since we have selected a triangle as our shape, we can fit four triangles into the four corners of our letterhead.
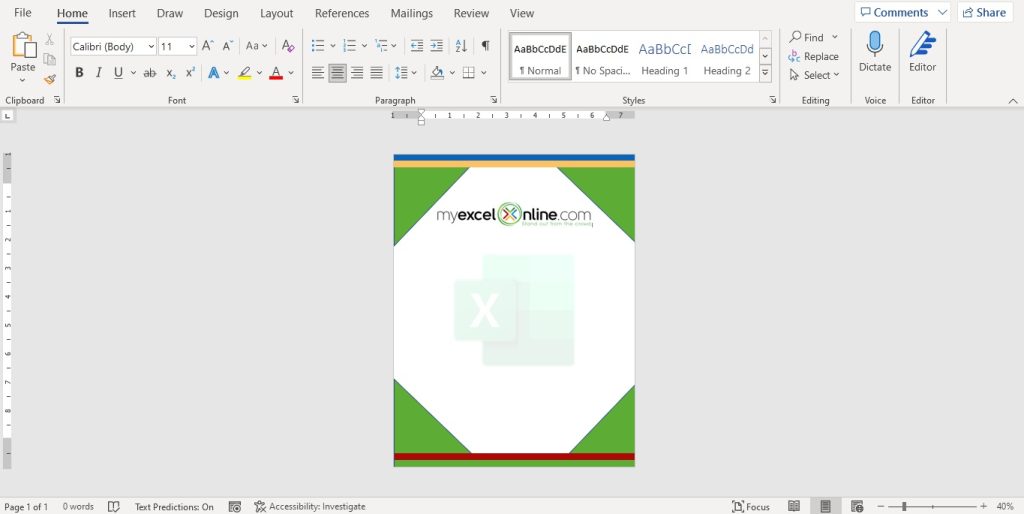
Now you will see that the shapes have the same colors as present in your logo. You can also add other shapes like rectangles and insert more graphical elements to your letterhead and give it a clean and attractive look.
You can add color as per the logo color scheme to enhance the final output of the letterhead.
QR Code
Inserting a QR code into your letterhead will provide the recipient the ease to simply click a photo of the code and go to any links that are encoded in it.
You can, for example, redirect the person to your website via your QR code where they are able to view information about your company and how to your contact details. Let us see how to insert a QR code in MS Word:
- Go to Insert.
- Click on Pictures.
- Under the “Insert Picture From” list, select This Device.
- From the pop-up window that opens, browse and select your QR Code.
- You can reduce the size of the code by dragging it from the corner. Now you can drag and place the QR Code wherever you want on your letterhead.
While you can certainly just start typing on your letterhead, inserting a text box is more flexible and will not mess with your layout. Furthermore, you can easily drag your text box to place it wherever you want.
You can add a text box by following the steps below:
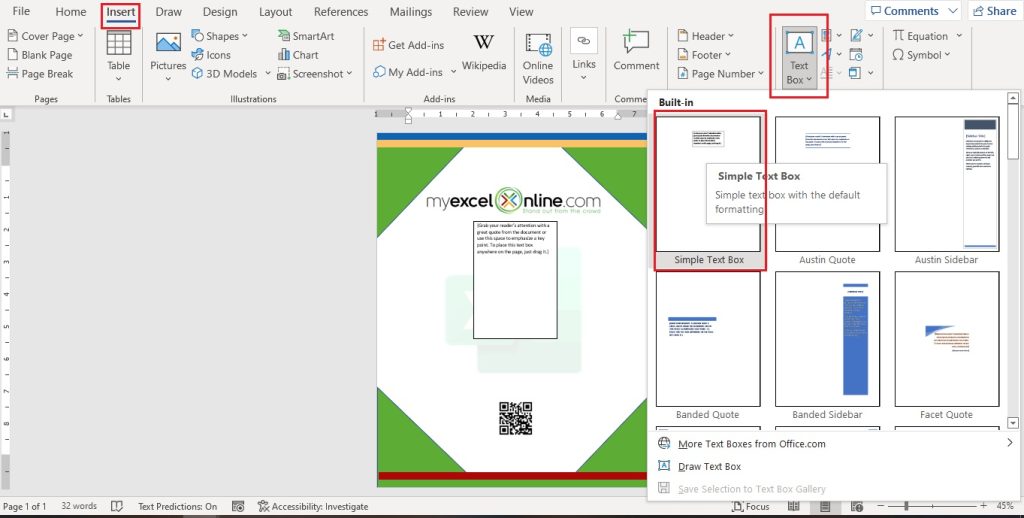
- Go to Insert
- Click on Text Box. Under the drop-down list, select any text box you want and just start typing.
Frequently Asked Questions
How do I insert a company logo into my letterhead?
To insert a logo, go to the Insert tab, click Pictures, and choose your image file. Use the Picture Format tools to resize, position, and align the logo as needed. For a consistent look, place it in the header or footer.
Can I save my letterhead as a template for future use?
Yes! After designing your letterhead, go to File > Save As > Browse, then choose Word Template (.dotx). This allows you to reuse the letterhead without modifying the original design.
How can I add company contact details to my letterhead?
Use the Header & Footer section to insert your company name, address, phone number, and website. You can also use Text Boxes or Shapes for better customization and alignment.
What’s the best way to ensure my letterhead prints correctly?
Before printing, go to File > Print Preview to check margins and layout. Ensure your images are high resolution and that you use the correct paper size settings to avoid cut-off edges.
How do I maintain letterhead formatting when sharing the document?
To preserve formatting, save your letterhead as a PDF by selecting File > Save As > PDF. This ensures the layout remains intact when viewed or printed on different devices.
Hopefully, this article has given you a headstart on creating your own letterhead. You can add or reduce the different elements explained here while creating your custom letterhead.
You can always come back to this article in case you want to revisit any concepts!
John Michaloudis is a former accountant and finance analyst at General Electric, a Microsoft MVP since 2020, an Amazon #1 bestselling author of 4 Microsoft Excel books and teacher of Microsoft Excel & Office over at his flagship MyExcelOnline Academy Online Course.

