Date subtraction in Excel is crucial for data analysis, helping uncover trends, forecast events, and manage deadlines effectively. Excel offers several methods and functions that make date calculations straightforward and precise, allowing users to maintain accuracy and relevance in their analyses.
Key Takeaways:
- Subtract dates directly using simple arithmetic (e.g.,
=B2-A2) for quick day counts. - Use the DATEDIF function for precise differences in days, months, or years.
- Ensure dates are correctly formatted in Excel to avoid calculation errors.
- The NETWORKDAYS function accounts for weekends and holidays in date calculations.
- Troubleshoot errors like #VALUE! by checking date formats and formula accuracy.
Table of Contents
Introduction to Subtracting Dates in Excel
The Importance of Date Calculations in Data Analysis
Understanding date calculations is a cornerstone of data analysis, which is central to uncovering trends, forecasting events, and setting deadlines. In Excel, these calculations allow us to measure the duration between events, calculate periods of growth, or determine expiration dates with speed and accuracy.
When it comes to time-sensitive data, proficiency in subtracting dates is indispensable for maintaining the integrity and relevance of the analysis.
Essential Excel Functions for Date Subtraction
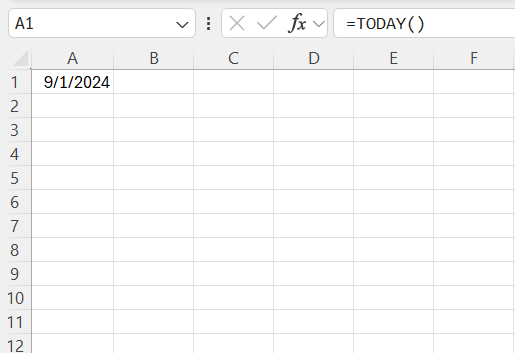
Excel boasts a suite of functions specifically designed for date arithmetic. The TODAY() function is perhaps the most straightforward, providing the current date which can serve as a reference point for calculations.
The DATEDIF() function, however, is a hidden gem in Excel’s arsenal, enabling precise date subtraction by calculating the difference between dates in days, months, or years.
Additionally, the simple expression of subtracting one cell containing a date from another is an essential skill for rapid date-related calculations.
Knowing these functions and when to apply them can significantly streamline any analytical task involving dates, saving us considerable time and bolstering our Excel efficiency.
Step-by-Step Instructions for Date Subtraction
#1 Direct Subtraction Method
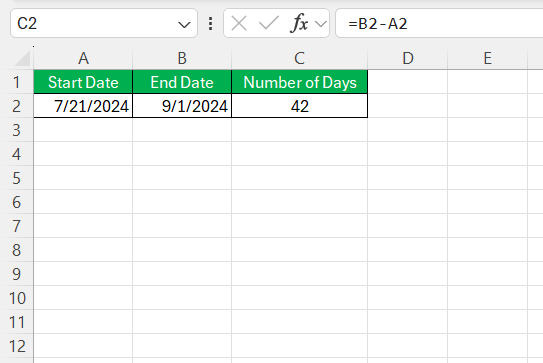
To use the direct subtraction method, simply type two dates into separate cells and subtract one from the other using the minus ‘-‘ sign. For instance, if cell A2 contains the start date and cell B2 the end date, we would input “=B2-A2” to obtain the number of days between them. This method operates under the premise that Excel stores dates as serial numbers, making direct arithmetic possible.
This method is straightforward and useful for quick calculations when precision to the day is sufficient for our analysis.
#2 Using the DATEDIF Function for Precise Results
For those of us seeking precise calculations beyond just the day count, the DATEDIF function is a robust solution. It computes the difference between two dates based on specific units like years, months, and days.
By using the correct unit parameter (“Y” for years, “M” for months, “D” for days, “MD” for the difference in days excluding months and years, “YM” for the difference in months excluding years, and “YD” for the difference in days within the same year), we can tailor our analysis to the granularity required.
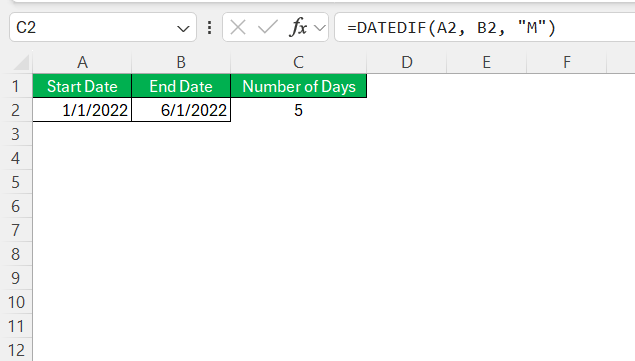
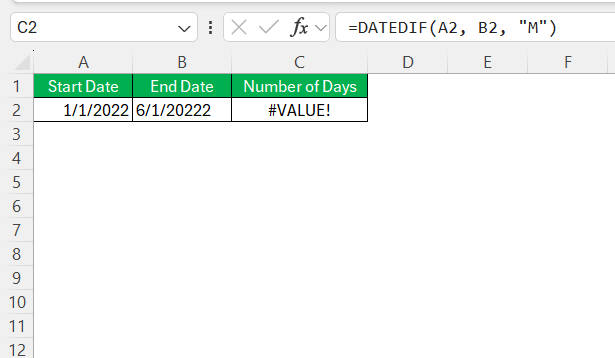
Here’s how we bring this function into play: Suppose we need to find out how many months have passed between January 1, 2022, and June 1, 2022. We would insert these dates into cells A2 and B2, respectively, and formulate our DATEDIF function in a third cell as follows: =DATEDIF(A2, B2, "M"). This formula would return ‘5’ to denote a five-month interval.
Employing DATEDIF enhances the precision of time-related reporting and allows for a deeper, more nuanced understanding of time spans in our data sets.
Tips for Accurate Date Subtraction
Formatting Dates Correctly Before Subtracting
Before performing subtraction on dates, it’s crucial that we properly format the cells containing the dates to prevent any errors or misinterpretations. If our cells are not formatted as dates, Excel may treat the data as text or a general number, which leads to incorrect or unexpected results.
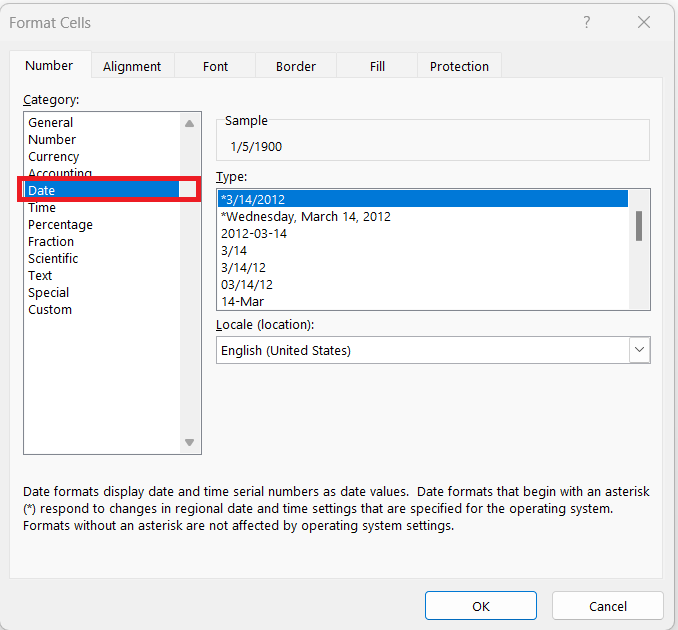
To ensure correct formatting, we select the cells with the dates and right-click to choose ‘Format Cells.’ In the dialogue box, under the ‘Number’ tab, we pick the ‘Date’ category and select an appropriate format from the list provided.
This action aligns our data with Excel’s internal date system, ensuring our calculations are both accurate and readable.
It’s these details in formatting that often make the difference between accurate temporal analytics and puzzling outputs, guiding us toward more reliable data manipulation.
Accounting for Leap Years and Holidays
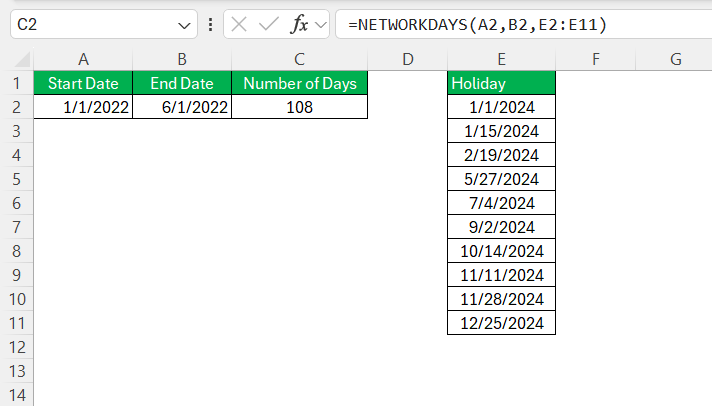
When subtracting dates, we must be mindful of leap years, which add an extra day to February. Excel automatically includes leap years in calculations, ensuring an accurate day count. Furthermore, if we’re calculating working days and need to exclude weekends and holidays, Excel’s NETWORKDAYS function becomes indispensable.
To factor in weekends and holidays, we can define a list of holidays and use it in our formula. Assuming the holiday dates are listed in a named range called MyHolidays, our NETWORKDAYS formula would look like =NETWORKDAYS(start_date, end_date, MyHolidays).
By accurately accounting for leap years and holidays, we ensure that our time-related calculations reflect reality, whether it’s determining project deadlines or tracking employee leave.
Common Pitfalls When Subtracting Dates
Error Watch: Avoiding Common Mistakes
Vigilance against errors while subtracting dates in Excel saves us from miscalculations that could lead to significant misinformation. A common mistake includes not verifying that both cells are indeed formatted as dates. Another typical oversight is ignoring the requirement for the end date to be greater than the start date in our subtraction to avoid negative results unless that’s the intended outcome.
By double-checking these aspects before executing subtraction, we bolster our results against the most habitual and easily averted mistakes in Excel date calculations.
Troubleshooting the #VALUE! Error and Other Issues
The dreaded #VALUE! error appears when Excel expects a date but finds something else, like text or a wrongly formatted number.
If we run into this error, our first step should be to confirm that the cells involved in the subtraction are indeed formatted as dates. We should also ensure our cell references are correct, and that no part of our formula is referring to a text cell by mistake.
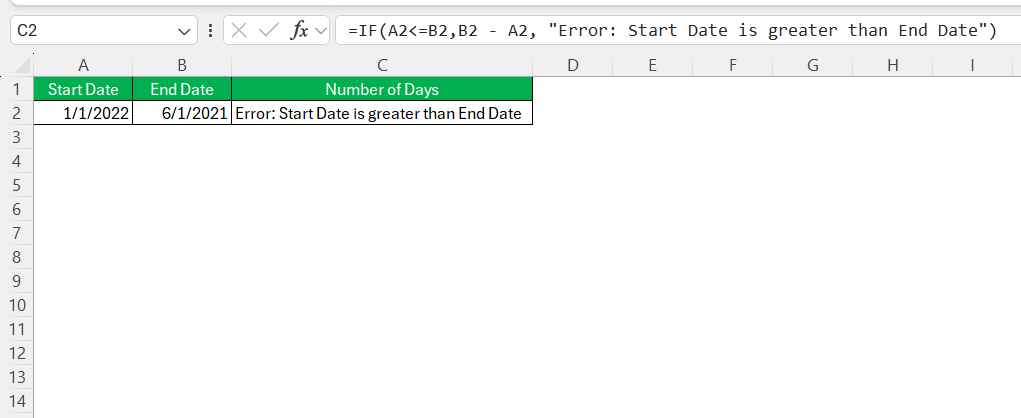
Another common issue is the #NUM! error, indicating that the start date is later than the end date. To prevent this, we can use an IF statement to check the date order before subtraction, like =IF(Start_Date <= End_Date, End_Date - Start_Date, "Error: Start Date is greater than End Date").
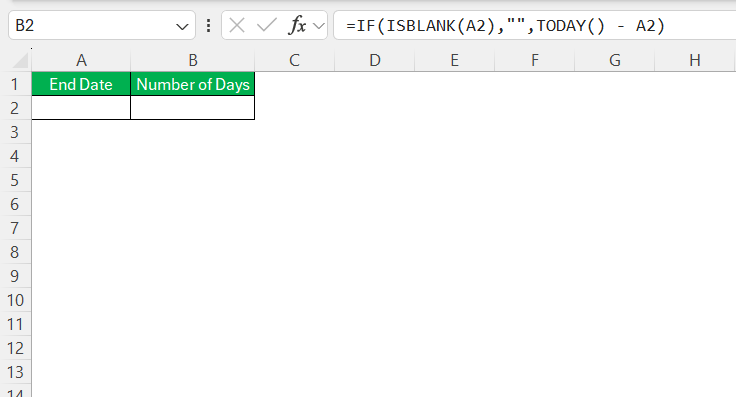
For cells that might be empty or contain invalid dates, the IF combined with ISBLANK functions can help manage such inconsistencies: =IF(ISBLANK(Date_Cell), "", TODAY() - Date_Cell).
Attending to these considerations, we can troubleshoot effectively and ensure our date subtractions remain fault-free.
Practical Examples of Date Subtraction in Excel
Case Study: Project Deadlines and Time Management
In a recent project, I was tasked with implementing an extensive VBA-based inventory management system within an Excel spreadsheet. This necessitated meticulous deadline management to align with project phases. Using Excel’s date functions, I could forecast project deadlines by employing the WORKDAY function to add the expected number of days to the start date while respecting weekends and holidays.
Further, when adjustments to the schedule were needed, additions to dates were calculated directly or through the EDATE function for monthly increments. For visual clarity, I paired these functions with conditional formatting to highlight approaching or missed deadlines.
This Excel-powered approach not only kept the project on track but also visibly displayed time management, ensuring that all deadlines were realistic and manageable.
Real-World Scenario: Tracking Age and Service Time
Consider the human resources department of a large corporation, where keeping track of employee service time is crucial for benefits and promotions. Using the DATEDIF function, the department can contemplate the time interval between an employee’s start date and the current date, providing precise calculations of tenure.
Moreover, to celebrate milestones, they can subtract the employee’s start date from the current date to pinpoint work anniversaries. Such precise date tracking fosters recognition of valuable service contributes to employee satisfaction, and streamlines administrative processes.
Leveraging these capabilities underscores the practical benefits of Excel in a dynamic organizational setting, where age and service time play a pivotal role in the employee lifecycle.
Frequently Asked Questions
How do I subtract two dates in Excel?
For date subtraction in Excel, input your start and end dates into separate cells. For example, if the start date is in cell A2, and the end date is in cell B2, you would enter =B2-A2 into another cell. This will give you the difference in days between the two dates.
How can I subtract two dates to get the number of days in between?
Subtracting the earlier date from the later date in Excel gives you the number of days between them. Enter your dates into two cells, say A1 and B1, and use the formula =B1-A1 in another cell. The result is the day count separating the two dates.
What is the DATEDIF function and how do I use it?
The DATEDIF function calculates the difference between two dates in various time units. Use it by specifying the start date, end date, and the unit of time for the result. For example: =DATEDIF(A1, B1, "D") will give the difference in days, while “M” stands for months, and “Y” for years.
Why do I get an error when subtracting dates, and how can I fix it?
If you’re getting an error when subtracting dates, it may be due to non-date formatted cells or an improper calculation order. Correct this by ensuring that both cells are formatted as dates. You should also verify that the end date is after the start date to prevent a negative result unless it’s intentional.
How do I subtract a specific date in Excel?
To subtract a specific date in Excel, subtract the number of days from the given date using a simple subtraction formula. For instance, to subtract 15 days from a date in cell A1, use =A1-15. This will give you a result that is 15 days earlier than the date in cell A1.
John Michaloudis is a former accountant and finance analyst at General Electric, a Microsoft MVP since 2020, an Amazon #1 bestselling author of 4 Microsoft Excel books and teacher of Microsoft Excel & Office over at his flagship MyExcelOnline Academy Online Course.

