Calculating the number of days between two dates in Microsoft Excel is a simple yet powerful tool for anyone who manages schedules, tracks events, or works with timelines. Excel offers a variety of methods to achieve this, with straightforward formulas that enable both quick calculations and complex date-related functions. Let’s delve into how you can use Excel’s built-in capabilities to easily calculate dates between in Excel.
Key Takeaways
- Use the DAYS function in Excel to calculate the number of days between two specific dates by inputting them as the function’s arguments.
- Use DATEDIF function in Excel to calculate the difference between two dates in a variety of units, including days, months, or years
- For calculating days from today’s date, use the TODAY() function in one argument of the DAYS function for dynamic updating.
- Count only working days by using the NETWORKDAYS function, excluding weekends and any listed holidays.
Download the workbook and follow along with the tutorial on How to Count Dates Between in Excel – Download excel workbookSimple-Dates-Between-Formula-in-Excel.xlsx
Table of Contents
Introduction to Dates Between Formulas in Excel
The Importance of Mastering Date Calculations
Effective and precise date calculations in Excel underpin a broad array of professional and personal applications, cementing its critical role in organizational and project management, event planning, and financial tracking. Excel’s potent date calculation capabilities empower users to effortlessly determine pay periods, project deadlines, class schedules, and weight loss timelines, as well as facilitate accurate financial planning and task scheduling to ensure timely project completion.
Understanding Excel’s Date Functionality
How Excel Stores Dates
Microsoft Excel manages dates through a system where each date is stored as an integer representing the number of days since the established base date, which is January 1, 1900. For example, Excel assigns an integer value of 1 to that base date, and any subsequent date is calculated as an integer increment, with January 2, 1900, being 2, and so on.
This sequential integer representation facilitates the calculation and comparison of dates, as one can simply perform arithmetic on these numbers to find the difference between them or to check if a date falls within a specific range. It’s essential to enter dates accurately in Excel’s acknowledged formats or use the DATE function to avoid issues, such as treating dates as text, which impedes proper calculations. Excel’s flexibility also allows users to create custom date formats for a varied display of date information.
Key Concepts for Working with Dates
Understanding the fundamentals of date handling in Excel is crucial for accurate calculations. Here are some key concepts:
- Date Serial Numbers: Excel stores dates as sequential serial numbers so it can perform calculations on them. January 1, 1900, is considered day 1, and each day thereafter is incremented by 1.
- Formatting: The appearance of a date in Excel can differ from how it’s stored. Formatting options help you display dates in numerous ways without altering the underlying value.
- Time as a Fraction: In Excel, time is represented as a fraction of a day. Thus, 12:00 PM is 0.5, 6:00 AM is 0.25, etc. This allows for combined date and time calculations.
- DATEDIF and DAYS Functions: Excel offers several functions for calculating dates. DATEDIF calculates the difference between dates according to specified “units”, such as days, months, or years. The DAYS function returns the number of days between two dates.
Understanding these concepts is the foundation for proficient usage of Excel’s date functions and effective calculation of the number of days between two points in time.
Step-by-Step Ways to Calculate Dates Between Two Points in Time
Using the DATEDIF Function
The DATEDIF function in Excel is a versatile tool for calculating the difference between two dates in a variety of units, including days, months, or years. The basic syntax of the DATEDIF function is:
Here is how to use the DATEDIF function step by step:
STEP 1: Input Start and End Dates: Enter the start date in one cell and the end date in another cell. Ensure they are formatted correctly as dates.
STEP 2: Select Output Cell: Click on the cell where you want the difference to be displayed.
STEP 3: Enter the DATEDIF Formula: Type =DATEDIF(A2, B2, then click on the cell with the start date, type a comma, then click on the cell with the end date. For instance, if A2 has the start date and B2 has the end date.
STEP 4: Specify the Unit: After the end date, type a comma and then the unit of time in quotation marks. You can use “d” for days, “m” for months, and “y” for years. For instance, in this case use “d” for days, where it will calculate difference between start date in A2 and end date in B2.
STEP 5: Close the Function and Press Enter: Close the function with a parenthesis and press Enter. The calculated difference between the two dates will appear in the designated output cell.
Bear in mind that if the start date is later than the end date, the DATEDIF function will return a #NUM! error. Also, DATEDIF is not documented in Excel help resources and could potentially be deprecated in future versions; alternative functions may be considered for long-term compatibility.
Applying the DAYS Function
The DAYS function is a straightforward and efficient method to calculate the number of days between two dates. It’s particularly user-friendly and just requires two arguments: an end date and a start date. Here’s how to apply the DAYS function in Excel:
STEP 1: Input both Dates: Begin by ensuring that your start and end dates are correctly input into their respective cells and properly formatted. In practice, if the end date is in cell B2 and the start date is in cell A2.
STEP 2: Select an Empty Cell: Click on the cell where you want the result of the DAYS function to appear.
STEP 3: Type the DAYS Function: Enter =DAYS( into the cell. Excel will be ready for you to input the function arguments.
=DAYS(
STEP 4: Add the End Date: Click on the cell containing the end date, or type its address after the open parenthesis.
=DAYS(B2
STEP 5: Comma and Start Date: Enter a comma, and then click on the cell containing the start date, or type its address.
=DAYS(B2,A2
STEP 6: Complete the Function: Add a closing parenthesis and hit Enter. The cell will now display the number of days between the two dates.
=DAYS(B2,A2)
After pressing Enter, if A2 contained “5/19/2022” and B2 contained “10/31/20221”, the output would be “165”, indicating there are 165 days between the two dates.
Remember, the DAYS function always returns a positive number regardless of the order of the start and end dates. If the start date is after the end date, the function will return a negative number.
Dates Between in Data Validation
Data validation in Excel is a powerful feature that can enforce date ranges and ensure that users input dates within a specific period. Here’s how to use data validation to restrict dates between two specific points in time:
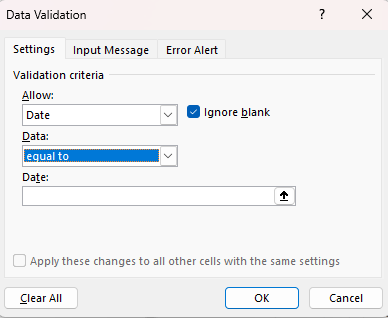
STEP 1: In the Data Validation dialog box, under the ‘Settings’ tab, choose ‘Date’ from the ‘Allow’ list.
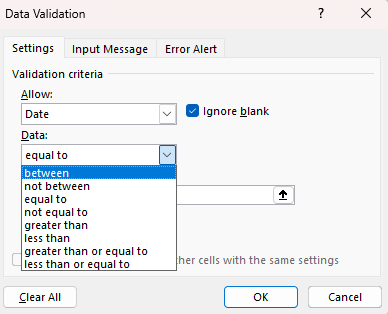
STEP 2: In the ‘Data’ list, select ‘between.’
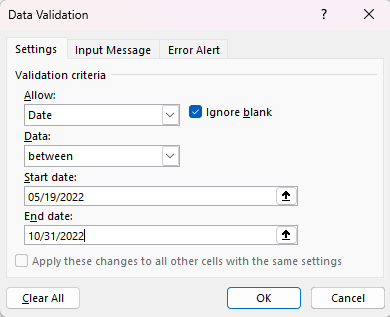
STEP 3: Enter the Start Date and End Date either by typing them directly into the ‘Start Date’ and ‘End Date’ fields or by referring to the cells where the dates are entered.
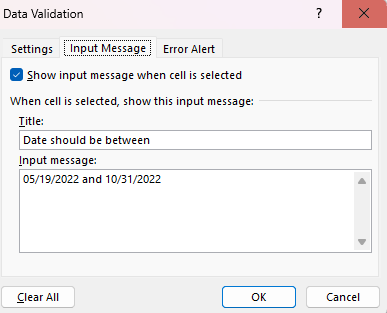
STEP 4: Switch to the ‘Input Message’ tab to provide instructions or information to users. This message will appear when they select a validated cell.
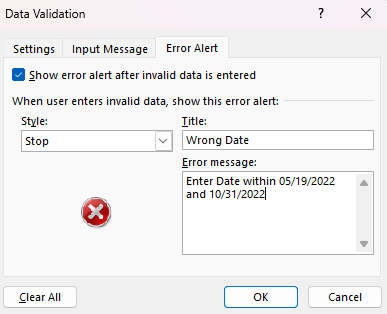
STEP 5: Shift to the ‘Error Alert’ tab to customize the warning or message that appears if someone tries to enter a date outside the specified range.
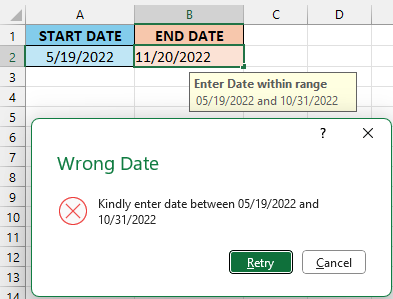
With the validation now in place, if a user attempts to enter a date outside the specified range, Excel will prompt them with the custom error message, guiding them to enter a valid date within the allowed range. This ensures data consistency and reliability for date-oriented analyses and record-keeping.
For example, to restrict data entry to dates between January 1, 2021, and December 31, 2021:
By setting up data validation correctly, users will find it easier to avoid input errors, leading to more accurate data collection and subsequent date calculations.
Advanced Tips and Tricks
Handling Errors and Exceptions in Date Calculations
Handling errors and exceptions in date calculations in Excel is imperative to maintain the accuracy and reliability of your data. Here’s how you can manage potential issues:
1. Correct Formatting Errors:
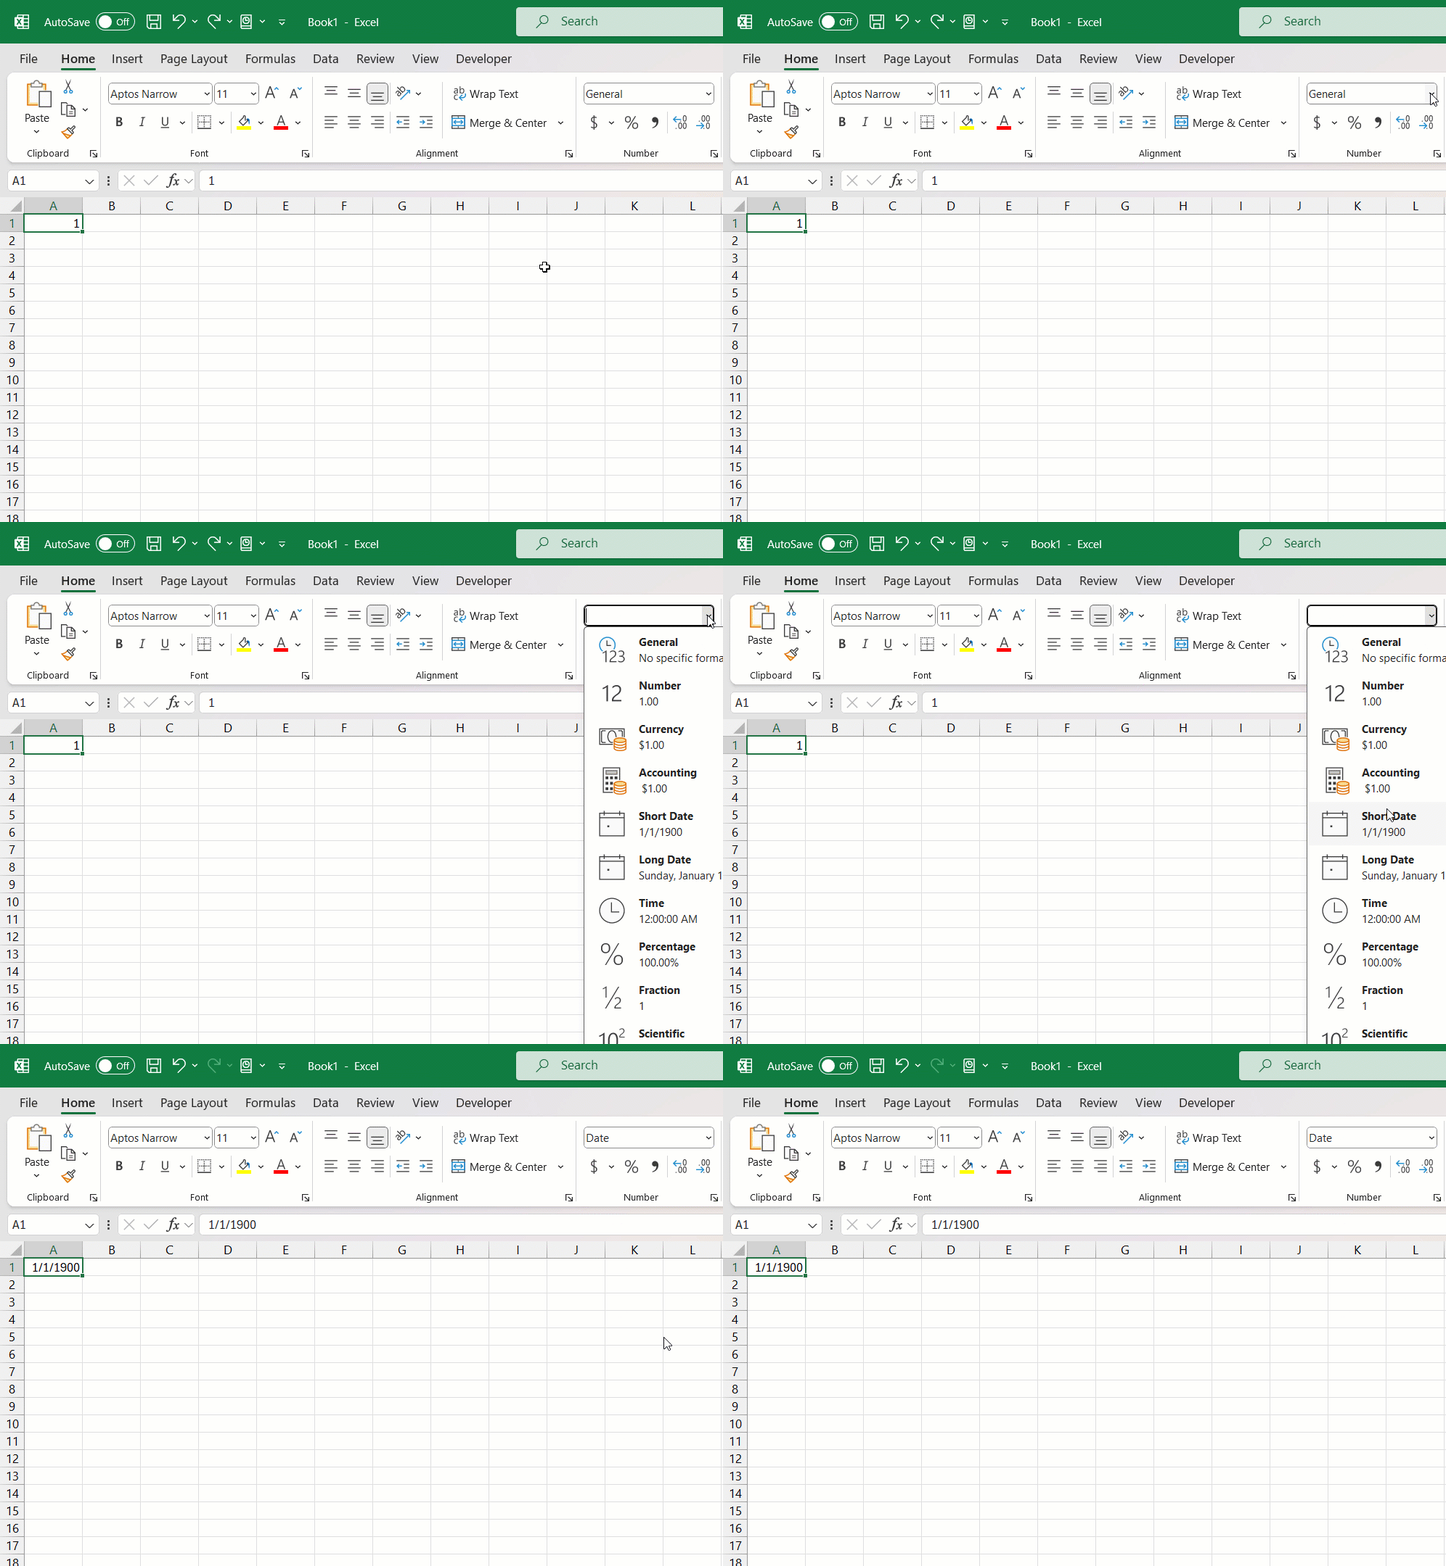
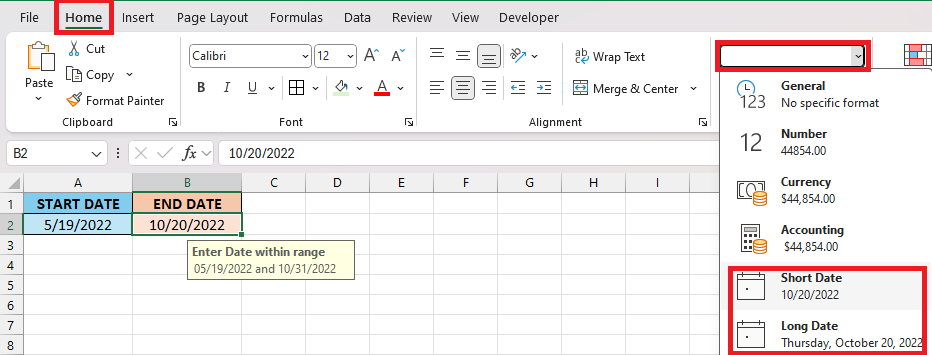
- Ensure your dates are recognized by Excel as date formats, not as text or strings. Re-format cells using the ‘Short Date’ or ‘Long Date’ format from the Number group on the Home tab.
2. Validate Input:
- Use Data Validation to restrict date entries to plausible ranges or specific formats to minimize input errors.
3. Manage Date Systems:
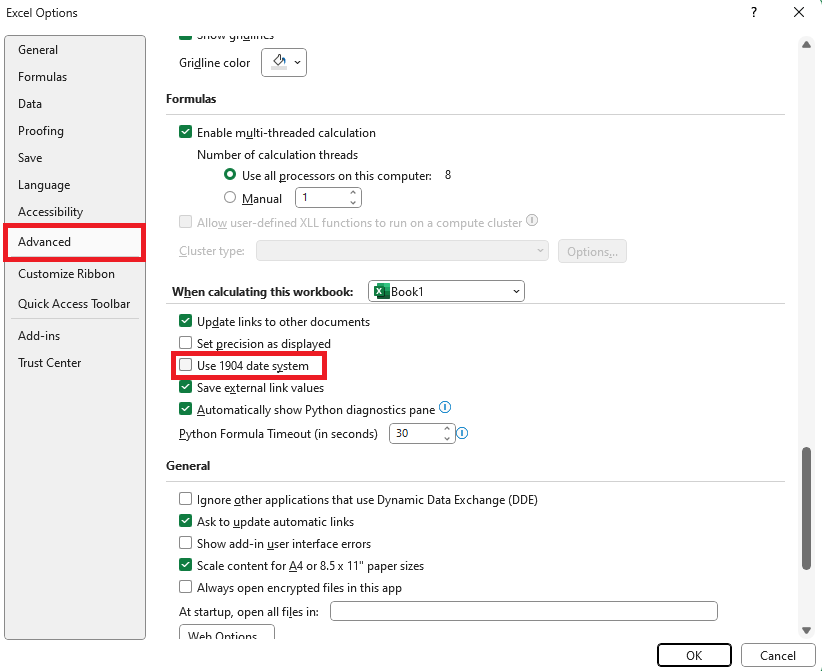
- Excel has two date systems — the 1900 and 1904 date system. Make sure your workbook is using the correct system (File > Options > Advanced).
4. Leap Year Considerations:
- In leap years, February has 29 days. Ensure functions that calculate differences account for this. The YEARFRAC function helps span multiple years properly.
5. Error Checking Tools:
- Use Excel’s built-in Error Checking tool (under the ‘Formulas’ tab) which can help locate and resolve common errors in formulas.
6. Troubleshooting Formulas:
- Double-check formulas for correct syntax and cell references. Ensure that the formula points to cells with date values and not text or error values.
7. Custom Formulas for Business Days:
- If you need to calculate only business days, avoid weekends or holidays. Use the NETWORKDAYS function, which allows you to exclude such dates from your calculations.
FAQs About Dates Between Formulas in Excel
What is the formula for between dates in Excel?
The formula to calculate the number of days between two dates in Excel is subtracting the earlier date from the later date, which is expressed as `=B2 – A2` if your start date is in cell A2 and your end date is in cell B2. Another method to find the difference is by using the `DAYS` function, which can be accessed through the Date & Time button within the FORMULAS tab in the Excel ribbon.
How do I generate dates between two dates in Excel?
To generate dates between two dates in Excel, you can use formulas or VBA scripting. With formulas, enter the starting date in cell A1, the ending date in cell A2, type `=A1+1` in cell C1, then enter `=IF($A$1+ROW(A1)>=$A$2-1,””,C1+1)` in cell C2 and drag the autofill handle down until the cells show blank. Alternatively, you can implement a VBA script which prompts you to input the start and end dates, and then outputs all dates in the specified range to a chosen cell.
What is the most efficient way to calculate the number of days between two dates?
To calculate days between two dates in Excel, use the DATEDIF function. It allows more control over the type of difference you want to calculate (days, months, or years). For days, the formula would be:
Remember, it is essential to ensure that the dates are formatted correctly in Excel and that the functions are typed accurately to avoid any errors in your calculations.
How to calculate networkdays function in excel?
To calculate the NETWORKDAYS function in Excel, enter the formula `=NETWORKDAYS(Start_Date, End_Date, [Holidays])` into a cell, where “Start_Date” and “End_Date” are the respective beginning and ending dates of the period you’re measuring, and “[Holidays]” is an optional argument where you can list known holiday dates to be excluded. After inputting the formula, press Enter to get the result, which will be the number of working days between the two dates, excluding weekends and any listed holidays.
John Michaloudis is a former accountant and finance analyst at General Electric, a Microsoft MVP since 2020, an Amazon #1 bestselling author of 4 Microsoft Excel books and teacher of Microsoft Excel & Office over at his flagship MyExcelOnline Academy Online Course.

