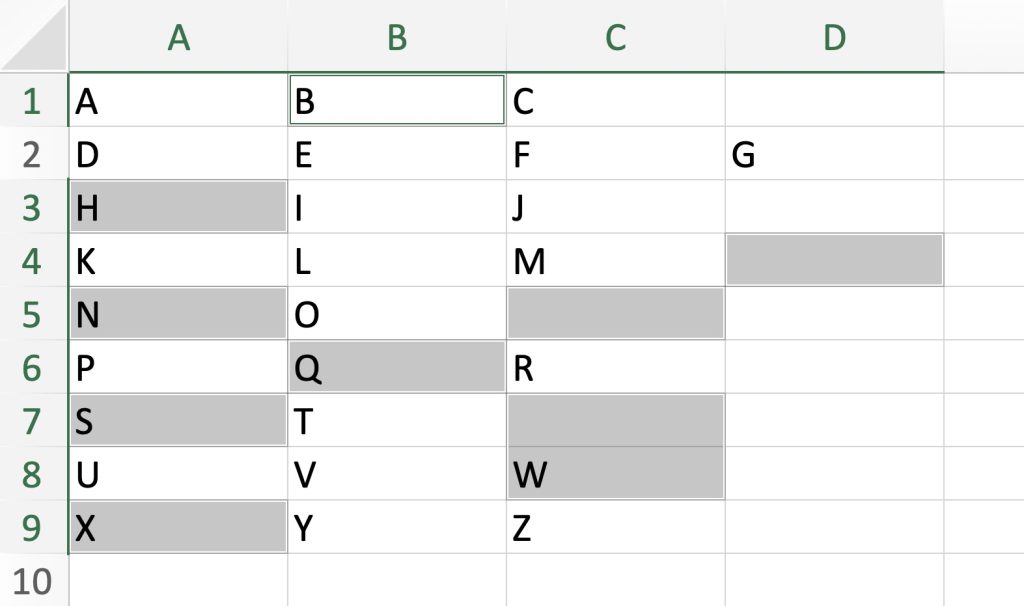
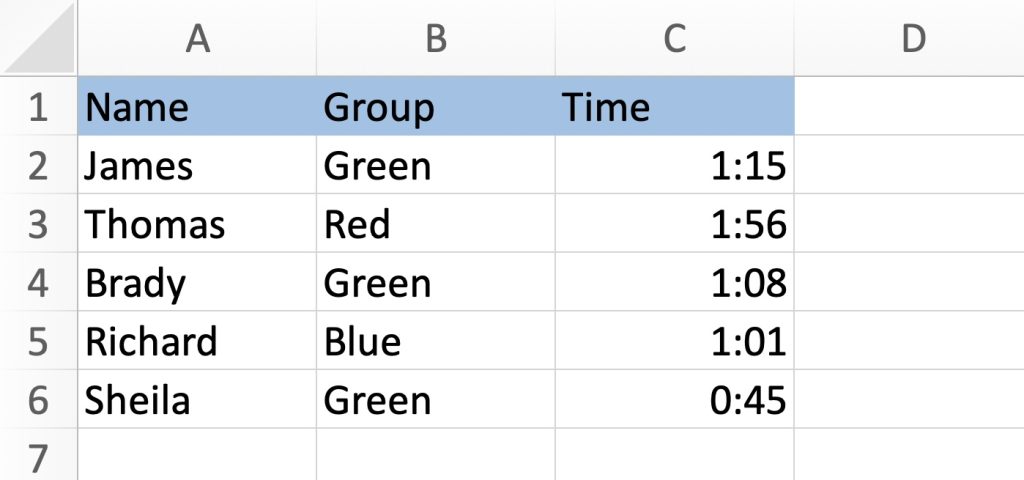
Blank cells in an Excel sheet can occur because of incomplete data input, importing data, or using them as placeholders. These vacant cells can make tasks like sorting, filtering, and calculations a little more difficult. Let’s discover methods to eliminate these empties and make your data smoother:
Let’s dive in!
Download the Excel Workbook below to follow along and understand How to Delete Blank Cells in Excel – download excel workbookDeleteBlankCells.xlsx
Method 1: Filtering Blanks
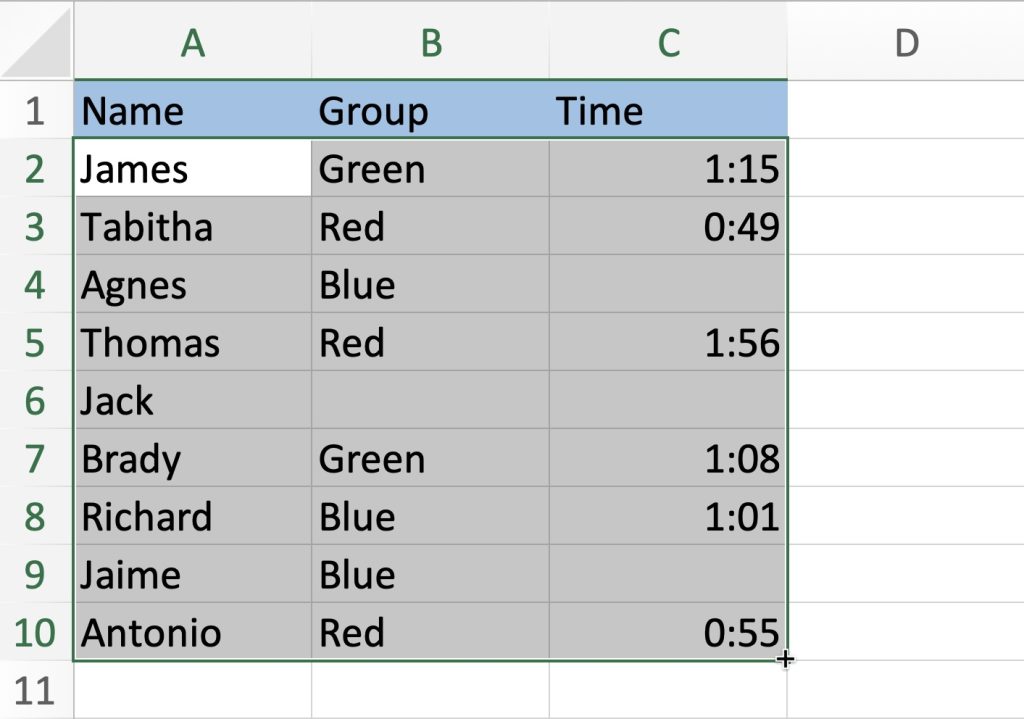
Select the column or range of cells containing the data with blank cells.
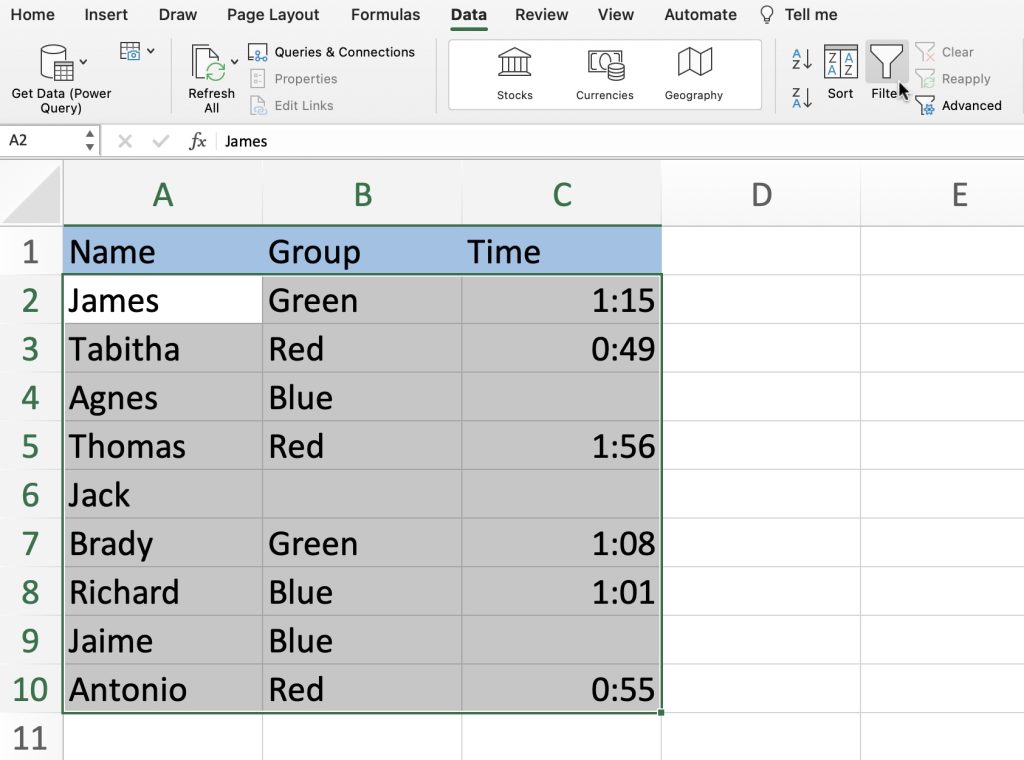
Go to the Data tab on the Excel ribbon.
Click on the Filter button. Drop-down arrows will appear in the header cells.
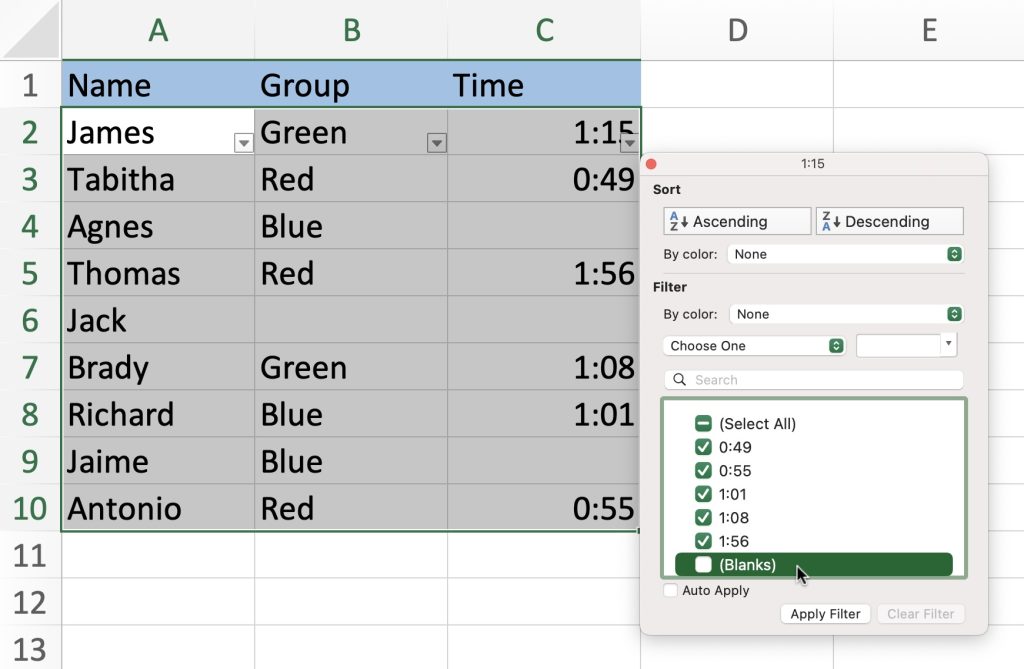
Use the filter drop-down for the column with blank cells.
Check the Select All option and Uncheck only the Blanks checkbox.
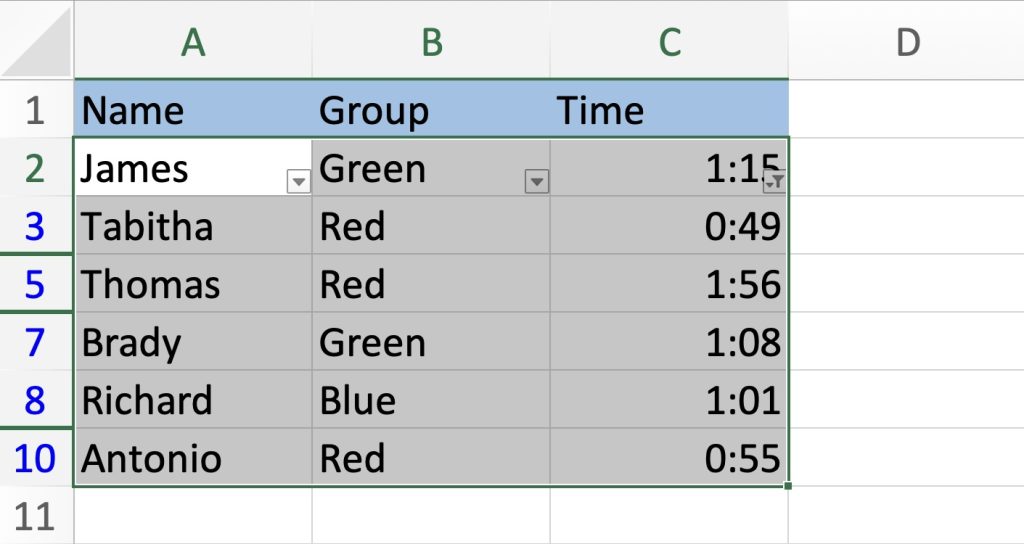
Click OK to apply the filter. This will hide all rows with blank cells.
You can then copy the visible data to another location if needed or apply further operations.
Method 2: Using the Go To Special Feature
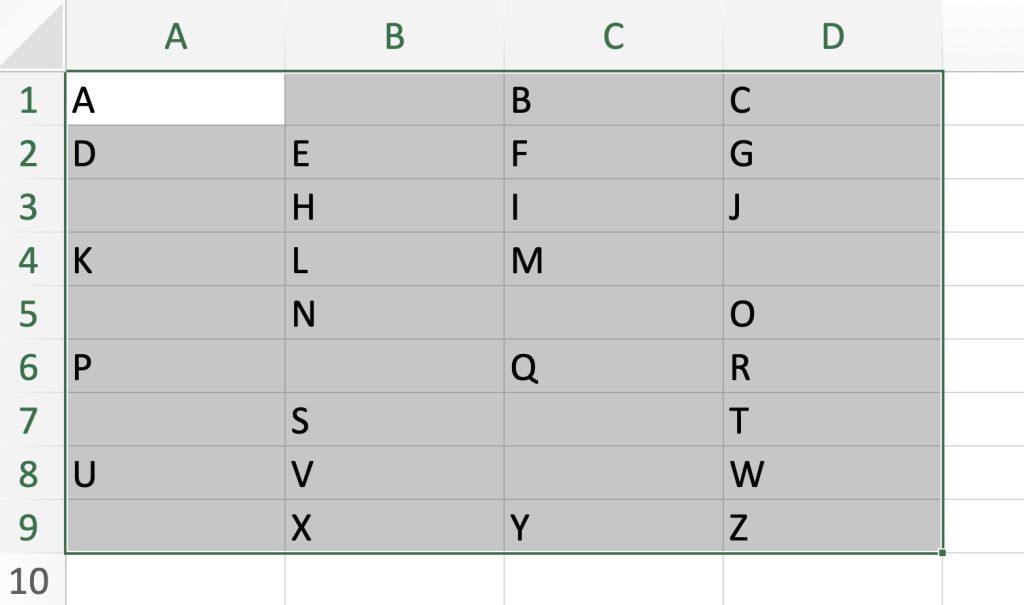
Select the range of cells containing the data with blank cells.
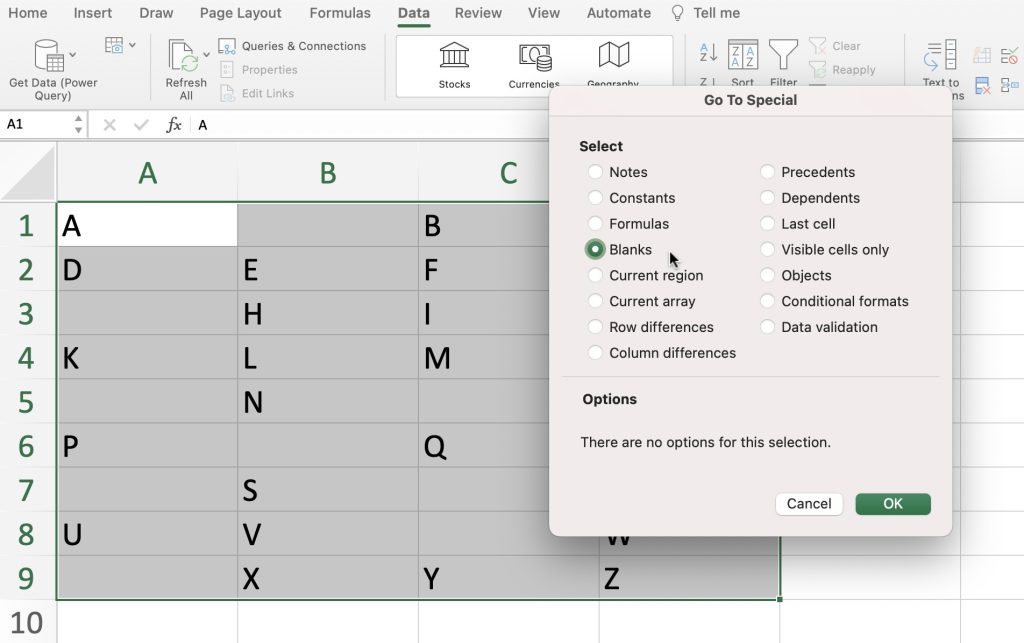
Press `Ctrl + G` or `F5` to open the Go To dialog.
Click on the Special… button.
In the Go To Special dialog, select Blanks and click OK.
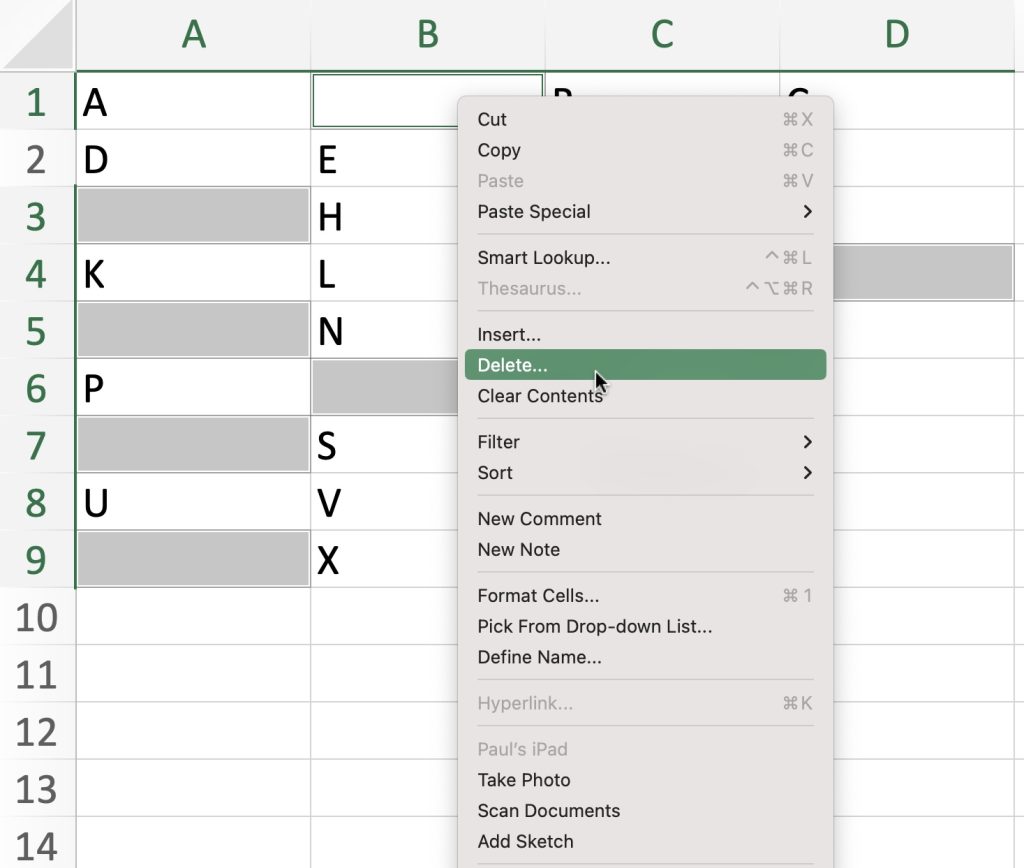
All the blank cells within the selected range will be highlighted.
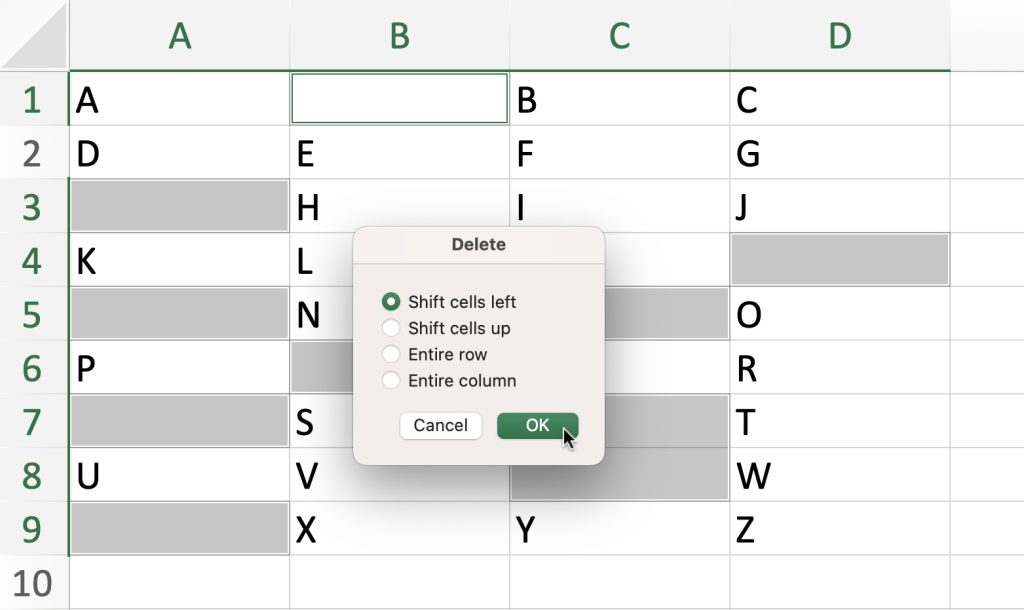
Right-click on any highlighted cell, choose Delete, and select Shift cells to the Left to remove the blank cells while preserving the data integrity.
Method 3: How to Remove Empty Cells Using the Find Command
Launch Microsoft Excel and open the spreadsheet containing the data with empty cells that you want to remove.
Press Ctrl + F on your keyboard, or you can go to the Home tab on the Excel ribbon and click on the Find & Select dropdown menu, then select Find…
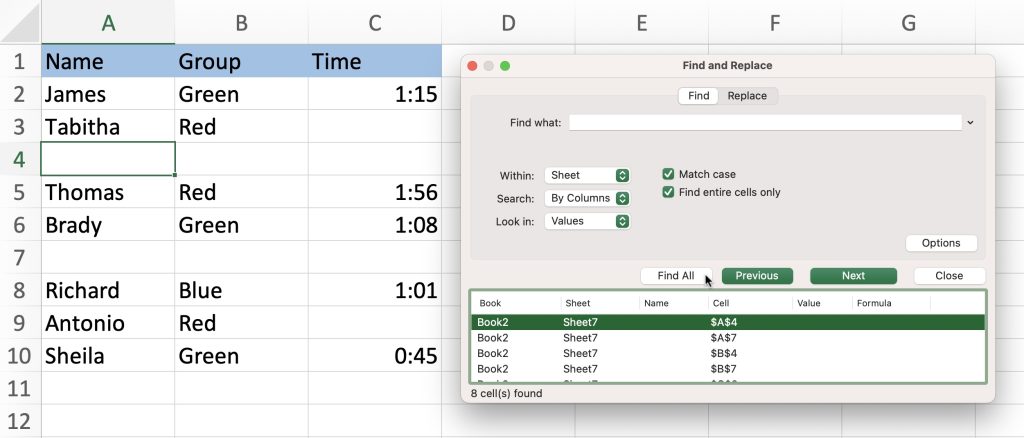
In the Find and Replace dialog box that appears, do not enter any specific search criteria. Simply click on the Find All button. This will open a new window called Find All.
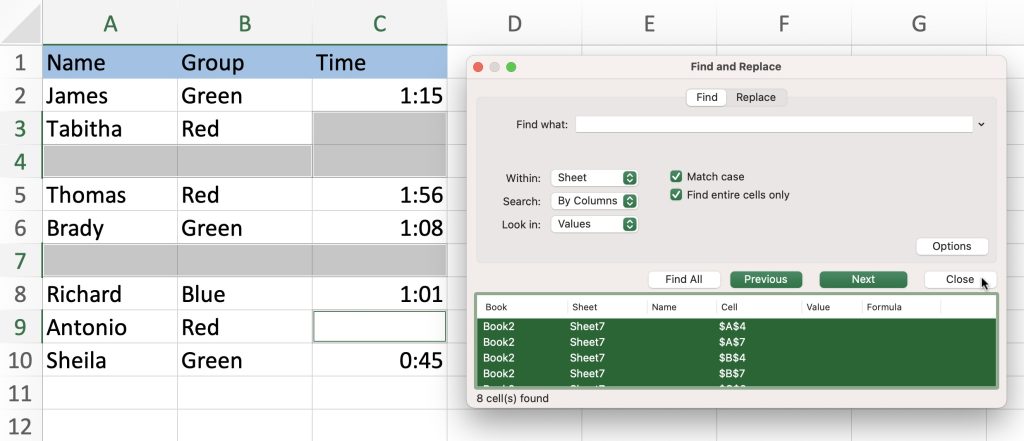
The Find All window will display a list of all the cells in your worksheet, including the empty ones. To select all the empty cells, Click CTRL+A on your keyboard. The empty cells will be highlighted.
Close the Find and Replace dialog box. You can do this by clicking the “X” button in the upper-right corner of the dialog or pressing Ctrl + F again and clicking Close on the Find and Replace window.
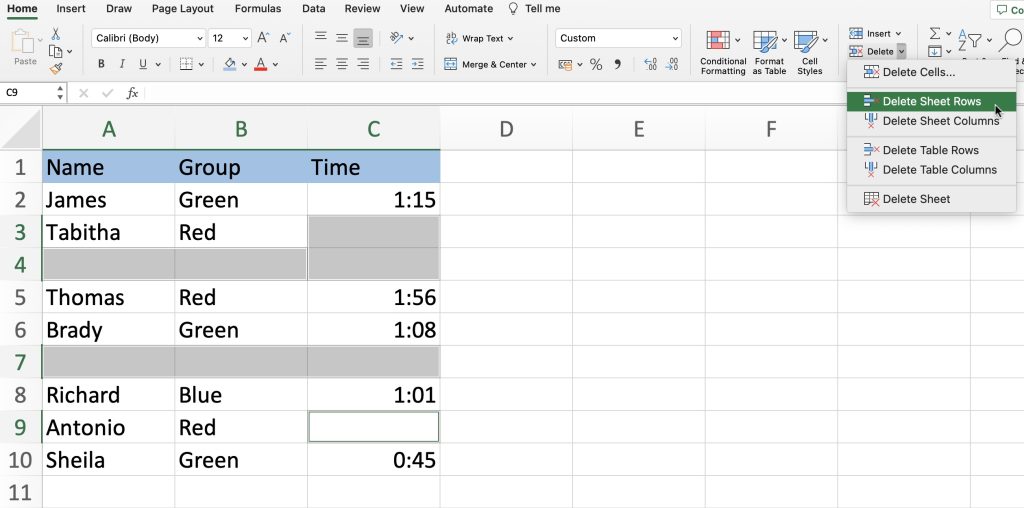
With the empty cells still selected, go to Home, Delete, then Delete Sheet Rows.
Excel will now remove the selected empty cells from your spreadsheet. Your spreadsheet is now cleaned of empty cells, and you can save your work if necessary.
Helpful Tip: In case something goes wrong, don’t worry. Simply press Ctrl + Z right away to undo any changes and retrieve your data.
Method 4: How to Delete Empty Cells After the Last Cell with Data
Empty cells with formatting or non-printable characters can lead to Excel problems such as bloated file sizes or unintended blank pages when printing. To prevent these complications, we will remove or clear empty rows and columns containing formatting, spaces, or hidden, invisible characters. To achieve this, follow these steps:
Select the header of the first empty column to the right of your data, then press Ctrl + Shift + End to choose cells between your data and the last used cell.
Next, go to the Home tab, find the Editing group, and select Clear > Clear All. Alternatively, right-click the selection, go to Delete…, and choose Entire column.
Select the header of the initial empty row below your data and use Ctrl + Shift + End. Then, go to the Home tab, click Clear > Clear All, or right-click the chosen area and opt for Delete… > Entire row.
Save the workbook with Ctrl + S.
To verify that only data-filled cells remain in the used range, check with Ctrl + End.
If it selects a blank cell, save and close the workbook. Upon reopening, the last used cell should correctly indicate the final data cell.
When to Avoid Deleting Empty Cells
While removing blank cells can be helpful for data analysis, there are situations when you should exercise caution and avoid deleting empty cells:
Data Structure Preservation
If the presence of blank cells signifies a specific data structure or format, deleting them may distort the original information.
Data Entry Continuation
Blank cells might indicate that more data will be entered in the future. Deleting them prematurely could lead to data loss.
Formulas and References
Removing blank cells could break existing formulas and cell references, causing errors in your spreadsheet.
Data Integrity
In some cases, such as when working with databases, it’s crucial to maintain data integrity by not deleting blank cells.
Before removing blank cells, always consider the context and purpose of your spreadsheet to ensure that the data remains accurate and functional.
Conclusion:
Learning how to get rid of empty cells in Excel is crucial for keeping your data accurate and making data analysis easier. But don’t forget to think about why you have empty cells in your data and what you need it for before you delete them. This way, you can prevent unexpected issues and make sure your data stays reliable.
Click here to learn how to Delete All Other Worksheets Using Macros In Excel!
Click here to learn how to Delete Steps Until End In Power Query!
Click here to access Microsoft’s tutorial on how to Insert or delete rows and columns!
John Michaloudis is a former accountant and finance analyst at General Electric, a Microsoft MVP since 2020, an Amazon #1 bestselling author of 4 Microsoft Excel books and teacher of Microsoft Excel & Office over at his flagship MyExcelOnline Academy Online Course.

