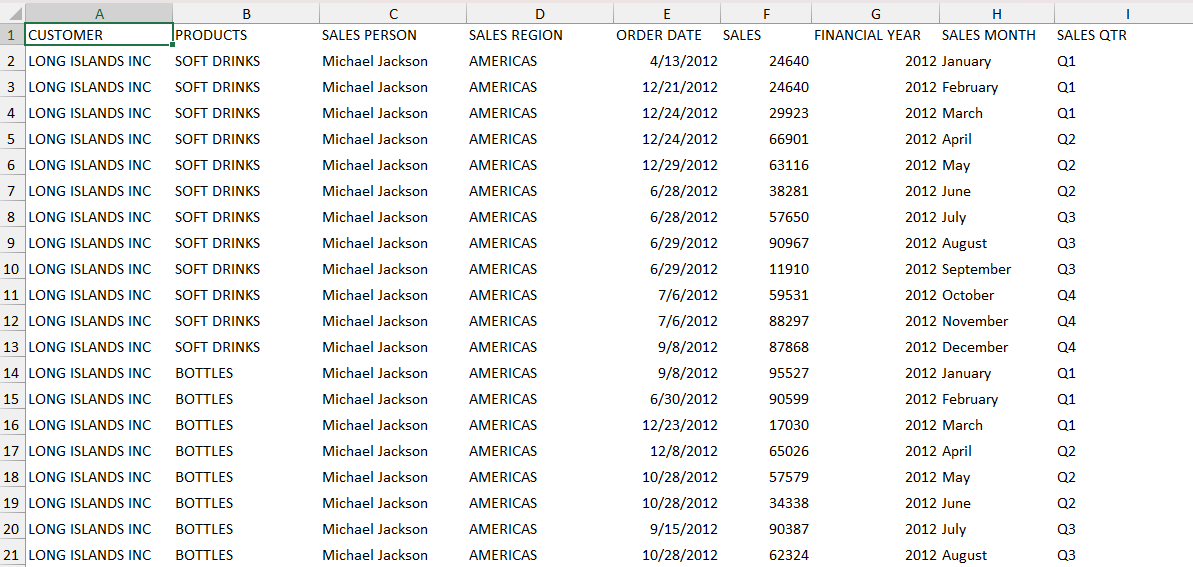
While the manual method of selecting rows and deleting them is an option, it can be both time-consuming and prone to errors, especially with large datasets. In this article, we will cover the following 3 approaches that can be used to delete every other row in Excel –
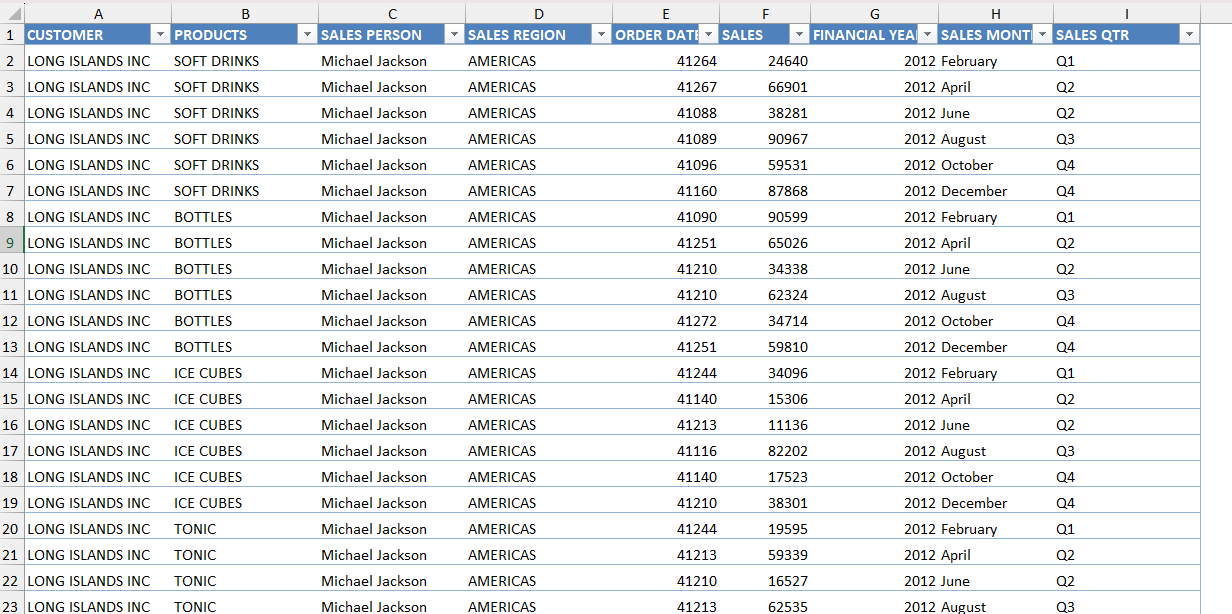
Download the Excel Workbook below to follow along and understand How to Delete Every Other Row in Excel –
Method 1 – Using Table Format
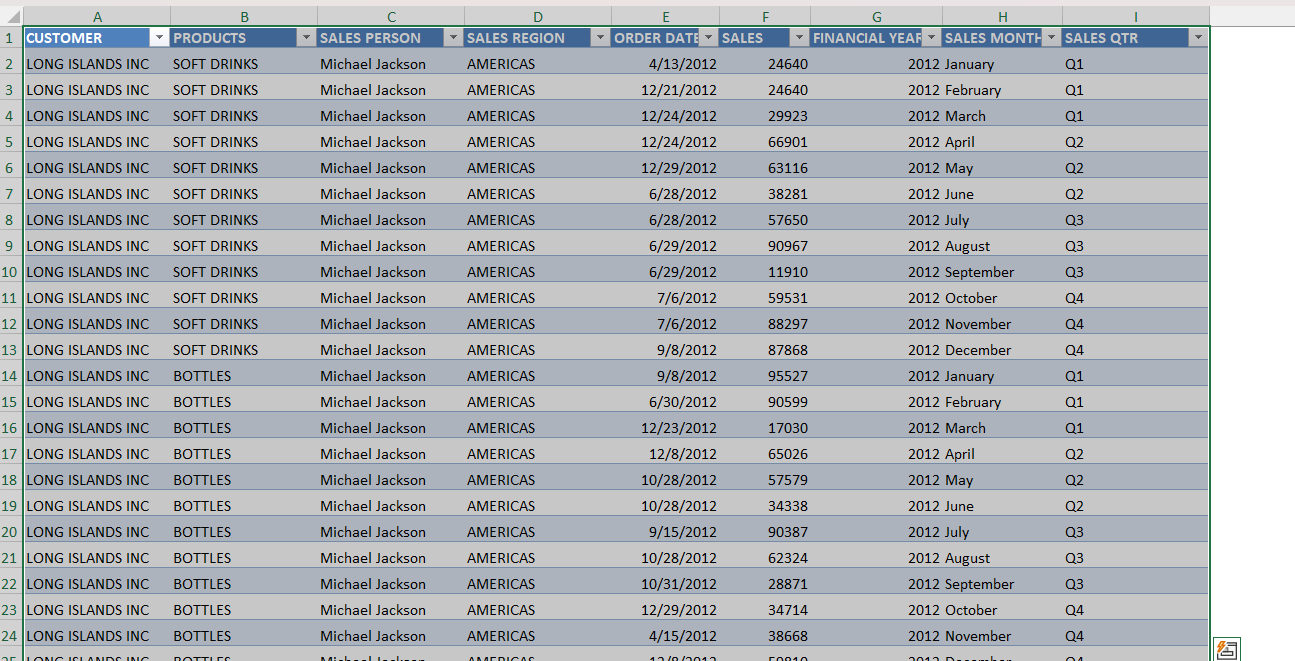
In this method, you need to format data to resemble a table with banded rows. This will automatically apply alternating colors to each row, making it visually distinct. After that, you can effortlessly apply a filter to identify and select the specific rows you want to delete.
Follow the steps below to know how –
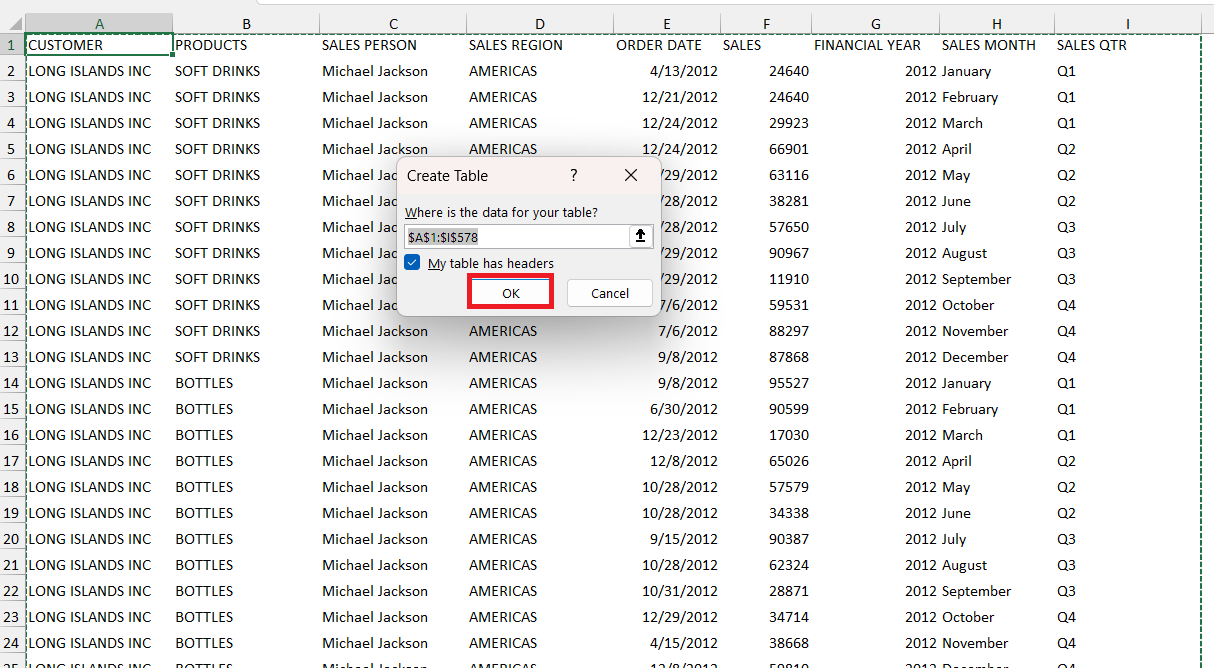
STEP 1: Press Ctrl + T to create a table.
STEP 2: In the Create Table dialog box, double-check the range selected and check the My table has headers option.
The data will be converted into a table with banded rows.
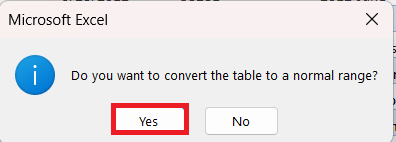
STEP 3: Go to the Table Design tab > Convert to Range.
STEP 4: In the dialog box, select Yes.
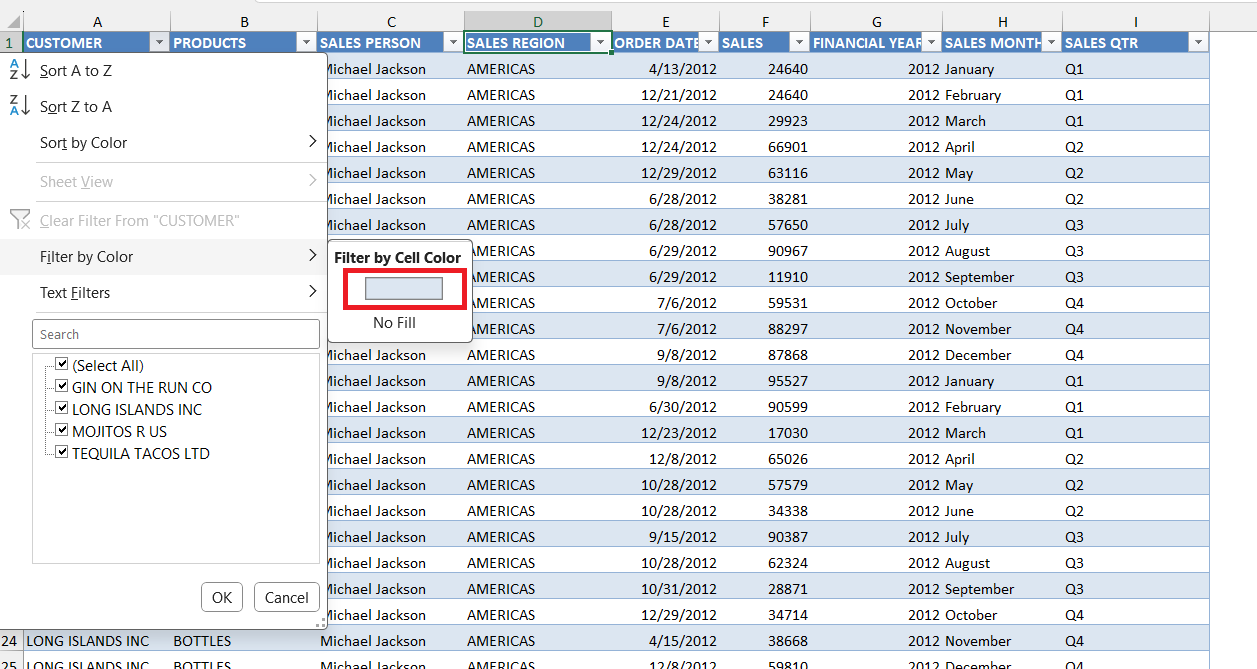
STEP 5: Click on the Filter button, go to Filter by color, and select Light Blue.
All the rows with no fill will be filtered.
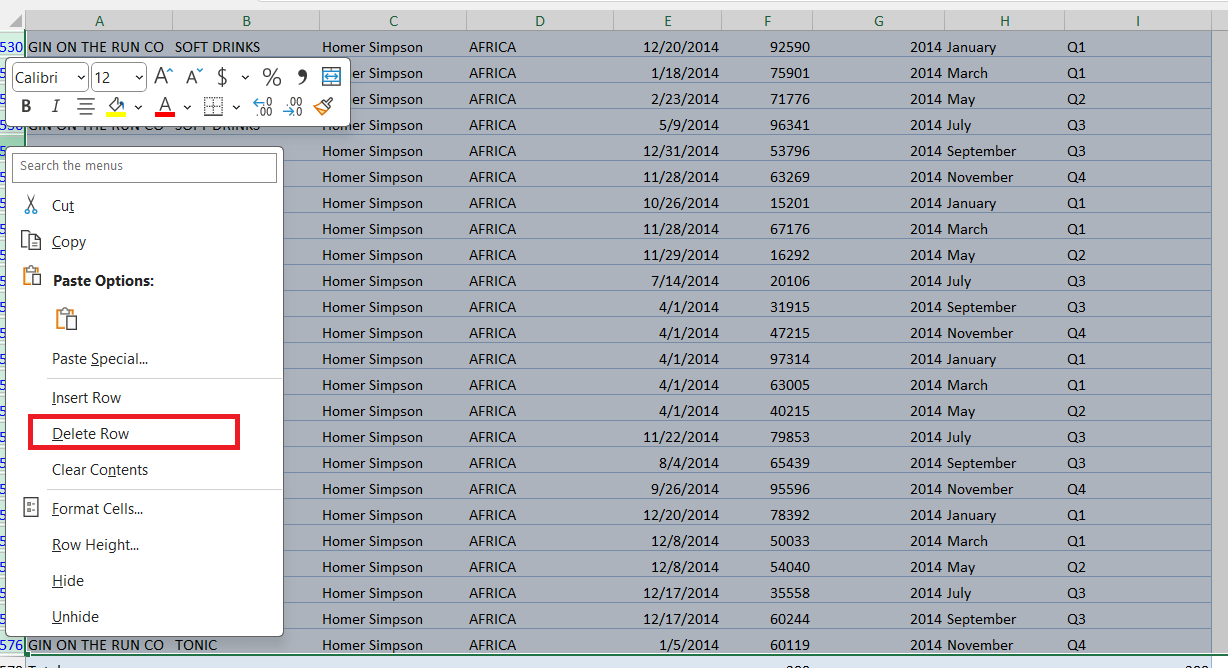
STEP 5: Right-click and select Delete Row.
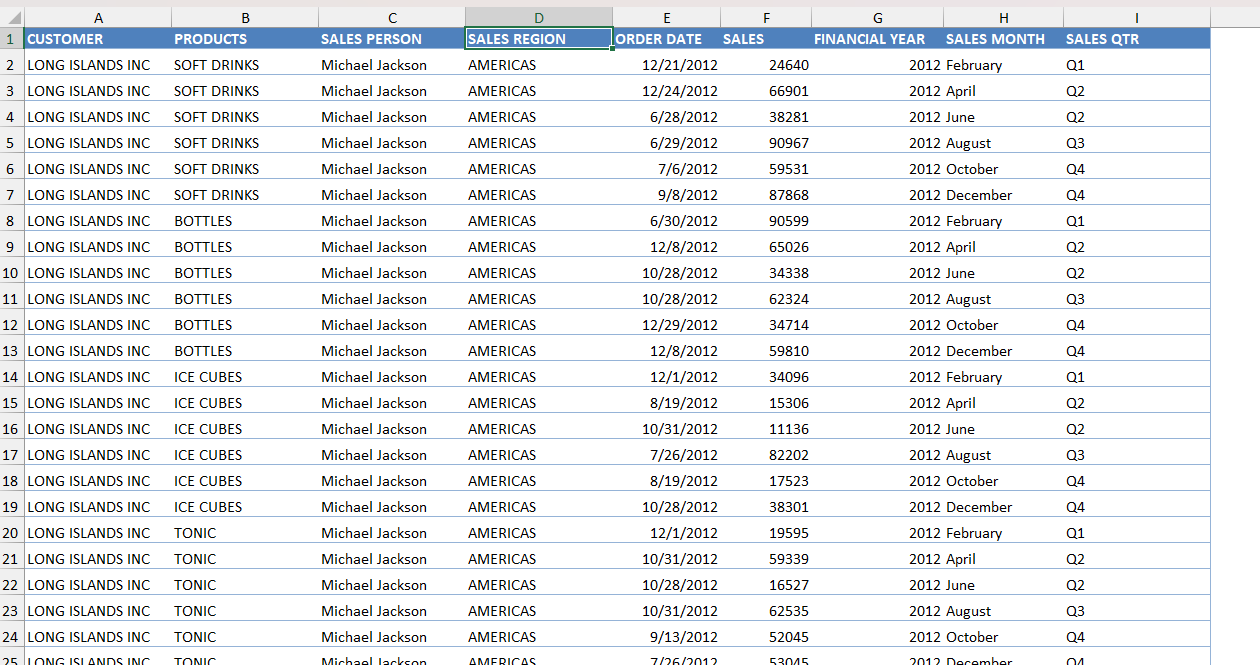
The rows with light blue fill will be deleted. Only the rows with no fill will remain in the data table.
Method 2 – Using MOD Format
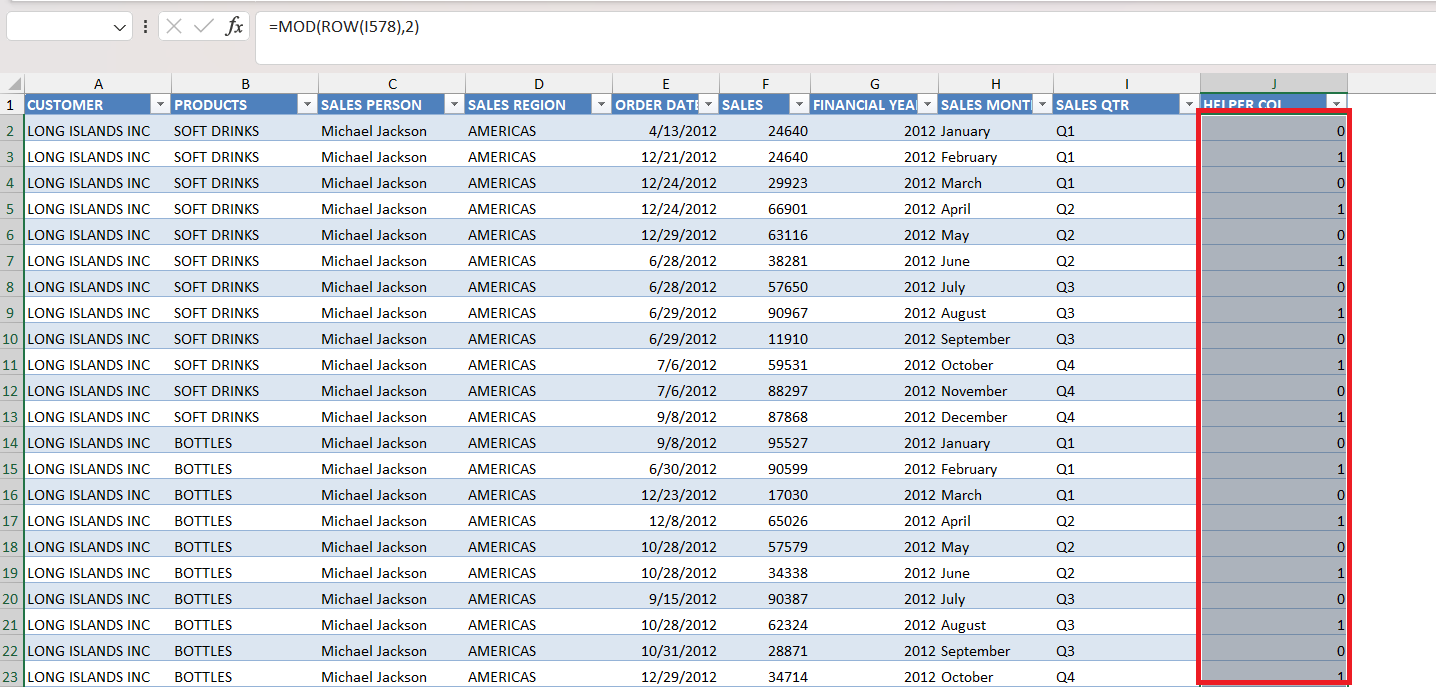
In this method, you need to use the MOD function to determine if a row number is even or odd. If a row is even-numbered, Excel will display a result of 1 and it will display 0 when the row is odd-numbered.
You will also have to use the ROW function to get the current row for each cell. Now let’s look at the step-by-step tutorial to know more.
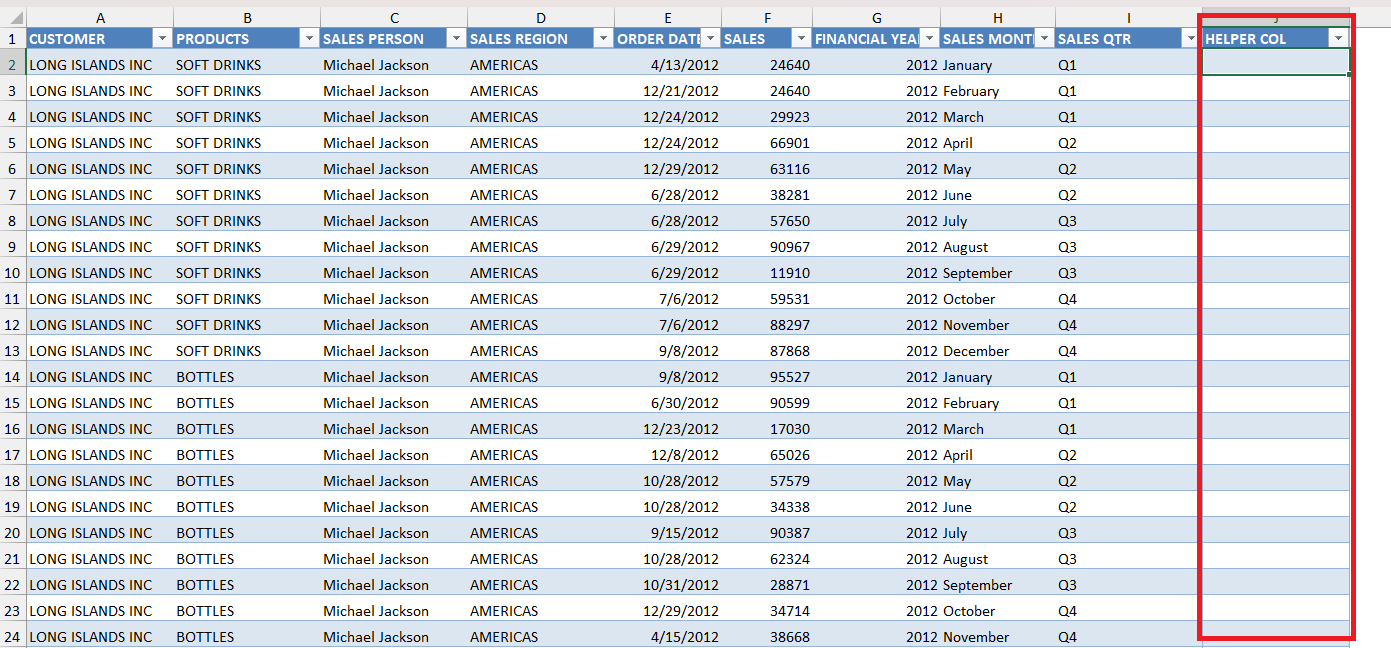
STEP 1: Insert a helper column next to your data.
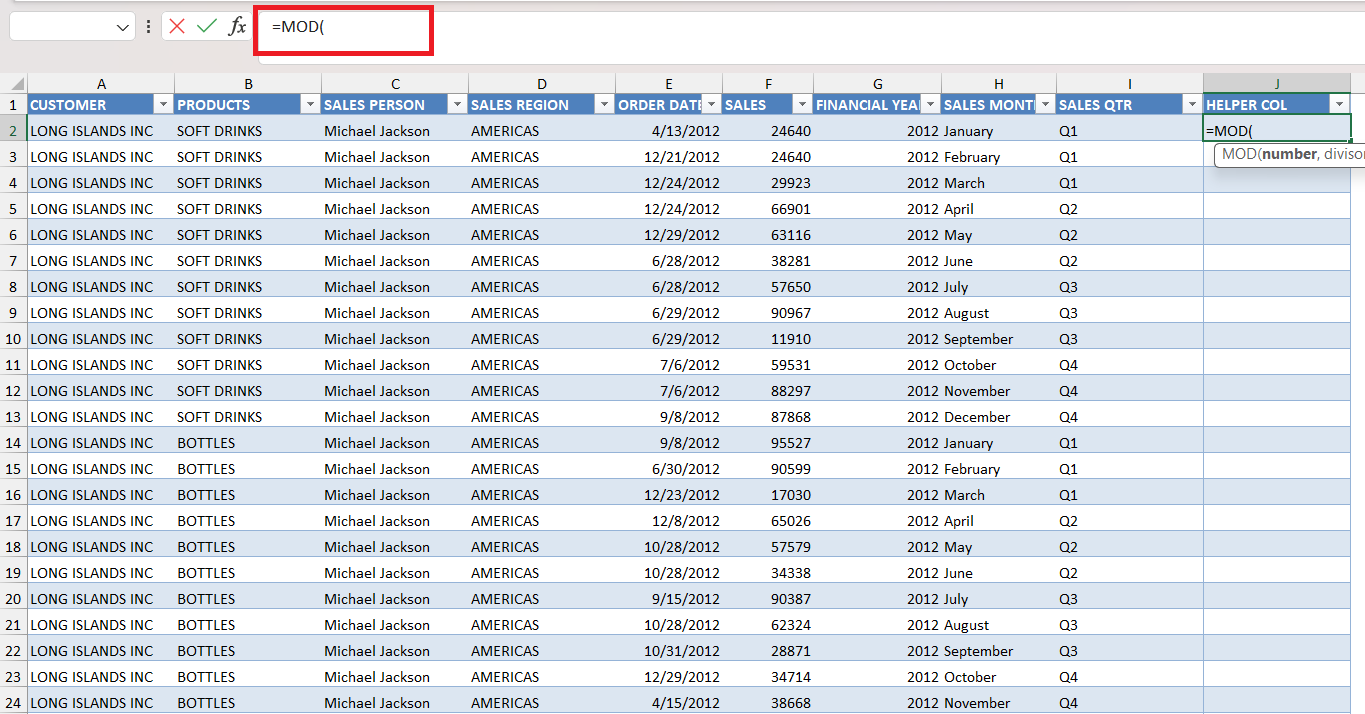
STEP 2: Enter the MOD function.
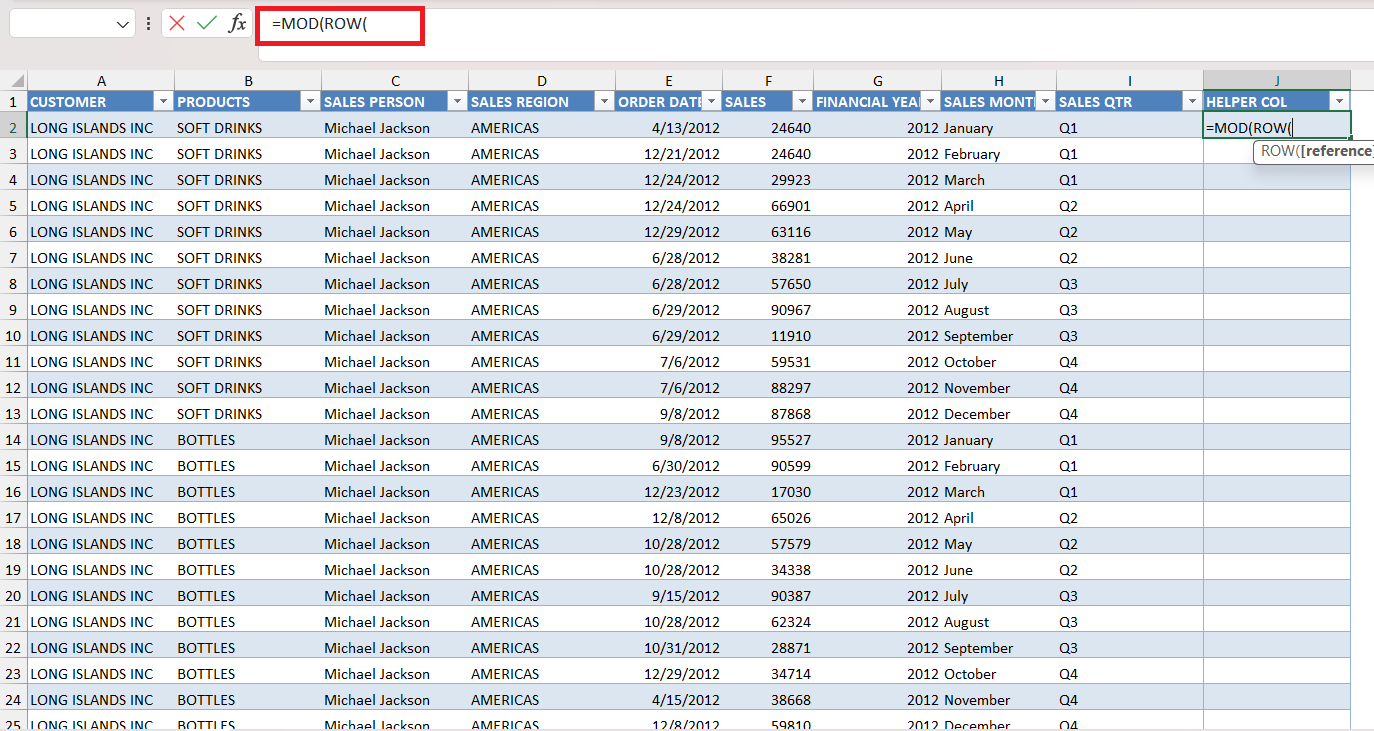
STEP 3: Enter the ROW function.
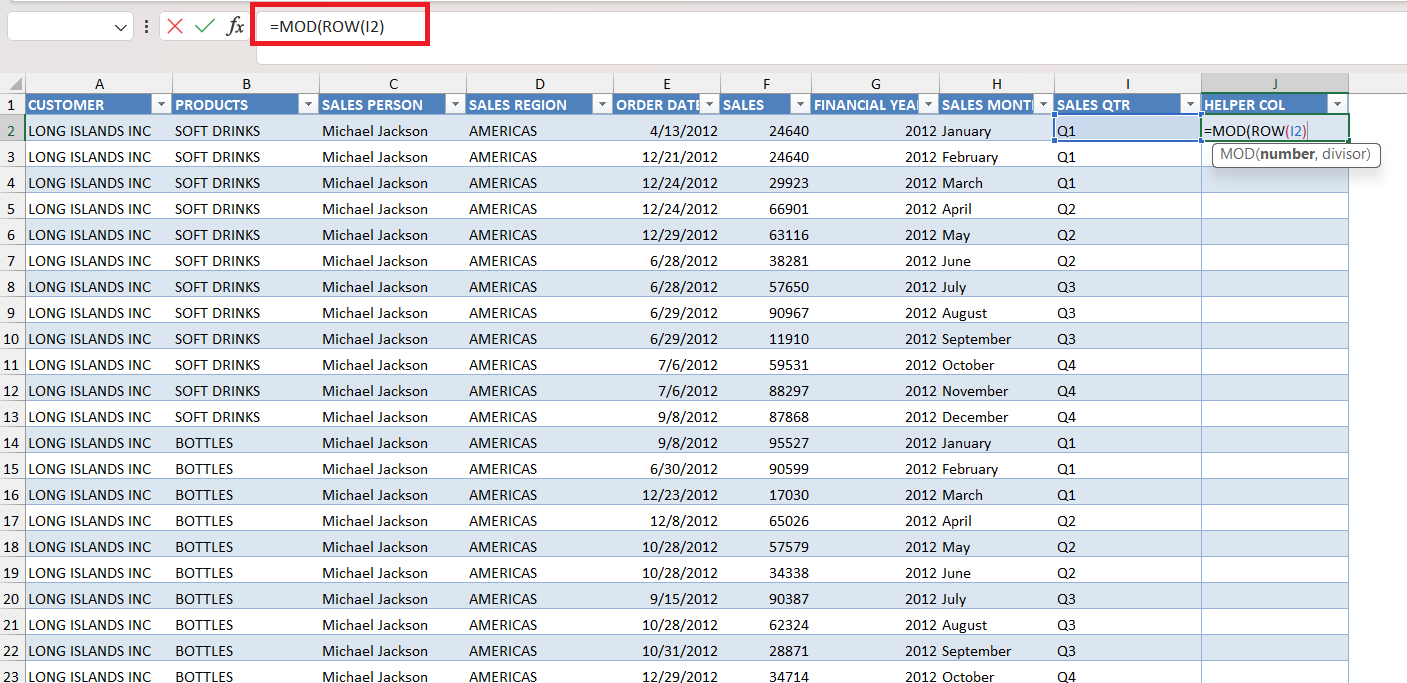
STEP 4: Enter the argument for the row function i.e. reference. Here, you can select any cell in the same row where you are typing the formula.
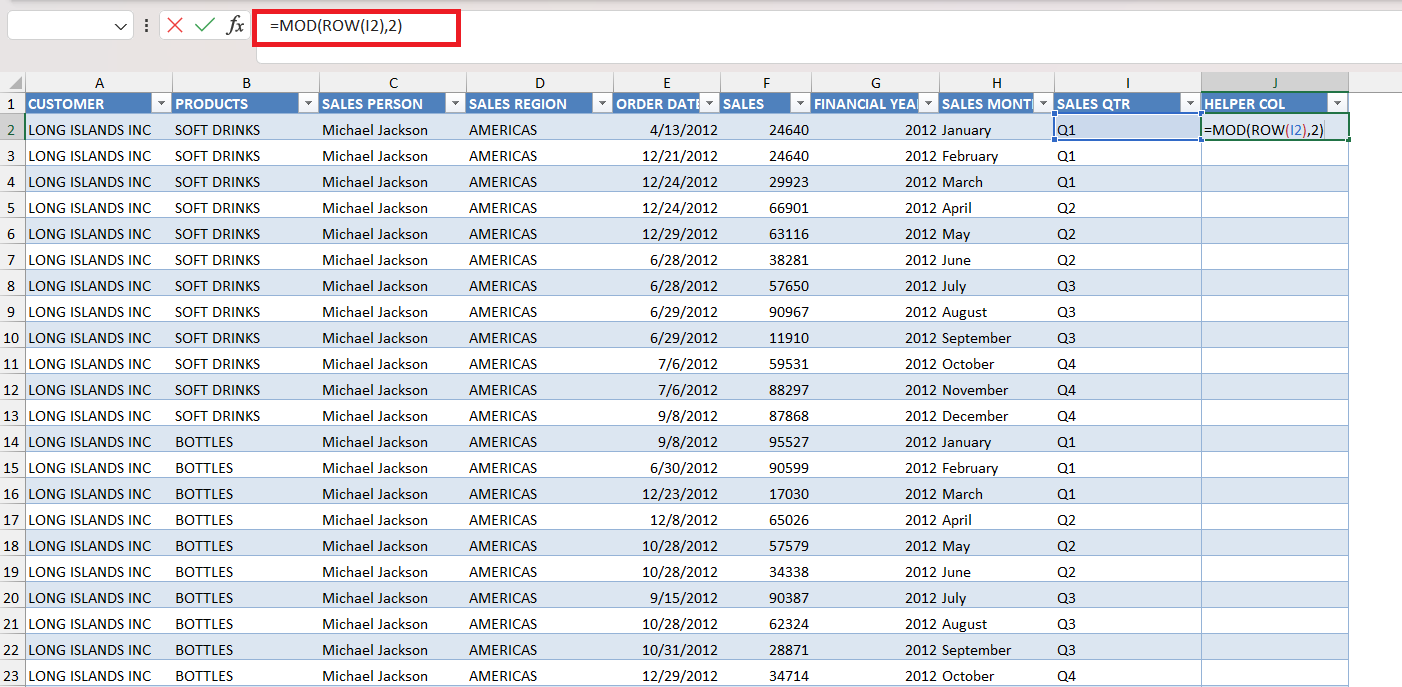
STEP 5: Enter the argument of the MOD function i.e. divider. Here, it is 2 as you will have to know whether the row is odd-numbered or even.
STEP 6: Copy the formula down.
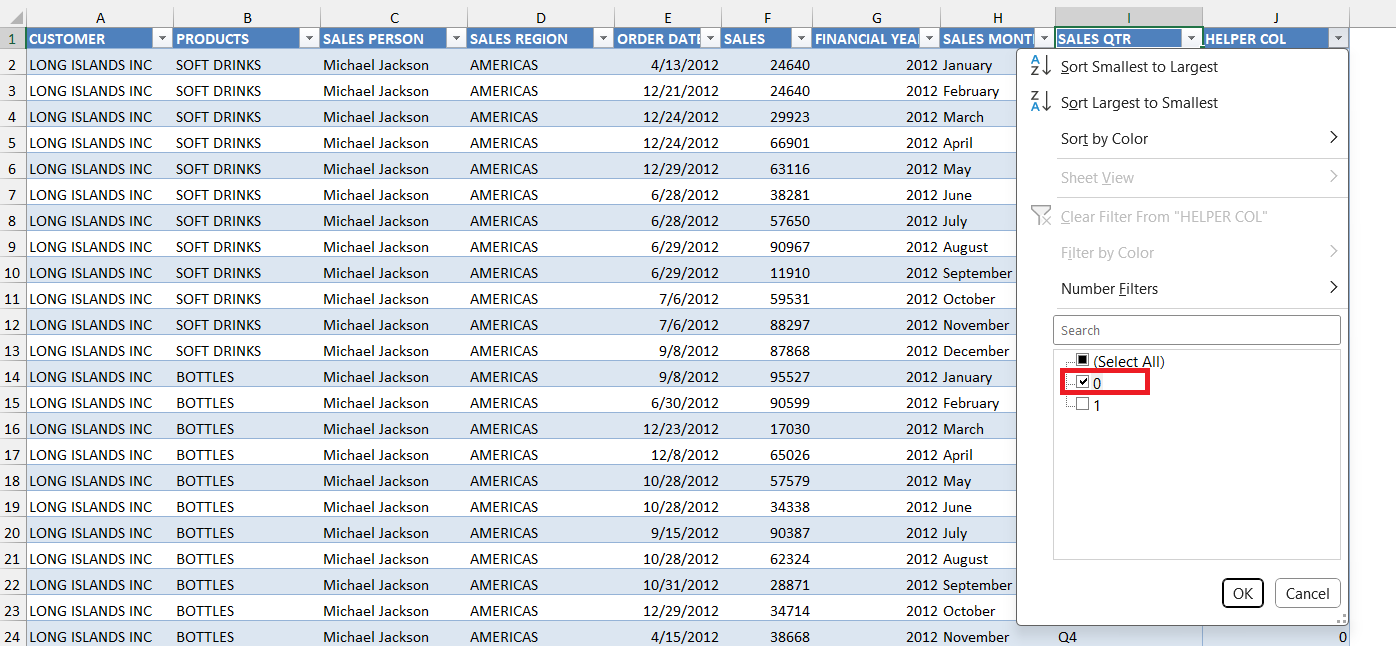
STEP 7: Click on the Filter button and select 0.
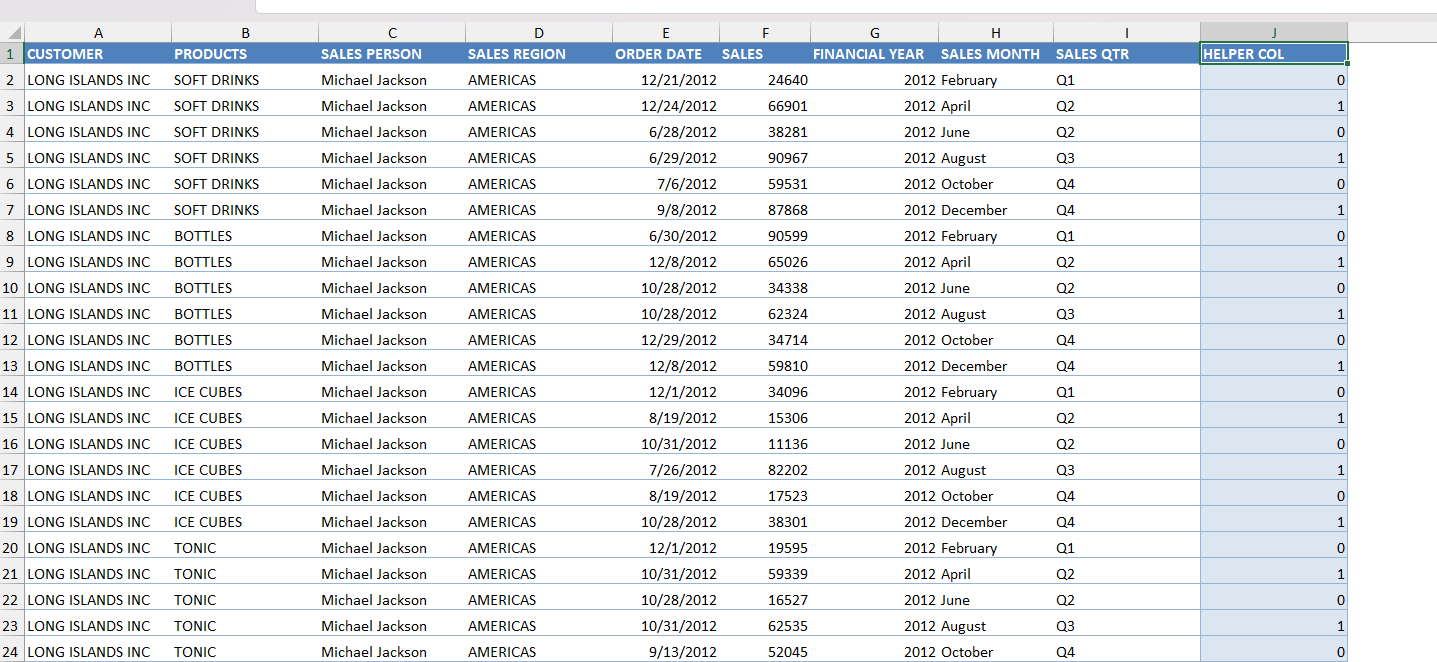
STEP 8: Right-click and select Delete Row.
All the even-numbered rows will be deleted.
Method 3 – Using VBA
In this method, you need to use a VBA code that can be employed to automate the process. Here are the steps to incorporate the same –
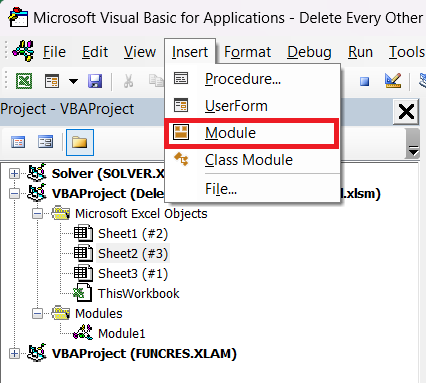
STEP 1: Go to the Developer Tab and select Visual Basic to open the VBA editor.
STEP 2: Go to Insert > Module.
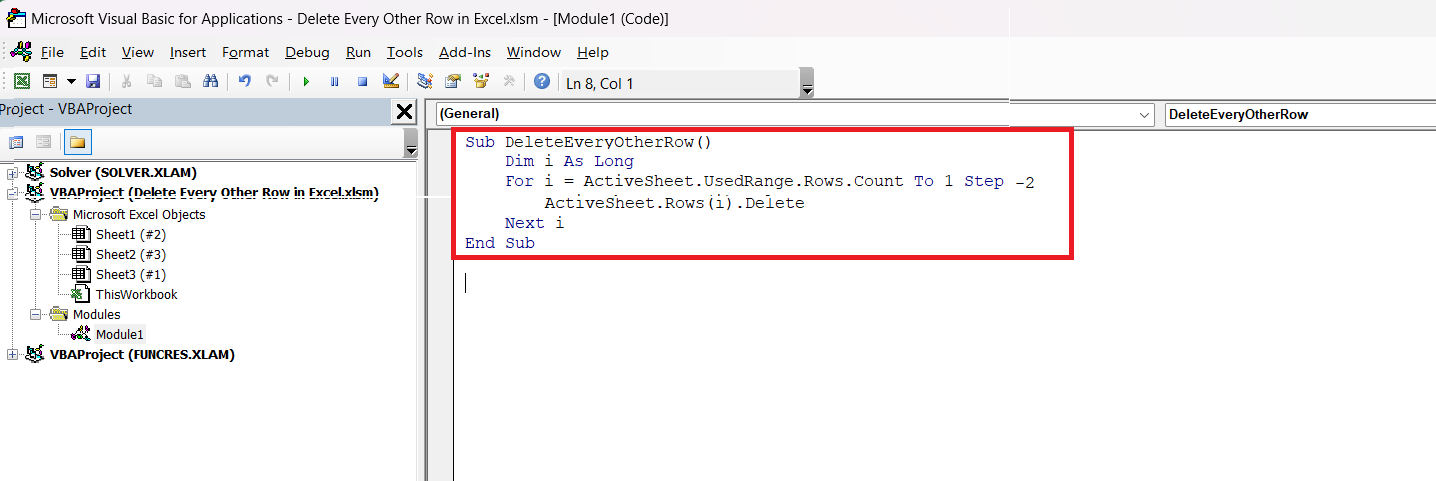
STEP 3: Copy and paste the following VBA code:
Sub DeleteEveryOtherRow()
Dim i As Long
For i = ActiveSheet.UsedRange.Rows.Count To 1 Step -2
ActiveSheet.Rows(i).Delete
Next i
End Sub
STEP 4: Press Ctrl + S to save the module.
STEP 5: In the dialog box, select No to save the file as a macro-enabled workbook.
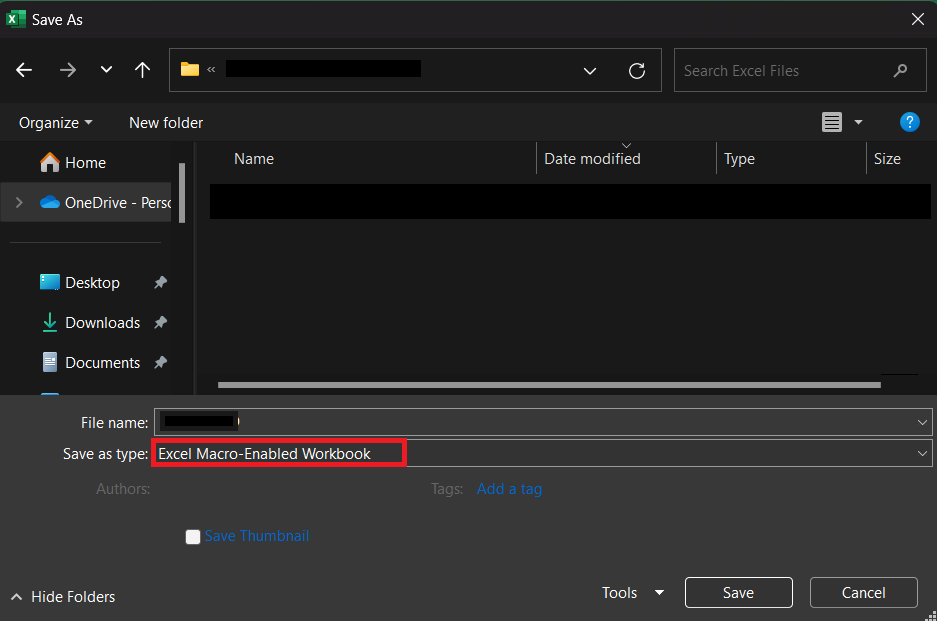
STEP 6: In the Save As dialog box, select Excel Macro-Enabled Workbook. Press Save.
STEP 7: Go to Developer Tab > Macro.
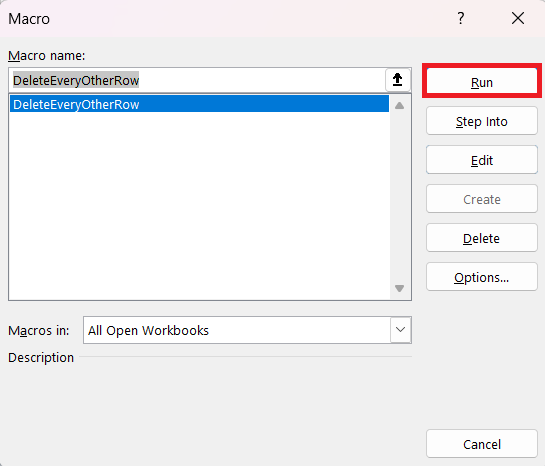
STEP 8: In the Macro dialog box, select Delete Every Other Row, and press Run.
Once you run this macro, all the odd-numbered rows will be deleted.
Conclusion
In conclusion, whether you prefer a simple table format, a formula-based approach, or VBA automation, Excel offers multiple ways to delete every other row. Choose the method that best suits your workflow and data requirements.
Click here to learn more about How to delete every other row on an Excel worksheet!
John Michaloudis is a former accountant and finance analyst at General Electric, a Microsoft MVP since 2020, an Amazon #1 bestselling author of 4 Microsoft Excel books and teacher of Microsoft Excel & Office over at his flagship MyExcelOnline Academy Online Course.

