The main issue when we try to delete spaces in Excel is that they are often invisible to the human eye. While leading spaces or multiple spaces between words can sometimes be noticed by attentive users, trailing spaces at the end of cells remain hidden. This becomes problematic because extra spaces can disrupt Excel formulas. Even if two cells appear to have the same text, Excel treats them as different values if they contain even a single space character. Consequently, you may encounter situations where a formula that seems correct fails to match two seemingly identical entries, leading to confusion and frustration.
Let’s say you have a list of names in two cells:
Cell A1 contains: “Homer Simpson”
Cell B2 contains: “Homer Simpson ”
To the naked eye, these two entries appear identical. However, suppose you want to compare them using a formula to check if they are the same. You might use a formula like this in cell A3:
=IF(A1=B2, “Match”, “No Match”)
We might expect this formula to return “Match” because the names in cells A1 and B2 look the same.
However, the formula actually returns “No Match.” Why? Because Excel considers the extra space at the end of “Homer Simpson ” in cell B2 as a character, making the two cell contents different.
This is a common source of confusion when working with Excel data. It’s essential to be aware of these hidden spaces and use appropriate techniques, like the TRIM function or Find and Replace, to clean up your data and ensure accurate calculations and comparisons.
In this article, we’ll cover topics like deleting leading and trailing spaces, dealing with spaces between words, removing line breaks and non-printing characters, getting rid of non-breaking spaces, and more. Let’s dive in and discover how to clean up your Excel data effectively –
Table of Contents
Let’s explore these methods!
Download the Excel Workbook below to follow along and understand How to Delete Spaces in Excel –
download excel workbookDeleteSpacesinExcel.xlsx
Deleting Spaces in Excel with the TRIM Function
The TRIM function eliminates extra spaces at the beginning, end, and between words. But remember, it will leave a single space between texts.
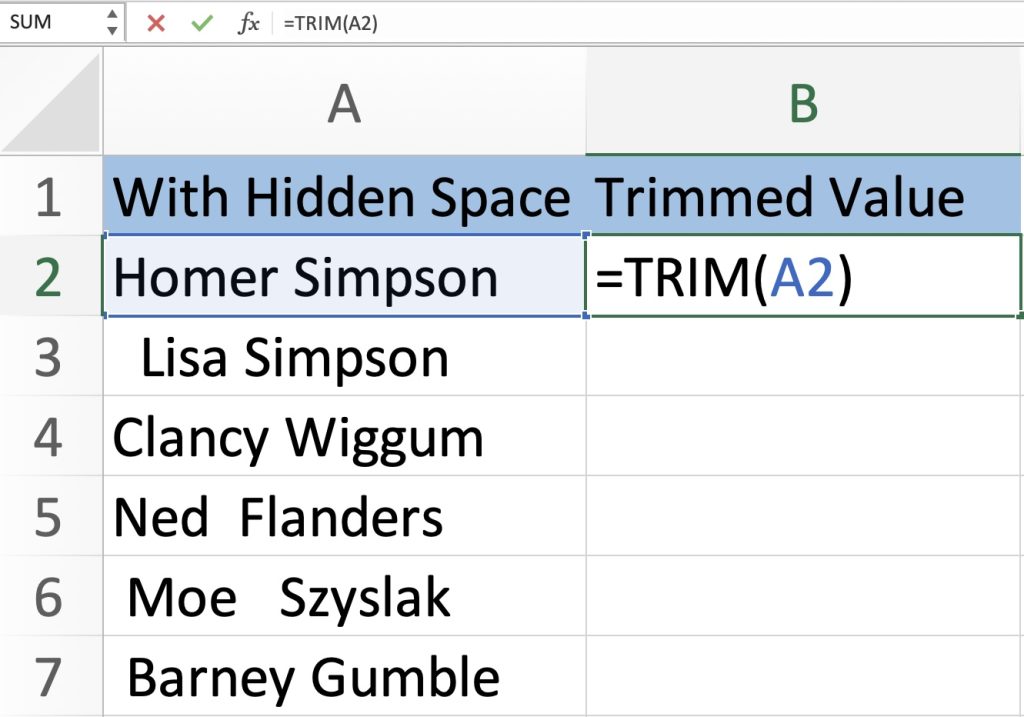
Suppose you have a list of names in column A with some extra spaces:
Select B2.
Enter the formula =TRIM(A2) in cell B2.
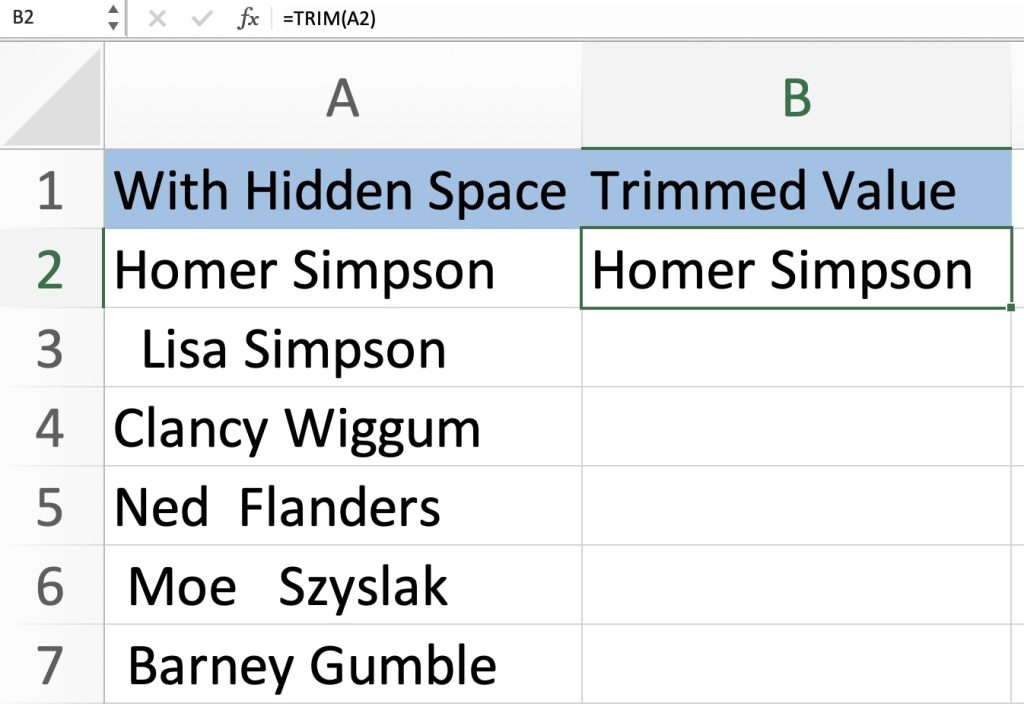
Press Enter.
The cleaned text will appear in cell B2 as “Homer Simpson” without extra spaces.
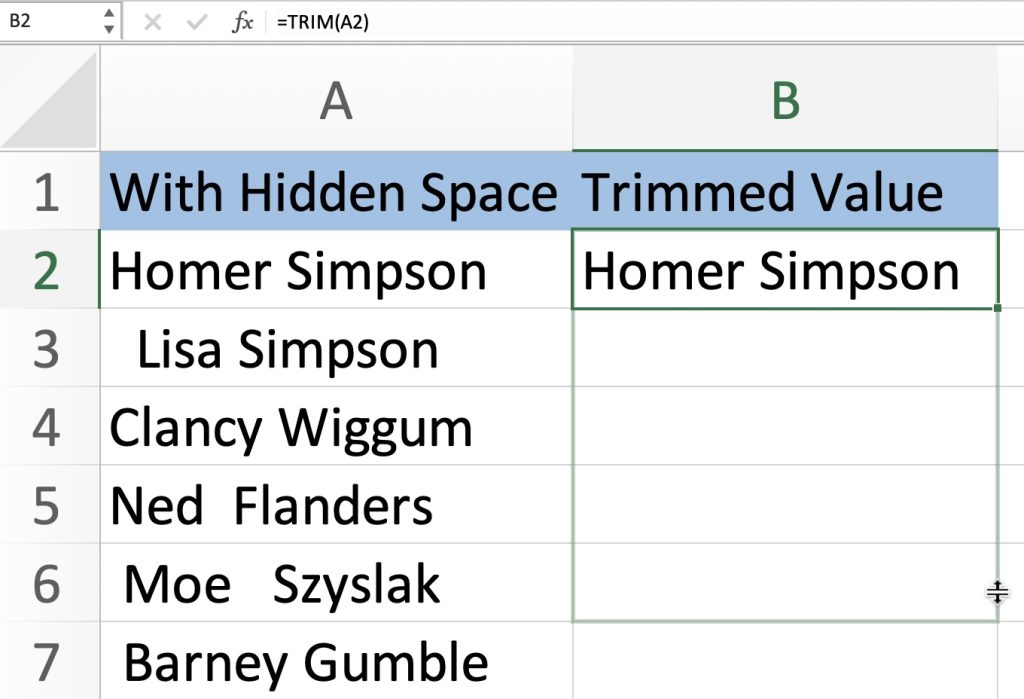
Click and Drag down the square on the bottom-right corner of the cell to Autofill the formula down to the entire list in column B.
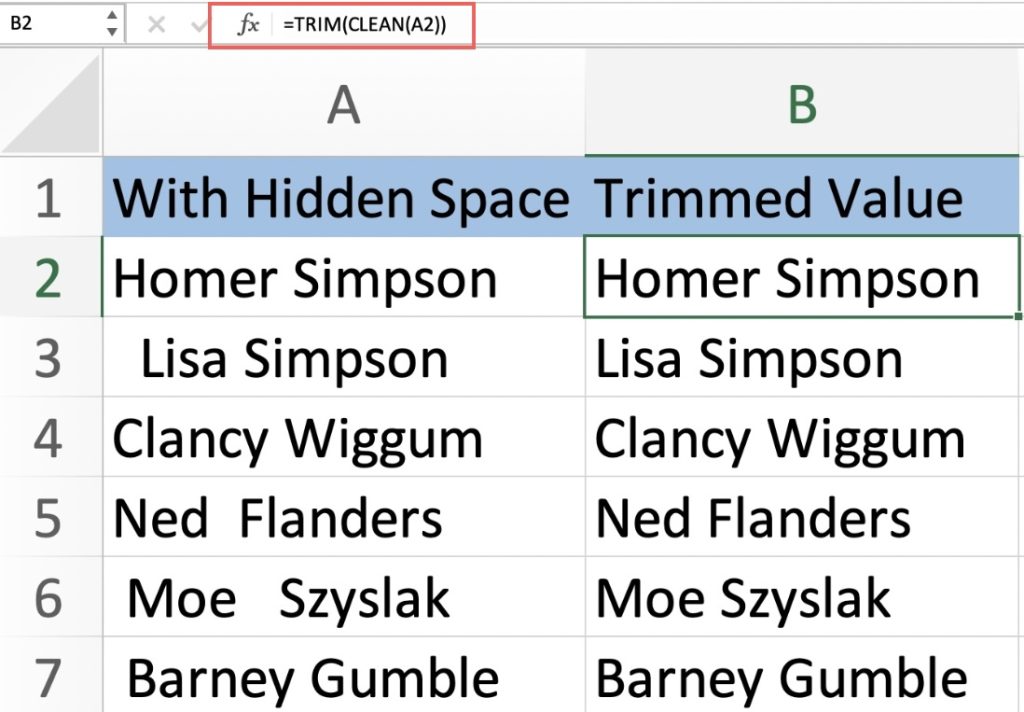
Your cleaned list will now look like this:
Tip: Occasionally, besides spaces, there could be non-printable characters present in your text. While the TRIM function solely addresses spaces, the CLEAN function specializes in removing any non-printable characters within the text. A powerful strategy involves employing both functions in tandem to effectively eliminate both spaces and non-printable characters.
How to Delete Spaces in Excel Using Find and Replace
The Find and Replace feature in Excel offers several advantages for removing spaces, including efficiency, precision, customization, time-saving, and the ability to target specific spaces without altering formulas. It allows users to quickly and accurately clean data throughout the spreadsheet, making it a valuable tool for maintaining data accuracy and integrity. To remove spaces in Excel using the Find and Replace feature, follow these steps:
Open the spreadsheet containing the data you want to work with.
Choose the range of cells where you want to remove spaces. You can select a single column, multiple columns, or the entire worksheet, depending on your needs.
On Windows: Press Ctrl + H or navigate to the Home tab in the Excel ribbon, and in the Editing group, click on Find & Select, then select Replace.
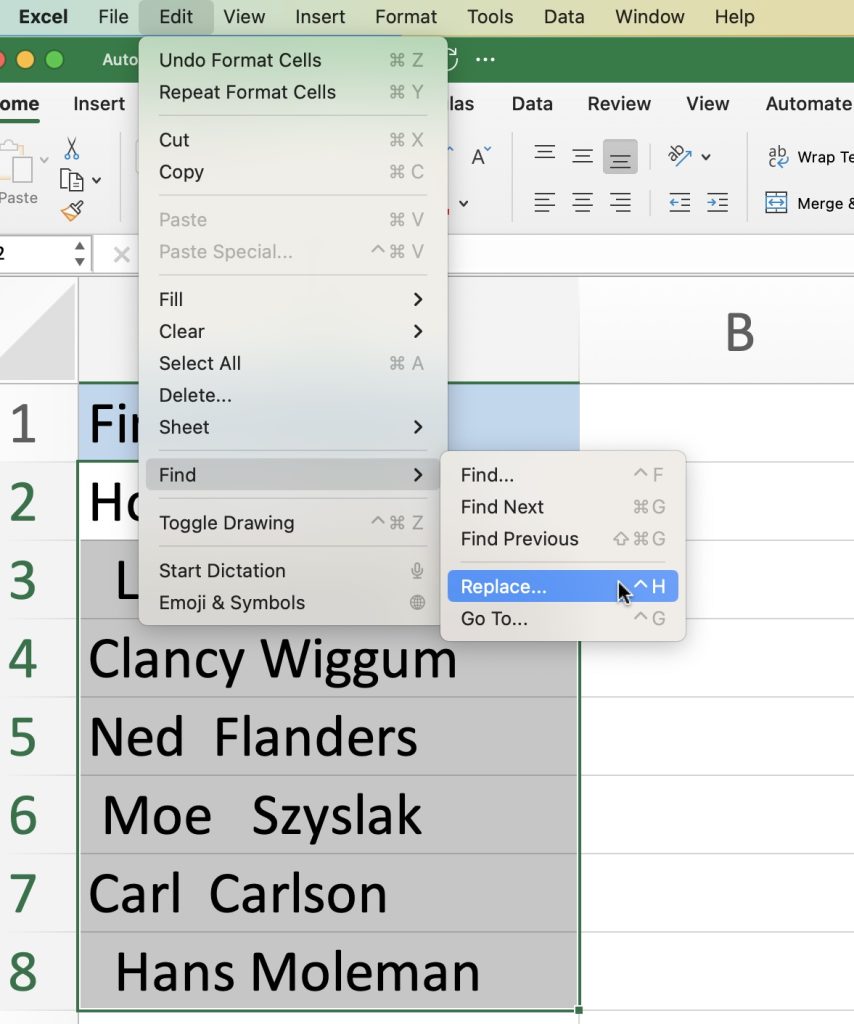
On Mac: Go to the Edit menu and choose Find > Replace.
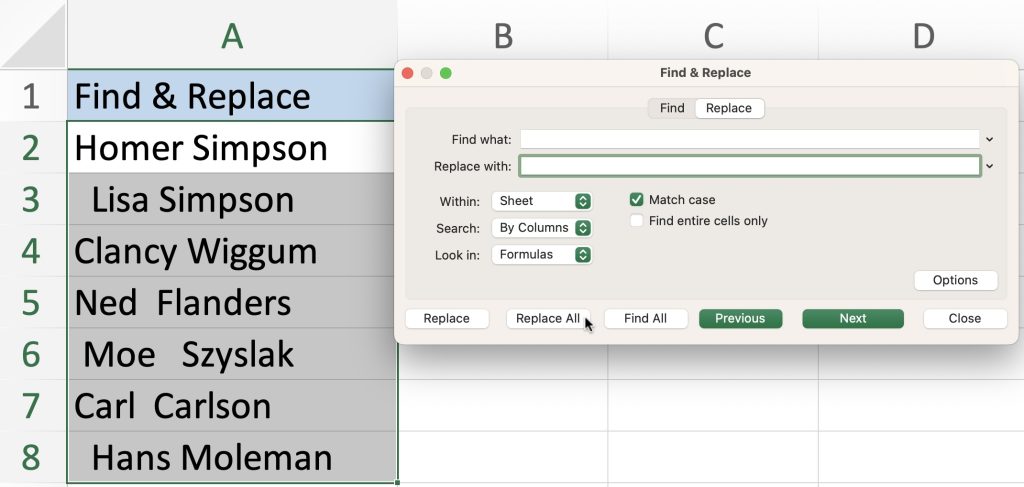
In the Find what field of the Find and Replace dialog box, enter a single space character by pressing the spacebar once.
Ensure that the Replace with field is empty or contains no characters. This step is crucial to remove spaces without replacing them with anything.
You can further customize the replacement process by clicking the Options button in the Find and Replace dialog box. Here, you can specify if you want to match the entire cell contents or just part of it, among other options.
Click the Replace All button to remove all the spaces in the selected range.
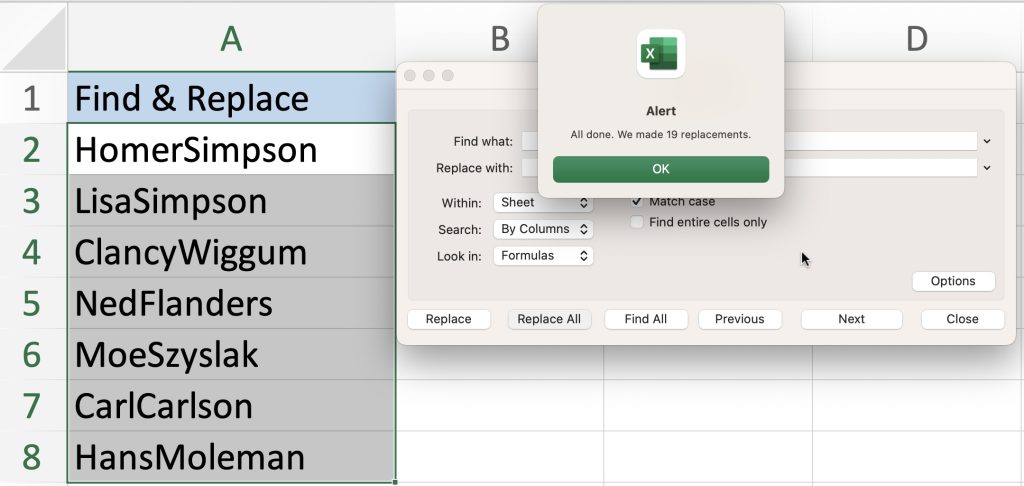
Excel will show you a dialog box with the number of replacements made. Review this information to ensure it matches your expectations.
Click OK to close the dialog box when you’re satisfied with the replacements.
Your selected cells will now be free of spaces. This method is especially useful for quickly removing spaces in bulk throughout your Excel spreadsheet.
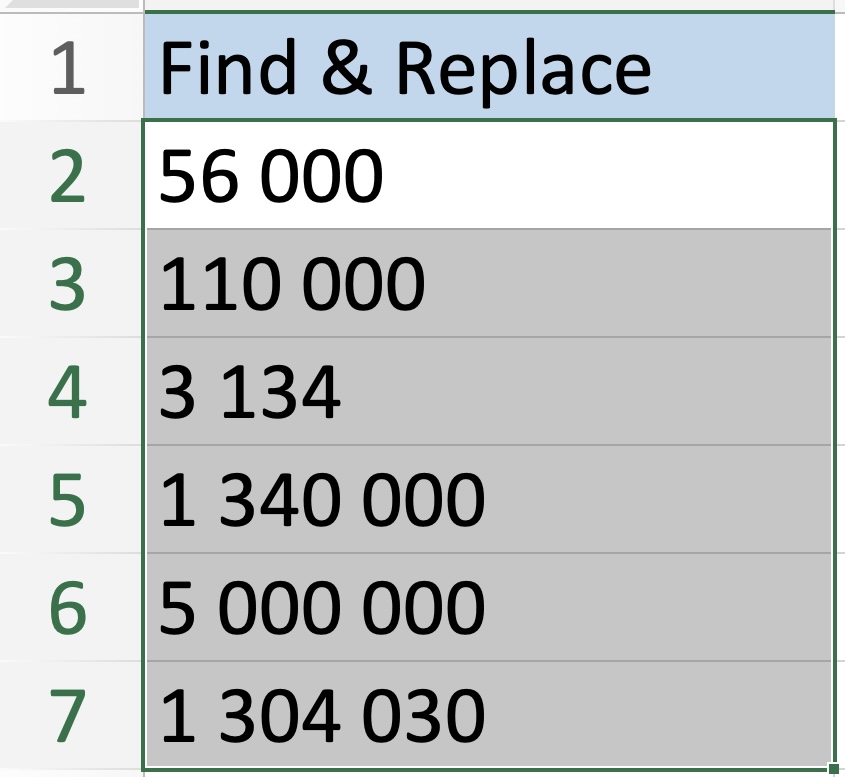
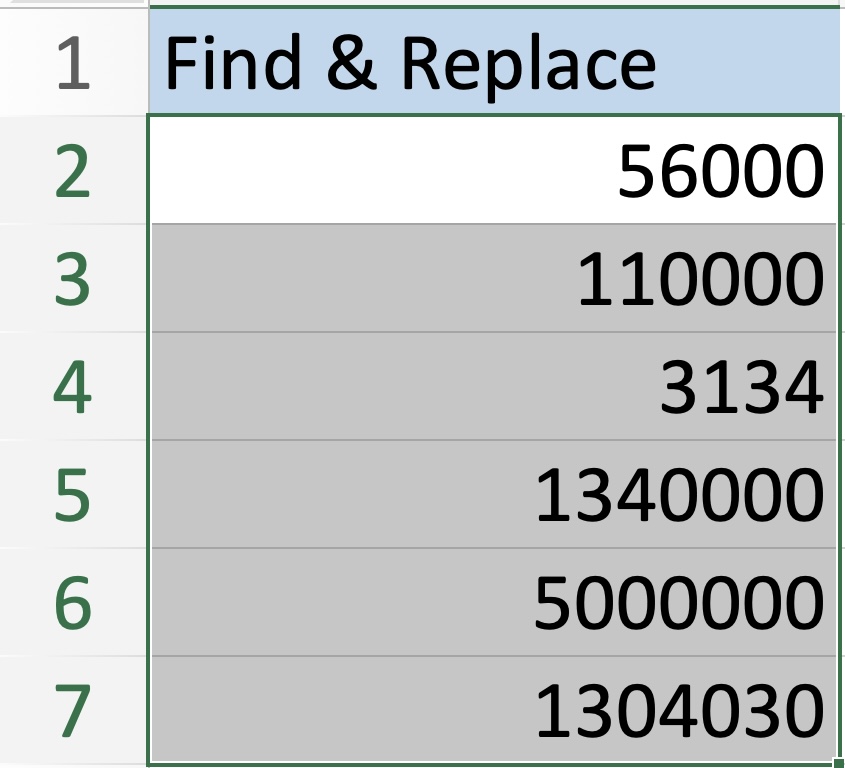
(This exact method can also be used when removing spaces from numbers!)
Warning: This method will scan for and substitute ALL spaces within the entire sheet or the chosen area. Exercise caution to avoid inadvertently eliminating spaces that are necessary or intentional.
Using the SUBSTITUTE Function
When you need to delete all spaces within numbers or text, this technique is your best choice. Employing a straightforward formula allows you to clear all spaces from your data. This approach operates by substituting each space with an empty string.
To remove the spaces using the SUBSTITUTE function:
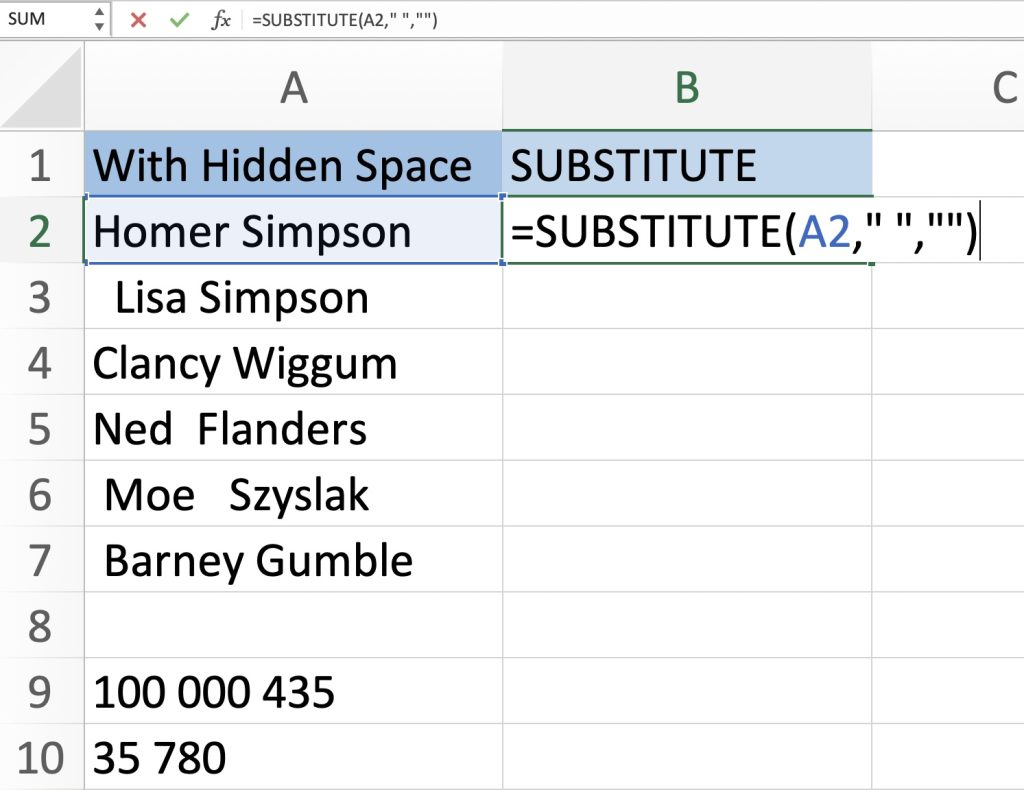
Select an empty cell, let’s say B2.
Enter the formula =SUBSTITUTE(A2, ” “, “”) in cell B2.
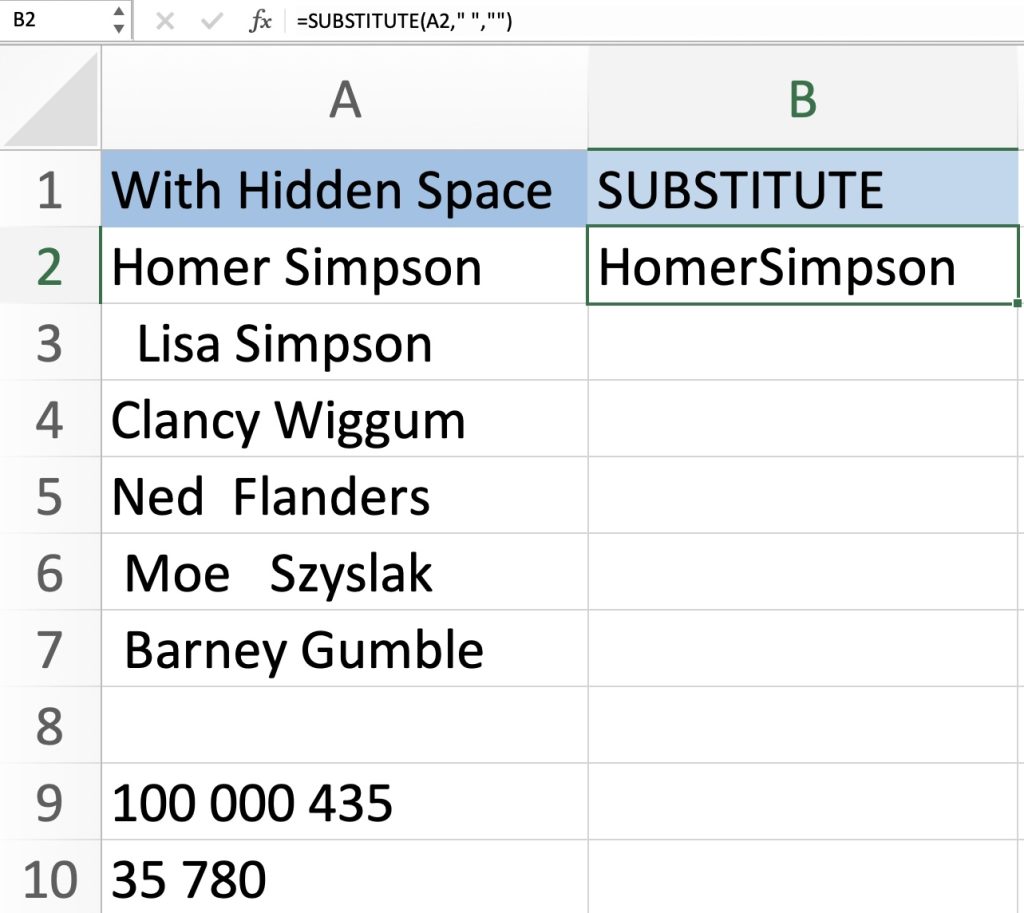
Press Enter.
The cleaned text will appear in cell B2 as “HomerSimpson” without any spaces.
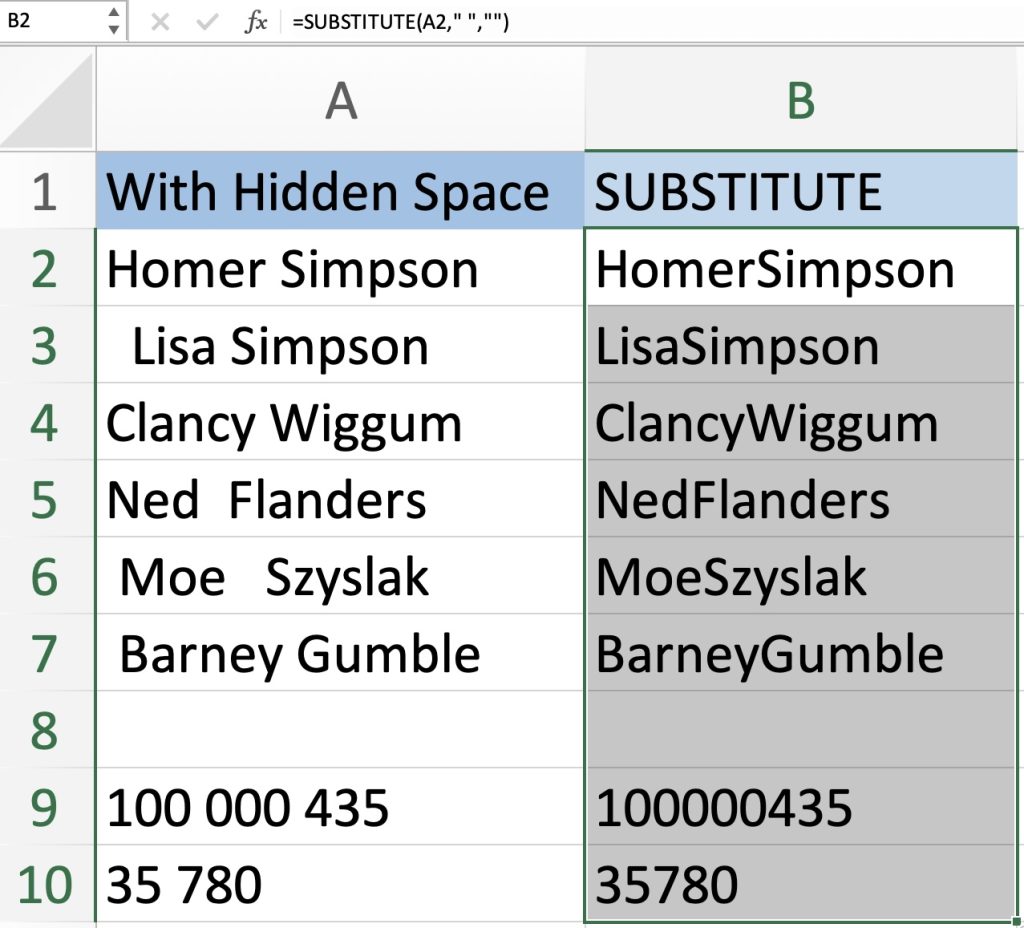
Autofill the formula down to apply it to the entire list in column B.
Your cleaned list will now look like this:
There you have it! Deleting unwanted spaces in Excel can be quite daunting when you have an entire spreadsheet with spaces appearing at the beginning, end, or in between words or numbers. Occasionally, extra spaces may even accompany unprintable characters. Hopefully, this tutorial has provided you with an effective strategy to address your space-related woes.
Further learning:
How to Delete Blank Cells in Excel
Add Comma in Excel between Names with SUBSTITUTE Formula
Top 3 Methods to Find Special Characters in Excel
Click here to access Microsoft’s tutorial on How to Use the TRIM Function!
John Michaloudis is a former accountant and finance analyst at General Electric, a Microsoft MVP since 2020, an Amazon #1 bestselling author of 4 Microsoft Excel books and teacher of Microsoft Excel & Office over at his flagship MyExcelOnline Academy Online Course.


