Managing data in Microsoft Excel efficiently often requires deleting unnecessary or redundant rows. Whether you’re cleaning up a large dataset or refining your spreadsheet for better clarity, knowing how to quickly and accurately delete rows can save you significant time and effort. This article will guide you through several methods for deleting rows in Excel, ensuring you can keep your data organized and relevant. From using simple right-click options to leveraging advanced filtering techniques, you’ll learn how to streamline your Excel workflow.
Key Takeaways:
- Efficiently delete rows in Excel using a variety of methods to keep your data organized and relevant.
- Keyboard shortcuts like Shift + Spacebar and Ctrl + – (minus) can speed up the row deletion process.
- Use the right-click menu to delete rows easily, catering to those who prefer visual interaction.
- The ‘Find & Replace’ feature helps delete rows based on specific cell content, ideal for large datasets.
- Precautions such as reviewing data and backing up spreadsheets prevent accidental data loss during deletions.
Table of Contents
Introduction to Efficient Excel Row Management
The Importance of Clear Data
Maintaining clear and concise data in your Excel spreadsheets is not just a matter of organization; it’s essential for making sure your data analysis is accurate and easily interpretable. Cluttered and redundant rows can skew results and make it more challenging for you or your team to extract meaningful insights. By mastering row deletion, you keep your data neat and analysis-ready, helping you drive decisions that are informed and reliable.
Overview of Row Deletion Techniques
Excel offers a variety of row deletion techniques to cater to different scenarios, whether you’re working with small datasets or managing large and complex spreadsheets. Some of these techniques are straightforward, like selecting rows and pressing a delete key, while others involve filtering, using Find & Select tools, or even incorporating Excel’s built-in automation features like macros. Understanding when and how to use each method ensures you work more efficiently and avoids disrupting the integrity of your data.
Step-by-Step Instructions for Deleting Rows in Excel
Using Keyboard Shortcuts for Quick Deletions
For those who love efficiency, keyboard shortcuts are a godsend, turning tedious tasks into quick executions. Deleting rows in Excel can be done in mere seconds with the right keystroke combinations. Here’s what you need to do:
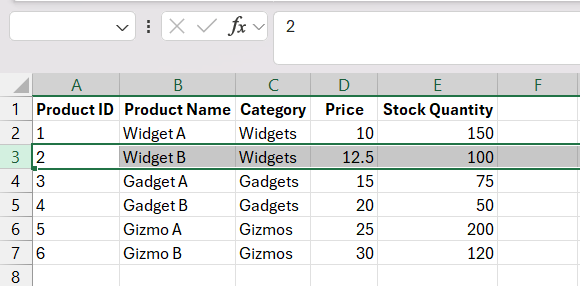
STEP 1: Press Shift + Spacebar to select the entire row you’re aiming to delete.
STEP 2: Then hit Ctrl + – (minus). This combo deletes the selected row immediately, bypassing the Delete dialog box and speeding up your workflow remarkably.
Remember, practicing these shortcuts can turn them into an instinctual part of your Excel routine, transforming you into a spreadsheet wizard in no time.
The Mouse and Menu Approach
If you’re more comfortable with a mouse or trackpad, fear not; Excel caters to you as well with an intuitive point-and-click method. Use the following steps:
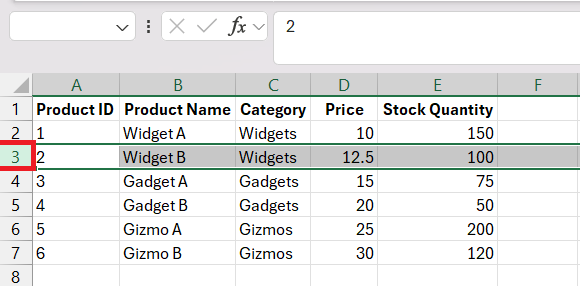
STEP 1: Just hover over the row number on the left-hand side to highlight the entire row.
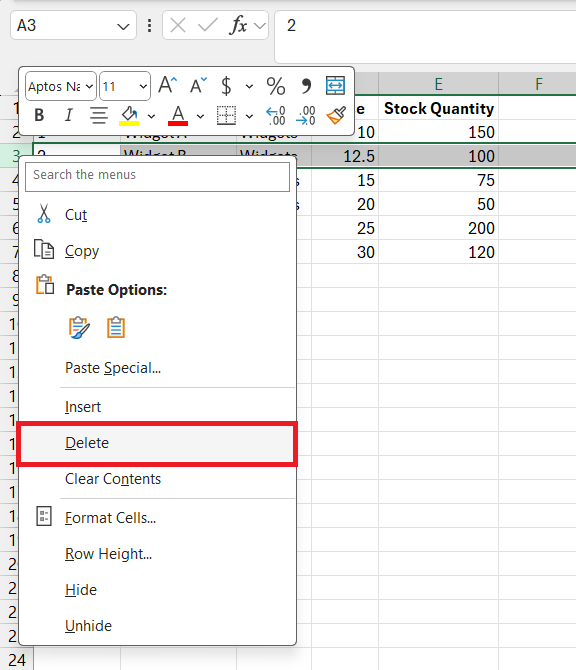
STEP 2: Right-click to bring up the context menu, and select ‘Delete’ from the list of options. The selected row disappears immediately, leaving you with a tidy spreadsheet.
This approach is particularly user-friendly for those new to Excel or for those who prefer a more visual interaction with their spreadsheets.
Advanced Excel Tips for Specific Situations
Deleting Rows Based on Cell Content
When your spreadsheet is brimming with data, pinpointing and eliminating rows by specific content becomes essential. Excel’s ‘Find & Replace’ feature comes in handy for this task. The following steps to be followed to achieve this:
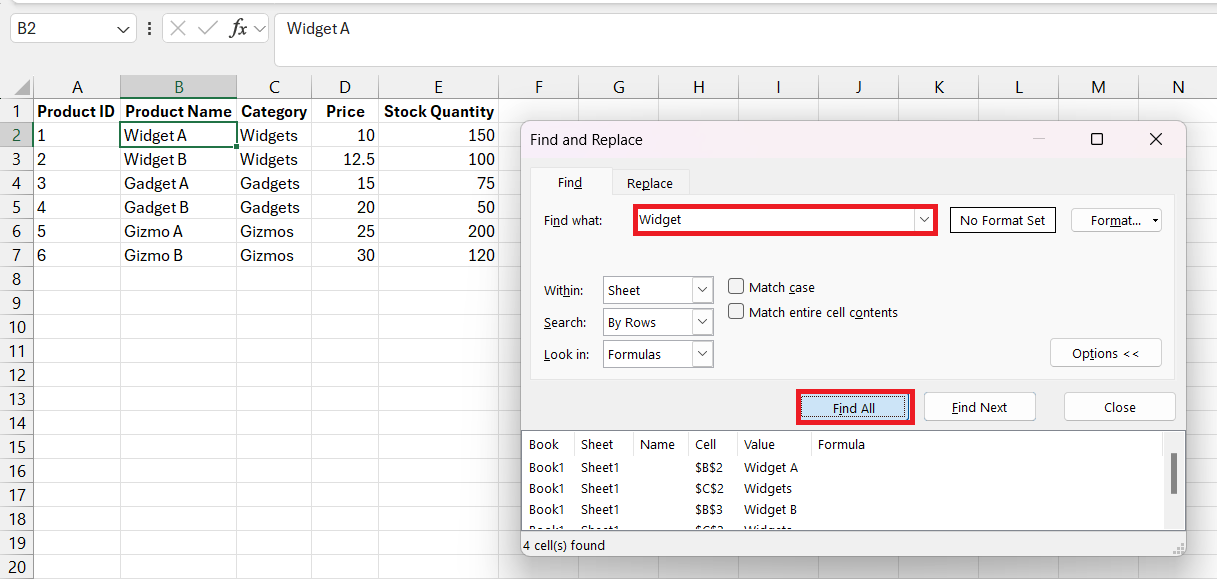
STEP 1: Once you’ve opened the ‘Find and Replace’ window (Ctrl + F), type in the content that’s your criteria for deletion, like a keyword or number.
STEP 2: Click ‘Find All’, select all the found items, then close the window.
STEP 3: Select rows as shown earlier using a keyboard shortcut or using your mouse, right-click, and hit ‘Delete’.
It’s an effective way to clean up large datasets where particular entries are no longer needed.
Select and Delete Multiple Rows in Excel
Managing data in Excel often involves removing unnecessary or outdated information. Deleting multiple rows at once can significantly speed up your workflow. Here’s a step-by-step guide on how to select and delete multiple rows in Excel. Perform the following steps:
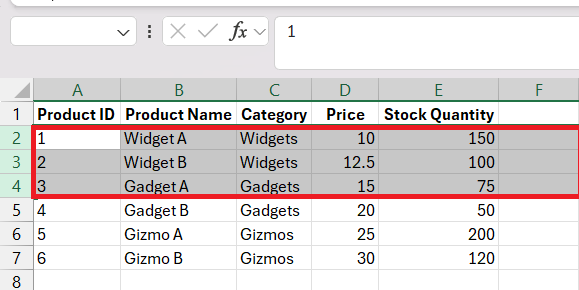
STEP 1: Select multiple rows at once by Click and Drag using your mouse Click the row number of the first row you want to delete. Hold down the mouse button and drag to select adjacent rows or Shift + Arrow Keys: Click the row number of the first row you want to delete. Hold down the Shift key and use the arrow keys to select additional rows.
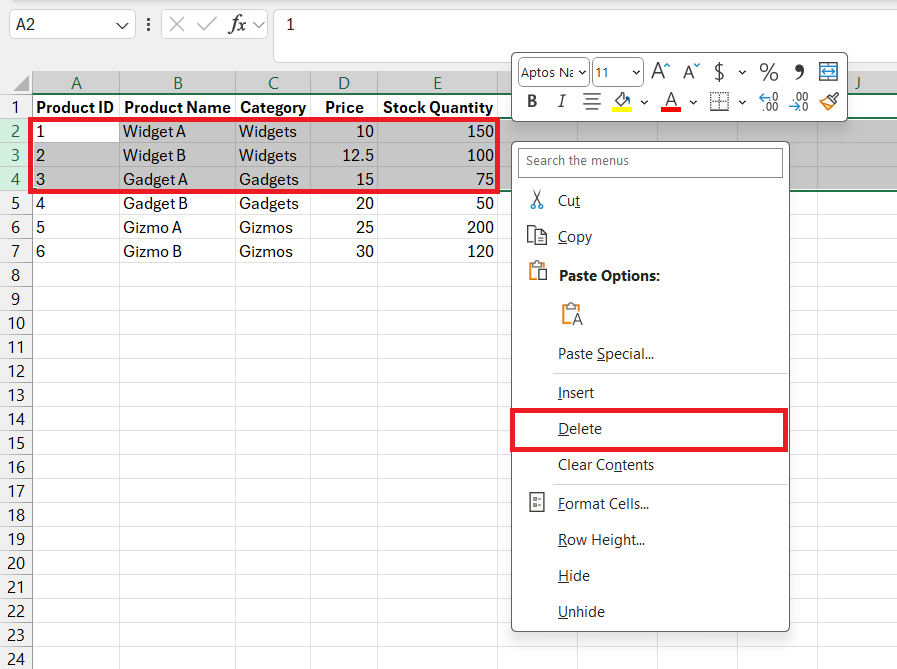
STEP 2: Right-click to bring up the context menu, and select ‘Delete’ from the list of options or use the shortcut Ctrl + – (minus). The selected row disappears immediately, leaving you with a tidy spreadsheet.
Tips & Tricks when deleting rows in Excel
Avoiding Data Loss During Deletion Processes
Data loss during the row deletion process can be a real concern, but with a few precautions, you can keep your valuable data safe. Always start by reviewing the rows you plan to delete to ensure they don’t contain necessary information. It’s a good idea to back up your spreadsheet before making bulk changes – you can do this by saving a copy or using Excel’s version history feature.
Additionally, familiarize yourself with the ‘Undo’ function (Ctrl + Z), which can revert your sheet back to its previous state if you accidentally delete the wrong row. For a more controlled approach, consider hiding rows instead of deleting them, especially if you’re uncertain about their future value.
Frequently Asked Questions
How can I delete multiple rows quickly in Excel?
To delete multiple rows fast in Excel, select them by clicking the row numbers while holding down the Ctrl key, and then either press the ‘Ctrl’ plus ‘-‘ (minus) keys together or right-click and choose ‘Delete’. This will remove all selected rows simultaneously.
What’s the safest way to delete rows without affecting other data?
The safest way is by manually selecting rows and confirming they’re the right ones before deleting them. Consider backing up your data and using the ‘Undo’ feature (Ctrl + Z) immediately if you delete something by mistake.
How do I quickly delete unused rows in Excel?
To quickly delete unused rows, select them at the bottom of your data, then use the shortcut ‘Ctrl’ plus ‘-‘ (minus) or right-click and choose ‘Delete’. This will remove the selected rows.
How do I get rid of infinite rows in Excel?
To get rid of infinite rows, select the row below your data by clicking the row number, press ‘Ctrl + Shift + Down Arrow’ to highlight all rows below, and then press ‘Ctrl’ plus ‘-‘ (minus) to delete.
What is the shortcut for deleting a row in Excel?
The shortcut to delete a row in Excel is to select the row, then press ‘Ctrl’ plus ‘-‘ (minus). This removes the currently selected row instantly.
John Michaloudis is a former accountant and finance analyst at General Electric, a Microsoft MVP since 2020, an Amazon #1 bestselling author of 4 Microsoft Excel books and teacher of Microsoft Excel & Office over at his flagship MyExcelOnline Academy Online Course.

