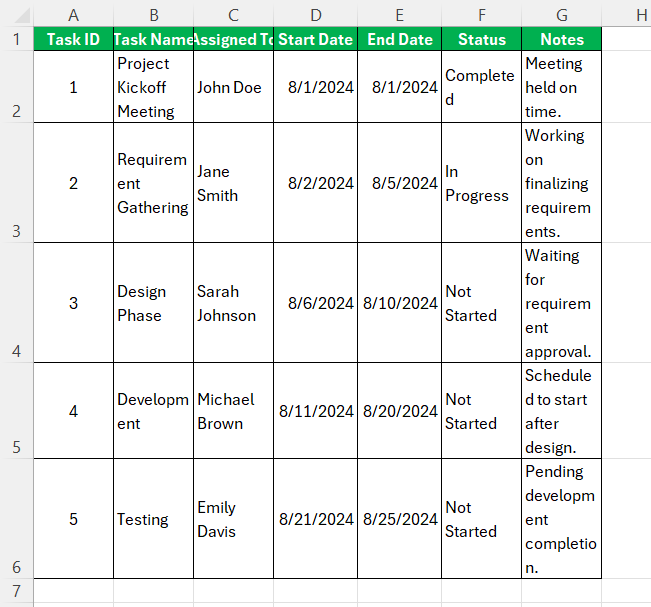
When working with Excel, one of the most efficient ways to enhance readability and streamline data presentation is by using the Autofit feature. In my experience, Autofit has been a game-changer for managing columns and rows, automatically adjusting their size to fit the contents perfectly. This not only saves time but also ensures that my spreadsheets look polished and professional without manual adjustments. In this article, I’ll delve into how to use Excel Autofit effectively and share some tips for getting the most out of this handy tool.
Key Takeaways:
- AutoFit Automatically Adjusts Sizes: AutoFit in Excel dynamically resizes columns and rows to fit the content, eliminating the need for manual adjustments.
- Easy Column Width Adjustment: To AutoFit column width, simply double-click the right boundary of the column header or use keyboard shortcuts like Alt+H, O, I.
- Efficient Row Height Adjustment: Adjust row height by selecting rows, then using the ‘AutoFit Row Height’ option or keyboard shortcuts like Alt+H, O, A.
- Manual Adjustments for Precision: When AutoFit doesn’t meet your needs, manually adjust column width and row height by dragging the borders or entering specific measurements.
- Troubleshooting AutoFit Issues: If AutoFit isn’t working, check for hidden characters, excessive spaces, or formatting issues that may interfere with automatic resizing.
Table of Contents
Introduction to Excel AutoFit
What Is AutoFit in Excel?
AutoFit in Excel is a dynamic feature that I found to be incredibly helpful, especially when dealing with sheets that contain various lengths of data. It essentially allows columns and rows to automatically resize themselves to fit the content within them snugly.
That means no more guessing games or endless dragging to make sure everything looks just right. Instead, once AutoFit is applied, all the contents are clearly visible and neatly contained within the cells, which is a game-changer for both presentation and data analysis.
Mastering AutoFit Techniques
How to AutoFit Column Width in Excel?
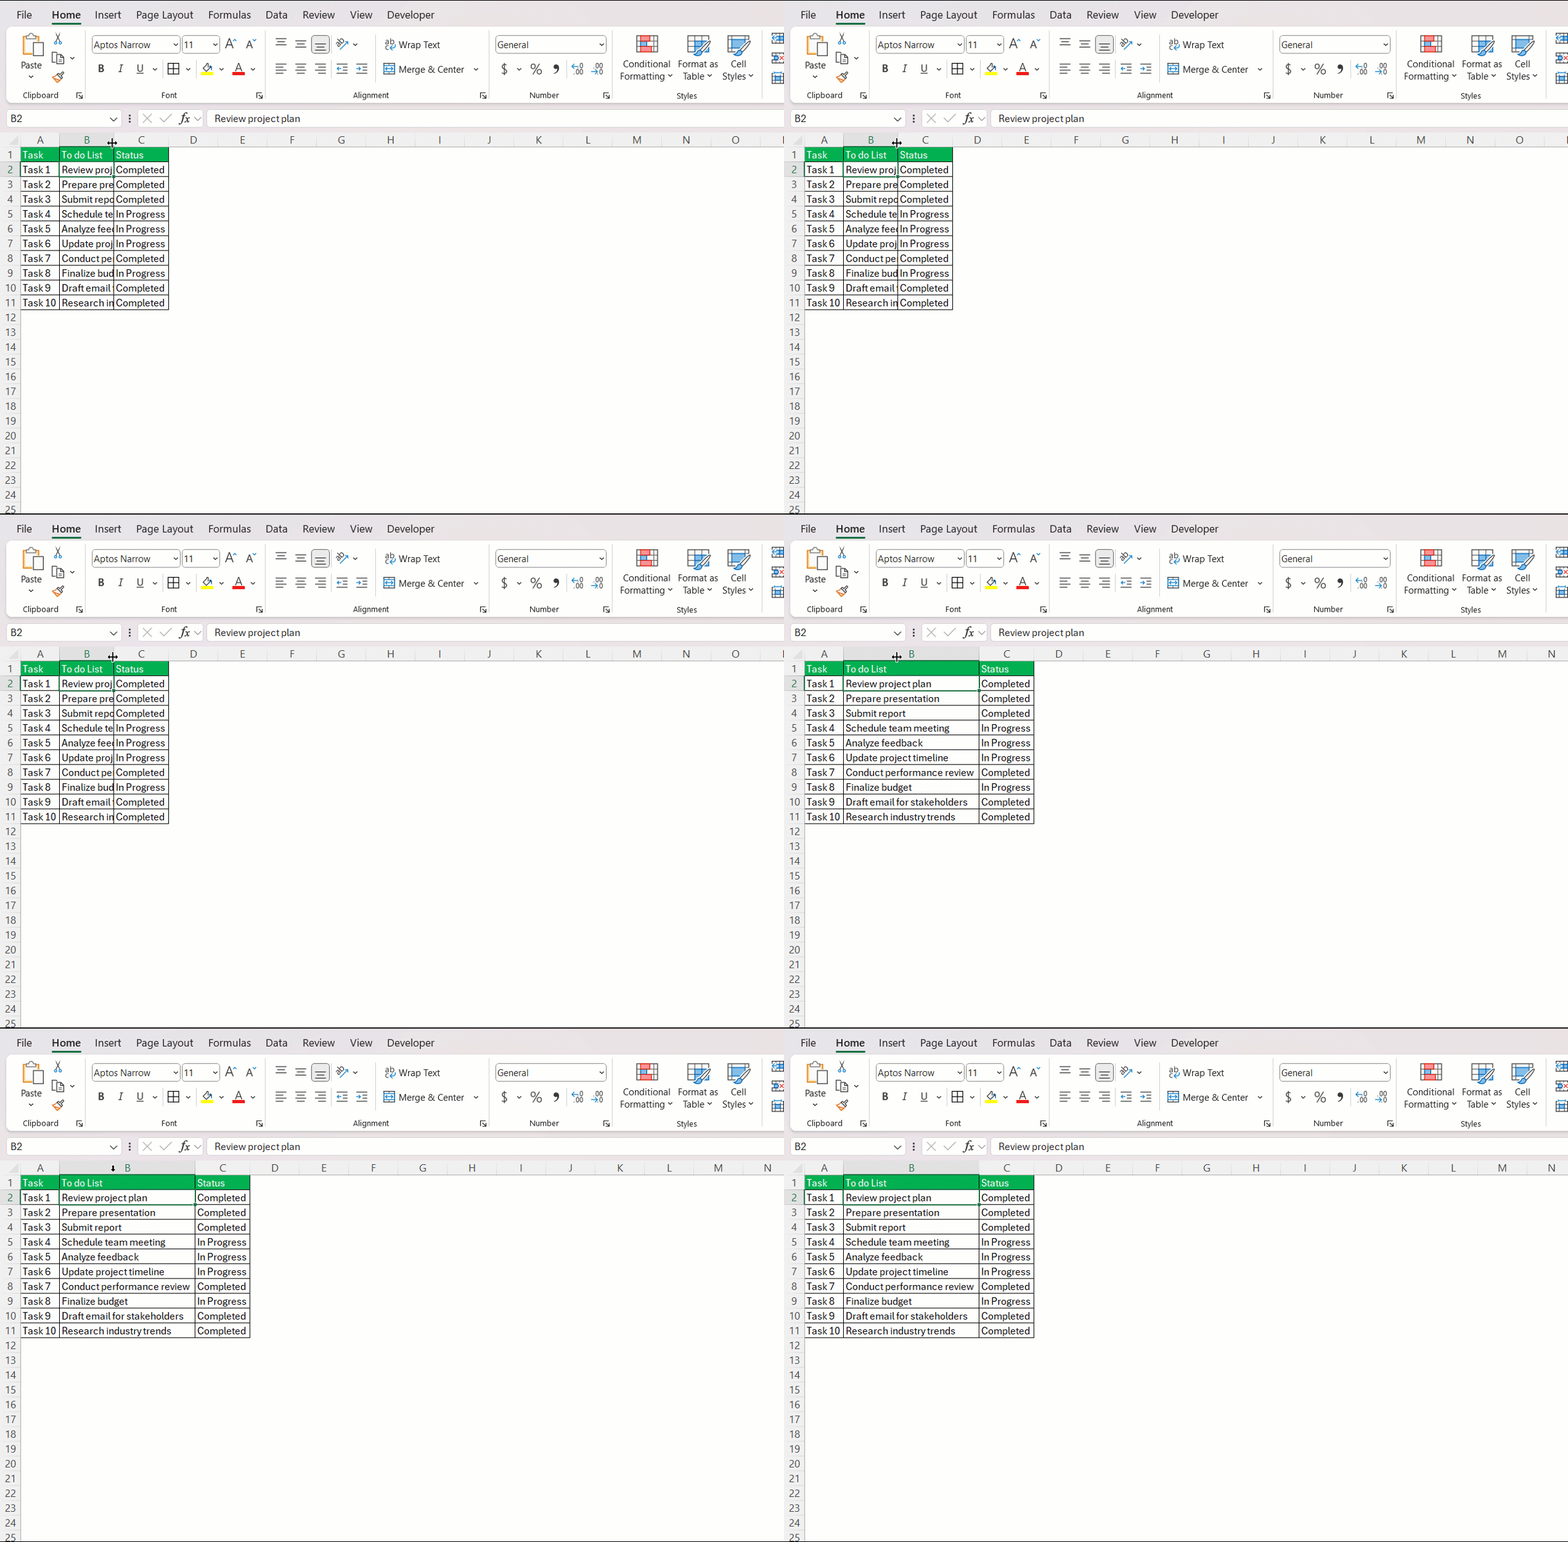
AutoFitting the column width in Excel is a breeze once you get the hang of it. Here’s what I do: I start by clicking the cell or the entire column header I want to adjust. I look for the right boundary of the column header, where the cursor will switch to a double-headed arrow. With a swift double-click, Excel works its magic and the column width snaps to fit the contents perfectly.
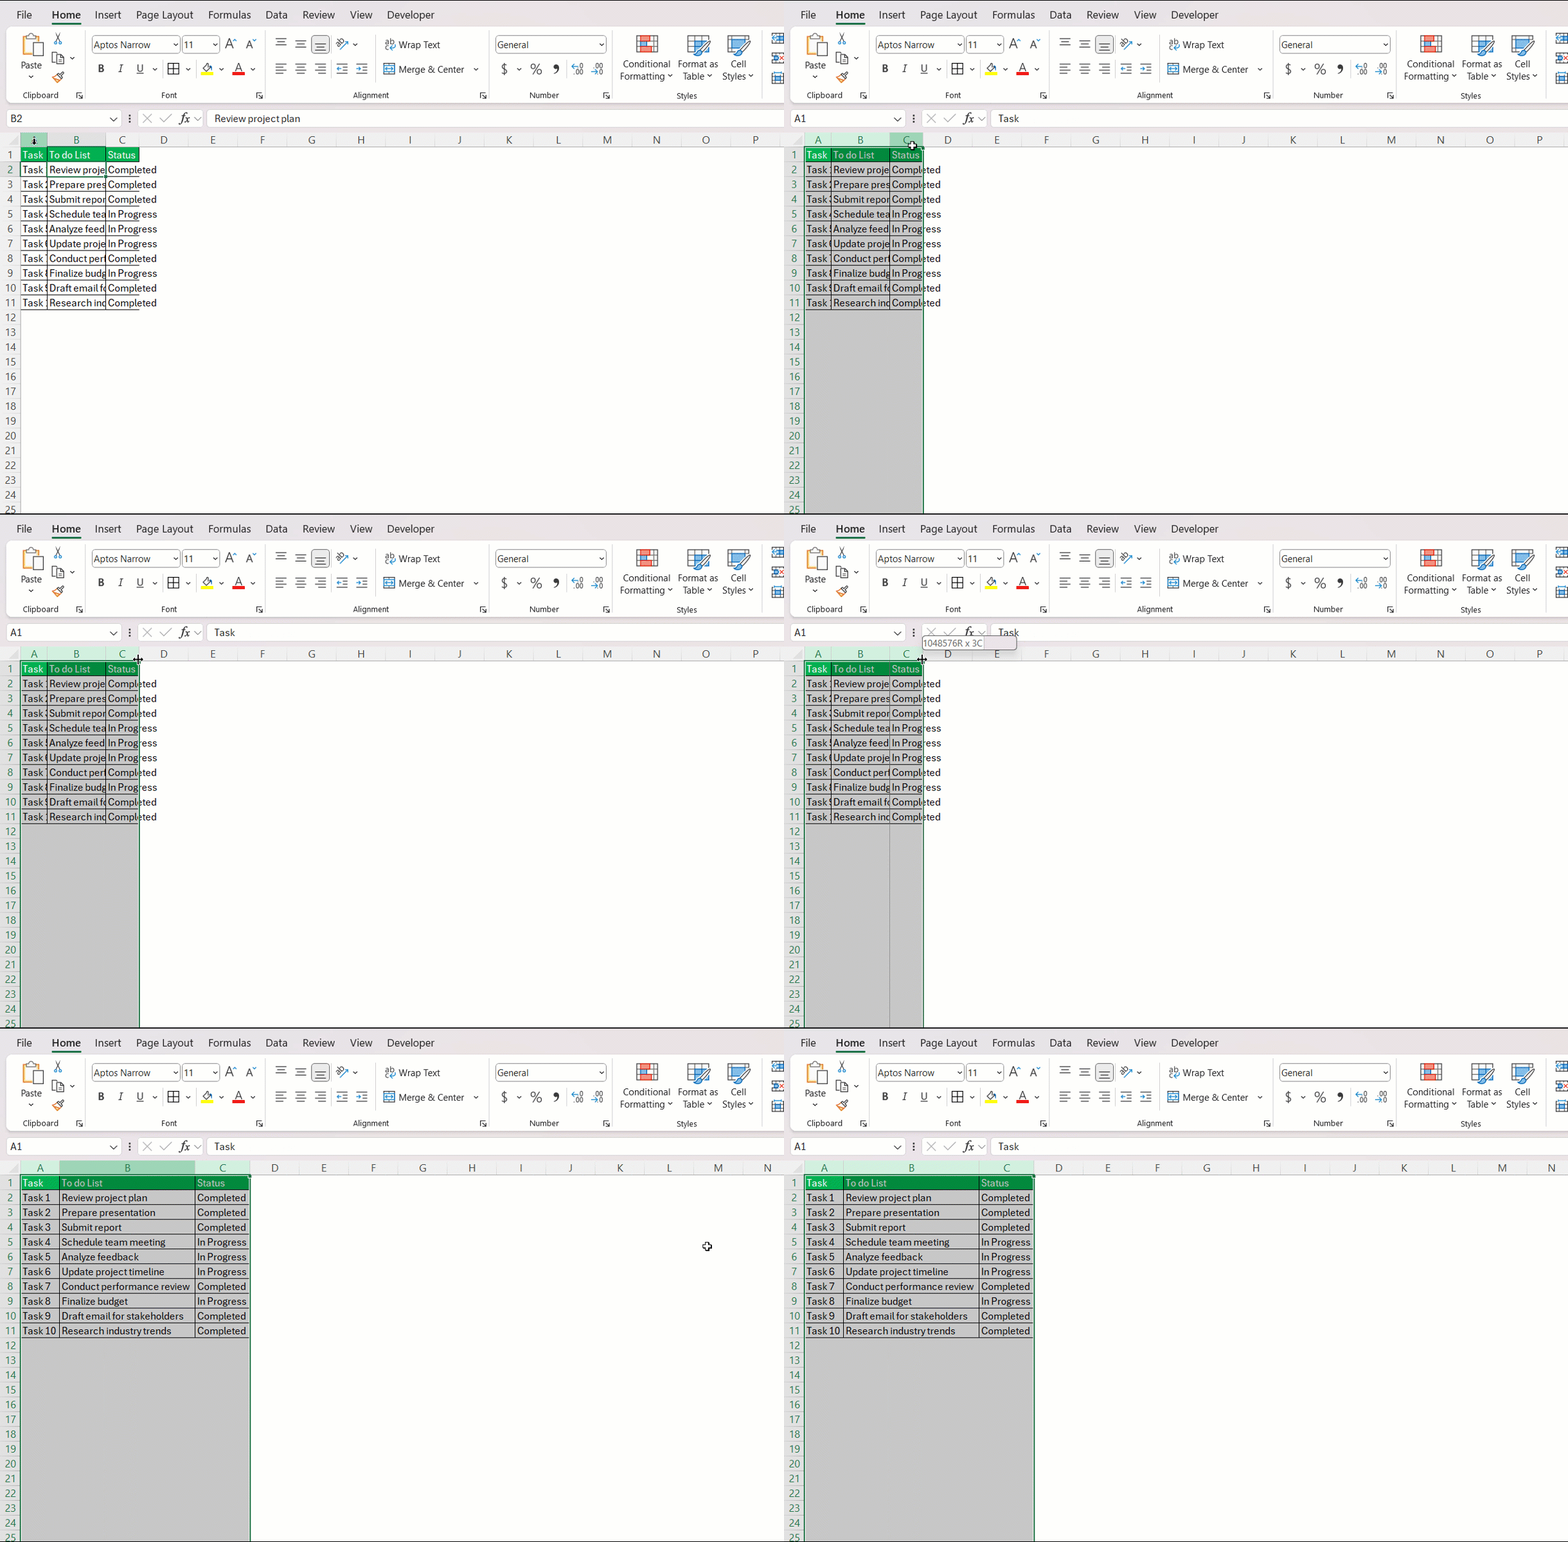
For multiple columns, I select them all and double-click on the boundary between any two selected column headers to AutoFit them simultaneously.
Adjusting Row Height with the AutoFit Feature
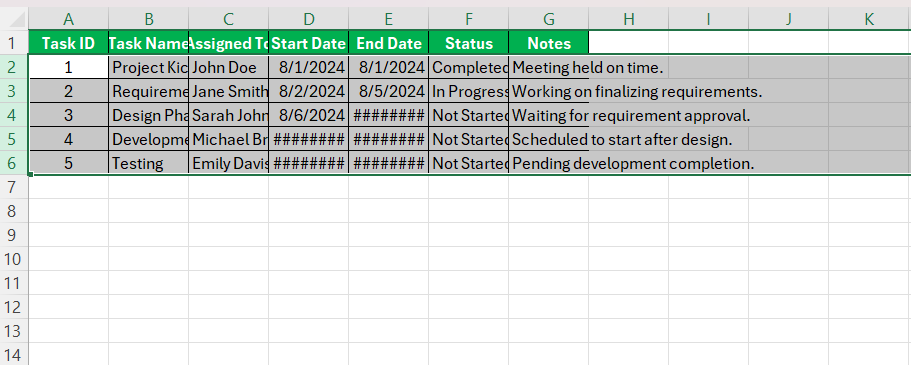
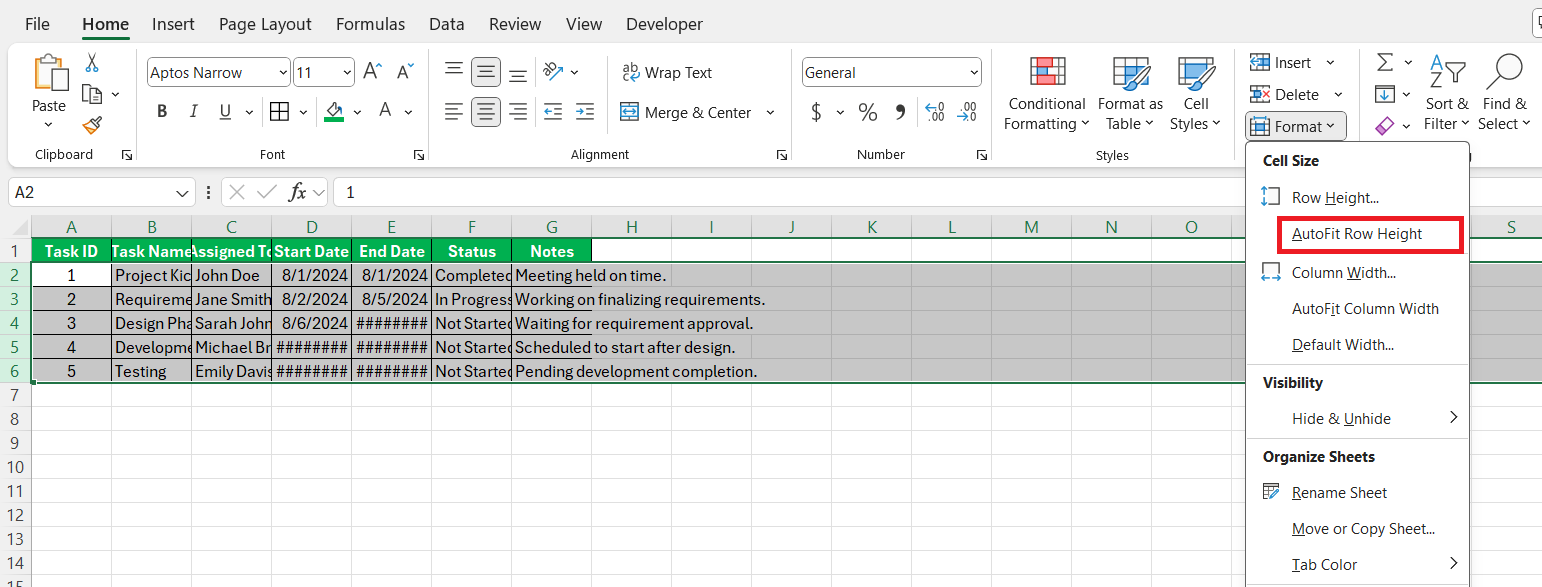
Adjusting row height with the AutoFit feature is a simple task as well. To start, I select the row or rows that I need to adjust.
I will click on the ‘Home’ tab and then select ‘Format’ and then ‘Autofit Row Height’.
Click on ‘Wrap Text’.
Voilà! The rows adjust automatically to accommodate the data.
Alternative Ways to Set Column and Cell Sizes
Manually Changing Column Width and Row Height
Should there come a need for more control over the dimensions within my spreadsheet, manually changing column widths and row heights is the way to go. Personally, I click on the right edge of the column header and then drag it to my desired width.
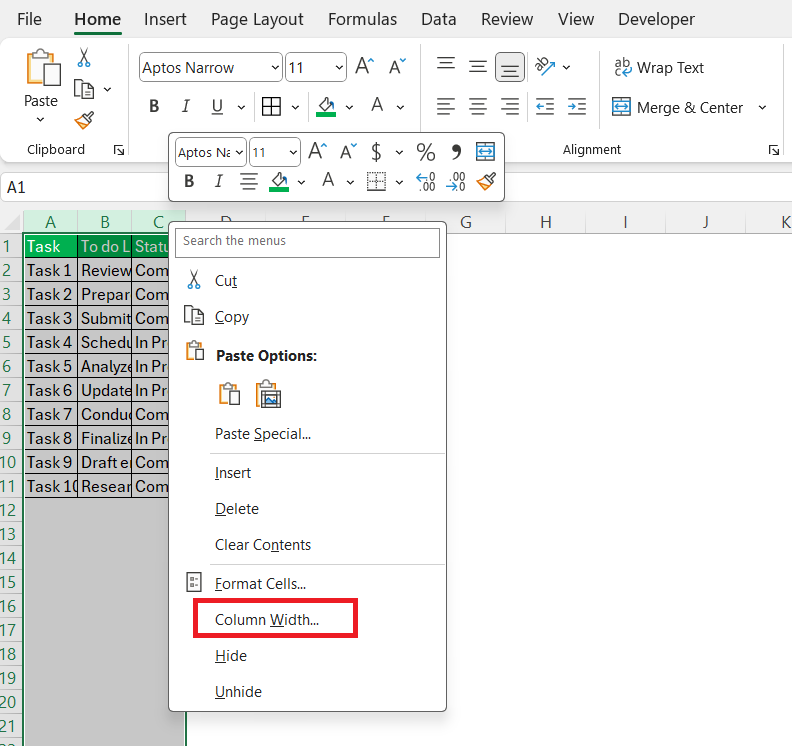
For row height, the bottom edge of the row header is the target, and similarly, I drag it to adjust the height as needed. For those who love precision, right-clicking a column or row and selecting ‘Column Width’ or ‘Row Height’ from the menu allows me to type in exact measurements – a blessing when uniformity is key.
Specifying Exact Dimensions for Columns and Cells
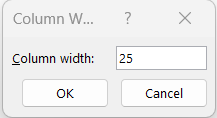
For cases when precision is paramount, specifying exact dimensions for columns and cells is the solution I rely on. It’s really straightforward: I first select the column or cell, then right-click and choose ‘Column Width’ or ‘Row Height’ from the context menu.
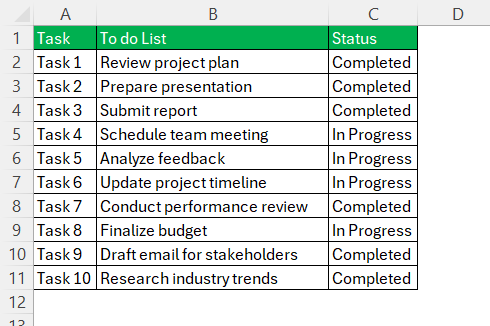
A dialogue box pops up where I enter the numerical value for the width or height in characters – it’s as exact as it gets.
This approach allows me to standardize the dimensions throughout the spreadsheet, ensuring that every cell aligns perfectly with my layout expectations.
Troubleshooting Common Excel AutoFit Issues
Dealing with AutoFit Limitations
Even a feature as useful as AutoFit has its limitations, and I’ve encountered a few along the way. For instance, AutoFit sometimes struggles with merged cells or cells containing certain types of formulas, leading to less-than-perfect adjustments.
I’ve learned to watch out for hidden characters or extra spaces that can throw off AutoFit, and if needed, I bypass AutoFit and switch to manual adjustments. A quick sweep through the spreadsheet to clean up these inconsistencies often allows AutoFit to work more effectively.
Solutions When Excel AutoFit Is Not Working
When encountering an uncooperative AutoFit, I’ve got a toolbox of solutions. It could be as simple as checking for excessive spaces or line breaks that are tripping it up. A more technical approach includes verifying that cell formatting isn’t obstructing AutoFit’s capabilities, such as a fixed column width or locked row height.
Sometimes, ensuring Excel is up to date or even conducting a repair of the installation solves deeper software issues. It’s about peeling back the layers of possible glitches to restore AutoFit’s functionality.
Accelerating Your Workflow with Shortcuts
Keyboard Shortcuts for Quick AutoFitting
I love using keyboard shortcuts for quick AutoFitting as they help me work with agility. To AutoFit column widths, pressing Alt+H, O, I one after the other does the trick – it’s like a magic spell for columns. And for rows, Alt+H, O, A gets the job done.
Remember, it’s not about pressing all keys at once; it’s a sequence. And, while this shortcut series works wonders on Windows systems, Mac users will have to indulge in the menu options or set up their own shortcuts. Utilizing these keystrokes allows me to move through large datasets at lightning speed.
Mouse Tricks for Faster Column and Row Adjustment
Getting accustomed to mouse shortcuts can transform the way I work with Excel. Double-clicking the border of a column or row header when the double-sided arrow cursor appears is the classic AutoFit shortcut. But for even faster adjustment, I select multiple rows or columns, right-click, and pick ‘AutoFit Column Width’ or ‘Row Height’ from the context menu to resize everything in one go.
For a real speed boost, dragging the edge of one selected column or row visually adjusts them all simultaneously. These mouse tricks help me blaze through formatting tasks with minimal effort.
FAQ: Excel AutoFit Insights and Tips
How do I open AutoFit in Excel?
To open AutoFit in Excel, click on the cell or select the range of cells you want to adjust, go to the ‘Home’ tab, click on ‘Format’ in the cells group, then choose either ‘AutoFit Column Width’ or ‘AutoFit Row Height’ from the dropdown menu. This will automatically resize the selected cells to fit their content.
How do you automatically resize all columns and rows to fit the data?
To automatically resize all columns and rows to fit the data, press Ctrl + A to select the entire worksheet, then double-click on any column boundary to AutoFit columns and double-click on any row boundary to AutoFit rows. Every column and row will adjust to fit their contents instantaneously.
Why isn’t my column width adjusting automatically in Excel?
If your column width isn’t adjusting automatically in Excel, there could be hidden characters or formatting issues. Check for extra spaces, line breaks, merged cells, or column width settings that might be preventing AutoFit from working correctly. Make sure to clean up any irregularities before trying to AutoFit again.
How can I copy a column’s width settings to another column?
To copy a column’s width settings to another, first copy a cell from the original column by right-clicking and choosing ‘Copy’ or pressing Ctrl + C. Then, right-click a cell in the destination column, select ‘Paste Special’, choose ‘Column widths’, and click ‘OK’. This will apply the copied width to the target column.
How to change the column width using a mouse?
To change the column width using the mouse, position the cursor on the right edge of the column header you want to adjust. The cursor will change to a double-sided arrow. Click and drag the border to your desired width, then release the mouse button. This manual method allows for quick visual adjustments on the fly.
John Michaloudis is a former accountant and finance analyst at General Electric, a Microsoft MVP since 2020, an Amazon #1 bestselling author of 4 Microsoft Excel books and teacher of Microsoft Excel & Office over at his flagship MyExcelOnline Academy Online Course.

