Multi select dropdown lists in Microsoft Excel enhance data management by allowing users to select multiple items from a single list, streamlining workflows and reducing errors. This feature is particularly beneficial for businesses, enabling quicker data entry and more accurate information categorization. By leveraging some basic programming skills, you can easily integrate this powerful tool into your Excel sheets.
Key Takeaways:
- Enhanced Efficiency in Data Processing: Multi-select dropdown lists allow for faster data entry, improving overall efficiency in handling large datasets.
- Reduction in Errors Due to Manual Entries: By reducing the need for repetitive manual data entry, multi-select dropdowns help minimize errors, ensuring data accuracy.
- Speedy Information Categorization and Filtering: These lists enable quick categorization and filtering of information, which can be particularly useful in complex data analysis tasks.
- Consistent Data Input Among Team Members: Multi-select dropdowns ensure uniform data entry across various team members, promoting consistency and reliability in data records.
- Bottleneck Mitigation Through Faster Decision-Making Processes: With quicker and more accurate data entry, businesses can make informed decisions faster, avoiding bottlenecks and improving workflow efficiency.
Table of Contents
Introduction to Excel Multi Select Dropdown Lists
The Power of Extended Selections in Excel
Excel is not just a spreadsheet; it’s a powerful tool for managing and analyzing a plethora of data. Imagine the convenience you could select multiple items from a dropdown list, rather than being limited to one at a time. Now, with a little programming prowess, you can unlock this feature, enhancing your Excel experience by leaps and bounds.
The Business Benefits of Using Multi Select Dropdown Lists
Multi select dropdown lists can revolutionize the way businesses handle data. They allow teams to record information more rapidly and with increased precision, which leads to improved decision-making. Picture a scenario where productivity spikes because employees are no longer bogged down by tedious manual data entry tasks—they simply click multiple relevant options and move on.
Integrating these lists can streamline workflow processes, especially when dealing with tasks that require selecting multiple criteria, like filtering through customer demographics or tracking project categories. The synchronous nature of the lists also ensures that everyone is on the same page, preventing the confusion that arises from inconsistent data inputs.
- Enhanced efficiency in data processing
- Reduction in errors due to manual entries
- Speedy information categorization and filtering
- Consistent data input among various team members
- Bottlenecks mitigation through faster decision-making processes
Integrating multi select dropdowns could be a game-changer for your business, bringing about efficiency and harmony in data management.
Setting Up the Data Validation Dropdown List
Prepare Your List of Options:
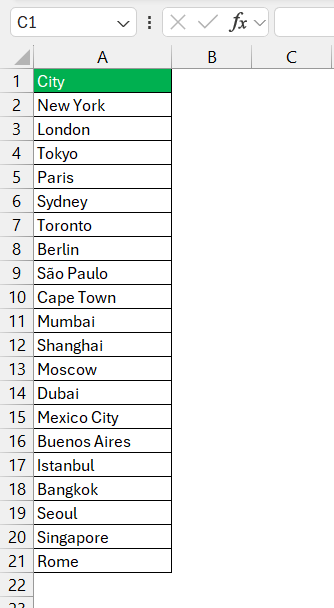
STEP 1: Create a list of options you want to include in the dropdown. Enter these options in a column on a separate sheet, preferably.
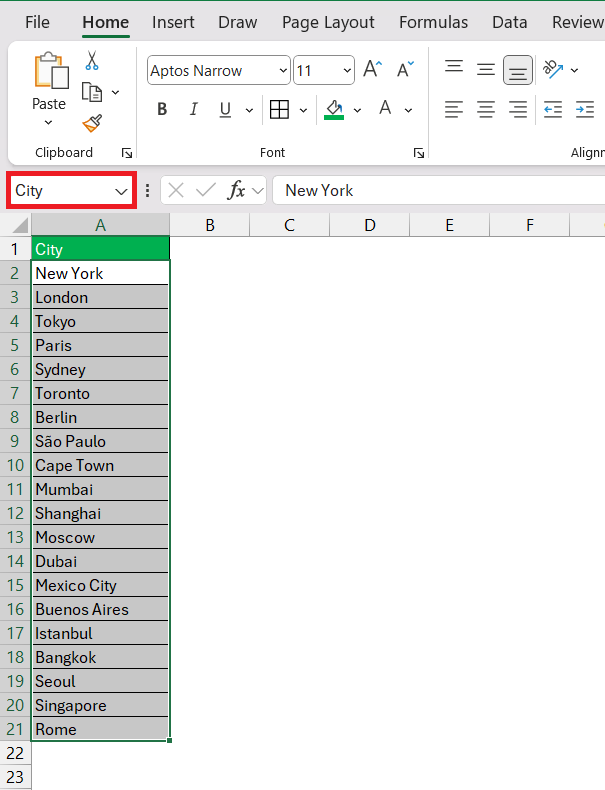
STEP 2: Select the list including the header and then go to the Formula tab and select “Create from selection’.
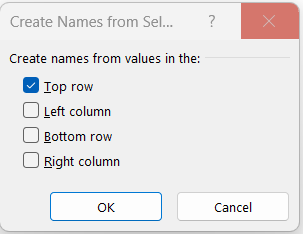
STEP 3: In the dialog box, select ‘Top Row’ and click OK.
The range will be named ‘City’.
Create the Dropdown List:
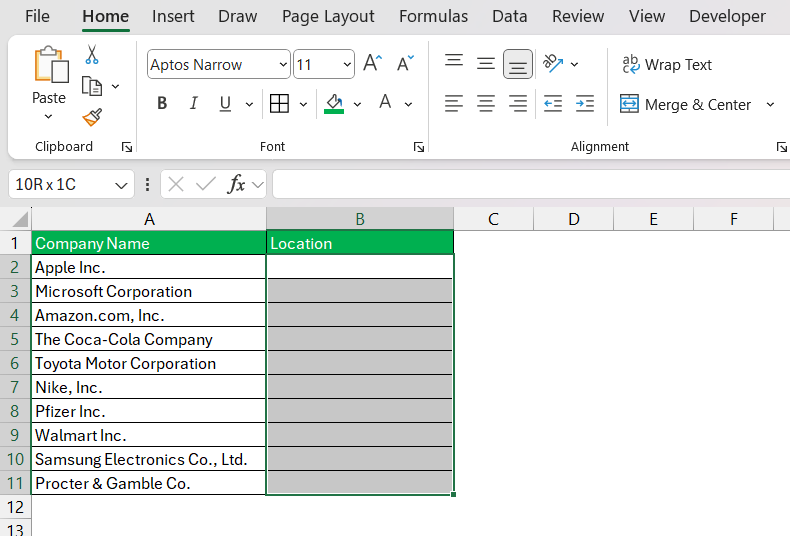
STEP 1: Select the cell or cells where you want the dropdown list to appear.
STEP 2: Go to the Data tab on the ribbon. Click on Data Validation in the Data Tools group.
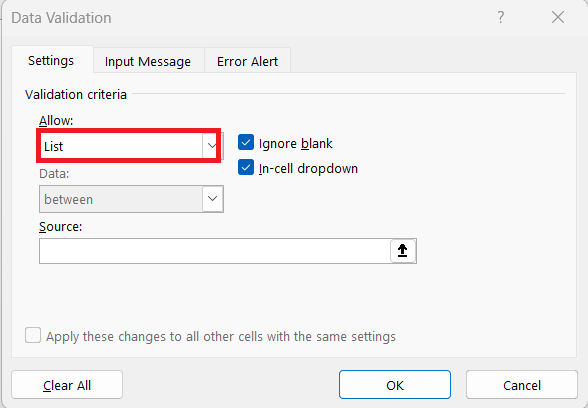
STEP 3: In the Data Validation dialog box, under the Settings tab, select List from the Allow dropdown.
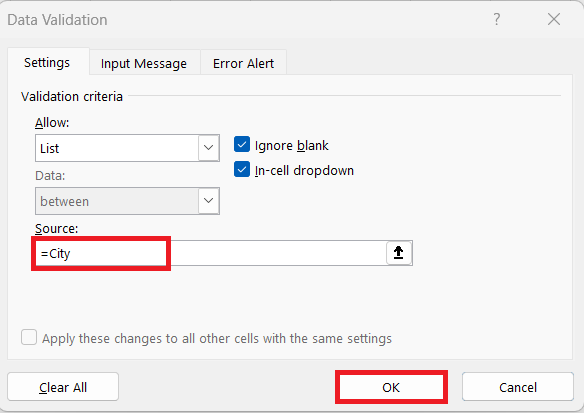
STEP 4: In the Source box, enter the name of your range (e.g., =City). Click OK.
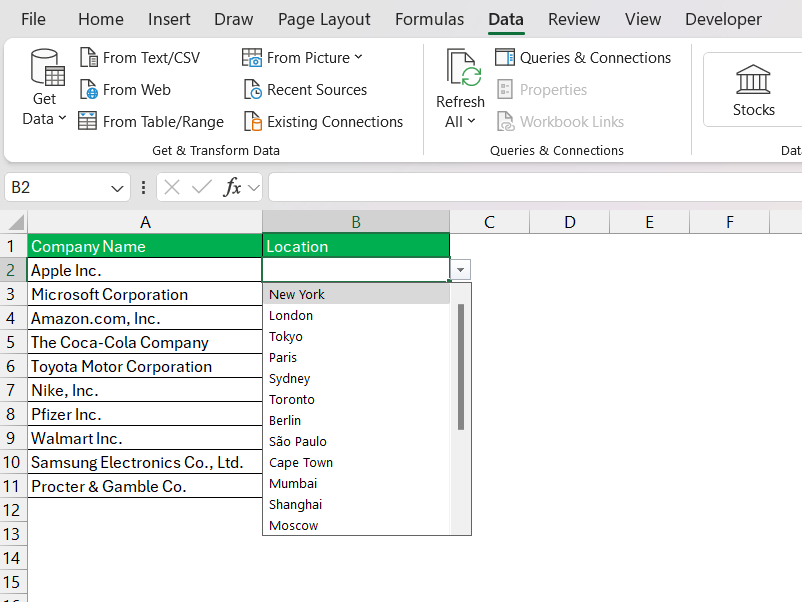
The dropdown will now have the list of cities mentioned in the range.
Creating Your Multi-Select Dropdown List in Excel
Step-by-Step Guide to Enabling Multi-Selection
Enabling multi-selection in Excel may sound complex, but it’s actually pretty straightforward, following these steps:
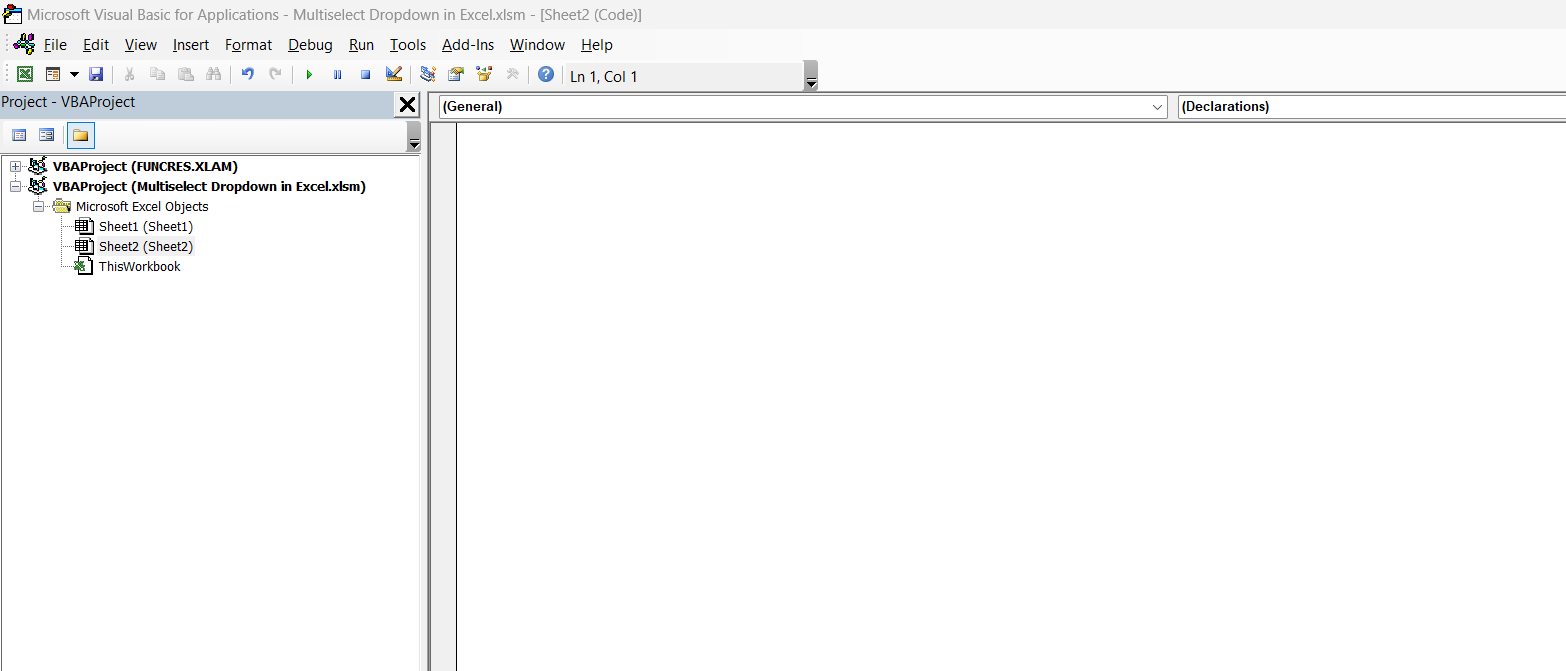
STEP 1: Press Alt + F11 to open the VBA Editor.
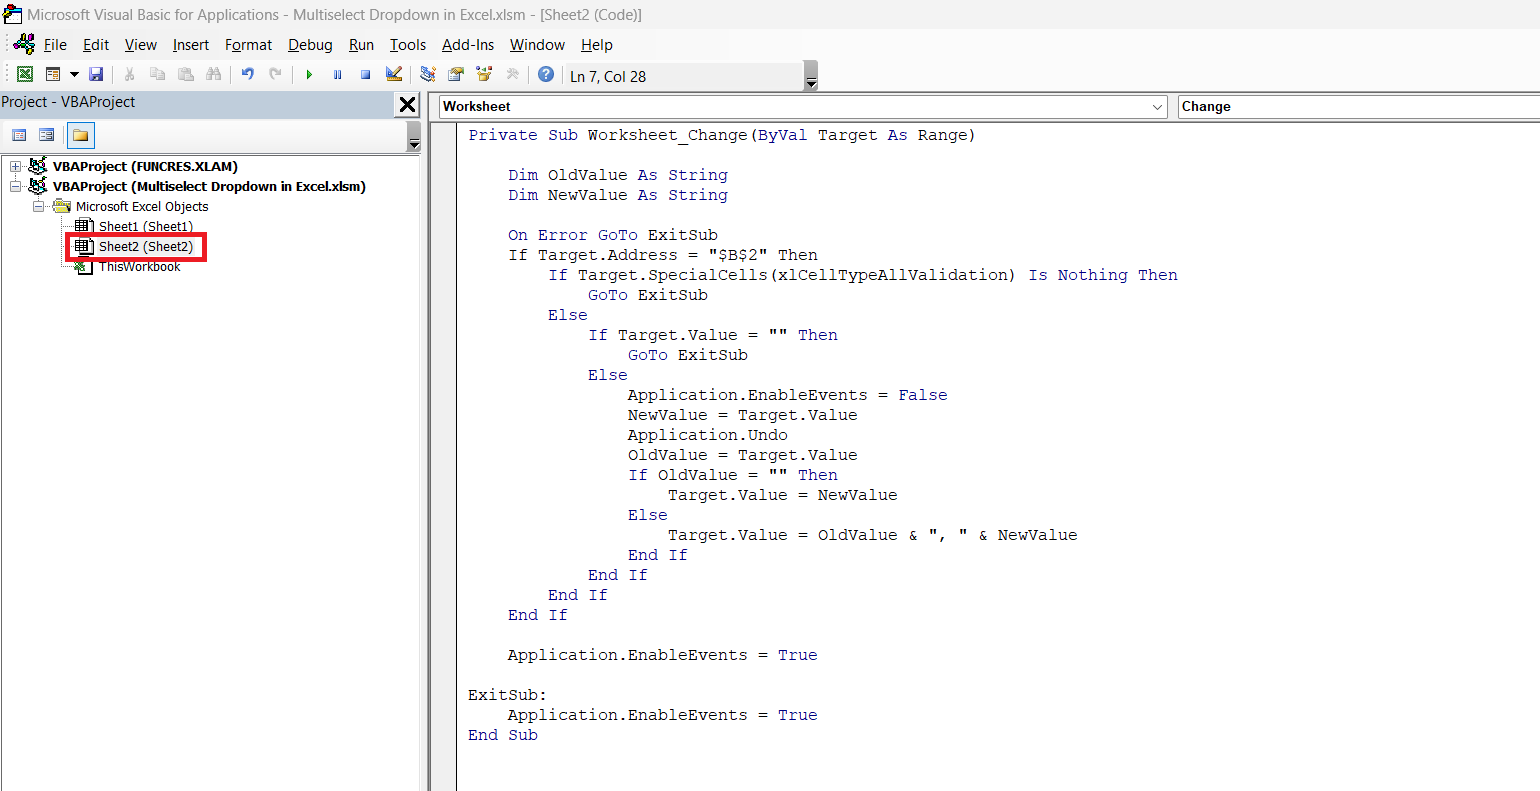
STEP 2: In the left panel of the VBA Editor, click on the worksheet where you want to use multi-select dropdown and paste the code –
STEP 3: Close the VBA Editor by clicking the X in the upper right corner or pressing Alt + Q.
And Voila!
Tips and Tricks for Efficient Dropdown Management
Managing a multi-select dropdown list efficiently is all about knowing the right shortcuts and tricks:
- Use Named Ranges: Define a named range for your list items to make managing and updating your list a breeze.
- Enable In-Cell Dropdown: Always ensure that the ‘In-cell dropdown’ option is enabled in ‘Data Validation’ settings for a smoother experience.
- Keep Your List Compact: Aim for conciseness to avoid overwhelming users—use subcategories if necessary.
- Regularly Update Your Lists: Keep your dropdown selections relevant by updating them periodically to reflect current data or choices.
- Utilize Keyboard Shortcuts: Keyboard shortcuts can save a lot of time. For example, use ‘Ctrl’ to select multiple non-adjacent items from your list.
A few handy tricks up your sleeve can turn dropdown list management from a chore into a quick, satisfying tick-off on your to-do list.
FAQs – Mastering Excel Multi-Select Dropdowns
Can You Create a Multi-Select Dropdown Without VBA?
Can you make multi-select dropdown lists without VBA in Excel? Sure, but it’s not straightforward. Excel’s built-in data validation feature allows just one selection. However, there are alternative methods like using ActiveX controls such as list boxes. This enables multi-selection but comes with its own limitations and isn’t as seamless or user-friendly as VBA-enhanced dropdowns. For a no-code approach, consider Excel’s filter functionality or pivot tables for multi-criteria data sorting, which can somewhat mimic multi-selection behavior in a different context.
How Do You Preserve the Multiple Selections After Closing Excel?
To keep your multi-selections intact after closing Excel can be tricky but here’s the scoop. With VBA, selections in a dropdown list are typically stored within the cell as a text string. When you save and close the workbook, this text string remains. So, when you open the workbook again, your multi-selections will be as you left them—preserved in the cell. It’s all about ensuring that your VBA script is set up to handle the storage and retrieval of these text entries between sessions. Always save your workbook in a macro-enabled format (.xlsm) to keep the VBA magic alive.
How do I multi select a drop down?
To multi-select in a dropdown list in Excel, you usually need a little VBA code wizardry. Here’s the broad stroke of how you’d do it:
- Enable ‘Developer’ mode to access VBA editor features.
- Navigate to the VBA editor by pressing
Alt + F11. - Insert the appropriate VBA code into the code window of your desired worksheet.
- Adjust the code parameters as needed to ensure it targets the right dropdown.
- Save your workbook as a macro-enabled file to preserve the functionality.
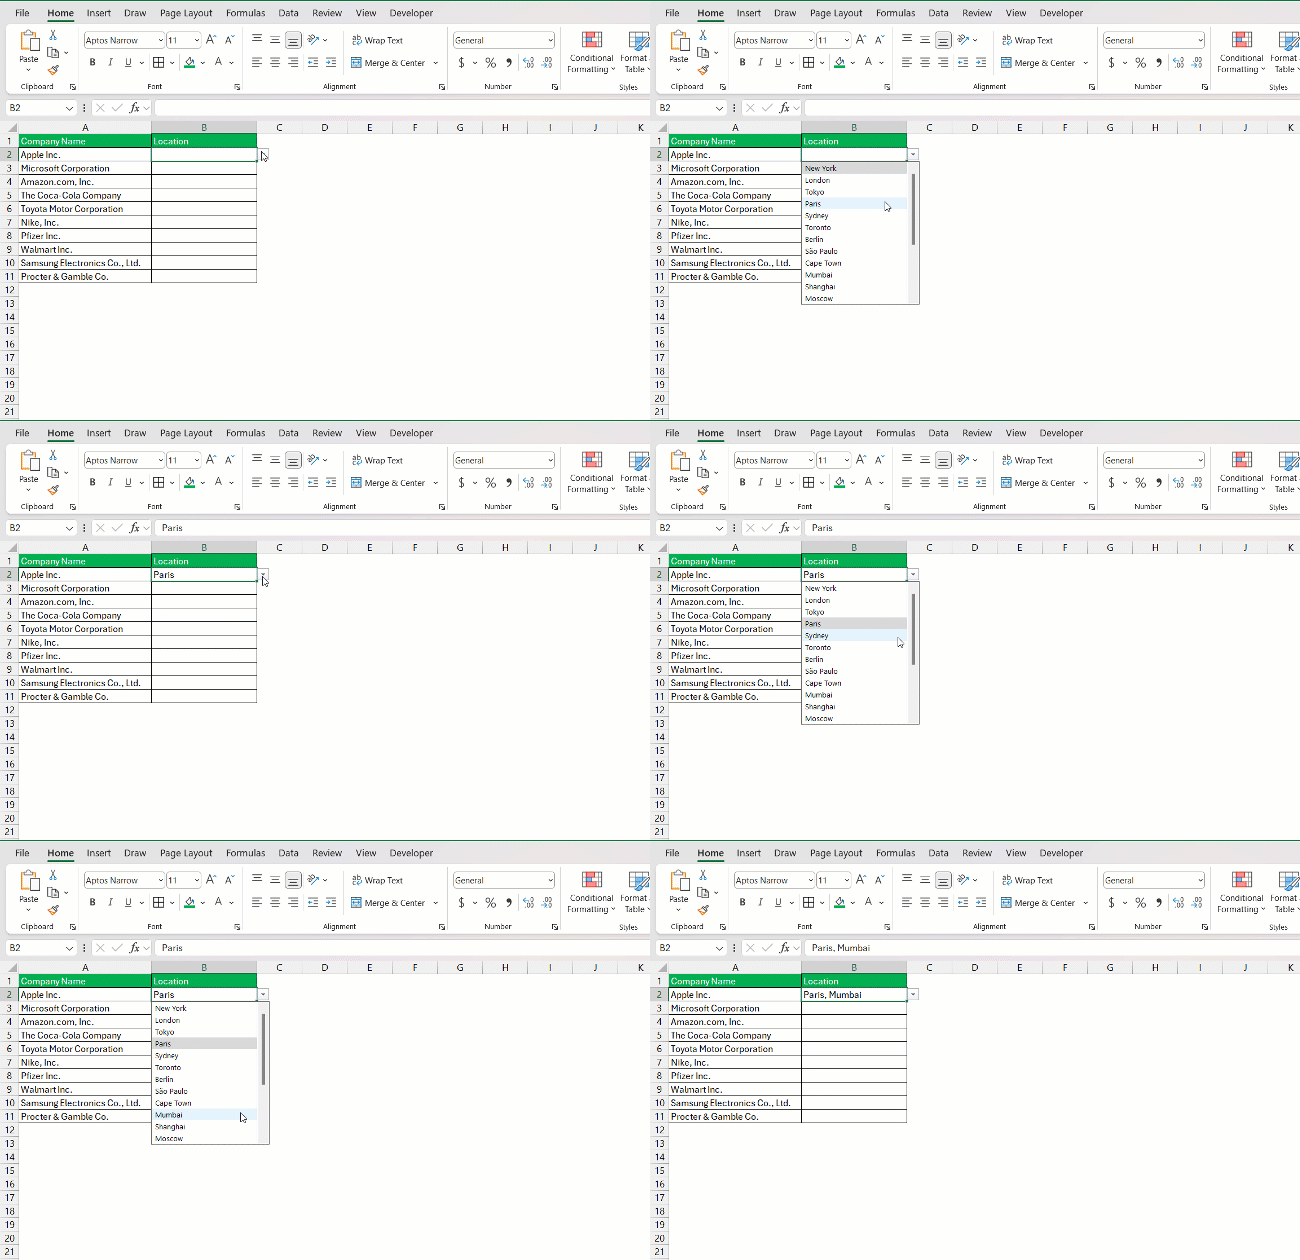
When done correctly, you should be able to click on your dropdown and select multiple options by holding down the Ctrl key and click your desired choices. The cell will then display your selections, typically separated by commas.
How to create a multi select dropdown in Excel?
To craft a multi select dropdown in Excel, dive into these detailed steps and give your dropdown superpowers:
- Initiate Data Validation: Define the dropdown’s source data by selecting ‘Data Validation’ from the ‘Data’ tab, choosing ‘List’, and referencing your data set.
- Access the VBA Editor: Press
Alt + F11to bring up the VBA editor, where you’ll input the code that does the heavy lifting. - Paste VBA Code: In the left pane, right-click the sheet you’re working on, select ‘View Code’, and paste in the VBA code tailored for multiselection.
- Customize the Script: Adapt the script, making sure it’s designed for your specific cell range and requirements, such as preventing duplicates.
- Save with Macros: Hit ‘Save As’, and opt for the ‘.xlsm’ format—a must to keep your VBA code intact.
Now when you activate the dropdown and pick your choices, each one compounds into the cell without erasing the previous ones, all neatly compartmentalized by your choice of delimiter, typically a comma.
John Michaloudis is a former accountant and finance analyst at General Electric, a Microsoft MVP since 2020, an Amazon #1 bestselling author of 4 Microsoft Excel books and teacher of Microsoft Excel & Office over at his flagship MyExcelOnline Academy Online Course.

