Leading spaces in Microsoft Excel can cause significant disruptions, affecting searches, sorting, and the functionality of formulas. Particularly in large datasets, detecting and eliminating these spaces manually is nearly impossible. Ensuring clean data is crucial for accurate analysis and reporting, making tools like the TRIM function and the Find and Replace tool invaluable. In this article, we will cover different ways to Excel remove leading spaces.
Key Takeaways:
- Impact of Leading Spaces: Leading spaces can hinder searches, sorting, and the functionality of formulas in Excel, complicating data management and analysis.
- TRIM Function: The TRIM function efficiently removes leading and trailing spaces from data, ensuring clean and accurate datasets.
- Find and Replace Tool: This tool allows for the quick removal of unwanted spaces, including advanced techniques for tackling multiple or non-breaking spaces.
- Data Validation: Prevents the entry of leading spaces by setting up rules, maintaining data integrity from the outset.
- Combination Strategies: Using TRIM with CLEAN or SUBSTITUTE functions provides a comprehensive approach to managing spaces and non-printing characters in Excel.
Table of Contents
Introduction to Streamlining Excel Data
The Troubles with Leading Spaces
Leading spaces in Excel can sneak up on you like a keyboard ninja, causing all sorts of mayhem. They can mess up your searches, affect sorting, and completely derail formulas that were supposed to make you look like a number-crunching superstar.
Especially when you’re working with large datasets, picking out those pesky spaces with your eyes is about as effective as finding a needle in a haystack.
Importance of Clean Data in Excel
Let’s be real, nobody enjoys data that’s as messy as a teenager’s bedroom. Clean data in Excel isn’t just about looking pretty; it’s like the foundation of a building, crucial for stability and functionality. When your Excel data is sparkly clean—free from the clutches of leading spaces—it ensures the accuracy and reliability of your analysis and reports.
This is particularly essential when performing complex calculations or feeding information into pivotal business decisions. Plus, it keeps your sanity in check because well-formatted data is just easier to navigate and understand. Remember, clean data is happy data!
Dive into the TRIM Function
How Does the TRIM Function Work?
Think of the TRIM function as your personal Excel barber—it snips off all the spaces you don’t want: the space before the first character of a string, all those taking up unnecessary space between words, and any stragglers at the end.
All you need to do is give TRIM a reference to the cell in need of a tidy-up, and voilà, it’s as neat as a new pin. But there’s a catch—it won’t touch single spaces between words; those are considered necessary for readability.
Using the TRIM Function to Excel Remove Leading Spaces
Wave goodbye to those annoying leading spaces with the TRIM function—it’s your trusty sword in the battle against cluttered data. Simply type =TRIM(A1) into a new cell next to your data, and treasure watch how those leading spaces vanish into thin air. Drag down this magical formula using the fill handle, and your entire column will align with your neatness standards.
Discovering the ‘Find and Replace’ Tool
Step-By-Step: Removing Leading Spaces with Find and Replace
Say you’re up to your eyeballs in digits, and the spaces between them are playing hide-and-seek. No worries, just summon the ‘Find and Replace‘ wizard in Excel:
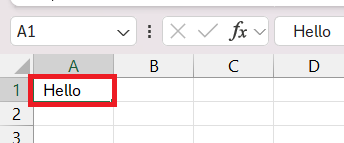
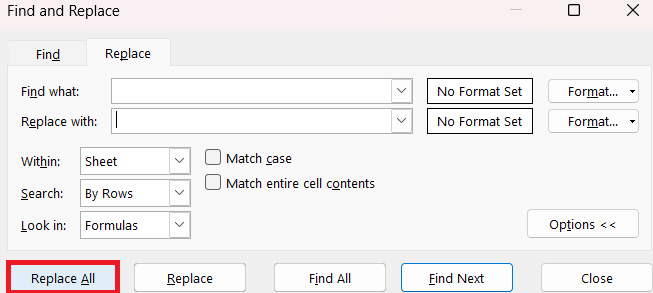
STEP 1: Select the cells you want to de-space.
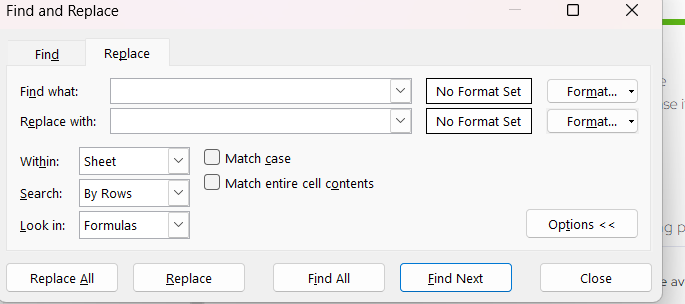
STEP 2: Unleash the shortcut Ctrl + H to bring up ‘Find and Replace’ like a genie from a bottle.
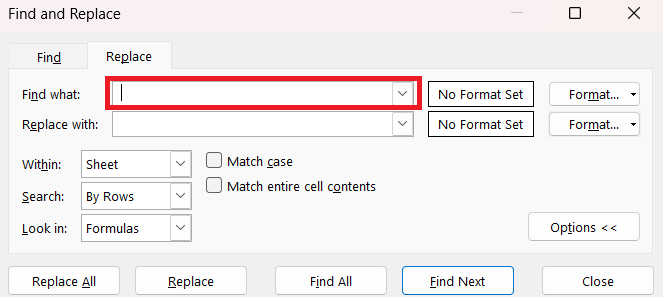
STEP 3: In the ‘Find what’ box, type a single space – that’s your target.
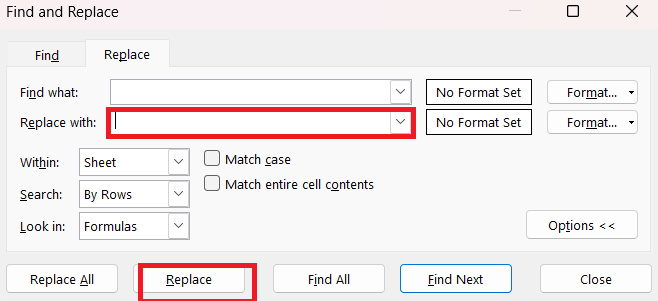
STEP 4: Leave the ‘Replace with’ field emptier than a ghost town.
STEP 5: Hit ‘Replace All’ and watch the spaces disappear faster than a plate of cookies at a kids’ party.
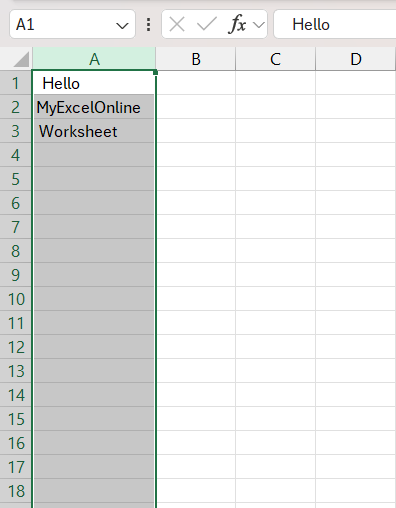
And that’s it! You’re now a space-removing ninja, and your data is as neat as a row of dominos.
Advanced Find and Replace Techniques for Space Management
Roll up those sleeves; it’s time to dive deep into Excel’s Find and Replace with a couple of advanced maneuvers:
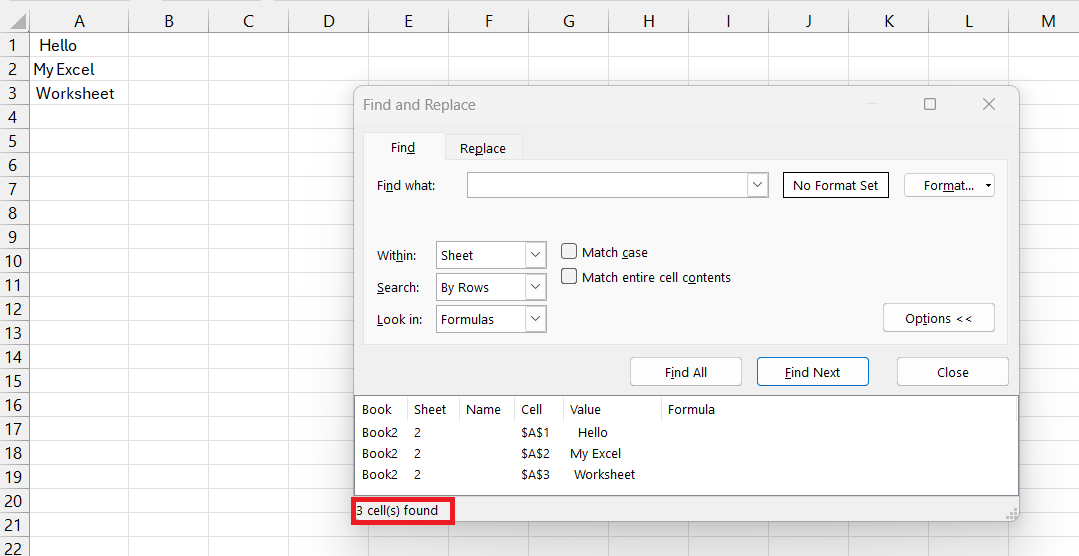
- Counting spaces: Use
Ctrl + Hto bring up Find and Replace. In the ‘Find what’ field, enter a space and hit ‘Find All’. A list appears telling you how many spaces are lurking in the shadows.
- Tackling multiple spaces: To remove sneaky doubles or more, type two spaces in ‘Find what’, and one space in ‘Replace with’. Keep hitting ‘Replace All’ until Excel has no more spaces to report.
- Zapping non-breaking spaces: These spaces are like the double agents of the space world. To catch them, in ‘Find what’, type
Alt + 0160using the numeric keypad, leave ‘Replace with’ blank, then send them into the void with ‘Replace All’.
After these steps, your data will be as sharp as a tack and ready for the limelight.
Extra Methods for Impeccable Data
Utilizing Data Validation for Space-Free Entries
Prevent future chaos by setting up a no-fly zone for leading spaces as you type. Data Validation is like the bouncer at the entrance of your spreadsheet cells, ensuring no unwanted leading spaces slip through. Here’s the lowdown:
STEP 1: Go where the action is: the cell or range where you want to stop spaces at the door.
STEP 2: Hit ‘Data’ on the Excel ribbon and pick ‘Data Validation.
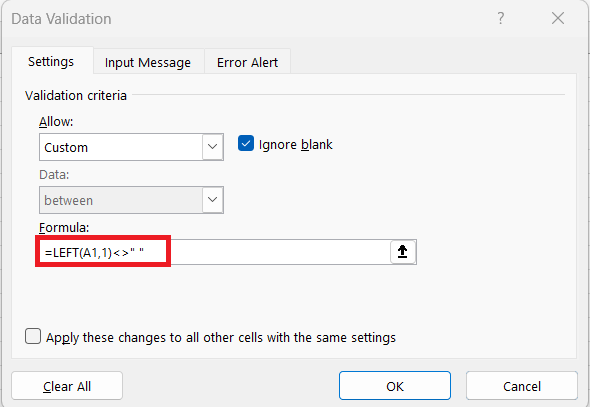
STEP 3: Go to the ‘Settings’ tab, and select ‘Custom’ from the ‘Allow’ dropdown menu. Into ‘Formula’, drop this code: =LEFT(A1,1)<>" " to tell Excel: “Hey, no spaces at the beginning, please.”
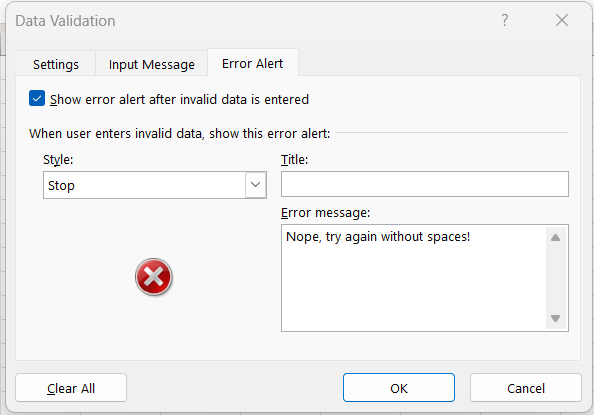
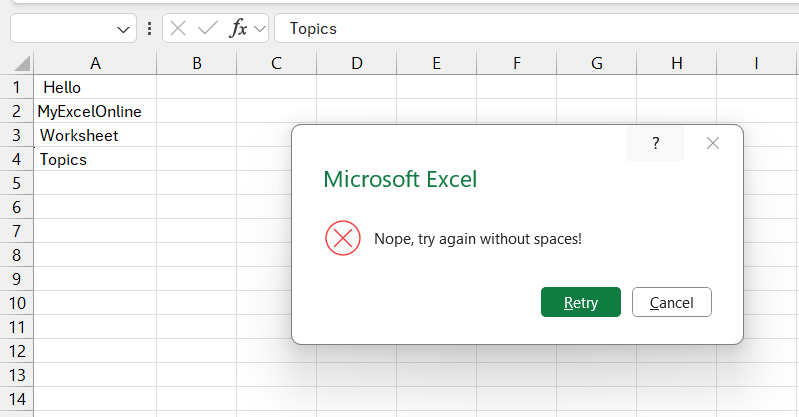
STEP 4: On ‘Error Alert’, set the style to ‘Stop’ and type an error message that says something like, “Nope, try again without spaces!”
With this setup, anytime someone tries to type in a space first, Excel will basically say, “Not on my watch!”
Combination Strategies for Rigorous Cleaning
Merging TRIM with CLEAN for Ultimate Results
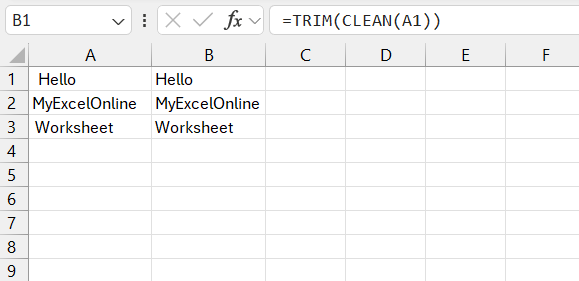
Join the tag team of TRIM and CLEAN and get ready to tag-team those dirty cells into submission. While TRIM grabs those pesky leading and trailing spaces, CLEAN enters the ring to wrestle away the invisible, non-printing characters that could be crashing your data party. Here’s how they work together:
Create a new, clean cell with this formula: =TRIM(CLEAN(A2)).
The CLEAN function tags in first, wiping out non-printing characters, then TRIM swoops in to tidy up any remaining spaces. The result? Data so clean, you could eat off it.
Dealing with Non-Breaking Spaces Effectively
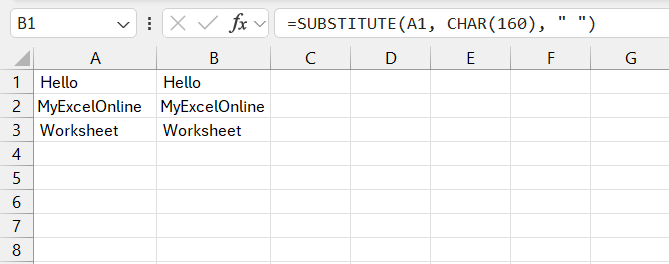
Dealing with non-breaking spaces can feel like a game of whack-a-mole you didn’t sign up for, but fear not—the SUBSTITUTE function is here to save the day. They may be invisible to the naked eye, pretending they’re not there, but your formulas can see them, and frankly, they’re not fans.
- Spot them by their character code, which is 160.
- Pull up your formula:
=SUBSTITUTE(A2, CHAR(160), " ")to swap non-breaking spaces with regular spaces.
Commit this to memory, or save that somewhere handy, and handling non-breaking spaces will be a breeze.
Practical Tips for Maintaining Pristine Excel Sheets
How to Check for and Count Spaces in Excel
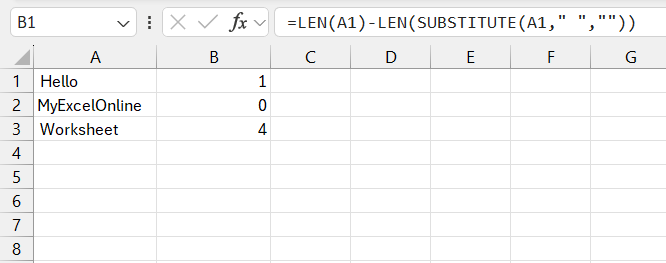
Want to play detective with spaces in Excel? Let’s count the clues. You can use the trusty LEN function to tally up all characters in a cell, and then subtract the count without spaces. Here’s the sleuthing formula: =LEN(B2)-LEN(SUBSTITUTE(B2," ","")).
This little gem calculates the total length of the string, then deducts the length sans spaces to tell you exactly how many spaces are in there, hiding in plain sight.
Preventing Future Issues with Leading Spaces
Let’s make sure those sneaky leading spaces don’t gatecrash your Excel party again. Here are some preventive measures:
- Embrace the habit of using the TRIM function right off the bat—make it a part of your initial data processing routine.
- Educate users entering data manually about the importance of consistency and caution, like a mother bird teaches her chicks to fly.
- Implement data entry protocols using techniques like Data Validation, as mentioned previously, so Excel itself will gently slap the wrist of anyone trying to lead with spaces.
FAQ About Managing Leading Spaces in Excel
Q1. How accurate is removing leading spaces in Excel?
If you use tools like the TRIM, CLEAN, and SUBSTITUTE functions or Find and Replace, removing leading spaces in Excel is very accurate. These functions specifically target and eliminate unwanted spaces, maintaining the integrity of your data.
Q2. How complex is it to remove leading spaces in Excel?
Removing leading spaces in Excel is straightforward, even for beginners. With functions like TRIM and the Find and Replace feature, you can easily automate the process without needing complex skills.
Q3. Would removing leading spaces cause errors?
No, removing leading spaces correctly in Excel usually doesn’t cause errors. However, if spaces serve as placeholders or are part of the formatting consistency, removing them could potentially lead to confusion or misalignment in the data set. Always double-check to ensure the removal aligns with your data’s formatting needs.
Q4 .How do I remove leading spaces in Excel without trim?
To remove leading spaces without TRIM, you can use the Find and Replace feature by searching for a space and leaving the replace field empty. Alternatively, employ Data Validation to prevent spaces or write a VBA script for precise control.
Q5. Do removing leading spaces help officers improve efficiency?
Yes, removing leading spaces helps officers and anyone using Excel improve efficiency by ensuring data accuracy, making it easier to sort and filter through the data for analysis and reporting. This saves time and reduces the risk of errors.
John Michaloudis is a former accountant and finance analyst at General Electric, a Microsoft MVP since 2020, an Amazon #1 bestselling author of 4 Microsoft Excel books and teacher of Microsoft Excel & Office over at his flagship MyExcelOnline Academy Online Course.


