As an avid Excel user, I’ve often found myself needing to manage the amount of data displayed on my spreadsheets. Whether it’s to improve readability, simplify data entry, or ensure that my data conforms to certain constraints, limiting the number of rows in Excel can be a lifesaver. In this article, I’ll walk you through a few methods to effectively limit the number of rows in your Excel worksheets.
Key Takeaways:
- Excel Row Limits: Excel can handle up to 1,048,576 rows, offering substantial capacity for data management.
- Version-Specific Limits: Excel 2003 and earlier versions are limited to 65,536 rows, while versions from Excel 2007 onwards support up to 1,048,576 rows.
- Hiding Rows: Simplify data visibility by hiding unused rows, making your spreadsheet easier to navigate and manage.
- Using VBA: Advanced users can write VBA macros to dynamically limit the number of rows, providing more control over data presentation.
- Handling Large Datasets: For datasets exceeding Excel’s row limit, consider using Power Query, external data sources, or other data management tools like R and Python.
Table of Contents
Unlocking the Mystery of Excel Row Limits
Understanding Excel’s Capacity
When I dive into the realms of data, Excel stands as my stalwart companion, offering a seamless grid of rows and columns to organize my data. It’s vital for me to know just how much data Excel can handle. Within the boundaries of a single worksheet, Excel can manage a staggering 1,048,576 rows. I imagine that as a bustling city of information, each row a house for my data, stretching into the horizon.
Version-Specific Row Restrictions
As with any good story, the tale of Excel’s row limits varies with each version. If I’m journeying through the historical archives with older software like Excel 2003 or before, I’d find myself confined to 65,536 rows. However, moving up the timeline to versions from Excel 2007 and beyond, including Microsoft 365, I’m bestowed with a more expansive playground, accommodating up to 1,048,576 rows and 16,384 columns.
Excel’s evolution has seen continual growth in its data capacity, aiming to match the accelerating size of datasets I must manage. The quantum leap from the .xls format of old to the .xlsx format of modern Excel is a testament to this progression.
How to Excel Limit Row
Method 1: Hiding Unused Rows
One of the simplest ways to limit the number of rows in Excel is by hiding the rows you don’t need. Here’s how I do it:
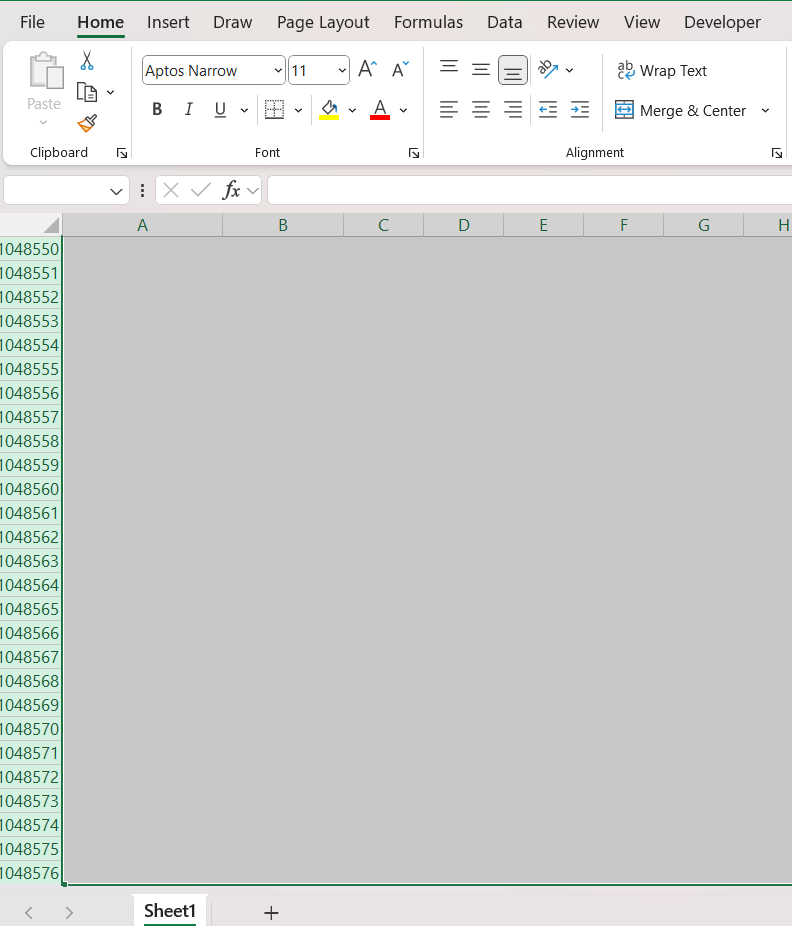
STEP 1: Select the Rows: First, I select the rows I want to hide. If I want to limit my worksheet to the first 50 rows, I’ll click on the row number 51 to select it, then hold down the Shift key and press the End key followed by the Down Arrow key to select all rows to the end of the worksheet.
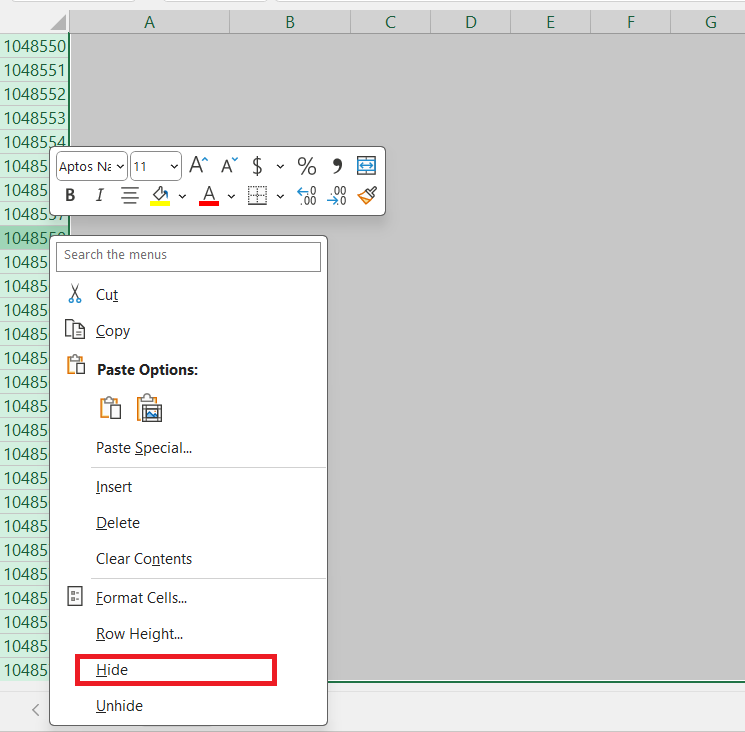
STEP 2: Hide the Rows: With all the unwanted rows selected, I right-click on one of the selected row numbers and choose “Hide” from the context menu. This hides all the selected rows, effectively limiting the visible rows to the first 50.
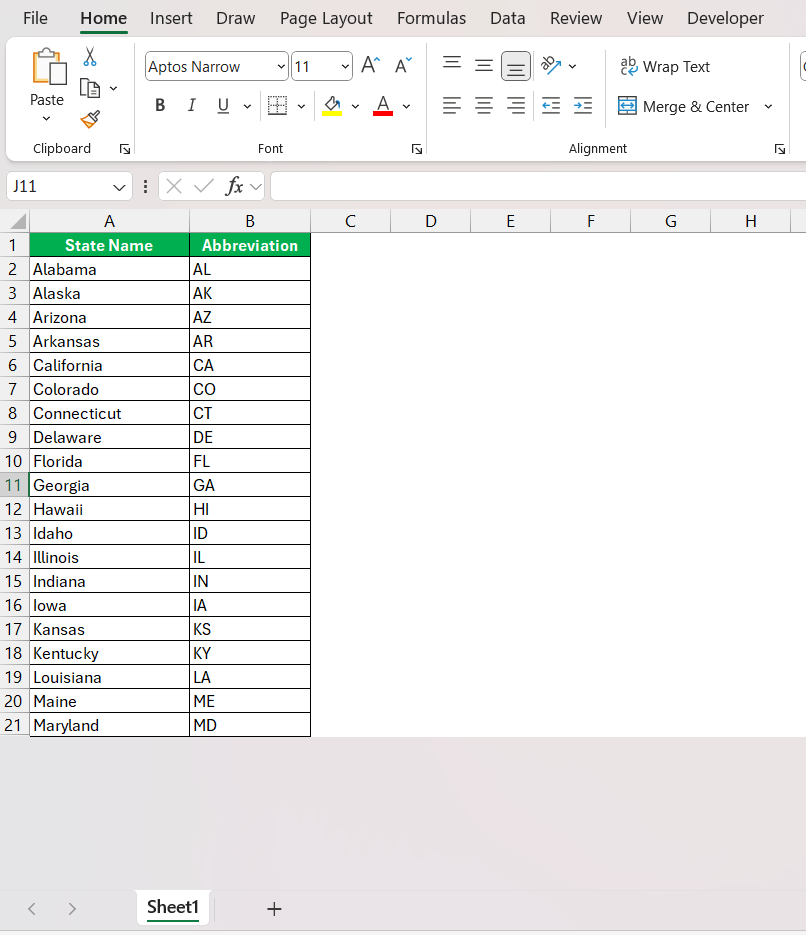
The extra rows will be hidden.
Method 2: Using VBA
For more advanced control, I often turn to VBA (Visual Basic for Applications). This method allows me to write a macro that can limit the number of rows dynamically:
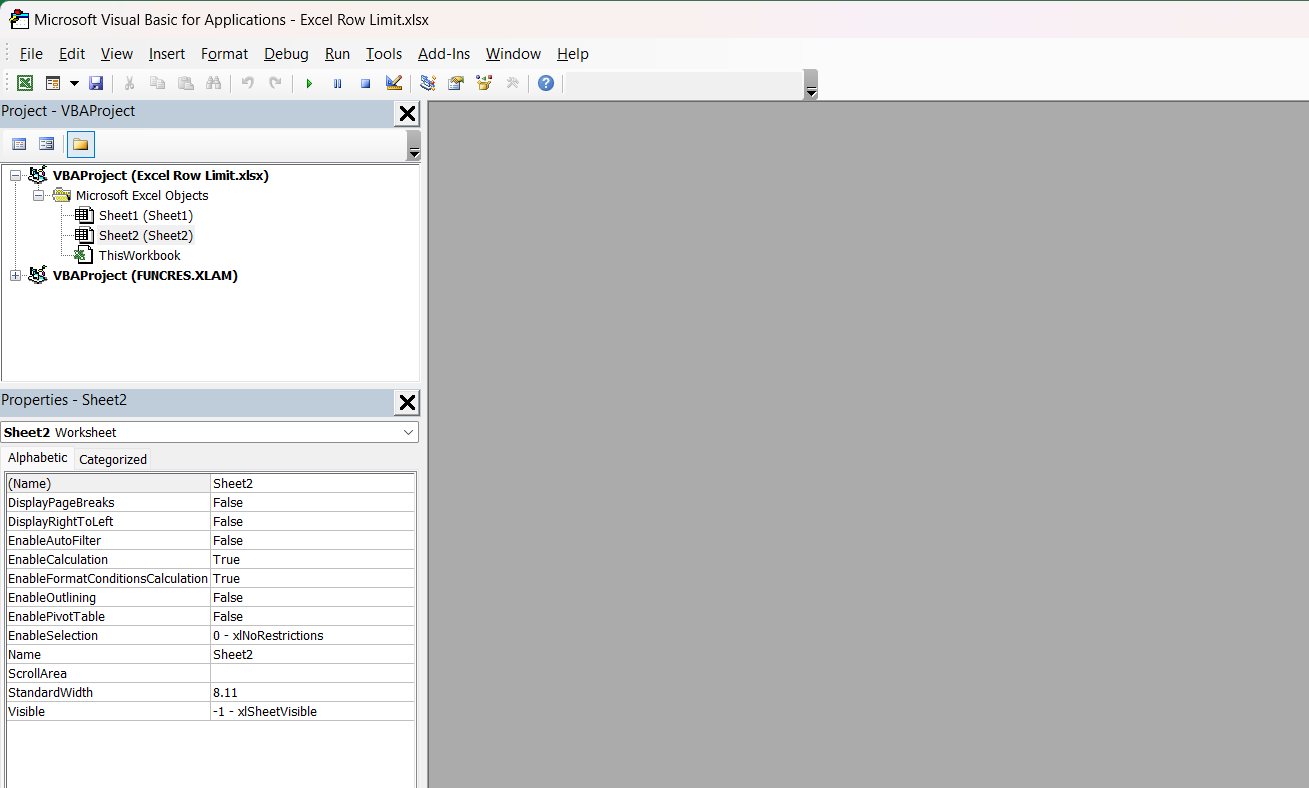
STEP 1: Open the VBA Editor: Press Alt + F11 to open the VBA Editor.
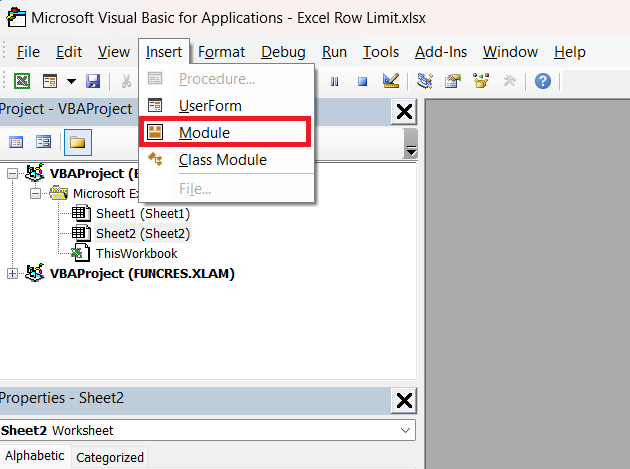
STEP 2: Insert a New Module: In the VBA Editor, go to “Insert” > “Module” to create a new module.
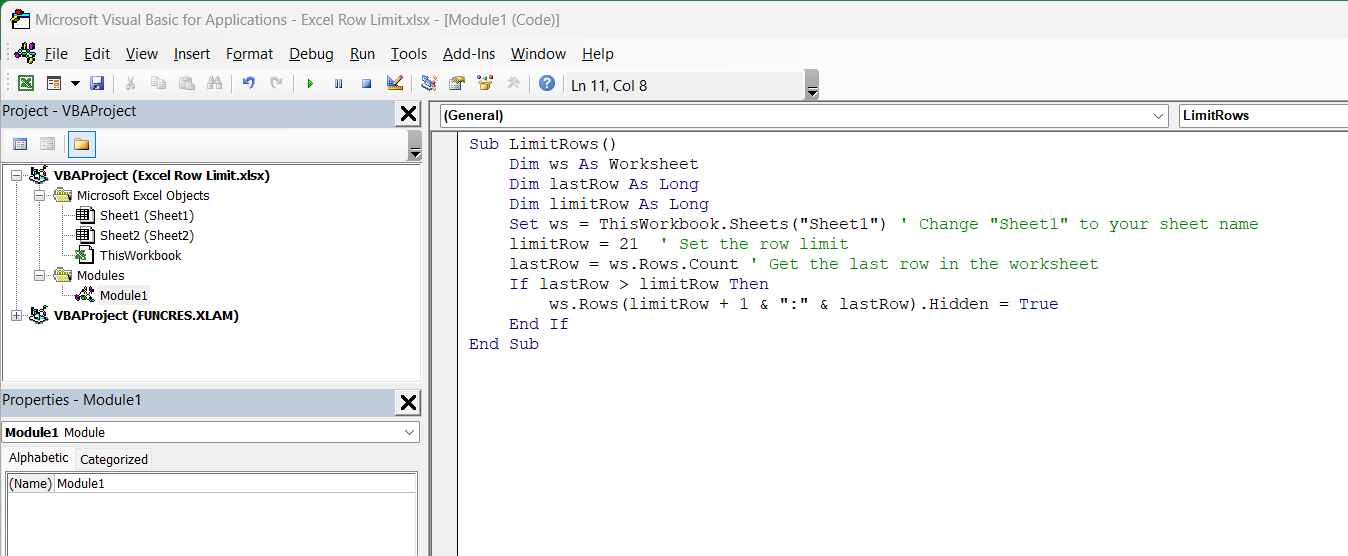
STEP 3: Write the Macro: In the module, write a macro to delete rows beyond a certain limit. Here’s an example macro that limits the worksheet to 20 rows:
ub LimitRows()
Dim ws As Worksheet
Dim lastRow As Long
Dim limitRow As Long
Set ws = ThisWorkbook.Sheets("Sheet2") ' Change "Sheet1" to your sheet name
limitRow = 21 ' Set the row limit
lastRow = ws.Rows.Count ' Get the last row in the worksheet
If lastRow > limitRow Then
ws.Rows(limitRow + 1 & ":" & lastRow).Hidden = True
End If
End Sub
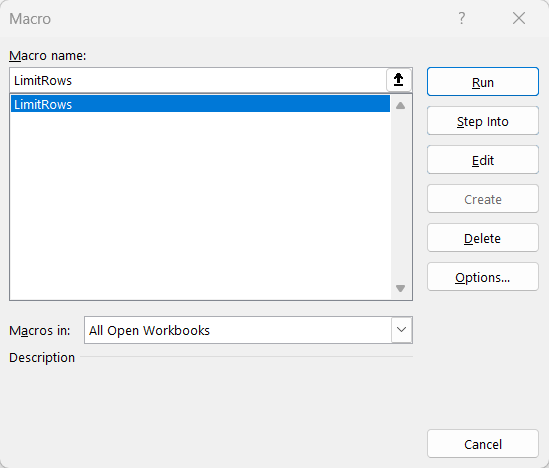
STEP 4: Run the Macro: Run this macro by pressing F5 while in the VBA Editor, or assign it to a button or a shortcut key for easy access.
By using one of these methods, I can effectively limit the number of rows in my Excel worksheets to ensure better data management and presentation. Each method has its own advantages, so I choose the one that best fits my needs for a particular project. Whether I’m hiding rows, using data validation, or writing a VBA macro, these techniques help me keep my spreadsheets organized and efficient
Frequently Asked Questions
Does Excel have a row limit?
Yes, Excel does have a row limit. The maximum number of rows you can have in a single worksheet is 1,048,576, starting from Excel 2007 onwards, including Microsoft 365. Prior versions, like Excel 2003, have a lower limit of 65,536 rows.
What triggers Excel’s row limit error?
Excel’s row limit error is triggered when you attempt to insert or import more data than the maximum number of allowable rows in a worksheet. If your data surpasses 1,048,576 rows in modern versions (from Excel 2007 and later), Excel either truncates the excess data or displays an error message, preventing any further row additions.
Why is there a row limitation?
There’s a row limitation in Excel because it ensures the program can run efficiently on a wide array of hardware and maintain good performance. Despite its many features, Excel isn’t designed to handle the massive, machine-generated logs or databases that specialized software can manage. If unlimited rows were allowed, performance could severely degrade, potentially leading to hangs or crashes as Excel struggles with the enormity of data. The cap on rows is a balancing act between utility and usability.
Can the row limit be extended or bypassed within Excel?
You can’t extend Excel’s inherent maximum row limit, as it is a fixed part of the program’s structure. However, you can bypass it in practice by using features like Power Query to manage and summarize large datasets, or by linking to external data sources rather than importing all data into the worksheet. These methods allow you to work with data that exceeds the row limit, without overwhelming Excel’s capabilities.
How to work with datasets larger than the Excel row limit?
When dealing with datasets larger than Excel’s row limit, consider splitting the data across multiple worksheets or using Power Query to import and analyze data in chunks. Database management systems or programming languages like R and Python also come in handy for sizable datasets. Alternatively, linking to an external data source allows you to work with large datasets without importing them entirely into Excel. Always ensure that your approach aligns with the dataset’s size and your analysis needs.
John Michaloudis is a former accountant and finance analyst at General Electric, a Microsoft MVP since 2020, an Amazon #1 bestselling author of 4 Microsoft Excel books and teacher of Microsoft Excel & Office over at his flagship MyExcelOnline Academy Online Course.

