When working with time data in Excel, calculating time duration is a common requirement. Excel provides built-in functions and formatting options to simplify these calculations. Whether I need to track working hours, measure the duration of an event, or calculate the difference between two timestamps, Excel provides powerful functions and formatting options to make it easy. In this article, we will cover a detailed guide on how to create time duration calculator in Excel.
Key Takeaways:
- Proper spreadsheet setup with labeled and formatted columns ensures accurate time duration calculations.
- Excel recognizes time as a fraction of a day, so consistent formatting is key for correct computations.
- Basic arithmetic operations help sum and subtract time, while handling midnight crossovers requires specific formulas.
- The TEXT function enhances readability by converting numeric time values into customized display formats.
- Advanced functions like DATEDIF allow precise calculations across days, weeks, and months for long-term analysis.
Table of Contents
Getting Started with Excel Time Calculations
Setting Up Your Spreadsheet for Success
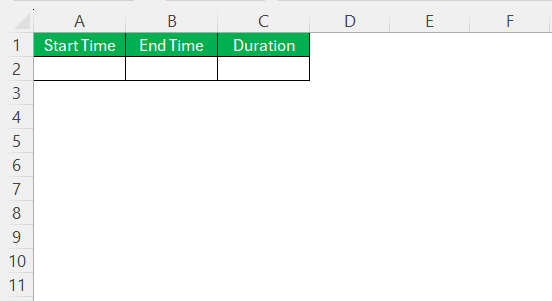
To effectively calculate time duration in Excel, you must first set up your spreadsheet correctly. Begin by defining a clear structure with labeled columns tailored to your specific needs, such as ‘Start Time,’ ‘End Time,’ and ‘Duration.’
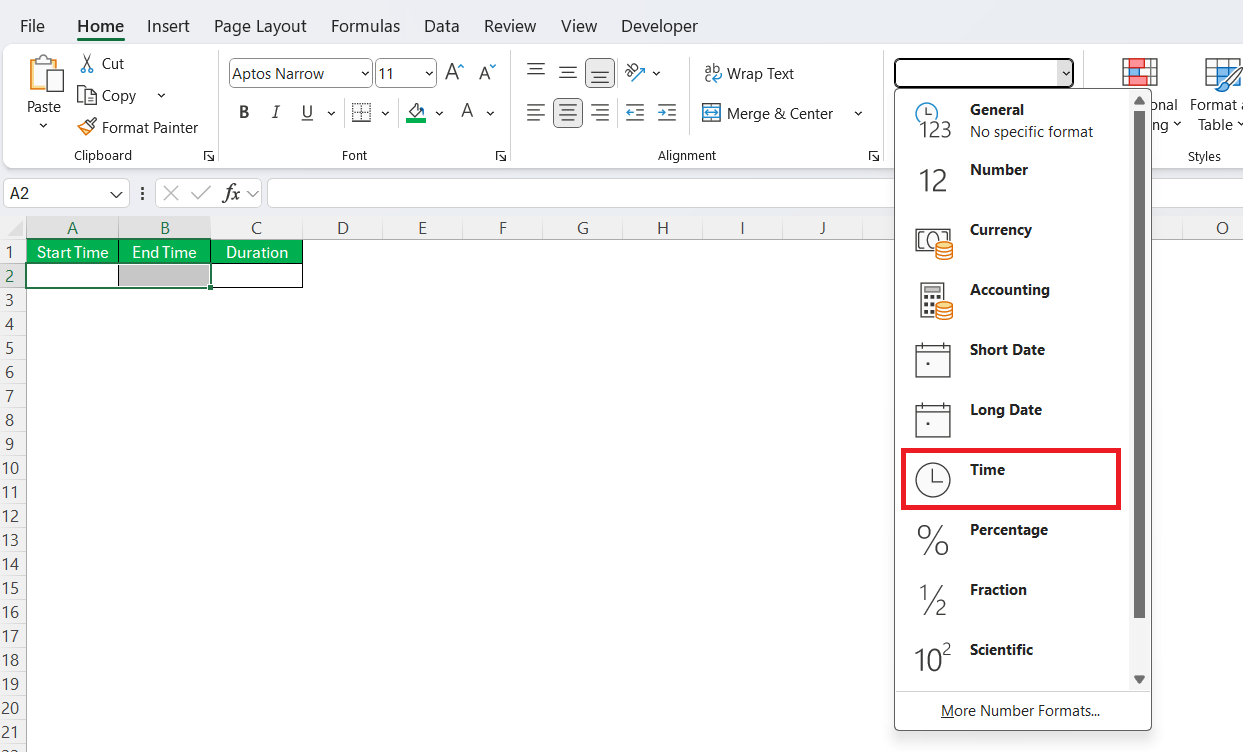
Ensure these columns are formatted for time data, which can be done by highlighting the column and selecting the ‘Time’ format from the format dropdown.
This setup minimizes errors and simplifies calculations. Additionally, keep your data organized with consistent formatting to enhance readability and ensure seamless time computation.
Basic Time Formatting Essentials
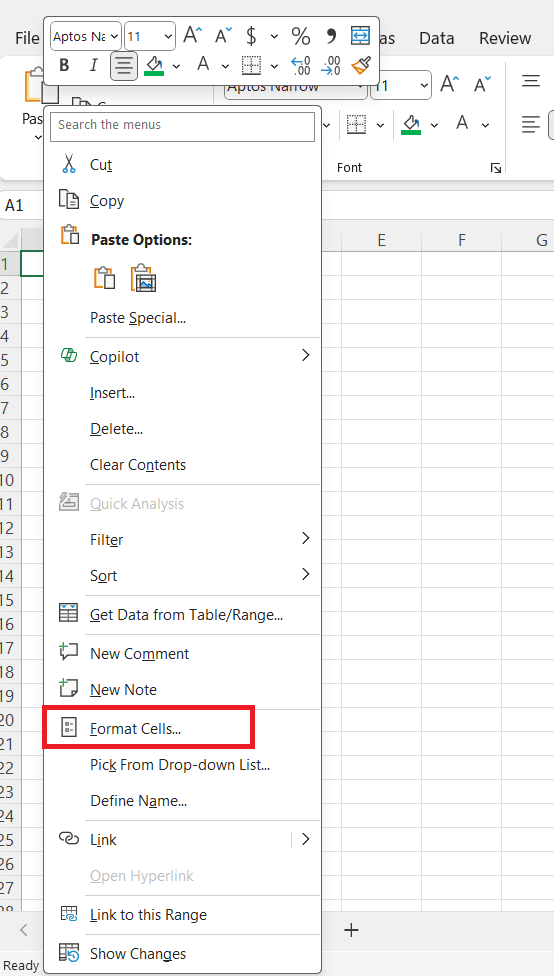
Understanding essential time formatting in Excel is the foundation for accurate calculations. Excel recognizes time as a fraction of a day where 24 hours equals 1, so 12:00 PM is recorded as 0.5. To format time cells properly, select these cells, right click on ‘Format Cells’.
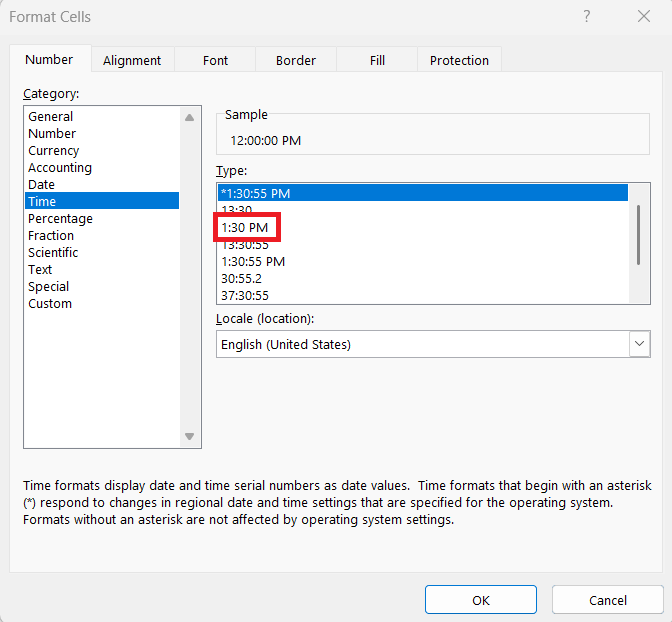
Navigate to ‘Number,’ and choose ‘Time.’ You can choose from various display formats, such as ‘hh:mm AM/PM’ or ‘hh:mm:ss’.
This standardization allows Excel to interpret and compute time data accurately, facilitating operations like addition and subtraction. It’s key to keep consistent time formats across your worksheet for clarity and efficiency.
Simple Methods for Time Duration Calculator
Using Basic Arithmetic to Sum and Subtract Time
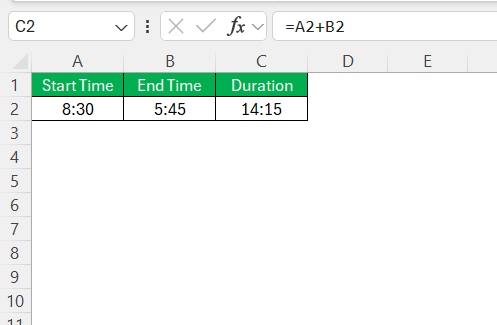
With Excel, you can easily use arithmetic operations to sum and subtract time values once they are properly formatted. To sum time, simply use the SUM function, giving you the total hours and minutes. For instance, adding 8:30 and 5:45 will produce 14:15.
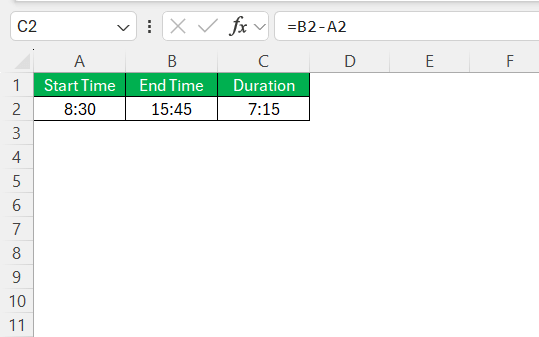
Subtraction involves directly deducting one time value from another, such as End Time - Start Time, to find the duration between two points.
Always format the result cells in the desired time format to ensure the output displays correctly. Such simplicity makes Excel powerful for managing schedules and analyzing time-based data.
How to Calculate Time Differences Across Midnight
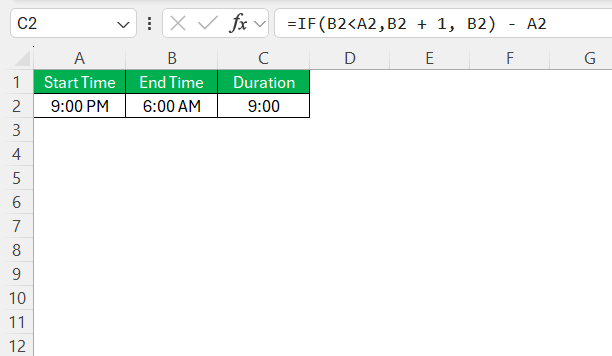
Calculating time differences across midnight in Excel requires special attention since the end time might be numerically smaller than the start time. To handle this, use a formula that adjusts for the crossing of midnight. If the end time is less than the start time, add 1 to the end time to account for the full day and then subtract the start time. For example, if your start time is 9:00 PM and ends at 6:00 AM, use =IF(End_Time < Start_Time, End_Time + 1, End_Time) - Start_Time.
This ensures accurate calculations and prevents negative values, allowing seamless management of shifts and schedules spanning two days.
Utilizing the TEXT Function for Time Display
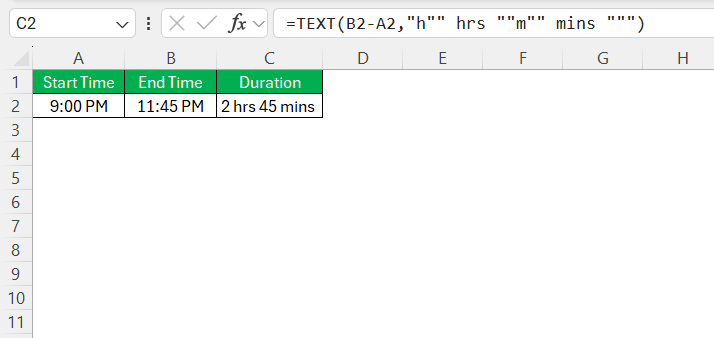
The TEXT function in Excel is a versatile tool for formatting time displays precisely to your preference. It converts numeric time calculations into readable formats, like hours and minutes, with embedded text. For example, if you want to show a duration as “X hours, Y minutes,” you would use =TEXT(End_Time - Start_Time, "h"" hrs ""m"" mins").
This offers flexibility, allowing users to present data in a way that aligns with specific reporting needs or presentation styles. Additionally, it helps maintain readability, making time data comprehensible, especially when dealing with complex schedules and reports.
Advanced Excel Techniques for Time Calculation
Calculating Time Differences in Daily, Weekly, or Monthly Units
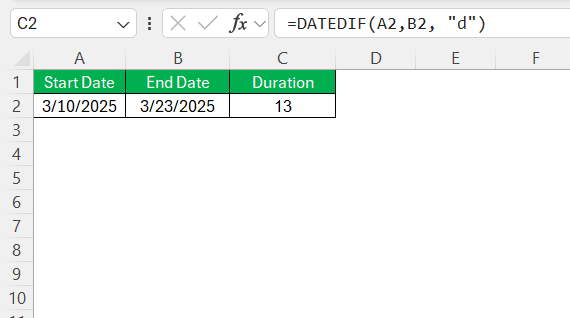
Calculating time differences across different units such as days, weeks, or months requires understanding Excel’s date and time functions. For daily calculations, subtract the start date from the end date to get the number of days. Use the formula =DATEDIF(Start_Date, End_Date, "d") for precise daily calculations.
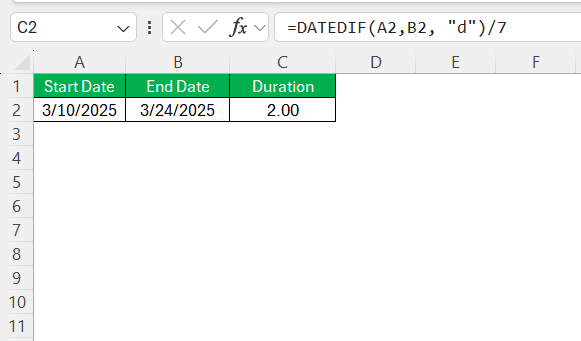
For weekly durations, divide the total days by 7 using =DATEDIF(Start_Date, End_Date, "d")/7 to convert the difference into weeks.
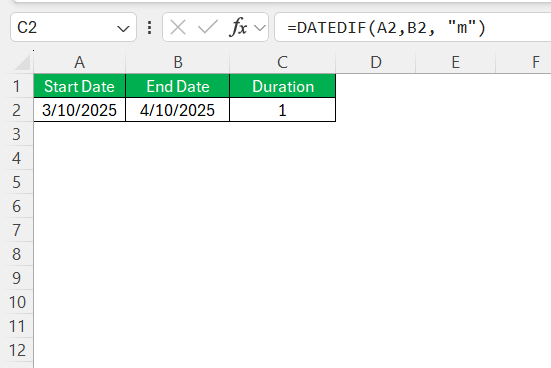
Monthly calculations are slightly more complex due to varying month lengths. Utilize =DATEDIF(Start_Date, End_Date, "m") to determine the number of full months between two dates.
This function automatically accounts for month variations, providing accurate and meaningful time frames for long-term planning and comparative analysis. For an even more precise measure that includes residual days, combine this with a subsequent day calculation.
FAQs
How to create a time duration calculator in Excel?
To calculate time duration in Excel, subtract the start time from the end time using a simple formula such as =End_Time - Start_Time. Ensure both times are formatted correctly to display results as time values (e.g., hours and minutes). For multi-day durations, include the start and end dates to capture the full period accurately.
How do I sum time values that exceed 24 hours?
To sum time values exceeding 24 hours in Excel, use the =SUM(range) formula for your time data. Then, format the result cell with a custom time format by selecting ‘Format Cells,’ choosing ‘Custom,’ and entering [h]:mm or [h]:mm:ss. This enables Excel to display the cumulative time over 24 hours correctly.
Can Excel calculate elapsed time as a decimal value?
Yes, Excel can calculate elapsed time as a decimal value. To do this, subtract the start time from the end time, then multiply the result by 24 to convert from the default day fraction to hours. Use the formula =(End_Time - Start_Time) * 24, and ensure the cell is formatted as a number.
What is the best way to handle time zones in Excel?
The best way to handle time zones in Excel is by converting all times to a standard time zone, such as UTC, before performing any calculations. Adjust for time zone differences by adding or subtracting the required offset in hours. With calculations complete, convert times back to the relevant time zone for presentation.
How can I display time durations in a specific format?
To display time durations in a specific format in Excel, use the ‘Format Cells’ option. Select the cells you want to format, right-click, choose ‘Format Cells,’ and then click on ‘Custom’ from the Category list. Input your desired format, such as “hh:mm:ss” or “[h]:mm”. This allows you to tailor the display to your specific requirements, ensuring clarity and consistency.
John Michaloudis is a former accountant and finance analyst at General Electric, a Microsoft MVP since 2020, an Amazon #1 bestselling author of 4 Microsoft Excel books and teacher of Microsoft Excel & Office over at his flagship MyExcelOnline Academy Online Course.

