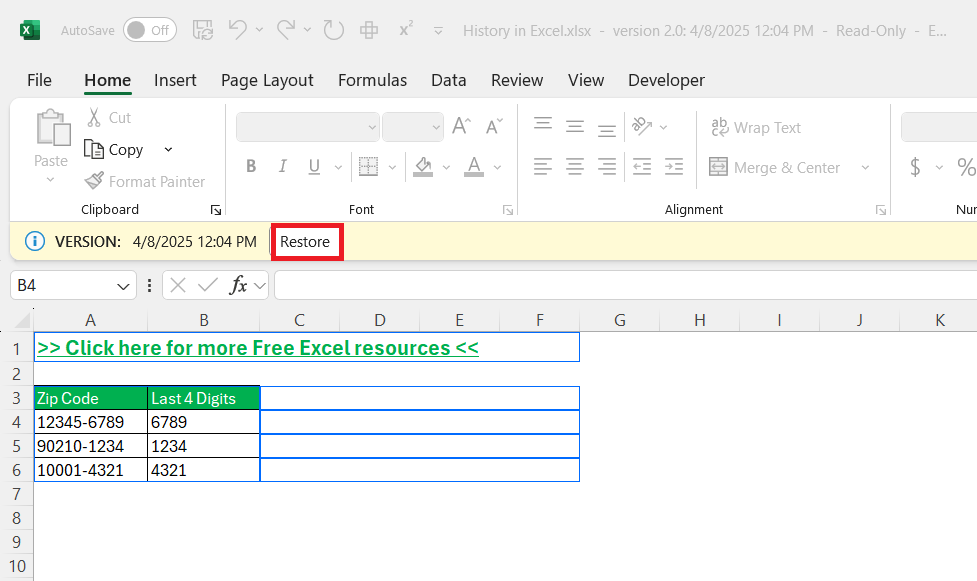
Excel has become indispensable for managing and organizing data, but accidental changes or data losses can be frustrating. To combat this, Excel offers a version history feature, allowing users to track, view, and restore past versions of their files. This guide explores utilizing and optimizing Excel’s versioning capabilities for a seamless data management experience.
Key Takeaways:
- Excel’s Version History helps track and restore previous versions of files saved on OneDrive or SharePoint.
- It works across devices—desktop, mobile, and web—with slightly different access steps.
- You can view detailed recent changes using the “Show Changes” feature, especially in Excel Online.
- Not all edits are tracked, especially those involving older Excel versions, unsupported tools, or local files.
- Before restoring, it’s best to save a backup copy and communicate with collaborators to avoid data confusion.
Table of Contents
Navigating the Excel Version History
Accessing Version History Across Devices
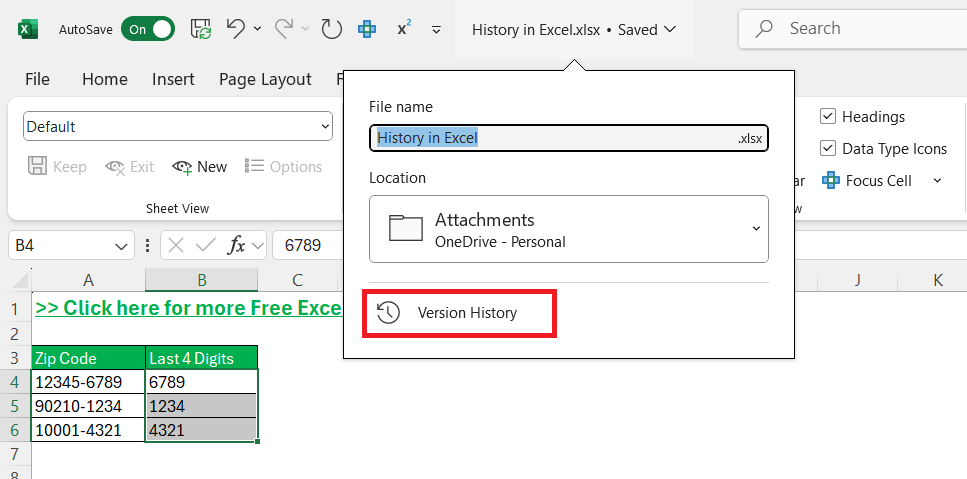
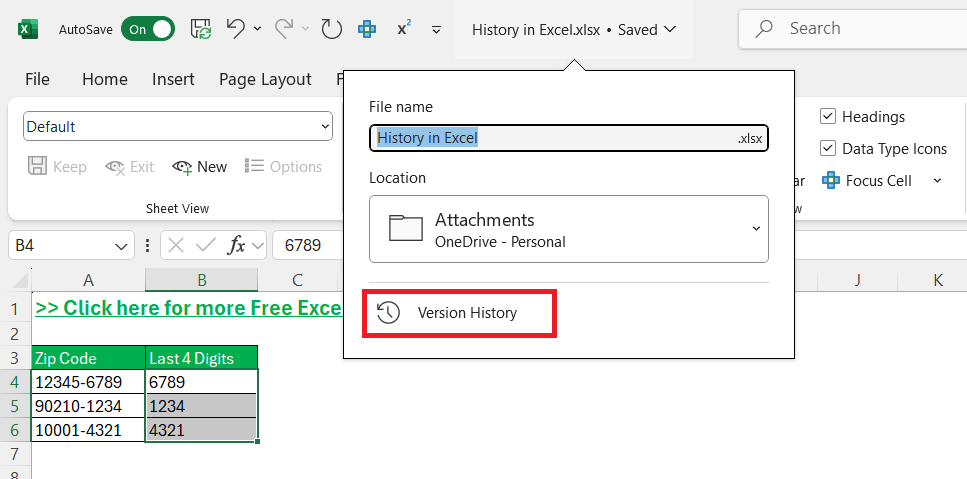
Accessing Excel’s version history is consistent yet varies slightly depending on the device used. On Windows or Mac desktops, begin by opening your file. For Microsoft 365 users, click on the file title bar, then select “Version History.” This will display a list of all previous versions, regardless of who edited them.
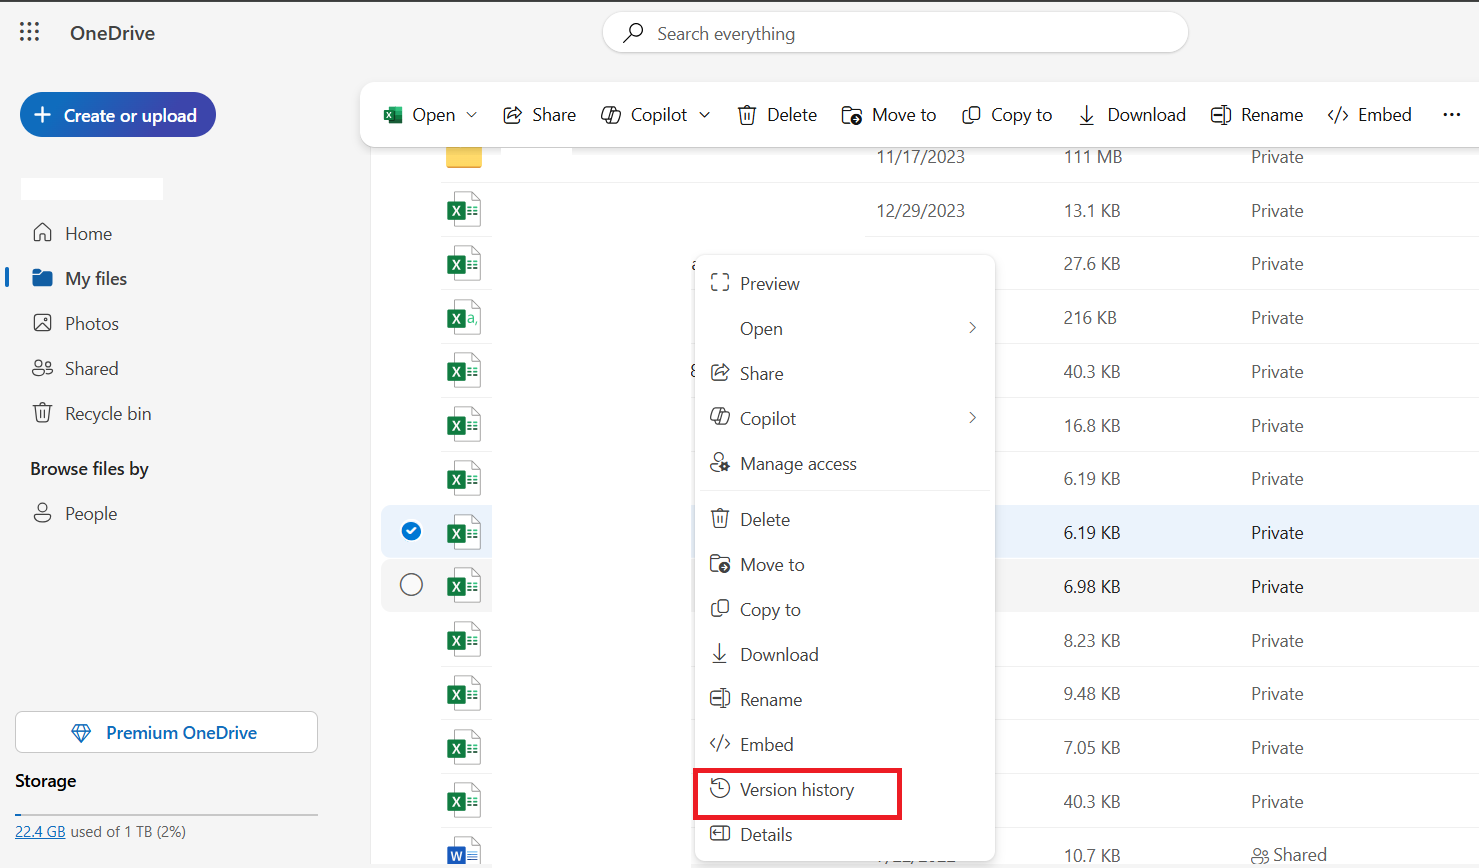
For those using OneDrive, navigate to the file on the OneDrive website. Right-click and choose “Version history” from the context menu.
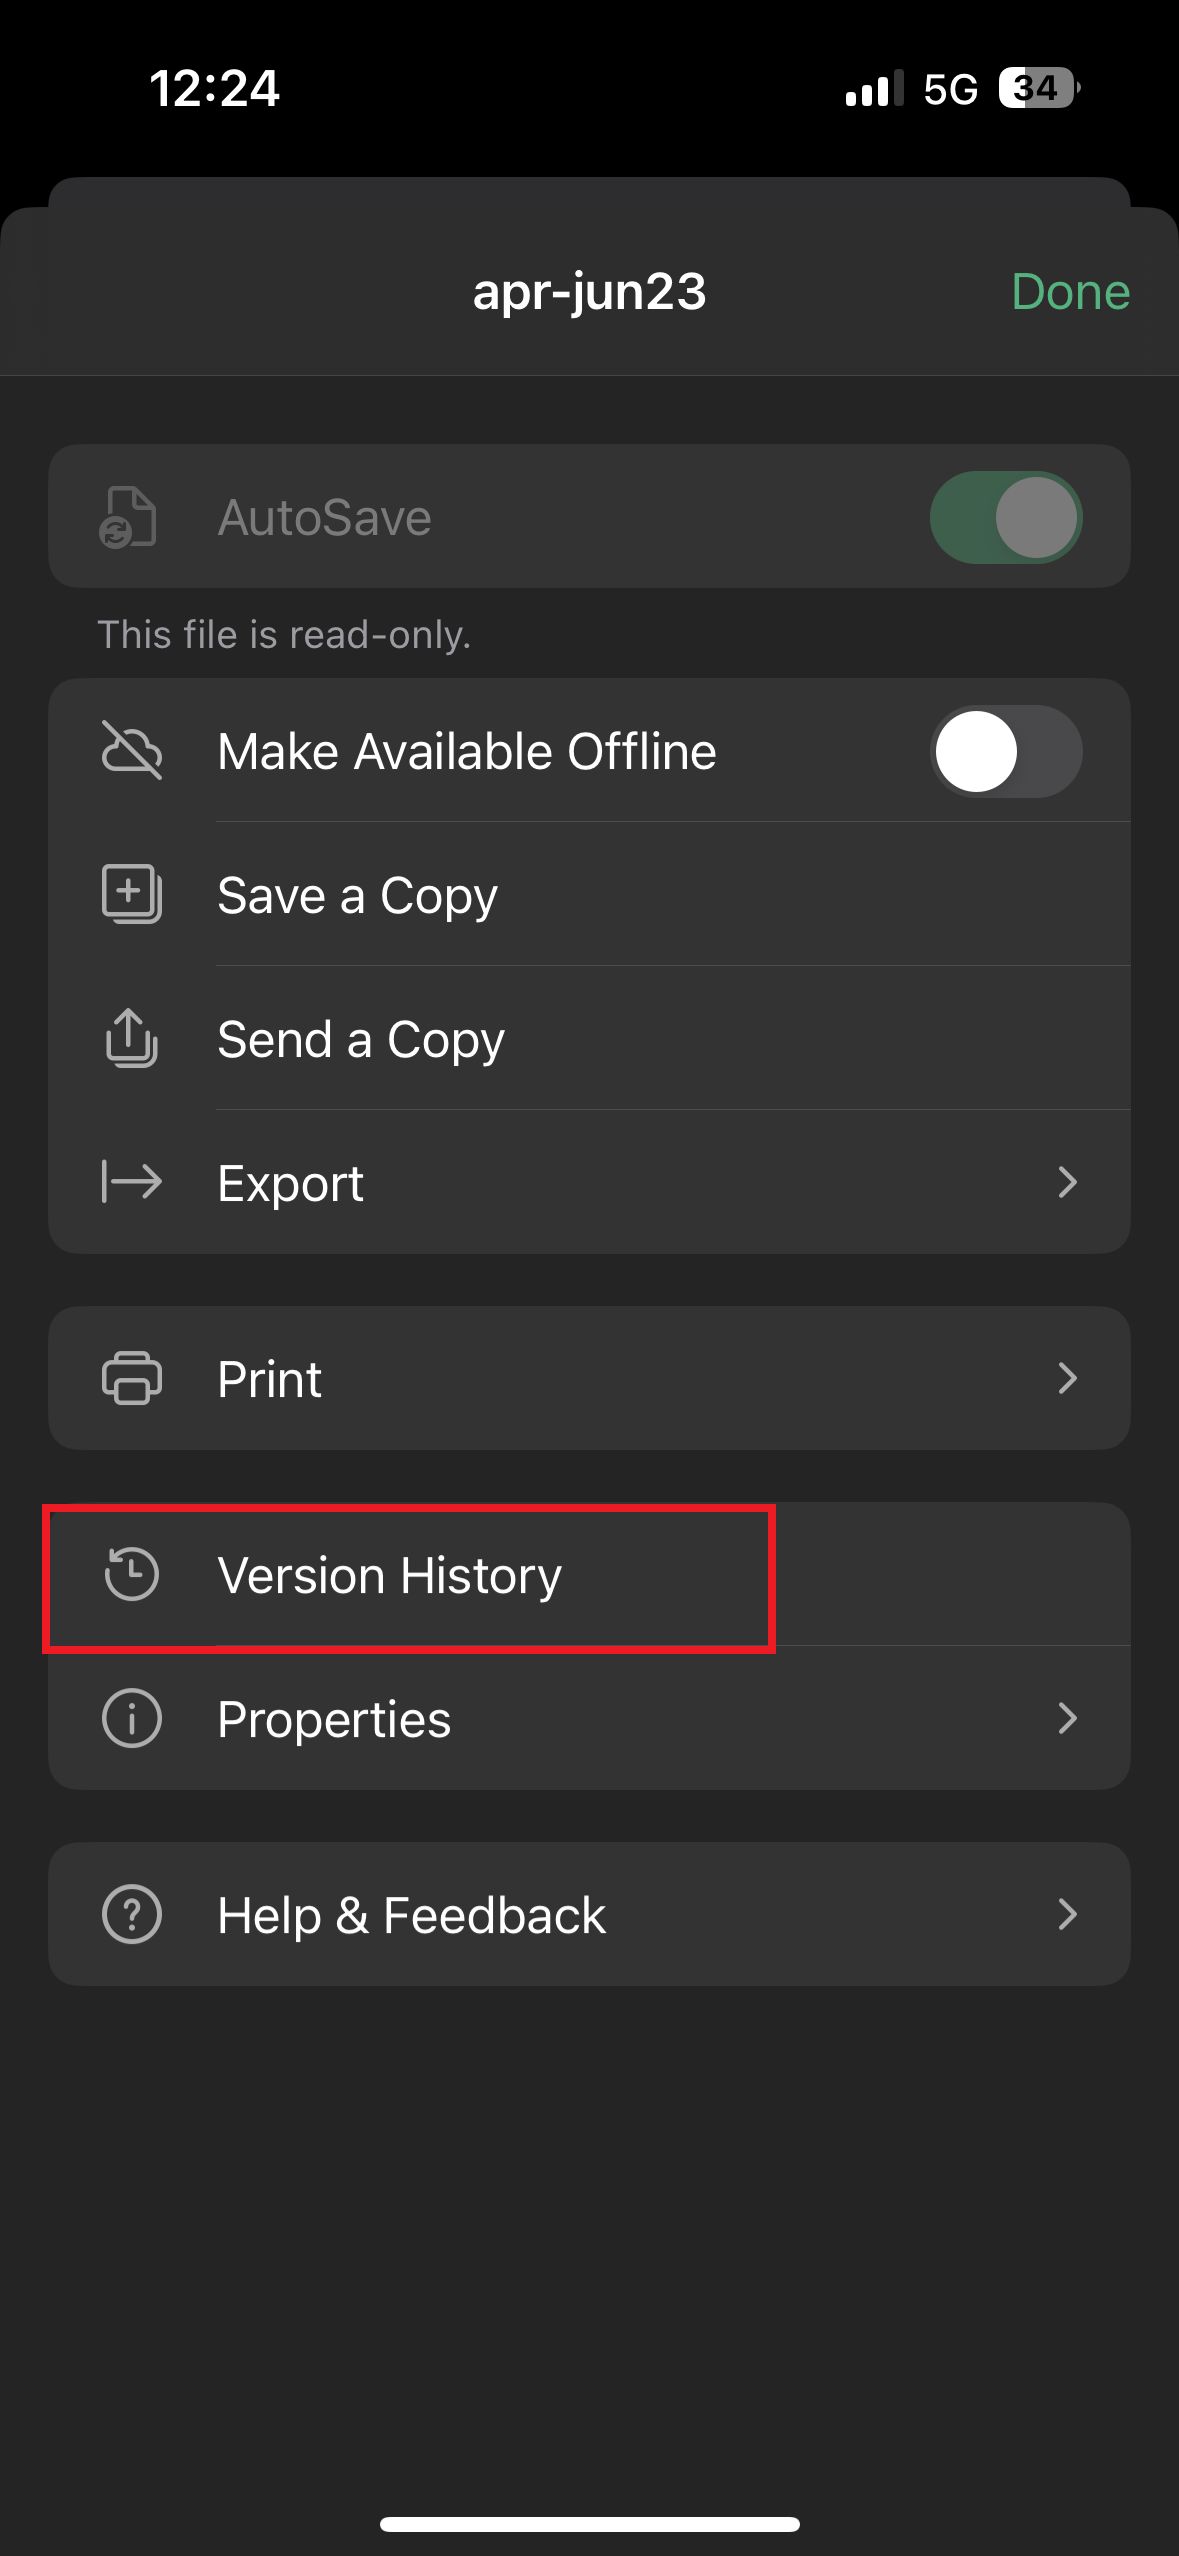
On mobile devices, such as phones or tablets, access is through the Excel app. Go to “File,” then “History” to explore different versions.
These methods ensure you have version visibility no matter the platform.
Why is the Version History Feature Useful?
- Peace of Mind – I no longer worry about saving dozens of versions with names like “Final_v3_UPDATED.xlsx.” I just save once and let Excel handle the backups.
- Error Recovery – Whether it’s an accidental overwrite or a formula gone rogue, I can roll back anytime.
- Team Collaboration – In shared workbooks, Version History acts as a built-in audit trail. No more guessing who changed what.
Understanding File Changes
How to View Recent Changes
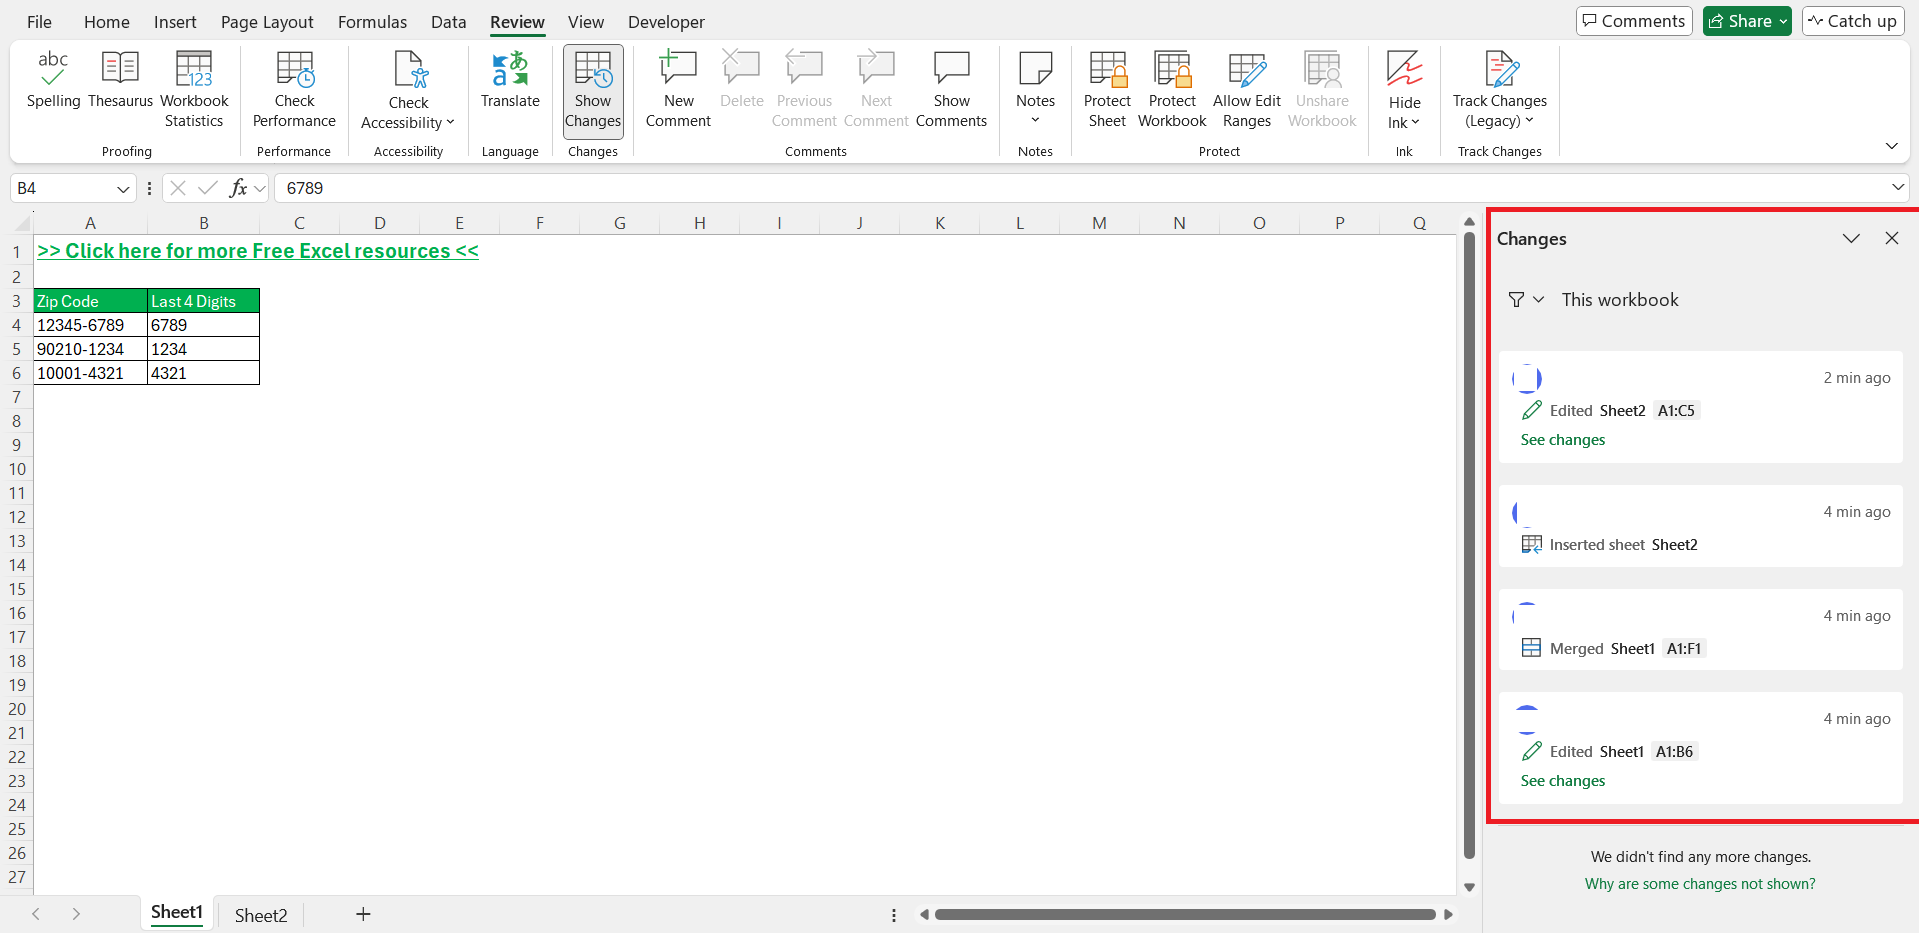
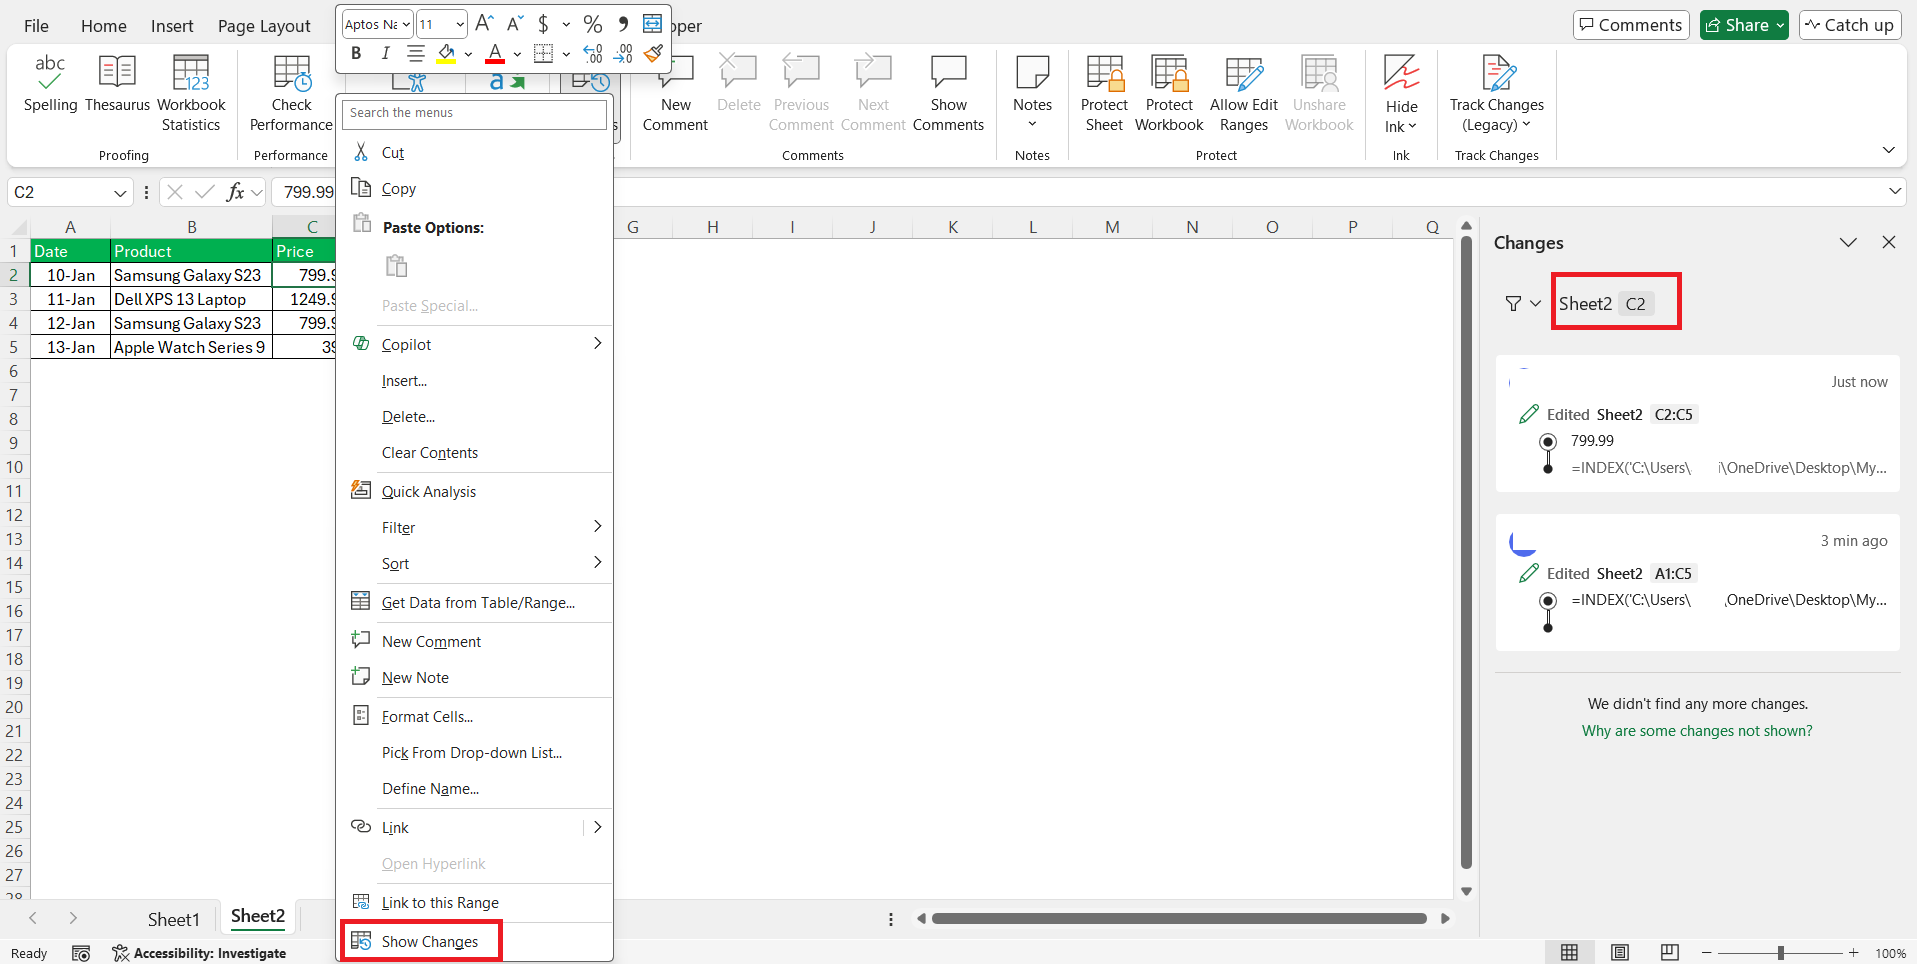
Viewing recent changes in Excel is streamlined through the “Show Changes” feature, which is accessible within the Excel Online version. To get started, navigate to the “Review” tab on the ribbon, then click “Show Changes.”
This opens a pane that lists modifications in reverse chronological order, starting with the most recent.
Each entry in the pane provides detailed information, including who made the change, when it occurred, and what specific alteration was made. For an even more focused view, select a specific cell or range of cells, right-click, and choose “Show Changes” from the context menu.
This filters the list to show only modifications related to the selected cells, enhancing your ability to pinpoint precise edits.
Common Reasons for Missing Changes
Missing changes in Excel’s history can occur due to various reasons. First, if the document was edited with an older version of Excel or an unupdated one-time purchase version, these sessions might not capture changes. Secondly, certain features, such as editing shapes, charts, or using unsupported functionalities in co-authoring, are not tracked by “Show Changes.”
Additionally, actions like uploading a file or saving a copy can reset the tracking pane, resulting in an empty list. Excel’s focus is primarily on cell values and formulas, so changes outside these parameters often go unrecorded. Understanding these limitations can help in diagnosing why certain alterations in your file might not appear in the change log.
Filtering and Organizing Change Lists
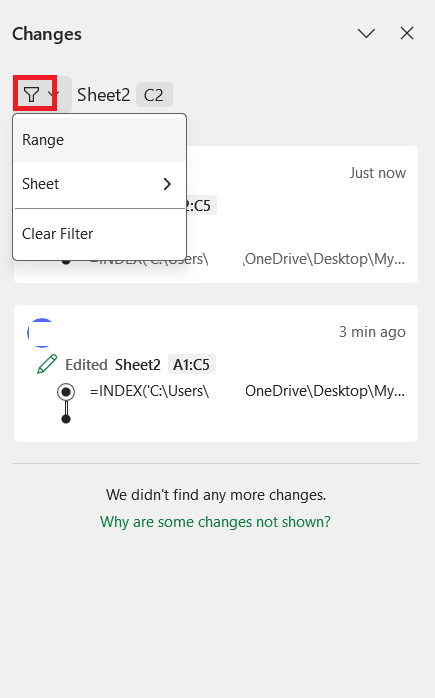
To effectively manage the list of changes in Excel, filtering and organizing tools come in handy. Begin by accessing the “Show Changes” pane to gain an overview of all recent modifications made by various collaborators. Utilize the filter option by clicking on the funnel icon at the top of the pane.
This feature allows you to specify a particular range or sheet, which can help focus on relevant changes.
Enter the desired range or sheet name and confirm your choice. Filters will refine the list to display only changes within that specific domain. Additionally, you can clear these filters anytime to return to the comprehensive view. This selective review process ensures you can pinpoint necessary updates without wading through irrelevant data, making spreadsheet management more efficient.
Restoring Past Versions
Step-by-Step Guide to Restoration
Restoring a previous version in Excel is a straightforward process that can reclaim previous data states efficiently. Here’s a step-by-step guide:
STEP 1: Open your Excel file and click on the file name in the title bar if you’re using Microsoft 365. Choose “Version History” from the dropdown menu, which will display all historical versions.
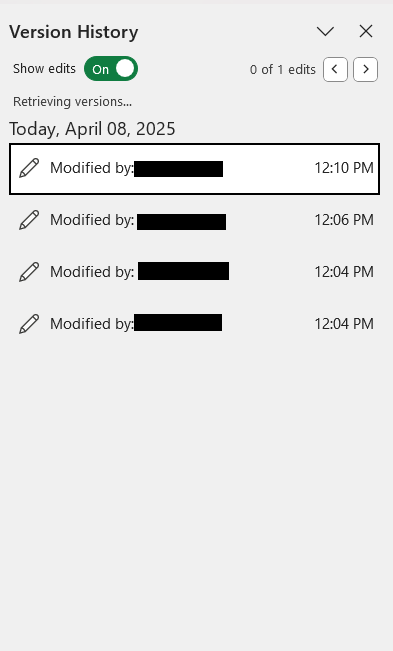
STEP 2: Browse the list of previous versions. Each entry is marked with a timestamp and the contributor’s name. Click “Open version” for any version you wish to inspect in detail.
STEP 3: The chosen version will open in a separate window. Review the document carefully to ensure it is the one you wish to restore.
STEP 4: Once confirmed, you have the option to either “Restore.” Clicking “Restore” will replace the current file with the selected version.
STEP 5: After restoration, ensure that your team members are informed of the change, especially in collaborative environments. Save your document to secure the restored version.
This method guarantees that critical data remains recoverable and allows you to maintain control over important changes in your workbooks. Following these steps minimizes disruptions and streamlines your workflow with confidence.
Tips for Safely Reverting Changes
Safely reverting changes in Excel involves a few practical steps to ensure no data is lost unintentionally. First, always review the version history thoroughly before committing to a restoration; this ensures you select the correct version to revert to. Consider making notes or screenshots if needed, to remember which changes might be impacted.
Before proceeding with a restore, use the “Save a Copy” feature to keep an existing version intact.
This serves as a backup should the need arise to revert to the current state. Additionally, communicate with collaborators about your intention to restore, particularly if you’re working on a shared document. Finally, after restoring, perform a comprehensive review of the document to confirm that all critical data aligns with expectations. By following these tips, you can navigate the process of reverting changes securely and efficiently.
Troubleshooting Version Issues
Empty Changes Pane Solutions
If you encounter an empty Changes pane in Excel, it can be perplexing, but several solutions can address this issue. Firstly, ensure that you’re using an up-to-date version of Excel, as older versions don’t support the Show Changes feature comprehensively. Updating your software may resolve the problem immediately.
Check if the document is stored on OneDrive or SharePoint, as file location is crucial for tracking changes. If the file is locally stored or opened from an unsupported source, consider moving it to a suitable cloud service to enable version tracking.
Another reason for an empty pane could be edits made using unsupported features or external tools like VBA scripts, as these are not tracked. Switching to features supported by the Excel co-authoring environment might help display recent changes.
Lastly, verify that the Changes pane has been correctly initialized by selecting the specific cells or ranges you focused on. Right-click and choose “Show Changes” from the context menu to refresh the pane, ensuring it reflects all relevant information. If these steps don’t resolve the issue, consulting the Excel support documentation for further troubleshooting might be necessary.
FAQs
Does Excel have a history log?
Yes, Excel has a history log known as the “Version History” feature, which tracks changes and allows users to view and restore previous file versions when the file is stored on OneDrive or SharePoint. It’s accessible through the Excel Online platform and Microsoft 365.
How to check the version history in Excel?
To check the version history in Excel, open your file in Excel Online or Microsoft 365, click on the file name in the title bar, then select “Version History.” A window will display all previous versions, allowing you to view or restore them.
Can I restore changes on the mobile version of Excel?
Yes, you can restore changes on the mobile version of Excel by opening your file within the app, tapping the “File” menu, selecting “History,” and choosing the version you wish to restore. Ensure the file is stored in a cloud service like OneDrive for this feature to function.
What should I do if I can’t see recent changes?
If you can’t see recent changes, ensure the file is saved in OneDrive or SharePoint and you’re using an updated version of Excel. Check that the “Show Changes” feature is enabled and that you’ve selected the correct cell or range. Restarting Excel or refreshing your document can also help.
How can I combine cells without losing history?
To combine cells without losing history, manually merge the information by copying data into a single cell. This preserves version history since automated merge functions are typically not tracked. Always save a copy of your document before merging to secure existing version history.
John Michaloudis is a former accountant and finance analyst at General Electric, a Microsoft MVP since 2020, an Amazon #1 bestselling author of 4 Microsoft Excel books and teacher of Microsoft Excel & Office over at his flagship MyExcelOnline Academy Online Course.

