This beginner’s guide will walk you through exactly how to:
Table of Contents
With step-by-step instructions, visuals, tips, and video tutorials, you’ll gain the fundamental skills to tap into the potential of Google Sheets. Time to ditch the spreadsheeting dummies label!
Table of Contents
Create New Sheets From Scratch or Templates
If you don’t have one already, sign up for a free Google account. This gives you access to Google Drive storage and apps like Gmail, Docs, and of course, Sheets.
To create a blank new spreadsheet from scratch:
- Open your web browser and go to sheets.google.com
- On the Google Sheets homepage, locate and click the multicolored plus icon.
- Select Blank to create an empty spreadsheet, or choose Template Gallery to browse pre-built sheet layouts for budgets, trackers, planners, and more.
To personalize your new spreadsheet:
- Click the title text in the top left: Locate the title of the spreadsheet in the top left corner, which is usually set as Untitled by default.
- Type your preferred name.
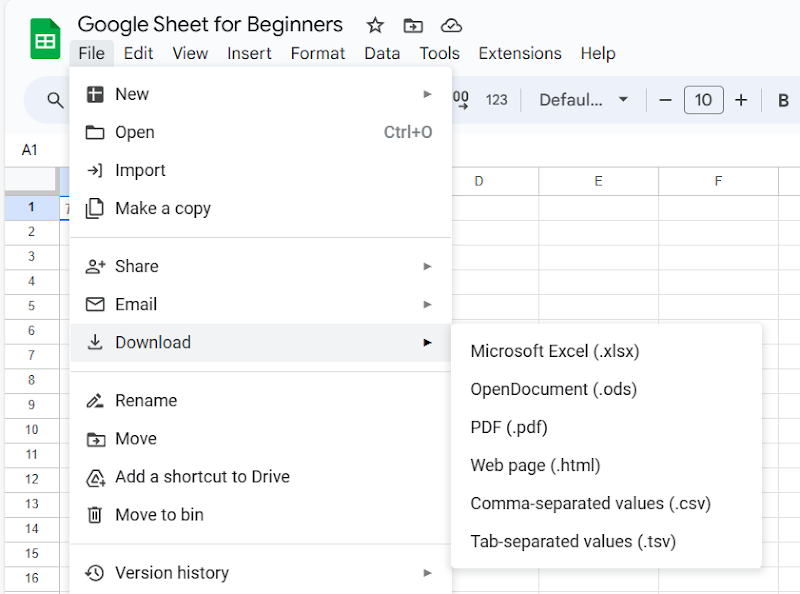
While Google auto-saves your work, you can manually save copies or download sheets as Excel files, PDFs or CSVs anytime by going to File > Download.
Enter and Format Data
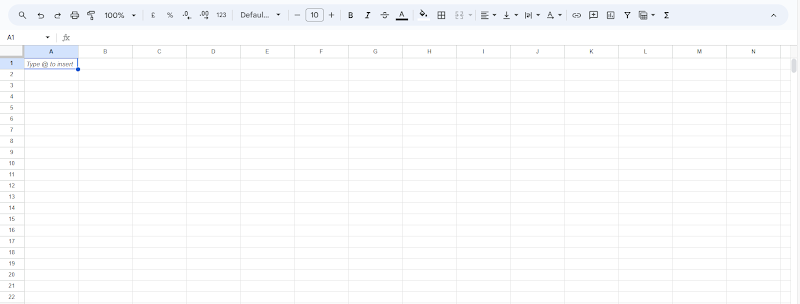
The heart of your spreadsheet is the grid made up of columns (labeled A-Z, then AA-ZZ) and rows (labeled with numbers). Each box on the grid is a “cell” that can hold text, numbers, formulas, or anything in between.
- Click on the cell where you want to input your data.
- Enter your text, numbers, or formulas.
- Press Enter to move one cell down or Tab to move one cell to the right, allowing for a smooth flow of data entry.
You can label row/column headers to organize information. For example, listing names down the first column and test scores across the first row.
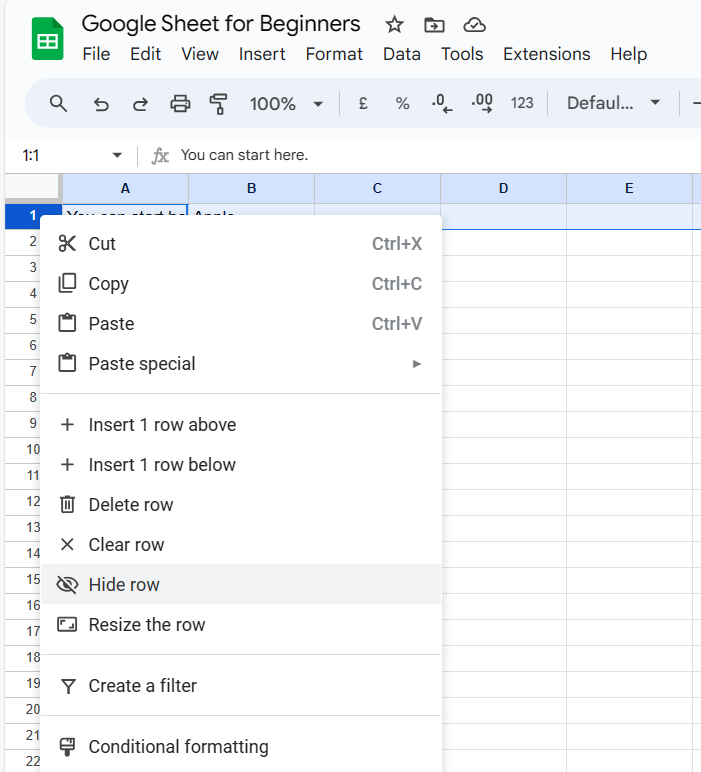
- Right-click row numbers for options like delete, hide, or copy
- Hover over column letters to access inserts, deletions, or formatting
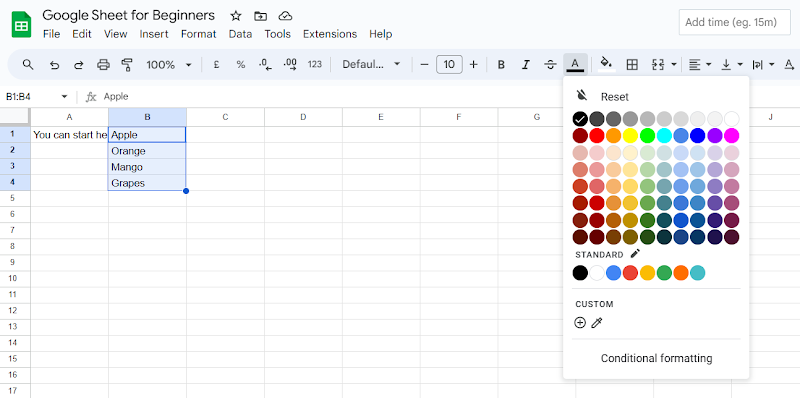
- Highlight cell(s)
- Use the toolbar buttons or Format options for font, size, color, etc.
You can also merge cells across rows or columns and implement number formats like currencies, percentages, or dates. These features empower you to input and organize data and present it in a meaningful and visually appealing way within your Google Sheets.
Sort, Filter, Freeze, and Organize Information
Once you’ve entered your dataset into Google Sheets, the next step is efficiently organizing and analyzing the information using features like Tables, Sorts, and Filters. These tools help arrange data systematically and allow you to extract valuable insights.
Creating Tables and Applying Filters:
- Highlight data range: Select the range of cells containing your dataset.
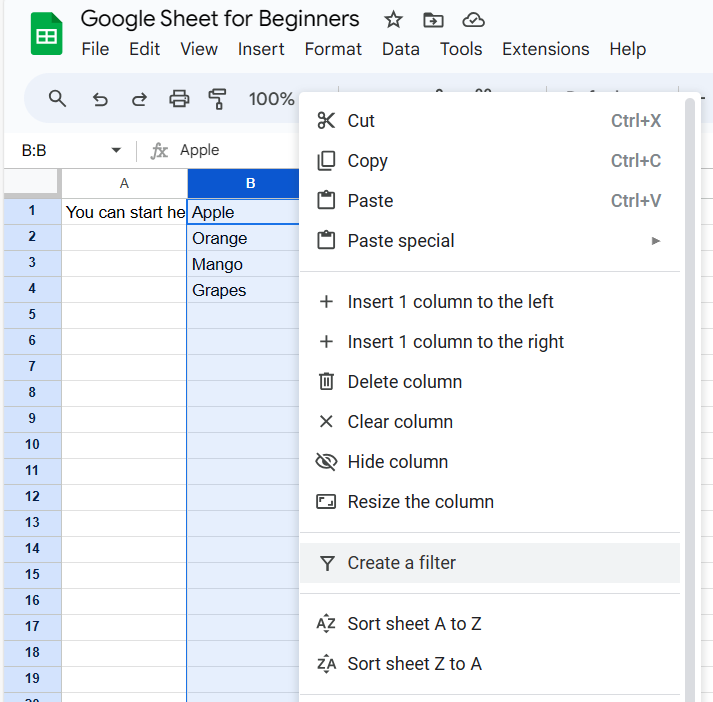
- Select Data > Create a Filter: Navigate to the Data menu and choose Create a Filter to activate the filter functionality.
- Check Data has header row if using header labels: If your dataset includes header labels (such as column names), ensure you check this option to correctly identify and categorize the headers.
- Use dropdown menus to sort or filter by column values: Once the filter is applied, you can use the dropdown menus in the header row to sort or filter data based on specific column values.
Advanced Sorting and Filtering Options:
Multi-level sorting: Perform complex sorting by selecting multiple columns. For example, you can sort data first by Last Name in ascending order (A-Z) and then by Test Score in descending order (Z-A).
Filter views: Create customized views of your data without altering the underlying dataset. For instance, you can filter for values greater than 80 or for data from the last week.
Customizable tables: Enhance the readability of your tables by applying features like banded row colors, making it easier to distinguish between different rows.
Named ranges: Define and reference specific groups of cells using named ranges. This allows for easier navigation and manipulation of data in complex spreadsheets.
Practical Applications:
-
- Organize and analyze data: Tables, sorts, and filters are essential for efficiently managing and drawing insights from large datasets.
- Create dynamic reports: Filter views enable the creation of dynamic reports, allowing you to present specific data slices without altering the original dataset.
- Improve readability: Customizable tables with banded row colors enhance the visual appeal of your spreadsheet, making it easier for users to interpret the information.
By leveraging these features, you can transform raw data into a well-organized, insightful, and visually appealing representation within Google Sheets.
Build Charts and Implement Formulas
Bring your analysis to life with charts:
- Select date range
- Go to Insert > Chart
- Choose a visualization style (column, pie, line, etc.)
Or implement functions and formulas for complex calculations:
- Select a cell
- Type =
- Input the name of the function or mathematical formula
-
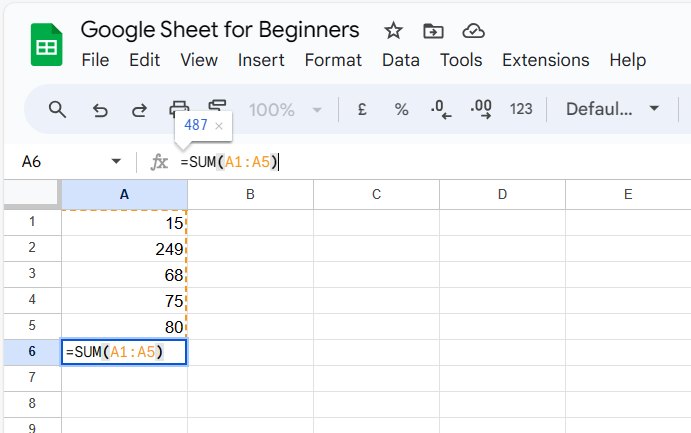
- =SUM(A1:A5) adds values from cells A1 to A5
- =IF(A1>50, “Pass”, “Fail”) checks if A1 is over 50 to display text
- =TODAY() inserts current date
Freezing Columns and Rows:
When dealing with extensive datasets, maintaining the visibility of essential information is crucial. To achieve this:
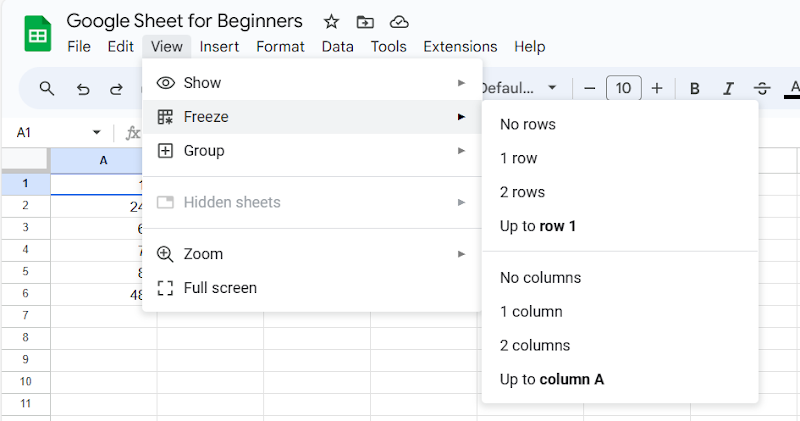
Navigate to the View menu and select Freeze to lock columns or rows in place. This ensures that specific columns or rows remain visible even as you scroll through other parts of the sheet.
This feature is particularly handy when dealing with large datasets, allowing you to keep important headers or labels in view for easy reference.
Share and Download Spreadsheets
Collaboration is a key benefit of Sheets. To work simultaneously with teammates:
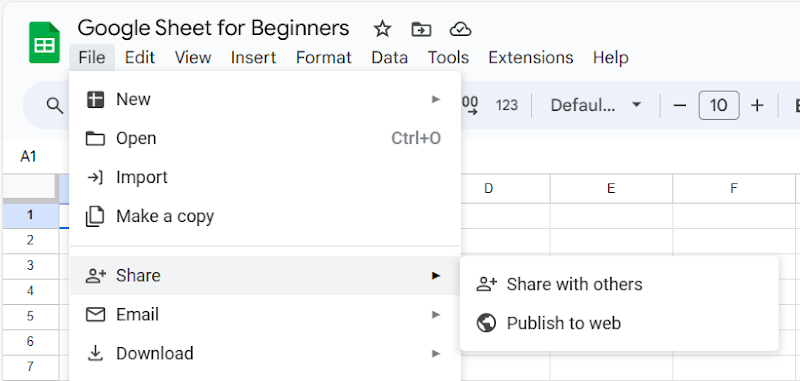
- Go to File > Share
- Enter email addresses
- Set permission levels to view, comment, or fully edit
This also generates a shareable link you can send to additional people.
Use Handy Keyboard Shortcuts
Keyboard shortcuts can significantly expedite your workflow. Here are some essential shortcuts:
- Ctrl + C (Cmd for Macs) to Copy, Ctrl + V to Paste.
- Ctrl + Arrow Keys to Jump Around
- Ctrl + / to Show All Shortcuts
Integrating Google Sheets with Other Apps
Since Sheets interoperates within Google Workspace:
Import from Docs
- Select sheet cell
- Insert > Document Outline
- Convert Doc headings into sortable/filterable Sheets of data.
Flow to Slides
- Create charts/tables in Sheets
- Copy them
- Paste into Slides to enrich presentations
Build Forms
- Create a sheet to collect form response data
- Extensions > AppScript
- Write code to populate responses automatically
Conclusion:
With its cloud-based convenience, smoothly interfacing free web app, and newly added features to rival Excel, Google Sheets removes all barriers to unlocking the power of spreadsheeting.
The sections above contain the must-know fundamentals, but there’s always more to explore. As you get comfortable with the basics, dig into templates for budgets, trackers, and more or spring sheets’ advanced formulas for deeper data analysis. Hopefully, this guide has piqued your interest in unleashing creativity and productivity with Google Sheets!
Learn more about Formulas with our 101 Advanced Excel Formulas & Functions Examples.
John Michaloudis is a former accountant and finance analyst at General Electric, a Microsoft MVP since 2020, an Amazon #1 bestselling author of 4 Microsoft Excel books and teacher of Microsoft Excel & Office over at his flagship MyExcelOnline Academy Online Course.

