Calculating the number of months between two dates in Excel is a common task that can be essential for various financial, project management, and data analysis applications. Whether you’re tracking project timelines, calculating interest periods, or analyzing monthly trends, Excel provides several functions to simplify this process. In this article, we will explore different methods to determine how many months between two dates, including the use of the DATEDIF, YEARFRAC, and other date-related functions. These techniques will help you accurately and efficiently perform date calculations in your spreadsheets.
Key Takeaways:
- Use the DATEDIF function to easily calculate the number of months between two dates with the formula
=DATEDIF(start_date, end_date, "M"). - Combine YEAR and MONTH functions for precise calculations by using the formula
=(YEAR(end_date) - YEAR(start_date)) * 12 + MONTH(end_date) - MONTH(start_date). - Utilize the YEARFRAC function for fractional year calculations, converting the result to months with
=YEARFRAC(start_date, end_date) * 12. - These date functions are essential for tasks like tracking project timelines, calculating interest periods, and analyzing monthly trends.
- Ensure proper date formatting and use IF statements to handle date order, avoiding common errors in time calculations.
Table of Contents
Unveiling the Mystery of Calculating Time Spans
The Importance of Time Calculations in Excel
Time acts as an invisible fabric woven into the essence of our daily tasks, and in the digital age, Excel has become a pivotal tool in managing this aspect of life. For professionals across various sectors, understanding time calculations is more than a convenience – it’s a critical analytical skill. It enables us to plan budgets, forecast future earnings, schedule projects, and track performance over periods. This temporal insight is invaluable in making informed decisions and crafting strategies that are grounded in concrete timelines.
Common Challenges in Finding Months Between Dates
Navigating time calculations in Excel can often feel like solving a puzzle due to the irregularity of the calendar. A month isn’t a consistent unit – it ranges from 28 to 31 days – which introduces complexity when determining the span between two distinct dates. Then there’s the common conundrum of how to handle the end-of-month dates, leap years, or the potential misunderstanding of Excel’s default date system, which can lead us astray. Perhaps the most unusual obstacle I encounter is the lack of a dedicated modern function in Excel for calculating months between dates, pushing us to rely upon the arcane DATEDIF function or craft custom solutions.
Top 3 Methods on How Many Months between Two Dates
The DATEDIF Function – Your Go-To Time Machine
The DATEDIF function is akin to a hushed secret in Excel’s arsenal, kept under wraps but exceptionally powerful. It is the closest thing we have to a time machine, seamlessly calculating the span between dates in the form of days, months, or years.
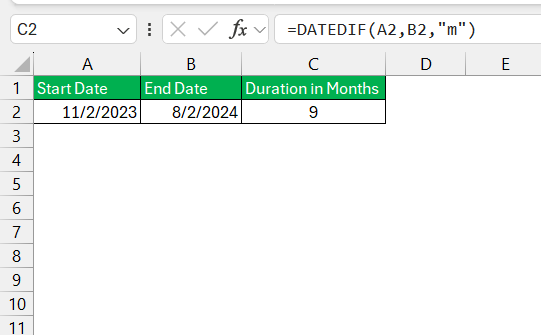
We can engage the function using the simple syntax: =DATEDIF(start_date, end_date, "M") for calculating the number of months. Its usability stretches beyond mere calculation; it’s a tool for monitoring time-sensitive contracts, aging reports, or any scenario where tracking the passage of time is quintessential.
The Dynamic Duo: YEAR and MONTH Functions
We can call upon the dynamic duo, the YEAR and MONTH functions, when precision is non-negotiable in our date-related conquests. These functions slice through dates, distilling the year and month components respectively. Their simplicity belies their strength; by extracting these individual parts, we can reconstruct the time span between two dates with mathematical finesse.
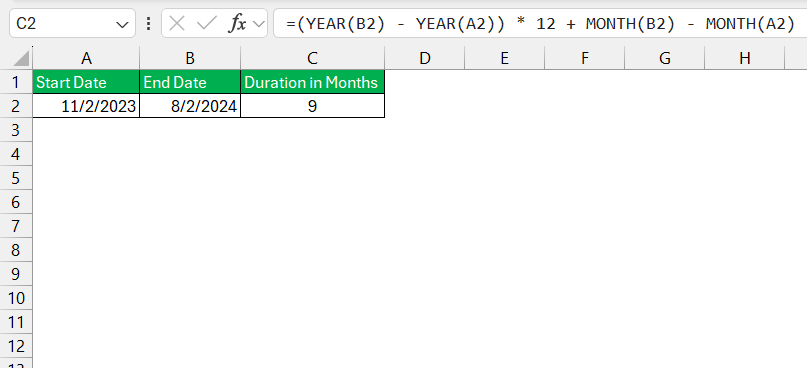
Imagine the elegance of combining these functions: calculating the difference in years, multiplying by 12 to convert to months, and then adding the month components to account for partial years. This method shines for its sheer clarity and consistency, especially when employed alongside more complex formulas.
=(YEAR(B1) – YEAR(A1)) * 12 + MONTH(B1) – MONTH(A1)
This formula first calculates the difference in years and multiplies it by 12 to get the total number of months, and then adds the difference in months.
YEARFRAC Function
Sometimes, the DATEDIF function may not meet our expectations or match the need of the hour. This is when we must don our creative hats and conjure up alternatives. One such approach is the YEARFRAC function, which offers a more precise measurement of the time between dates, especially when dealing with non-integer year spans.
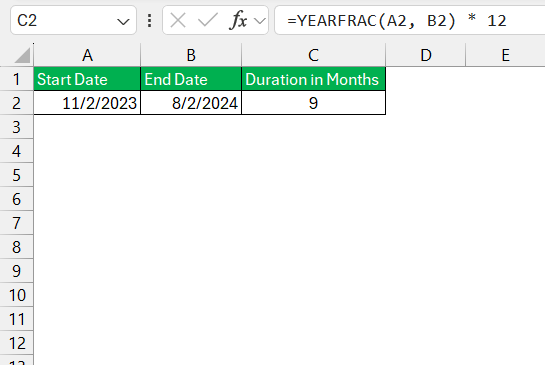
The YEARFRAC function in Excel calculates the fraction of a year between two dates, which can be useful for determining the number of months between dates. To convert this fractional year to months, you can multiply the result by 12.
=YEARFRAC(A1, B1) * 12
This formula calculates the fractional year between the two dates and then multiplies it by 12 to convert it to months.
Case Studies: Real-world Applications
Delving into the case studies of how Excel’s date functions are employed in the real world magnifies their value. We can look at human resources professionals who utilize these functions for tracking employee tenure and benefits eligibility. Or consider financial analysts forecasting interest accrual over specific time frames with surgical accuracy. Project managers also rely heavily on these functions to calculate durations and deadlines critical to keeping developments on track.
In the healthcare sector, the calculation of months between dates is instrumental in monitoring patient follow-ups or medication dosing intervals. Educational institutions, too, leverage this capability to determine scholarship durations or to prepare academic year schedules.
Each of these applications not only demands precision but also a deep understanding of the context to select the most appropriate Excel function for the task. And that’s the real art – matching the complexity of real-life time dynamics with the right Excel toolkit.
Tips and Tricks for Accurate Time Calculations
Avoiding Common Pitfalls with DATEDIF
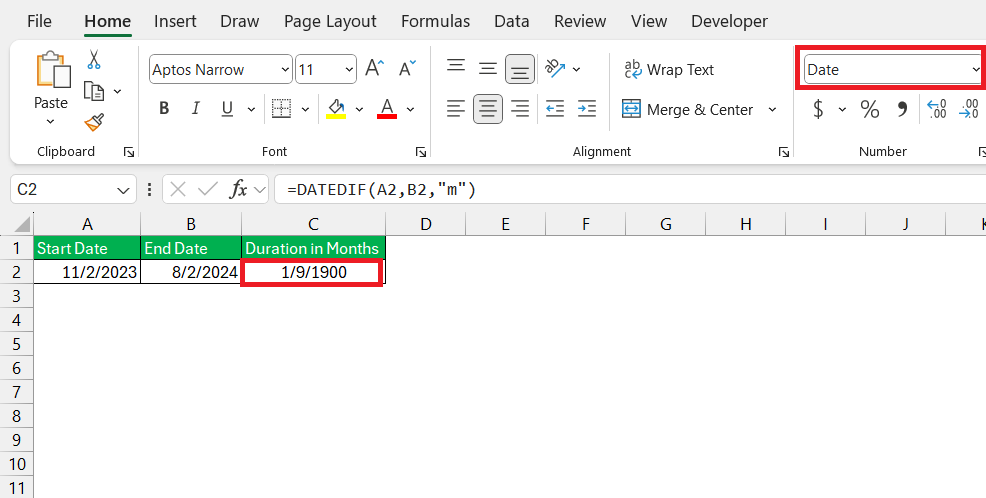
When we journey through Excel’s time-calculating landscapes with DATEDIF, it’s essential to be vigilant of pitfalls. A common misstep is neglecting to format cells correctly, which can lead to erroneous date interpretations or even integers masquerading as dates.
We must ensure that our start and end date cells are formatted as dates and our result cell as a number, to prevent Excel from casting the wrong spell of confusion.
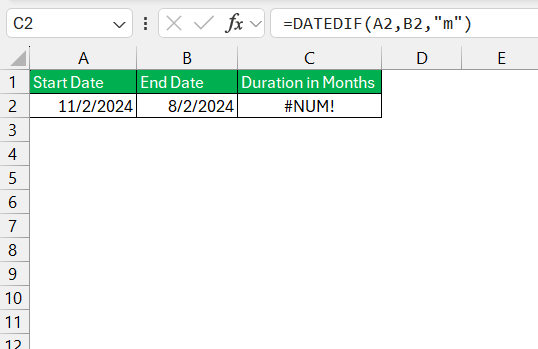
Moreover, overlooking the possibility of a start date being later than the end date can cause an unexpected error.
To prevent this, an IF statement can be our safety net, checking date order before unleashing DATEDIF. Being aware of these traps enables us to harness DATEDIF’s power without falling victim to its quirks.
Tactics for Maneuvering Non-Consecutive Cells
Maneuvering non-consecutive cells to calculate the time span between dates can seem daunting at first glance, but with a tactical approach, we can navigate this with ease. The key lies in not being confined by cell proximity. We simply reference the intended dates, wherever they may reside within the spreadsheet, and apply our formula.
For example, if our dates are in scattered cells, we don’t have to realign them; we reference them directly in our formula like so: =DATEDIF(A2, H5, "M"). This flexibility allows us to maintain robust and clean spreadsheets without succumbing to the inefficiency of restructuring our layout for every time calculation.
And if we’re dealing with time as well as dates, it’s a matter of separating the time intervals. First, we secure the difference in dates with the appropriate function and then address the time difference with simple subtraction. Such tactics empower us to maintain the veracity of our time calculations, no matter the layout complexity.
FAQs
What is the datedif function?
The DATEDIF function in Excel is a somewhat clandestine feature that calculates the difference between two dates. You can specify the unit in which you’d like the result, be it years (“Y”), months (“M”), or days (“D”), among other options. Despite its absence from the function list and tooltip assistance, it robustly performs to meet the needs of various time-span calculations.
Why Isn’t My DATEDIF Working?
If your DATEDIF function isn’t operating as expected, I’d check for the usual suspects: ensure that the cell formula is formatted correctly and not set to a date format; confirm the start date is not after the end date; and verify the correctness of the formula’s arguments. These issues are often the culprits behind a malfunctioning DATEDIF.
How to calculate months between two dates in Excel?
To calculate the number of months between two dates in Excel, you use the DATEDIF function with “M” as the third argument, like so: =DATEDIF(start_date, end_date, "M"). This will return the whole months between the two dates.
How do you calculate 2 months from a date in Excel?
To calculate a date that’s two months from a given date in Excel, the EDATE function comes into play. Simply enter =EDATE(start_date, 2), and Excel will output the date that’s exactly two months ahead of the start_date you provide.
How Can I Exclude Weekends When Counting Months Between Two Dates?
To exclude weekends when counting months between two dates, first calculate the number of working days using the NETWORKDAYS function: =NETWORKDAYS(start_date, end_date). Then, convert this total to months by dividing by the average number of workdays in a month, which is typically around 21.75.
John Michaloudis is a former accountant and finance analyst at General Electric, a Microsoft MVP since 2020, an Amazon #1 bestselling author of 4 Microsoft Excel books and teacher of Microsoft Excel & Office over at his flagship MyExcelOnline Academy Online Course.

