Adding audio to a PowerPoint presentation can make it more engaging and memorable. Whether it’s background music, a voiceover, or sound effects, incorporating audio elements is straightforward and adds a professional touch. Let me walk you through the steps on How to Add Audio to PowerPoint Presentation.
Key Takeaways:
- Adding audio to PowerPoint enhances engagement and creates a memorable multimedia experience.
- You can record narration directly or insert pre-recorded audio files for personalized content.
- Playback options like looping, automatic play, and fade effects help tailor audio to your presentation flow.
- Synchronizing slide timings with audio ensures seamless transitions and a polished delivery.
- Addressing common audio issues, such as compatibility and embedding errors, ensures a smooth presentation.
Table of Contents
Tune Into Success: The Power of Audio in PowerPoint
Why insert audio in PowerPoint presentations
Inserting audio into PowerPoint presentations isn’t just about adding background noise; it’s about creating a multimedia experience that can capture and maintain audience interest. From my professional perspective, integrating sound effectively is akin to how a film’s score underscores its most poignant moments – it can enhance the message and influence the audience’s emotional response.
When I consider the role of audio in presentations, I see it as an opportunity to complement the visual content, break up monotonous speech, and provide clarity through voice-overs or explanations.
The impact of sound on presentation engagement
The inclusion of sound within PowerPoint slides is a game-changer when it comes to engagement. Studies reflect that presentations featuring a mix of audio-visual elements are more likely to hold the audience’s attention and make a lasting impression. That’s because our brains are wired to respond to stories, and an auditory component can turn a static slide into a dynamic narrative.
For instance, music can set the tone and create an emotional response, while voice narrations can guide the audience, ensuring they follow along and absorb the information more effectively. Sound effects, used judiciously, can punctuate key points, almost like an auditory highlighter. It’s a multi-sensory approach that leads to a more immersive and impactful communication experience.
Adding a Sonic Layer: Inserting Audio into Your Slides
Recording your own audio: A step-by-step guide
Recording our own audio for a PowerPoint presentation can personalize and clarify the content. Here’s how I recommend doing it:
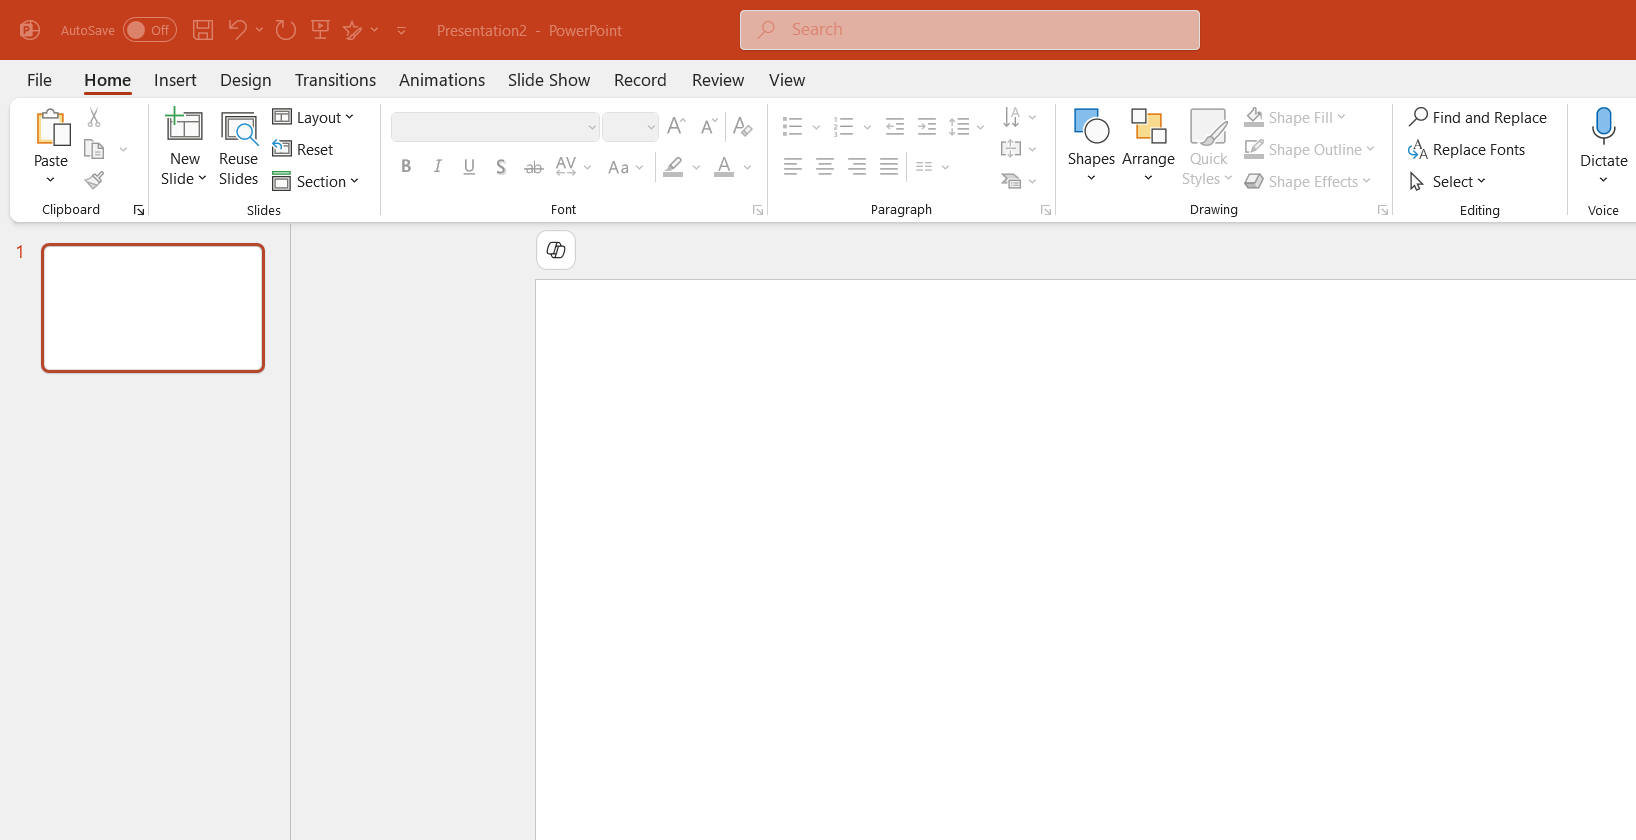
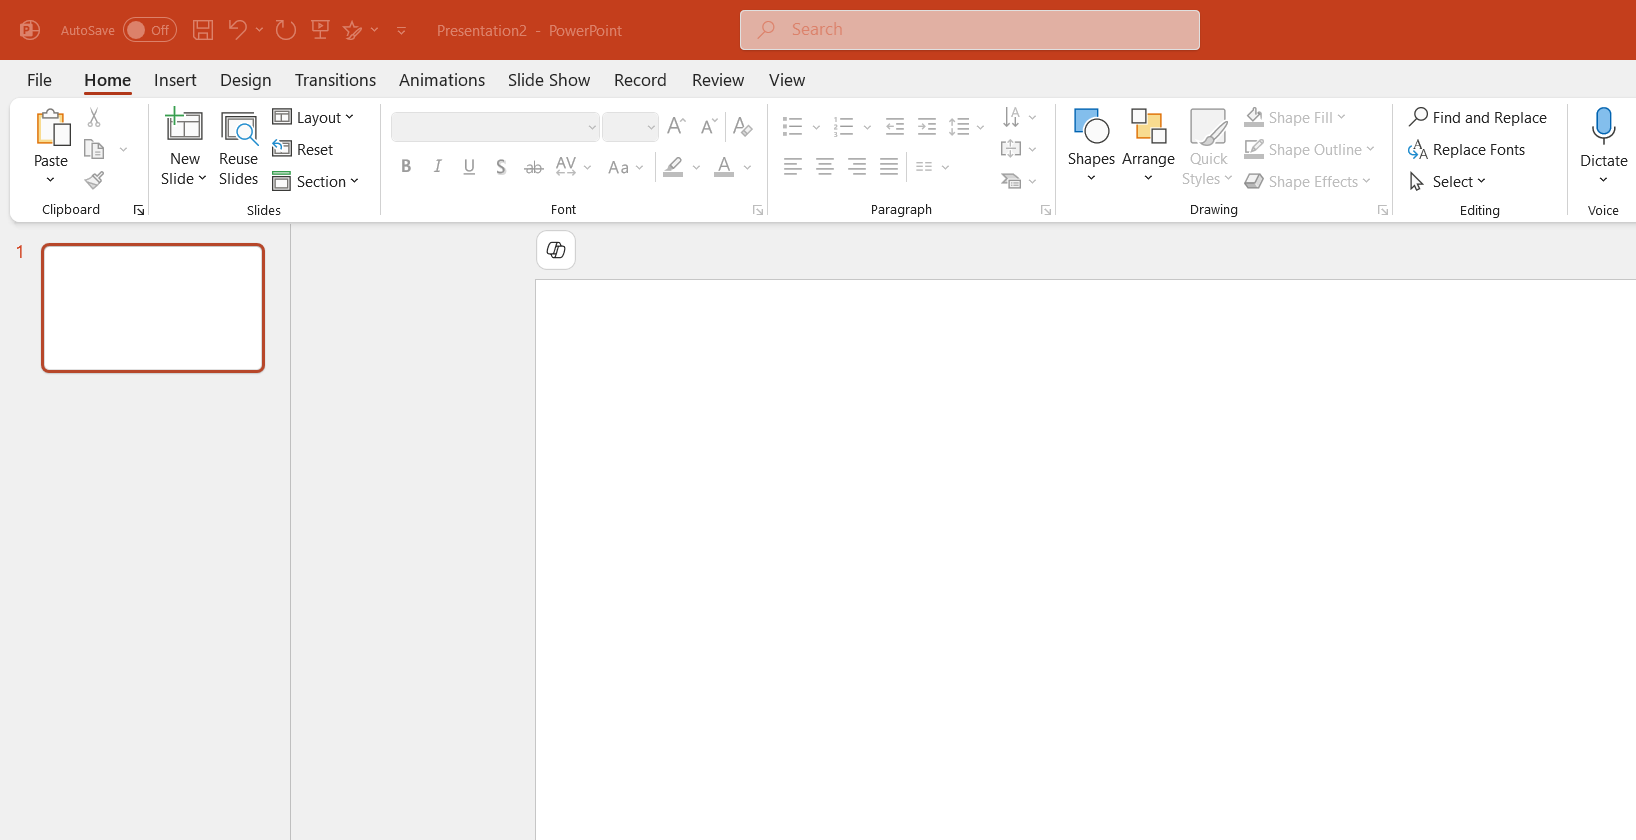
STEP 1: Open the PowerPoint presentation and navigate to the slide where the audio is needed.
STEP 2: Click on the ‘Insert’ tab, then select ‘Audio’ and choose ‘Record Audio’ from the drop-down menu.
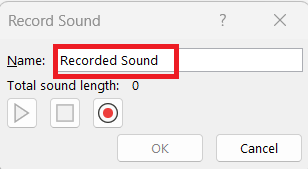
STEP 3: When prompted, provide a name for the audio clip — this helps keep things organized.
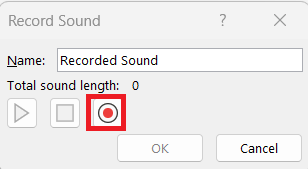
STEP 4: Hit the red ‘Record’ button and speak clearly into your microphone.
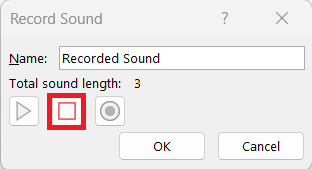
STEP 5: To stop recording, click the ‘Stop’ button. Play it back to ensure the quality and clarity of the audio.
STEP 6: Drag the audio icon to your preferred spot on the slide for consistency.
Keep in mind that a good-quality microphone and a quiet environment are crucial for clear recordings.
Add audio from your computer or online sources
To add an existing audio track from our computers or online sources into a PowerPoint presentation, we should:
STEP 1: Open the presentation and select the slide where the audio will enhance the content.
STEP 2: Click on the ‘Insert’ tab followed by the ‘Audio’ option. Depending on our operating system, we select ‘Audio on My PC’ in Windows or ‘Audio from File’ on a Mac.
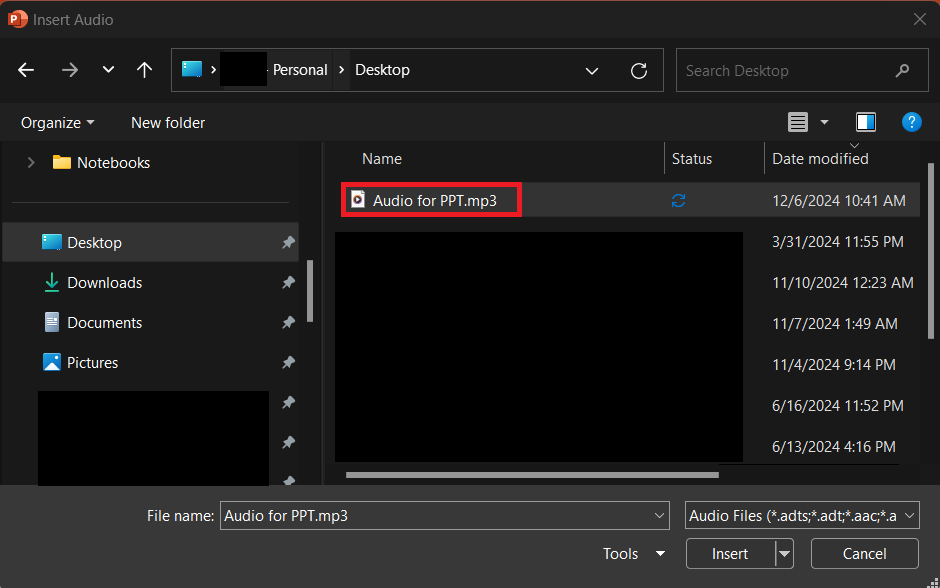
STEP 3: Navigate through the files and choose the desired audio file.
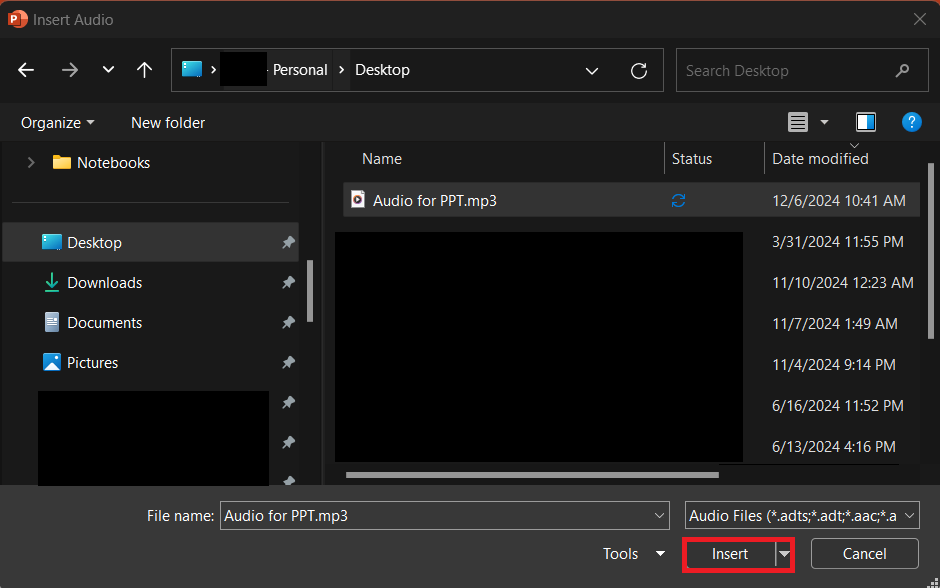
STEP 4: Once the file is selected, click ‘Insert’.
A speaker icon will appear on the slide, representing the audio file. We can then move and resize this icon as necessary and use the ‘Playback’ options to customize how it plays during the slideshow.
Adding audio confirms the narrative or creates the ambiance we envision for our presentation.
Master the Playback: Audio Options and Playback Adjustment
Change playback options for maximum effect
Adjusting the playback options of audio in PowerPoint lets us tailor the experience to fit the flow of our presentation perfectly. Here’s my process:
STEP 1: After inserting an audio clip, click on it to bring up the ‘Playback’.
STEP 2: Under ‘Playback’, there are options like ‘Start’, where we can choose to have the audio ‘Play across slides’, ‘Loop until Stopped’, or ‘Play in Background’, excellent for creating a consistent atmosphere.
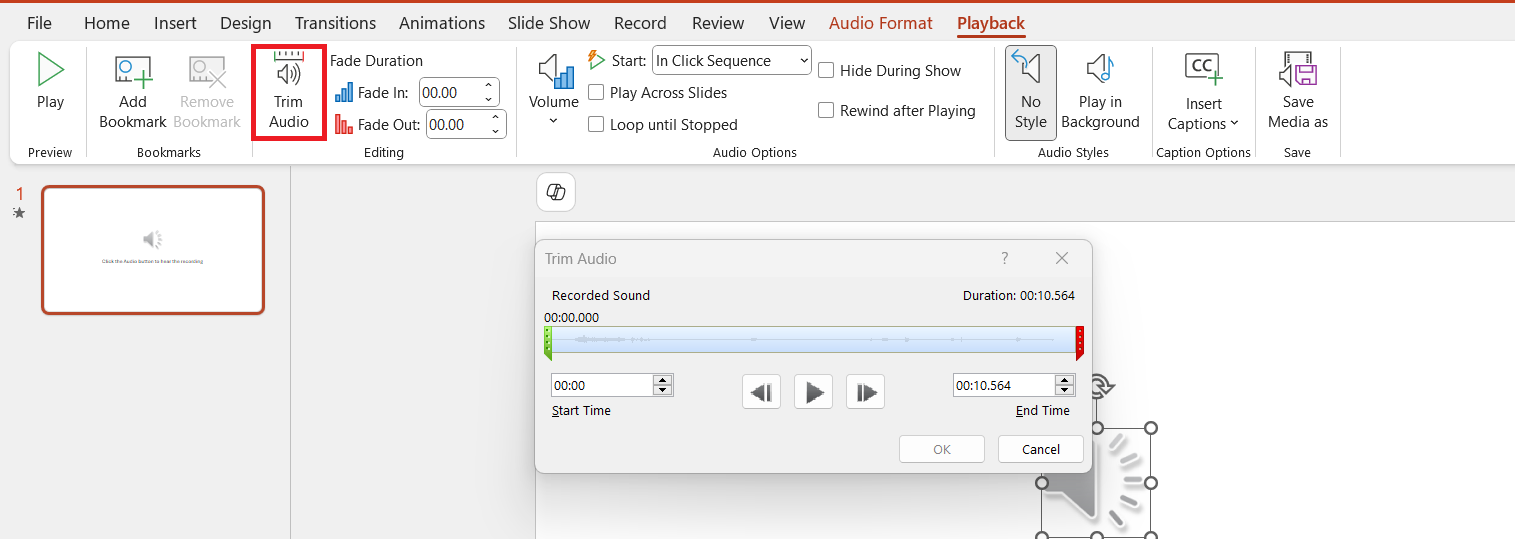
STEP 3: ‘Trim Audio’ allows us to edit the start and end points of the audio clip, ensuring it fits our timeframe.
STEP 4: Adjusting ‘Fade Duration’ helps the sound naturally enter and exit, which can prevent jarring audio changes.
Choosing the right combination of these options can significantly enhance the overall impact and professionalism of our presentation.
Playing audio across slides without interruptions
Ensuring our audio plays smoothly across multiple slides requires a bit of tinkering with PowerPoint’s features. After inserting the desired audio clip into the initial slide, here’s what I do:
STEP 1: In the ‘Playback’ tab, I ensure ‘Play in Background’ is selected. This setting turns on ‘Play Across Slides’, ‘Loop Until Stopped’, and ‘Hide During Show’ by default.
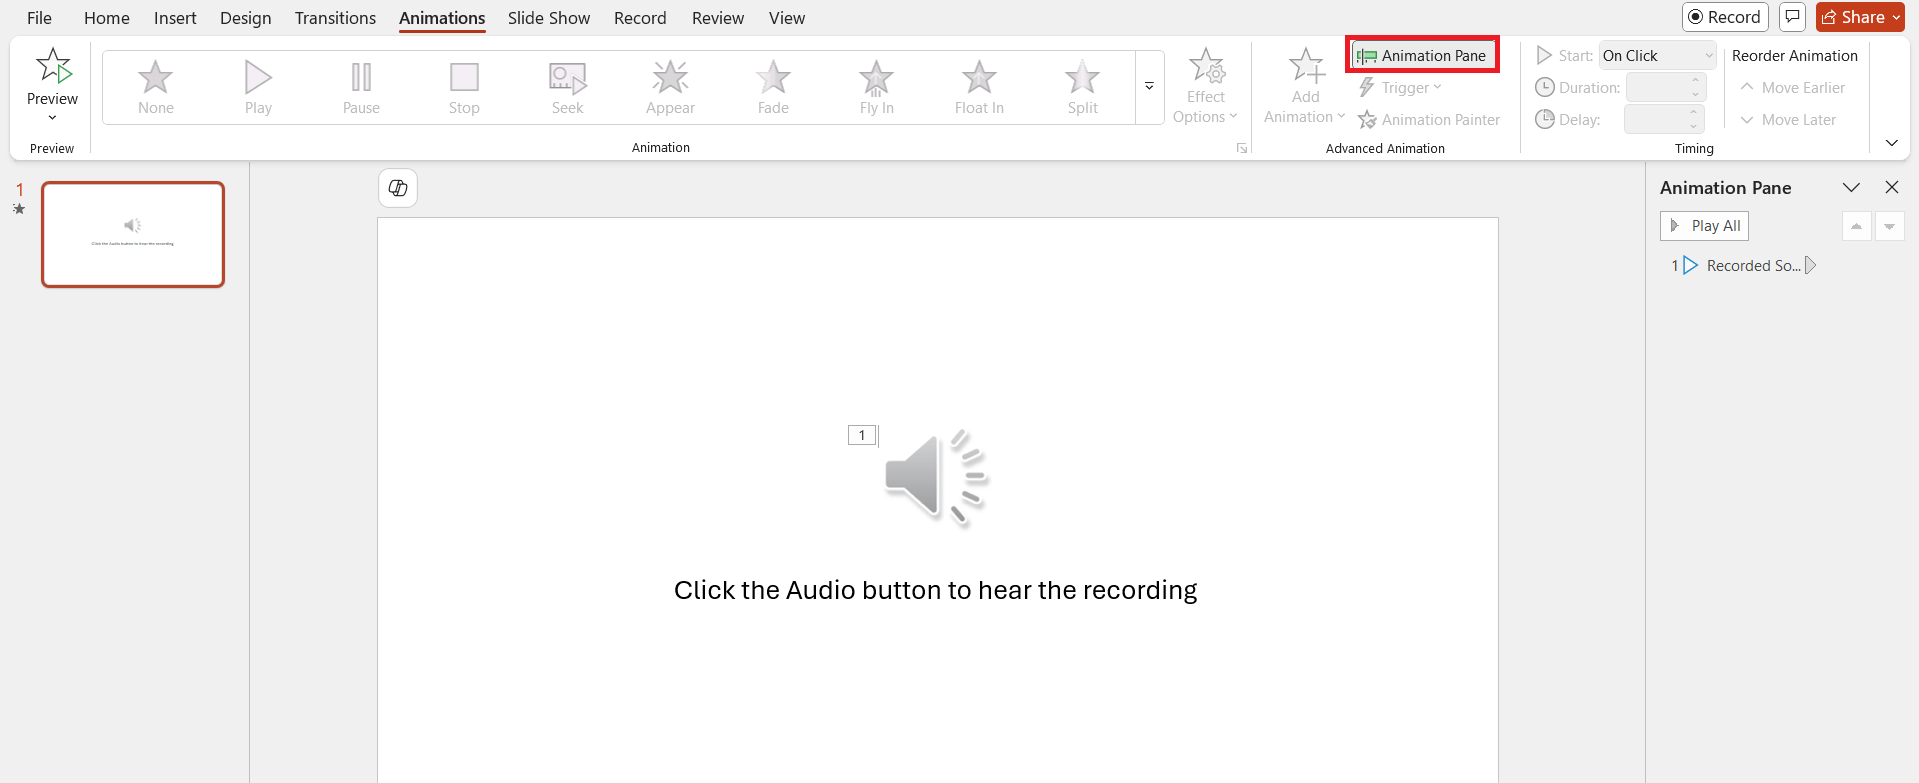
STEP 2: If I want the audio to stop after a certain number of slides, I go to the ‘Animations’ tab and open the ‘Animation Pane’.
Then, I locate the audio file, double-click it, and set the ‘Stop Playing’ option to ‘After’ a specific number of slides. This preparation guarantees that our audio provides a seamless listening experience, setting the stage for our slides to unfold with uninterrupted harmony.
Managing the Unseen: Audio Icons and Timings
Hide the Audio icon for a cleaner slide appearance
For a polished, distraction-free presentation, hiding the audio icon on slides is an elegant solution. Here’s the straightforward approach I take:
STEP 1: Select the audio icon on the slide.
STEP 2: Under the ‘Playback’ tab, look for the ‘Hide During Show’ checkbox and select it.
The key here is to ensure the audio is set to play automatically, otherwise, we’d need the icon visible to trigger playback manually. In the ‘Normal’ view, this will always show, but during the slideshow, it’ll be invisible, offering a much cleaner look to our slide.
In my experience, this neat trick is especially helpful when the visual focus is paramount, and we want to avoid any unnecessary on-screen clutter.
Set the slide timings manually to sync with the audio
Synchronizing our slides to match the timing of our audio can make a world of difference in the presentation’s flow. Manual adjustment is a thoughtful approach to this. To set slide timings manually, I follow these steps:
STEP 1: Click on the slide that needs timing adjustment.
STEP 2: Go to the ‘Transitions’ tab and locate the ‘Timing’ group.
STEP 3: Here, I check the ‘After’ box in the ‘Advance Slide’ section and enter the number of seconds the slide should remain visible.
If we need the slide to advance automatically but also want to retain the option of a manual click, we can check both the ‘On Mouse Click’ and ‘After’ boxes. This dual approach offers us flexibility during the presentation.
Taking control of slide timings like this ensures seamless audio transitions, contributing to a refined and professional outcome.
Common Challenges and Solutions
Overcoming common audio issues in PowerPoint
Navigating common audio troubles in PowerPoint might initially seem daunting, but typically, they resolve with a few simple checks. Here’s how I usually overcome these issues:
- I verify if the audio file format is compatible—formats like MP3 and WAV are generally reliable.
- If the audio doesn’t play, I ensure it is properly embedded and hasn’t just been linked from an external source that’s no longer accessible.
- I check the audio isn’t unintentionally muted or set to an extremely low volume within PowerPoint or on the computer.
- Making sure the slide timings don’t prematurely advance is another crucial step, ensuring the audio has enough time to play.
- Updating the audio drivers and the software ensures there are no compatibility issues due to outdated technology.
By methodically addressing these areas, usually, any audio hiccup in PowerPoint can be rendered just a temporary glitch that’s swiftly corrected.
FAQ: Amplifying Your Presentation Skills
How do I add audio to my PowerPoint slides?
To add audio to your PowerPoint slides, follow these steps:
- Open the slide you want to add audio to.
- Click the ‘Insert’ tab.
- Choose ‘Audio’, then select ‘Audio on My PC’ or ‘Audio from File’.
- Find and select your audio file, then click ‘Insert’.
- An audio icon appears on your slide, which you can click to play during the presentation.
It’s a straightforward process that can significantly enhance the impact of your slides.
Can I play different songs across multiple slides?
Yes, you can play different songs across multiple slides in PowerPoint. Insert each audio file on its respective slide, set ‘Start’ to ‘Automatically’ under the ‘Playback’ tab, and adjust ‘Stop Playing’ options as needed. This allows you to have distinct audio tracks for different segments of your presentation.
Is there a way to record narration directly in PowerPoint?
Indeed, you can record narration directly in PowerPoint. Go to the ‘Slide Show’ tab, select ‘Record Slide Show’, and choose ‘Start Recording from Beginning’ or ‘Start Recording from Current Slide’. This allows you to add voiceovers to each slide as you proceed through the presentation.
What format should my audio file be for use in PowerPoint?
For use in PowerPoint, your audio file should ideally be in a format like MP3 or WAV. These formats are widely supported and ensure compatibility across different versions of PowerPoint and computer systems.
How can I ensure my audio plays automatically during the slideshow?
To ensure your audio plays automatically during the slideshow, select the audio icon on your slide, go to the ‘Playback’ tab, and choose ‘Start Automatically’ from the ‘Start’ dropdown menu. This makes your audio commence as soon as you arrive at the respective slide.
John Michaloudis is a former accountant and finance analyst at General Electric, a Microsoft MVP since 2020, an Amazon #1 bestselling author of 4 Microsoft Excel books and teacher of Microsoft Excel & Office over at his flagship MyExcelOnline Academy Online Course.

