When you’re working with a large dataset in Excel, one of the best ways to make your work stand out is by applying styles to the important parts of your data. Specifically, the “Calculation” style can give your calculations a professional and organized look. Excel makes it simple to format your cells, but it’s not just about aesthetics—it’s also about making your data easier to read and interpret.
In this article, I’ll walk you through the steps on How to Apply Calculation Style in Excel. I’ll explain why it’s useful, and we’ll explore a few tips and tricks along the way to help you customize it for your own needs.
Key Takeaways:
- The Calculation Style in Excel visually distinguishes formula cells, making data easier to interpret.
- Readability and Consistency are enhanced by applying the Calculation Style across large datasets.
- Customizing Styles allows precise control over formatting, tailored to specific project needs.
- Predefined and Custom Styles save time by offering quick formatting solutions, improving efficiency.
- Calculation Styles work on both Windows and Mac versions of Excel, ensuring cross-platform consistency.
Table of Contents
Unlocking the Power of Calculation Styles in Excel
What Is the Calculation Style in Excel?
Excel offers built-in cell styles that can save you time when formatting different types of data. Among these, the Calculation Style is particularly useful for any cells that contain formulas or calculated results. The style applies specific formatting (such as bold, and blue text) to visually differentiate calculated data from other values. This can help you quickly spot errors, and it can also make your spreadsheets more intuitive for others to understand.
In short, applying the Calculation Style makes it easier for anyone—whether it’s you, your team, or external viewers—to immediately identify where the calculations are happening in your spreadsheet.
Why Should I Use the Calculation Style?
Let me share a few reasons why I use the Calculation Style frequently:
- Readability: Large datasets can be overwhelming, and having a visual cue like the Calculation Style makes it easy to spot where formulas are used.
- Consistency: Applying consistent formatting across your workbook ensures that all your calculations look uniform. This can be helpful when sharing files with others.
- Error Prevention: By highlighting the cells with calculations, you can quickly identify where a mistake might be when you’re troubleshooting errors in your spreadsheet.
- Time-Saving: Once you’ve applied the Calculation Style, it saves you the hassle of manually adjusting formatting every time you add or modify a formula.
Now, let’s get into the step-by-step guide on how to apply the Calculation Style to your worksheet.
How to Apply Calculation Style in Excel
Accessing and Using Predefined Cell Styles
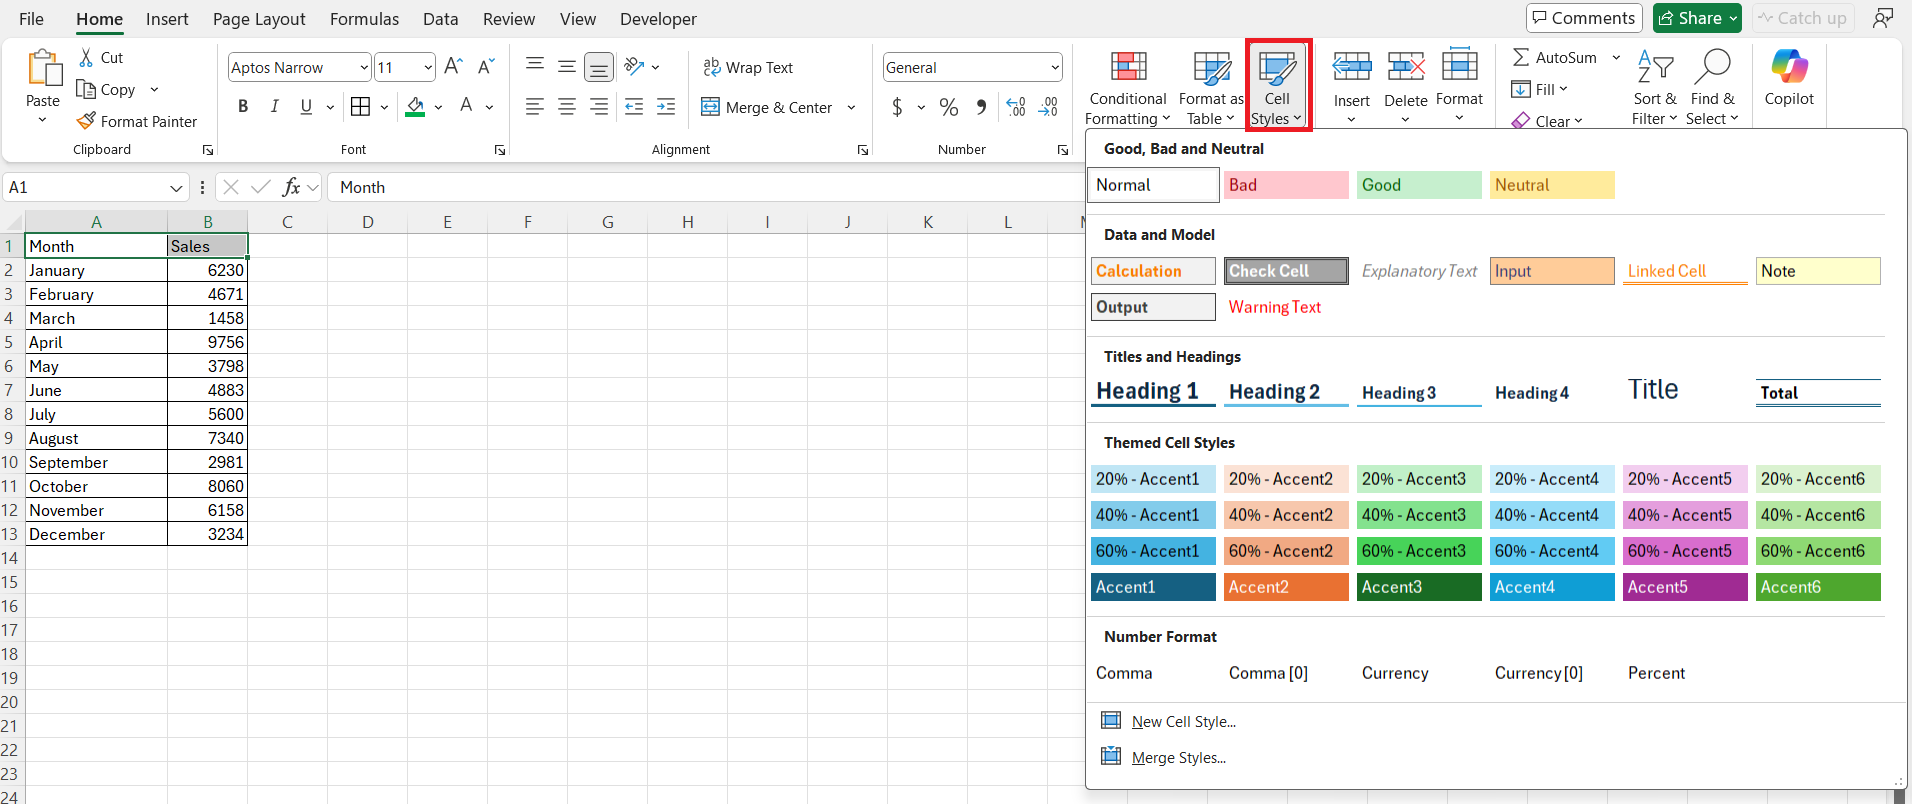
Accessing and using predefined cell styles is the gateway to enhancing a spreadsheet’s visual hierarchy, which can be accomplished effortlessly in Excel. When I want to apply these built-in styles, I simply select the cells that require formatting, navigate to the ‘Home’ tab, and in the ‘Styles’ group, click on the more options arrow to unveil the style gallery.
Here, it’s straightforward to pick out a style that suits my objective for the selected cells.
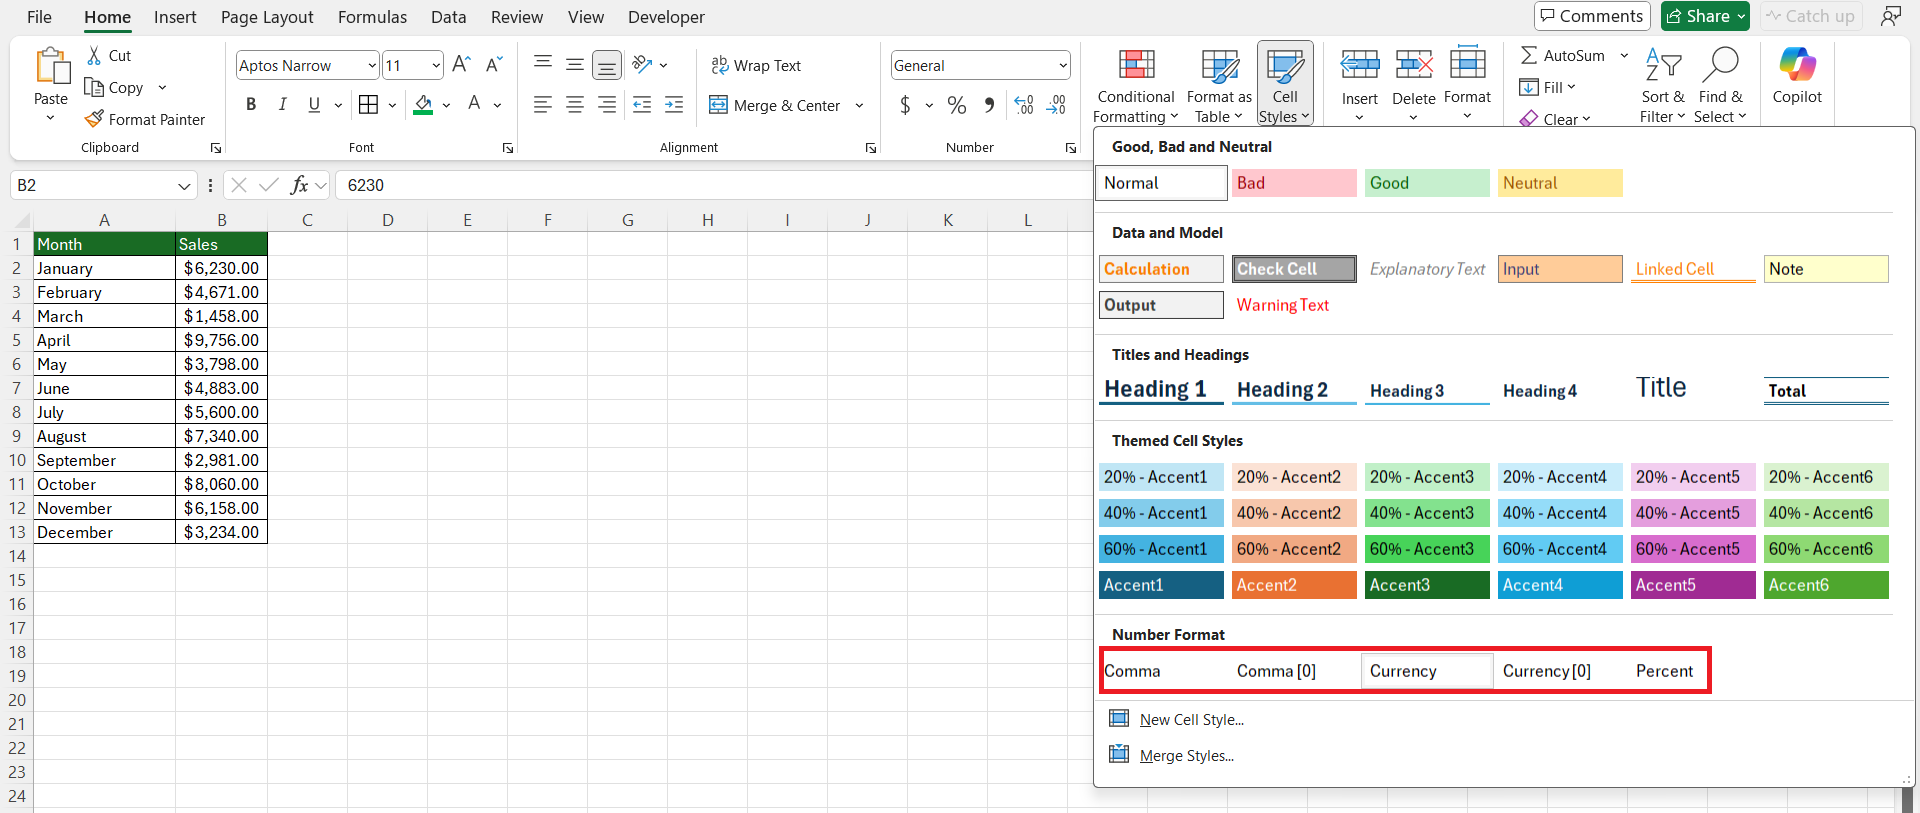
The plethora of choices within the gallery includes ‘Normal’, ‘Currency’, ‘Percent’, and more, which are instantly applicable to my selected range.
These styles are premised on the workbook’s theme, so they integrate seamlessly with the overall design. What’s more, Excel facilitates consistency in presentation through these styles which is crucial for professional documentation.
Creating Custom Calculation Styles from Scratch
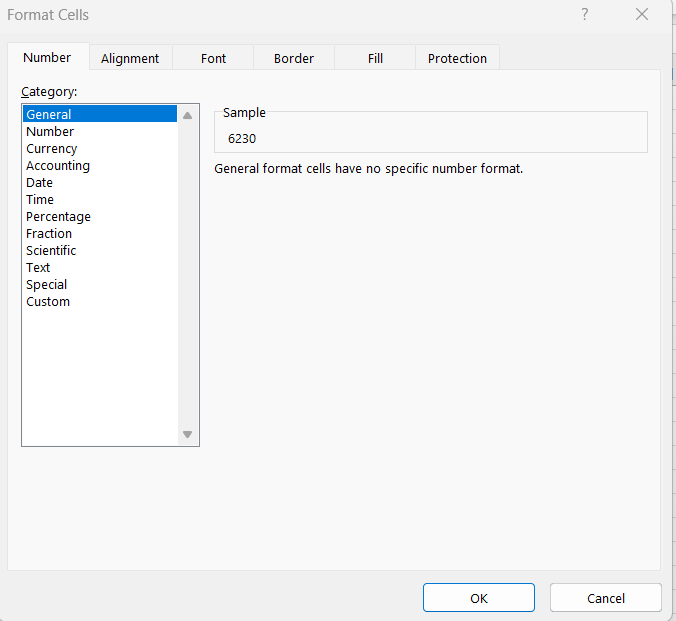
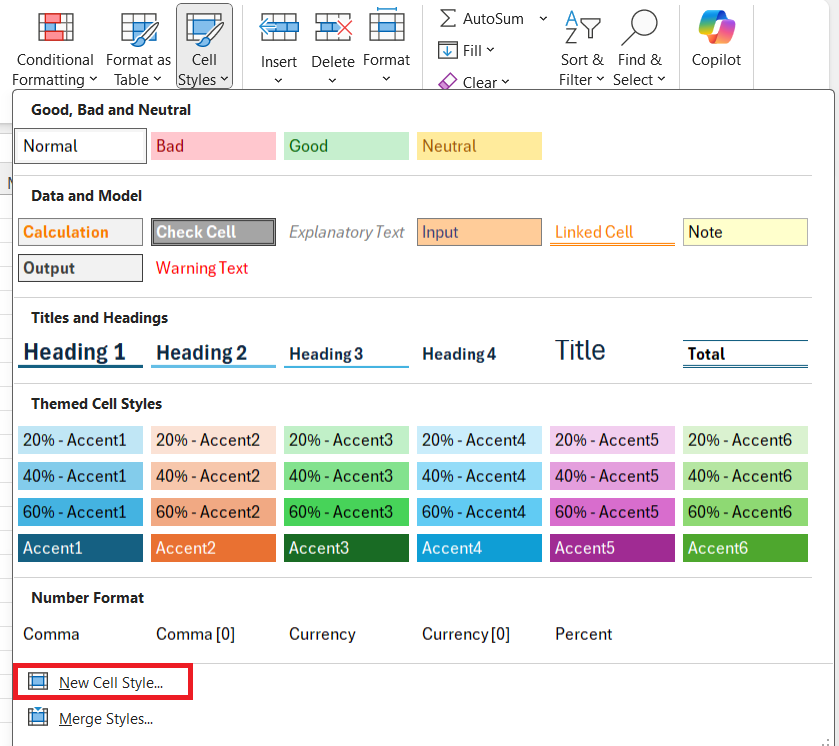
Creating custom calculation styles from scratch lets me go beyond the scope of Excel’s predefined options and tailor cell appearances precisely to the project’s requirements. Embarking on this creative endeavor, I select the cells I intend to modify, then right-click and choose ‘Format Cells’, or press Ctrl+1 to open the Format Cells dialog box.
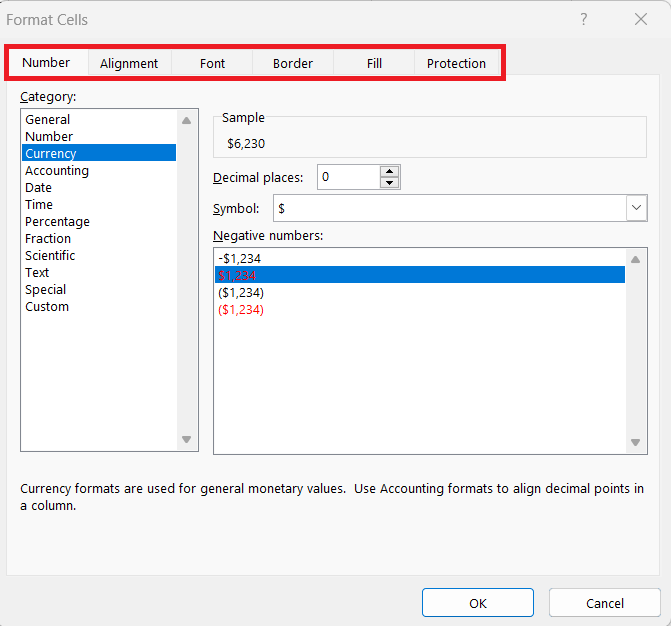
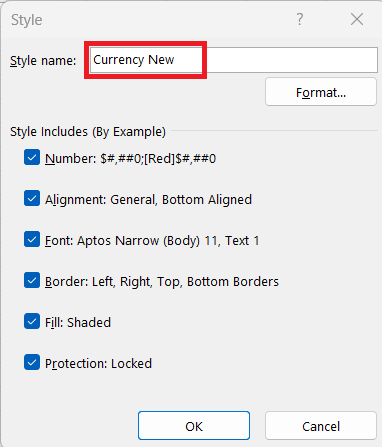
Herein lies the flexibility of Excel: I can manipulate number formats, alignment, font, border, and fill properties to craft a completely personalized style.
Upon perfecting the style, I can save it for repeated use within the workbook by clicking ‘New Cell Style’ after setting all desired formatting options.
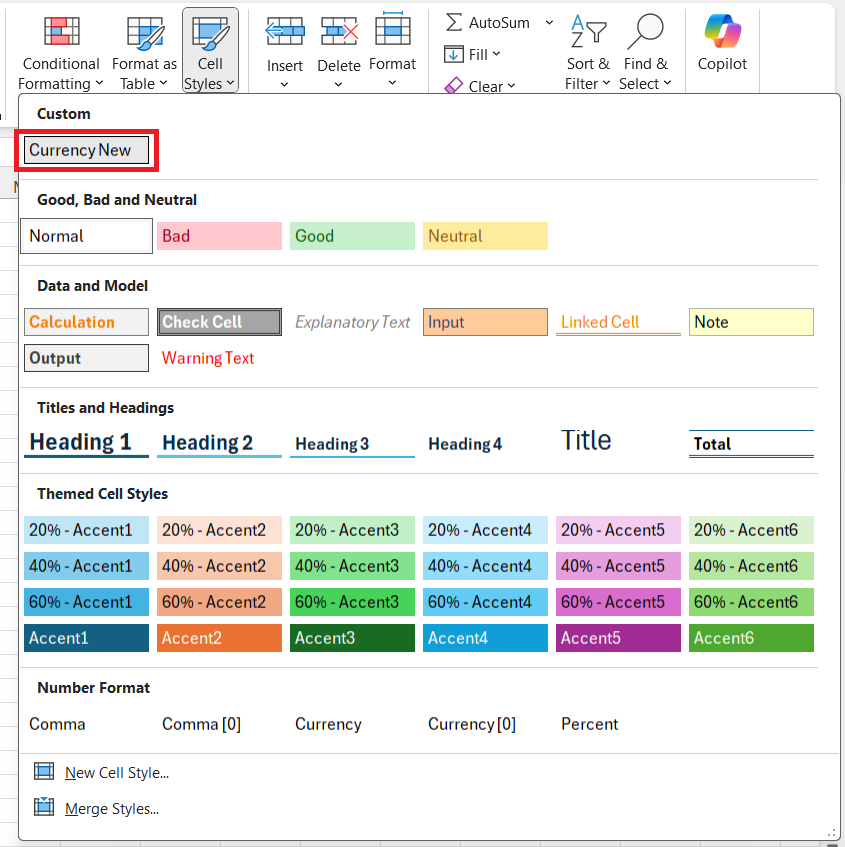
I name this crafted style for reference.
Excel adds it to my gallery of cell styles, ready to be applied to any relevant cells or range.
It’s a powerful method to establish a consistent visual language within a spreadsheet.
Personalizing Your Data with Calculation Styles
Modifying an Existing Calculation Style for Precision
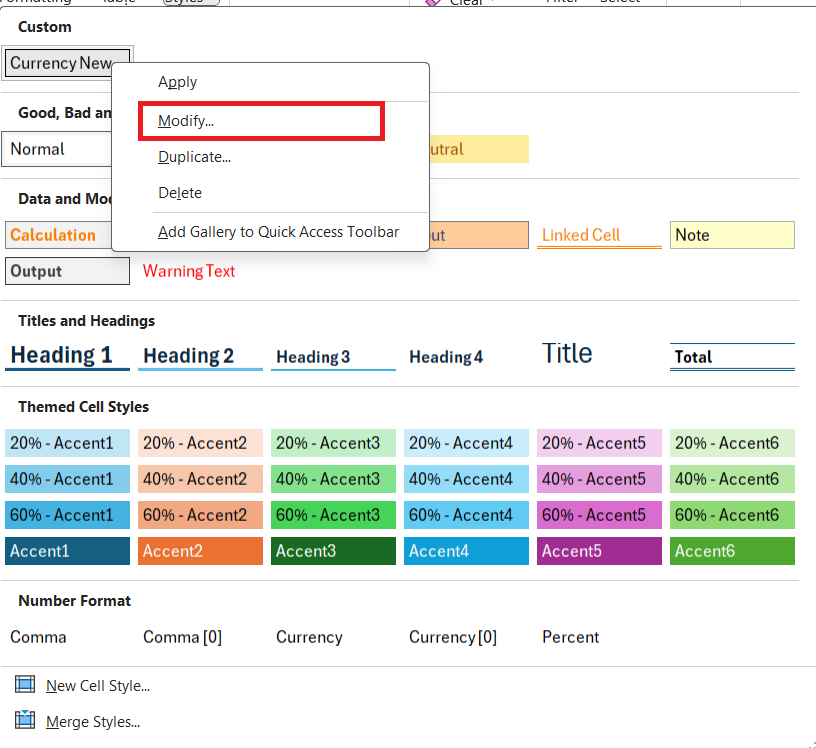
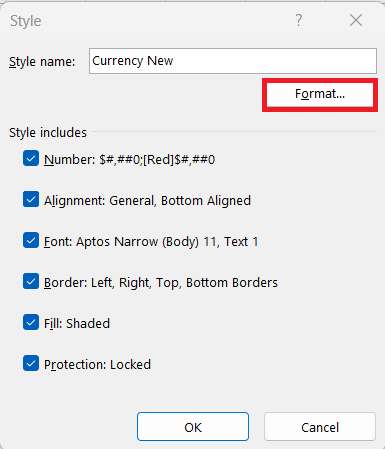
Modifying an existing calculation style is a process that gives me precise control over the presentation of my data. Starting with a predefined style, I can then shape it to meet the particular demands of my dataset. Here’s how it unfolds: Upon locating the Calculation Style that needs refinement, I right-click and select ‘Modify’ from the context menu.
This springs open the Style dialog box where I select ‘Format’ to access the modifications.
In the Format Cells window, numerous tabs await, each one an opportunity to fine-tune elements like number formats or text alignment. It’s here that the number tab lets me adjust decimal places or date formats, for instance, which is pivotal for financial sheets where precision is paramount. The font tab allows adjustments in terms of typeface, size, or color, thus emphasizing certain calculations or summary cells.
During this meticulous process, I ensure the checkboxes in the ‘Style Includes’ section correspond to the formatting elements I want to apply. It’s crucial for marrying style with function; an unchecked box means that a particular format won’t change.
Upon hitting OK, my custom adjustments are saved, and this enhanced Calculation Style now embodies the perfect fitting for my data nuances.
Frequently Asked Questions
What is the calculation style and when should it be used?
A calculation style is a predefined or custom Excel format that changes the appearance of cells, typically based on the type of calculation or data input they contain. It should be used when you want to distinguish calculation cells from regular data entries visually, highlight key figures, or when you want to create a clear and consistent formatting structure within your spreadsheet for better readability.
How do I apply the calculation style to a cell in Excel?
To apply the calculation style to a cell in Excel, first, select the cell or range of cells you wish to format. Then, navigate to the ‘Home’ tab, click on the ‘Cell Styles’ button in the Styles group, and from the dropdown menu, choose ‘Calculation’ which applies the predefined calculation style to your selected cells. If it’s not visible, you might need to expand the Cell Styles menu or create a new custom style if a specific look is needed.
Can Calculation Styles Be Used on Both Windows and Mac Versions of Excel?
Yes, calculation styles can be used on both Windows and Mac versions of Excel. Both platforms offer similar functionality for applying and customizing cell styles, ensuring that users can utilize these features regardless of their operating system. It’s important, however, to be mindful of any slight interface differences between the two versions that may affect the user experience.
What’s the Difference Between Cell Styles and Conditional Formatting?
Cell Styles are predefined or custom sets of formatting options applied manually to cells to ensure uniformity in appearance, whereas Conditional Formatting refers to Excel’s feature that applies formatting to cells automatically based on their values. While cell styles remain static until the user changes them, conditional formatting dynamically updates as the data in the cells change, reflecting instant visual cues about the data.
What are some common cell styles available in Excel?
Some common cell styles available in Excel include Normal, Currency, Comma, Percent, Title, Heading 1, and Total. These styles cater to different data presentations, such as financial figures, headlines, and accumulated sums, and are accessible from the Cell Styles gallery in the Styles group of the Home tab. They provide a quick and efficient means to ensure consistency and clarity in your spreadsheet’s formatting.
John Michaloudis is a former accountant and finance analyst at General Electric, a Microsoft MVP since 2020, an Amazon #1 bestselling author of 4 Microsoft Excel books and teacher of Microsoft Excel & Office over at his flagship MyExcelOnline Academy Online Course.

