Microsoft Teams has become an essential tool for managing communications, especially when juggling multiple projects and teams. However, with constant messages, calls, and activities, it’s easy for your Teams workspace to feel cluttered. If you’re like me and want to declutter and manage your digital workspace, clearing history in Microsoft Teams is a straightforward way to stay organized. In this article, I’ll walk you through how to clear history in Microsoft Teams, covering both chat and activity cleanup.
Key Takeaways:
- Microsoft Teams doesn’t have a single “clear history” button, but you can manage chats and cached data to declutter your workspace.
- Deleting your own messages removes them from your view, though recipients still see a placeholder indicating deletion.
- You can hide or leave chats to keep your interface streamlined without deleting the entire history.
- Clearing the app’s cache improves performance and resets temporary data without affecting saved chats or files.
- Admin settings and retention policies may limit your ability to delete specific messages or activity logs.
Table of Contents
Introduction to Clearing Chat History in Microsoft Teams
Overview of Microsoft Teams’ Chat Features
Microsoft Teams, as a hub for collaborative endeavors, offers a variety of chat features designed to suit our communication needs. The platform allows for one-on-one chats, enabling private dialogues directly between colleagues. For group efforts, we can opt for multi-participant group chats that can be conveniently named for quick reference.
What’s more, there’s even a ‘Chat with yourself’ feature — perfect for jotting down notes or transferring files across devices, this chat stays pinned for easy access. Central to advancing our collaborative work, these chat functionalities are thoughtfully implemented to foster easy and efficient communication.
Can You Completely Clear History in Microsoft Teams?
First, let’s set expectations. Microsoft Teams doesn’t have a one-click “clear history” button like some other platforms. However, you can manage chats, delete individual messages, and clear cached data to tidy up your experience. While you can’t erase all activity logs or chat history for everyone, you can manage your personal view effectively.
How to Clear History in Microsoft Teams
Delete Messages in Chat
If you sent a message you no longer need or that’s irrelevant, you can delete it. Here’s how:
STEP 1: Open the Chat where the message you want to delete is located.
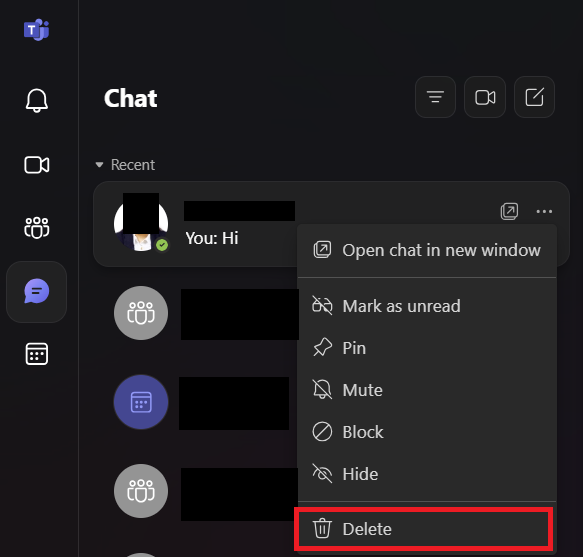
STEP 2: Hover over the message and click on the three dots (More Options) that appear. Select Delete.
STEP 3: A prompt will appear confirming the deletion. Click Delete again.
The message will be deleted. While you can clean up your end, recipients may still see this placeholder.
Hide or Leave Chats
If there’s a chat you no longer need, hiding or leaving it can help declutter your Teams interface.
To hide a chat:
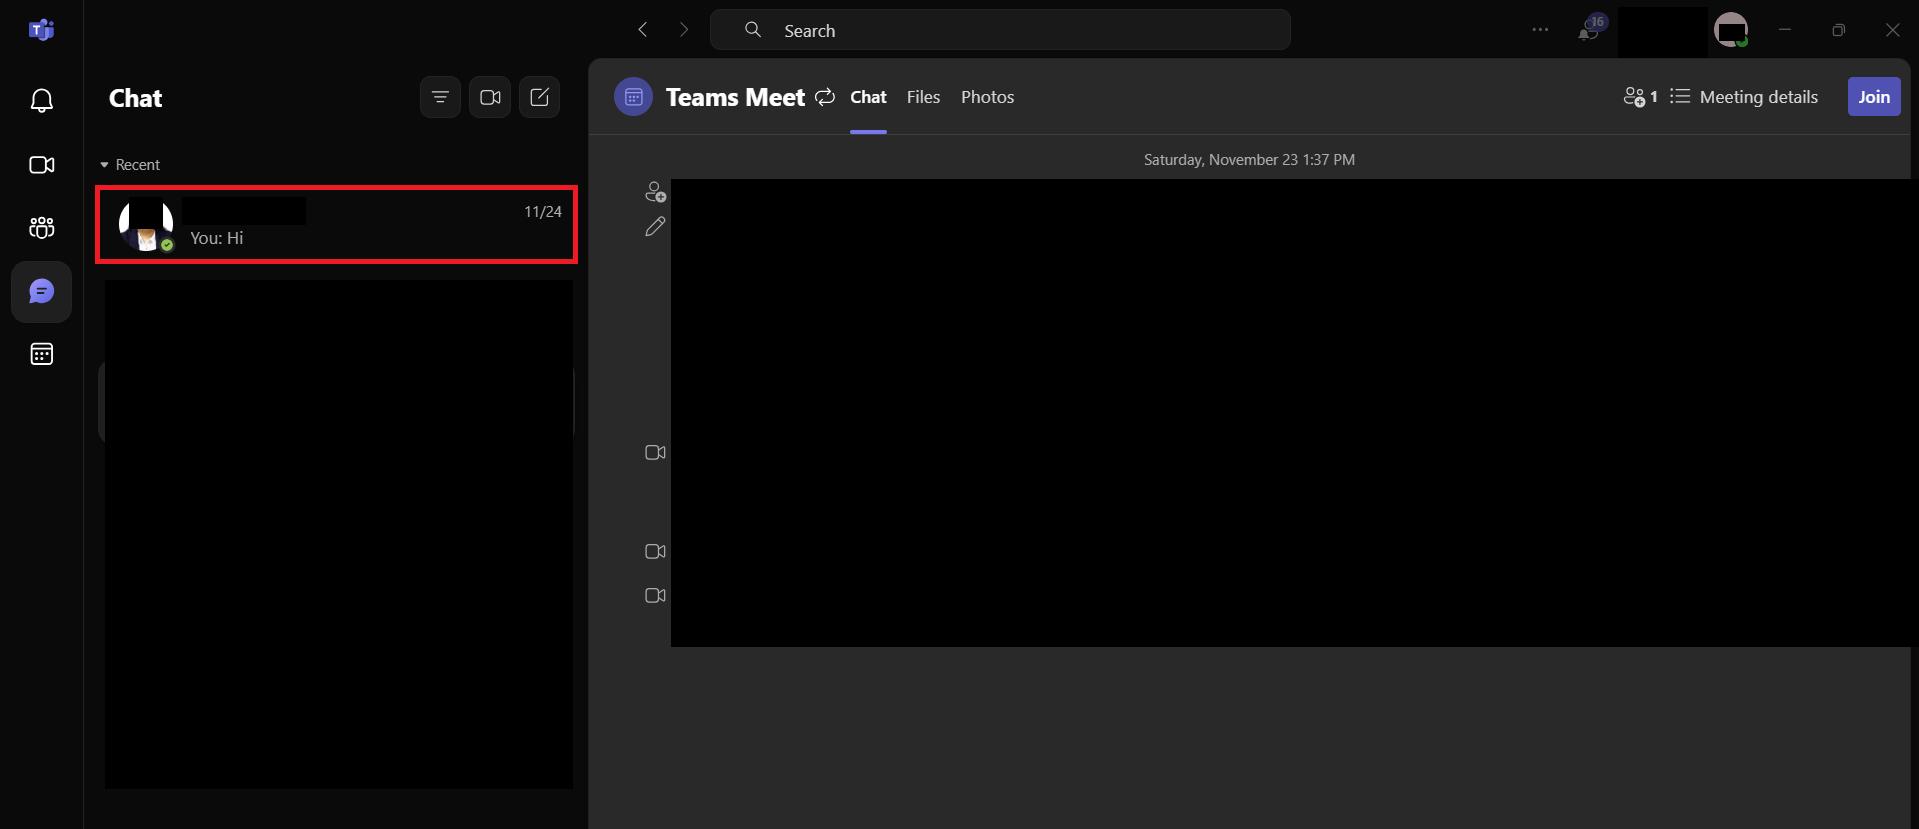
STEP 1: Go to the Chat section in Teams.
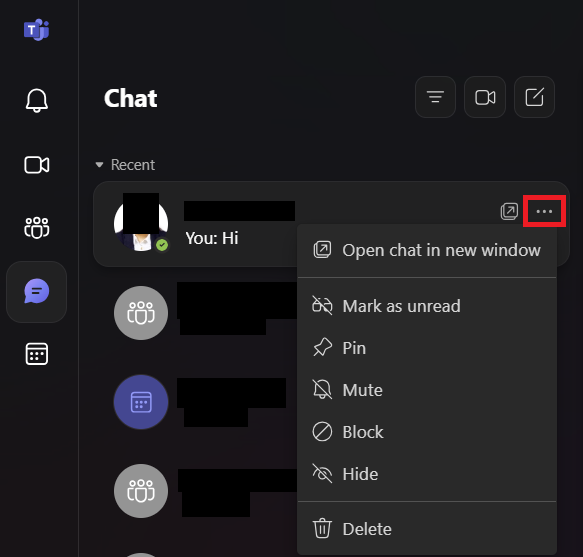
STEP 2: Right-click on the chat or click the three dots (More Options) next to it.
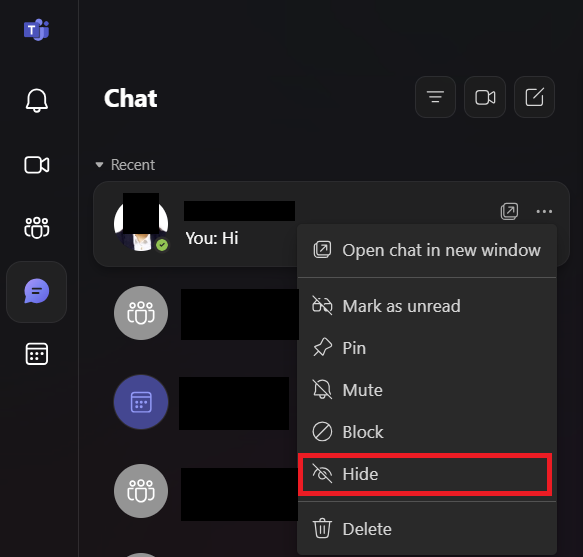
STEP 3: Select Hide.
Don’t worry! Hiding doesn’t delete the chat—it simply removes it from your view. If you need to revisit the conversation, search for it in the search bar.
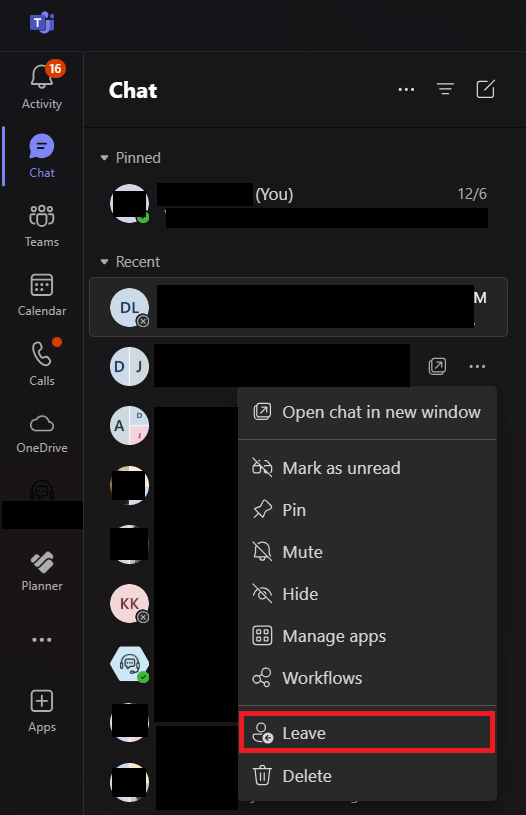
To leave a group chat:
STEP 1: Open the group chat you want to leave.
STEP 2: Click on the three dots (More Options) in the chat header.
STEP 3: Select Leave.
Clear Cached Data in Microsoft Teams
Sometimes, Teams retains cached data that can make the app feel sluggish or cluttered. Clearing the cache can help. Follow the steps below –
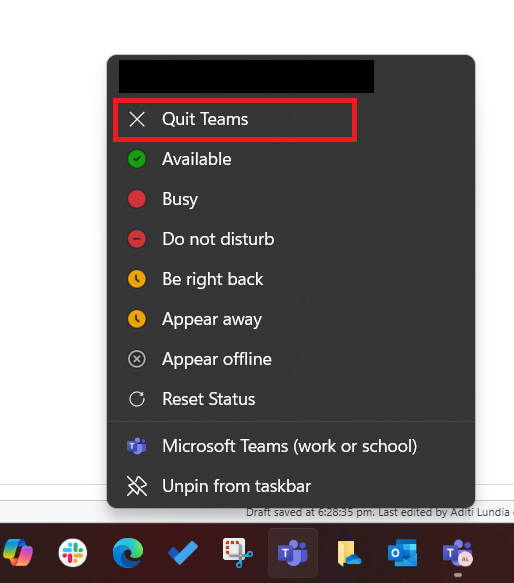
STEP 1: Close Microsoft Teams completely. Right-click the Teams icon in your taskbar and select Quit.
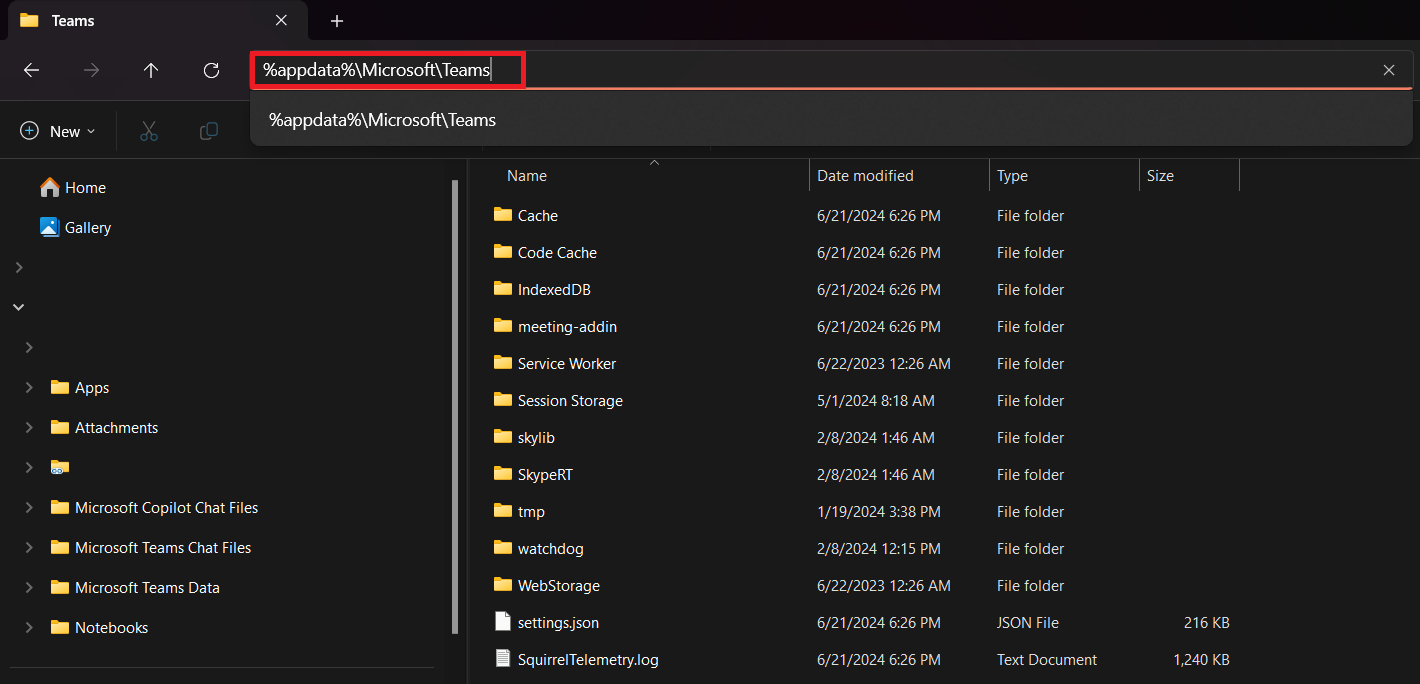
STEP 2: Open File Explorer and navigate to: %appdata%\Microsoft\Teams
STEP 3: Delete the following folders: Application Cache, Cache, databases, GPUCache, IndexedDB, Local Storage, tmp.
STEP 4: Restart Teams.
Manage Activity Feed
Your Activity Feed can also get cluttered. While there’s no “clear all” option, you can manually manage it:
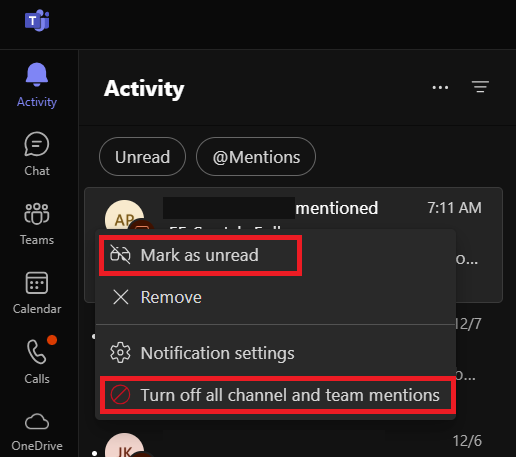
STEP 1: Open the Activity tab in Teams.
STEP 2: Right-click or click on the three dots.
STEP 3: Select Mark as Read or Turn off Notifications to reduce unnecessary clutter.
Tips for Managing Privacy and Storage
Handling Deleted Message Notifications
Dealing with deleted message notifications in Microsoft Teams requires an understanding of what those notifications signify. When a message is removed, Teams displays ‘This message has been deleted’ to indicate that content has changed. It acknowledges the gap and maintains the flow of conversation without divulging specifics.
As an admin, one might notice a different notification stating ‘This message was deleted by an admin’, which distinguishes administrative actions from those taken by individual users. Keeping a keen eye on these notifications allows me to stay informed about the activity within various teams and ensures transparency in chat interactions.
Editing Messages vs. Deleting: What’s the Difference?
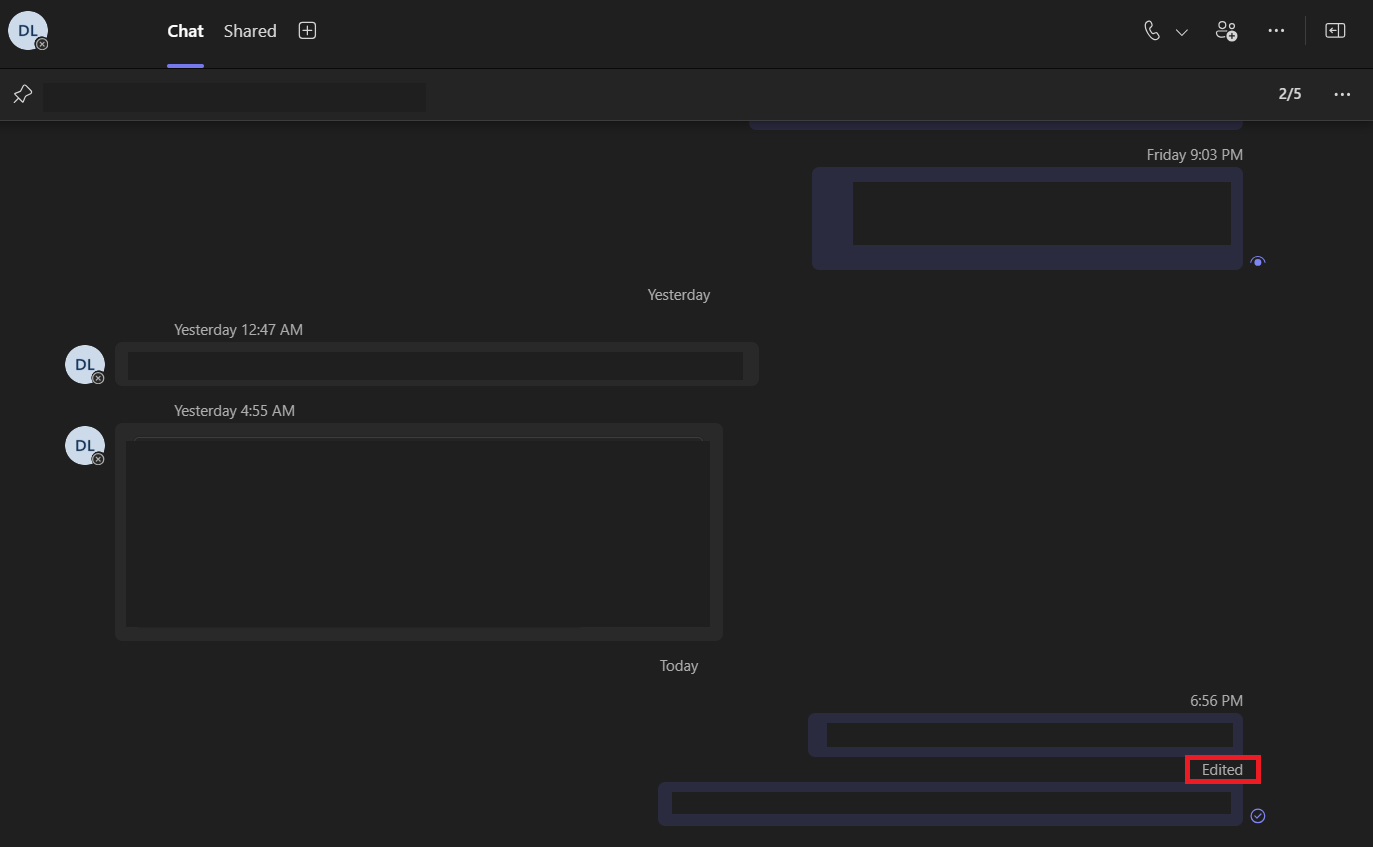
Editing messages and deleting them in Microsoft Teams serve different purposes, and discerning when to use each function is key to maintaining effective communication. Editing a message is my go-to for correcting typos, updating information, or clarifying a statement, and the edited message is discreetly marked as ‘Edited’ to notify others of the change.
Deletion, on the other hand, comes into play when a message is no longer relevant or should not have been sent; it leaves behind a placeholder indicating a message was deleted. It’s about choosing the route that best preserves the integrity and clarity of our digital conversations.
Troubleshooting Common Deletion Issues
Why Some Messages Can’t Be Deleted
At times, I encounter messages within Microsoft Teams that defy deletion, and it’s essential to understand the reasons behind this. Some messages, especially those that are system-generated like meeting summaries or certain notifications, are designed to be permanent for reference.
Also, if an admin has restricted deletion rights in the messaging policies, then users will find their ability to delete messages is curtailed. It pays to be aware of your organization’s settings and restrictions which determine what can and cannot be removed from the chat history.
Resolving Errors when Clearing Chat Data
Running into errors when trying to clear chat data in Microsoft Teams can be frustrating. If I strike against an uncooperative cache that refuses to be cleared or messages that persist despite my best efforts to delete, there are steps I can take.
One reliable method is to manually clear the Teams cache by signing out, deleting specific files from the app’s data folder, and then restarting Teams. It’s also wise to check for any updates to the app—Microsoft periodically releases patches that could resolve such glitches. Persisting issues could flag the need for assistance from an IT professional or Microsoft support.
Best Practices for a Streamlined Teams Experience
Regularly Clearing Chats to Maintain Efficiency
I cannot overstate the benefits of regularly clearing chats to maintain efficiency. A periodic clean-up serves as the digital equivalent of decluttering your workspace, which can sharpen focus and reduce cognitive overload. By removing conversations that are no longer active or relevant, we make room for new, pertinent discussions.
It becomes quicker and easier to find essential information when it’s not buried under a pile of outdated exchanges. This practice of digital tidiness helps keep not only our chats but also our thoughts and work processes clear and directed.
Cultivating Positive Digital Communication Habits
Cultivating positive digital communication habits within Microsoft Teams transcends mere technicalities; it’s about nurturing a culture of clear, concise, and respectful interaction. By setting clear guidelines on message brevity, responsiveness, and the appropriate use of features like ‘@mentions’, we can foster a more productive environment. Encouraging the use of ‘likes’ or ‘reactions’ to acknowledge messages without cluttering threads can also be effective.
And let’s not forget the significance of regularly reviewing and archiving important conversations to prevent valuable insights from getting lost in the fray. These habits, when consistently practiced, can transform a team’s digital communication dynamics for the better.
FAQs on Clearing Microsoft Teams Chat History
How do I delete activity history on Teams?
To delete activity history on Teams, currently, you can manage specific items by marking them as read or hiding notifications, but you cannot delete the entire activity feed.
How Can I Ensure a Message is Completely Deleted from Teams?
Once you delete a message in Teams, it’s removed from your chat history and isn’t visible to other participants. Ensure complete deletion by checking your organization’s retention policies to know how long Teams keeps data before it’s permanently deleted.
What are the Limitations of Microsoft Teams’ Chat Delete Function?
Microsoft Teams’ chat delete function allows users to remove their own messages, but not system messages or entire chat histories. Also, deletion may be restricted by administrative settings, and certain compliance or retention policies could override it.
What is the duration for which Microsoft teams retains call history?
Microsoft Teams retains call history indefinitely unless you manually delete call entries. There is no automatic deletion over time, so it’s up to users to manage their call logs as necessary.
Why clear your call history?
Clearing your call history in Teams is important for privacy, as it removes traces of past conversations, and for organization, helping you declutter and easily locate recent calls.
John Michaloudis is a former accountant and finance analyst at General Electric, a Microsoft MVP since 2020, an Amazon #1 bestselling author of 4 Microsoft Excel books and teacher of Microsoft Excel & Office over at his flagship MyExcelOnline Academy Online Course.

