As someone who frequently deals with sensitive information, I understand the importance of keeping my emails secure. Encrypting emails in Outlook in Microsoft 365 is a crucial step to ensure that only the intended recipient can read the contents of my messages.
In this article, I’ll walk you through the process of How to Encrypt in Outlook, explain the different encryption options available, and share some tips for using email encryption effectively.
Key Takeaways:
- Email encryption in Outlook ensures that only the intended recipient can access your message.
- Outlook offers two main encryption options: S/MIME and Microsoft 365 Message Encryption.
- S/MIME requires certificates, while Microsoft 365 encryption is simpler and doesn’t need certificates.
- Test encryption with trusted recipients and communicate encryption instructions to avoid access issues.
- Some encryption features may incur additional costs, depending on your Outlook plan and certificate needs.
Table of Contents
Keeping Your Conversations Confidential
The Rise of Email Privacy Concerns
In our digitally driven world, email privacy concerns are at an all-time high. Daily, we navigate through floods of messaging containing varying degrees of sensitive information. Unfortunately, cybercriminals are becoming increasingly sophisticated, targeting these digital exchanges to exploit personal and business communications.
The realization has dawned on us that simple passwords are no longer robust enough defenses. As such, encryption in popular email services like Outlook has become key in the battle to protect digital correspondence.
Quick Overview of Encryption in Outlook
To address these concerns, Outlook offers built-in encryption features that serve as a secure envelope for your digital conversations. Encryption transforms the content of an email into a scrambled format that can only be read by someone who has the right decryption key.
In Outlook, users have options like Encrypt Only and Do Not Forward, which I find to be straightforward yet robust security measures for ensuring both confidentiality and control over email content.
When users encrypt emails in Outlook, they’re deploying a technology that’s akin to sealing a letter in a tamper-proof envelope. It’s essential to acknowledge that this not only prevents unauthorized access but also ensures that a message’s integrity is maintained from sender to recipient.
Introduction to Encrypt Email in Outlook
Understanding Email Encryption
Before diving into the steps, it’s essential to understand what email encryption is and why it’s important. Email encryption converts readable plain text into scrambled cipher text, which can only be deciphered by someone who has a private key that matches the public key used to encrypt the message.
This ensures that even if someone intercepts the email, they won’t be able to read its contents.
Encryption Options in Outlook
Outlook in Microsoft 365 offers two primary encryption options:
- S/MIME Encryption: This method requires both the sender and recipient to have a mail application that supports the S/MIME standard. It uses certificates to encrypt and sign emails.
- Microsoft 365 Message Encryption (Information Rights Management – IRM): This method is available to Microsoft 365 subscribers and allows for easy encryption without the need for certificates. It includes options like “Encrypt-Only” and “Do Not Forward.”
Step-by-Step Guide on How to Encrypt in Outlook
S/MIME Encryption
To use S/MIME encryption, I first need to obtain a certificate and add it to my computer’s keychain. Here’s how I do it:
STEP 1: Open Outlook and go to the File menu.
STEP 2: Select Options.
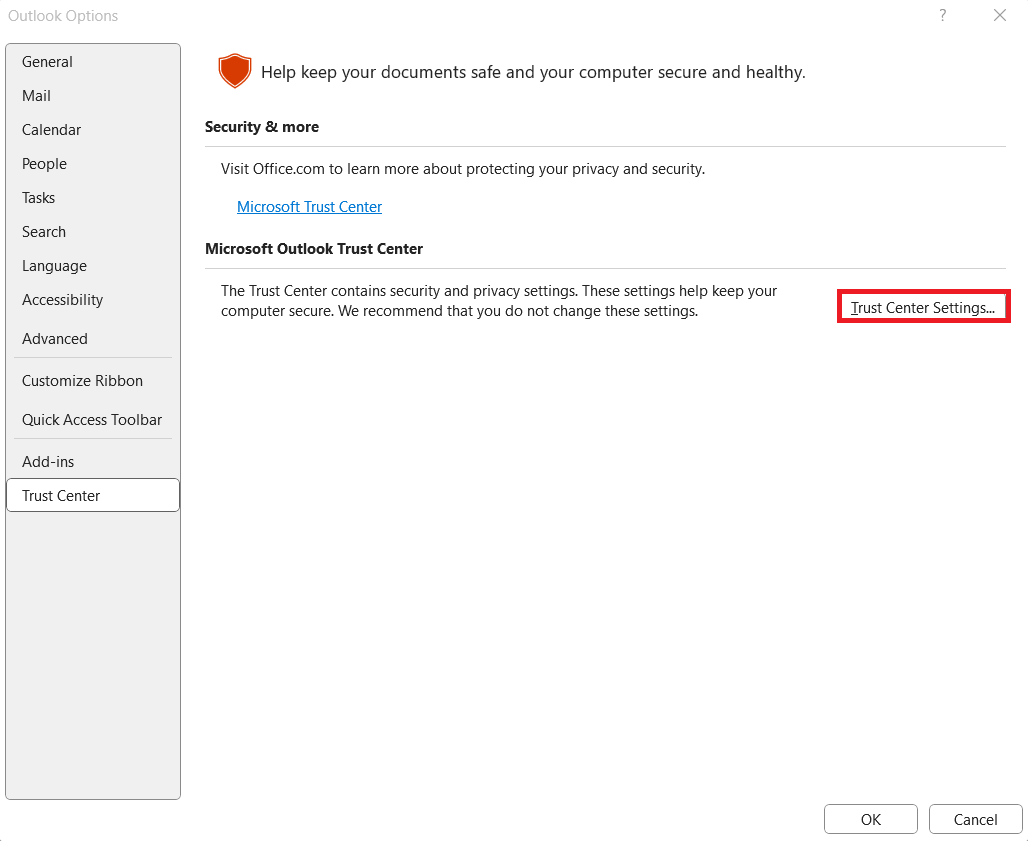
STEP 3: In the dialog box, select Trust Center. Click on Trust Center Settings.
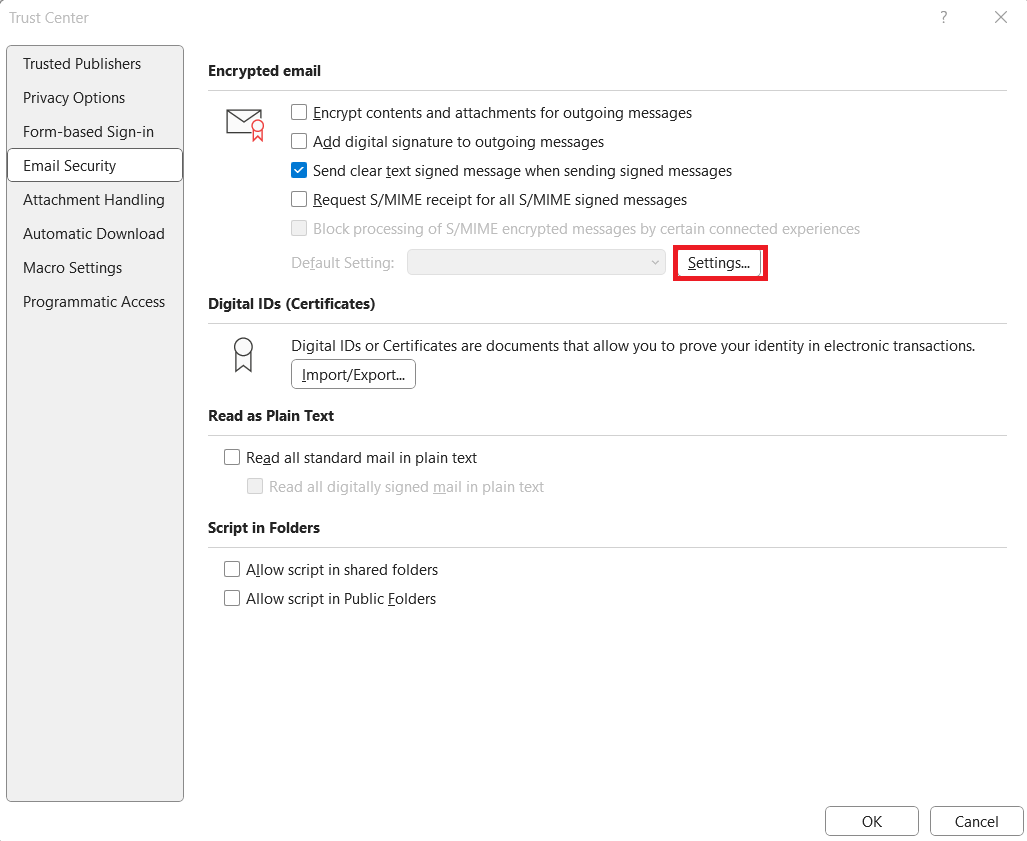
STEP 4: Select Email Security. Under Encrypted email, choose Settings.
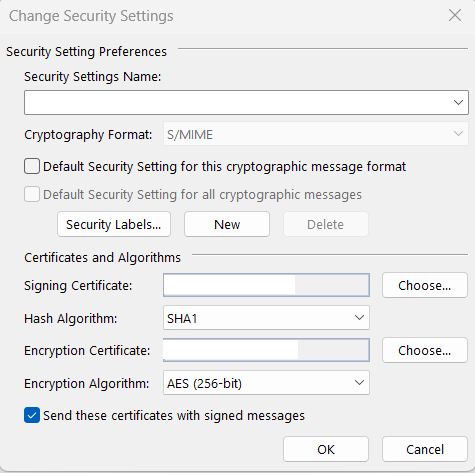
STEP 5: Click Choose under Certificates and Algorithms and select the S/MIME certificate. Click OK to save the settings.
STEP 6: Open a new email message in Outlook. Go to the Options tab. Select Encrypt and choose Encrypt with S/MIME.
Microsoft 365 Message Encryption
Microsoft 365 Message Encryption is a more straightforward option that doesn’t require certificates. Here’s how I use it:
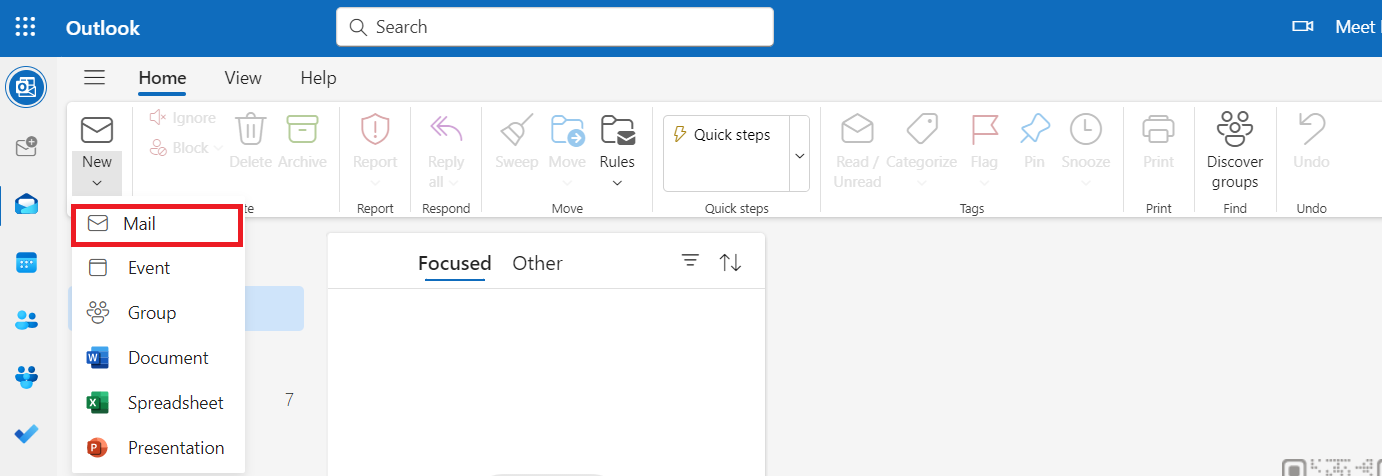
STEP 1: Open a new email message in Outlook.
STEP 2: Go to the Options tab.
STEP 3: Select Encrypt and choose the encryption option that suits my needs, such as Encrypt-Only or Do Not Forward.
STEP 4: Finish composing the email and click Send.
Viewing and Replying to Encrypted Emails
When I receive an encrypted email, Outlook will prompt me to verify my identity. If the email is encrypted with S/MIME, I’ll need to have the corresponding private key to decrypt it.
For emails encrypted with Microsoft 365 Message Encryption, I might need to sign in with my Microsoft account or use a one-time passcode.
Tips for Using Email Encryption Effectively
Here are some tips I’ve found helpful when using email encryption:
- Communicate with Recipients: Let recipients know that you’ll be sending encrypted emails and provide instructions on how to open them if necessary.
- Use Strong Passwords: Ensure that my email account and any associated accounts have strong, unique passwords to prevent unauthorized access.
- Regularly Update Certificates: If using S/MIME, keep my certificates up to date and renew them before they expire.
- Be Mindful of Attachments: Remember that attachments are also encrypted, so sensitive documents are protected.
- Test Encryption: Before sending sensitive information, I test the encryption process with a trusted recipient to ensure everything works correctly.
FAQs: Mastering Email Encryption in Outlook
How do I encrypt a single email message in Outlook?
To encrypt a single email in Outlook, head to the compose window, click on the ‘Options’ tab, then choose ‘Encrypt’. You’ll see encryption choices like ‘Encrypt-Only’ or ‘Do Not Forward’. Select your preference, compose your message, and then press ‘Send’. The email will be encrypted and securely delivered to the recipient.
How do I know if my email is encrypted in Outlook?
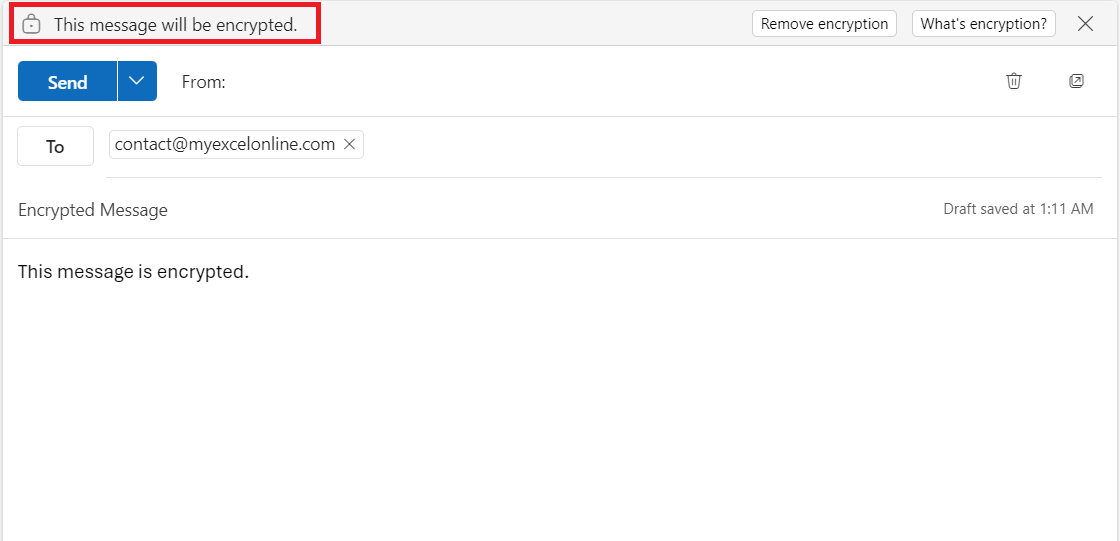
You’ll spot a padlock icon next to the subject of your sent email in Outlook to confirm encryption. Additionally, in the ‘Sent Items’ folder, if you see the Encryption icon next to your message, that indicates successful encryption. This symbol is your assurance that the email is secured.
What options are available for encrypting emails in Outlook?
Outlook offers ‘Encrypt-Only’ to secure the email content and ‘Do Not Forward’ to prevent copying, printing, and forwarding. These options are readily available within the compose message window under the ‘Encrypt’ button, ensuring a suitable level of protection for your emails.
Can I encrypt emails when using Outlook on Mac or Webmail?
Absolutely, encryption in Outlook is available both on Mac and via webmail. On a Mac, you’ll find encryption options in the Outlook toolbar. For webmail, use the lock icon when composing a message to access encryption settings. This ensures that your emails remain secure, regardless of your platform choice.
Is there a cost associated with Outlook email encryption features?
Yes, some encryption features incur costs. S/MIME requires purchasing certificates from authorized providers, with prices varying. Outlook’s Office 365 Message Encryption is part of certain Office 365 subscriptions, so additional charges may apply depending on your plan. Consider the needs of your organization when evaluating these options.
John Michaloudis is a former accountant and finance analyst at General Electric, a Microsoft MVP since 2020, an Amazon #1 bestselling author of 4 Microsoft Excel books and teacher of Microsoft Excel & Office over at his flagship MyExcelOnline Academy Online Course.


