Indenting cells in Microsoft Excel is a useful feature for organizing and presenting data clearly. Indentation can enhance the readability of complex spreadsheets by visually grouping related information, making it easier to navigate and interpret. Whether you’re outlining data hierarchies or simply looking to improve the aesthetics of your spreadsheet, understanding how to apply and adjust indents in Excel is a valuable skill. This article will guide you through the steps on how to indent in Excel to improve your data presentation.
Key Takeaways:
- Improved Readability: Indenting cells in Excel enhances the clarity and organization of complex data by visually grouping related information.
- Ease of Navigation: Proper indentation makes it easier to interpret and navigate through large spreadsheets, especially when dealing with hierarchical data.
- Quick Indenting Tools: Use the Increase/Decrease Indent buttons and keyboard shortcuts for efficient text indentation within cells.
- Advanced Customization: The Format Cells dialog box allows for precise control over indentation, catering to specific formatting needs.
- Enhanced Presentation: Combining indentation with other formatting tools like wrapping text, adding bullets, and adjusting cell alignment can significantly improve the overall presentation and professionalism of your spreadsheet.
Table of Contents
Introduction to Text Indentation in Excel
The Importance of Indenting Text
Indentation in Excel isn’t just a stylistic choice; it’s a structural tool that adds clarity to your data. Imagine trying to decipher a dense spreadsheet where all the text starts in the same place—it would be quite a challenge, right?
Indenting text can help you avoid such confusion, guiding anyone who looks at your worksheet with a clear visual flow from one point of information to the next. It’s particularly useful when you’re dealing with layers of data, such as financial reports or project outlines, where hierarchy is key.
Step-by-Step Guide on How to Indent in Excel
Indenting with the Increase/Decrease Indent Buttons
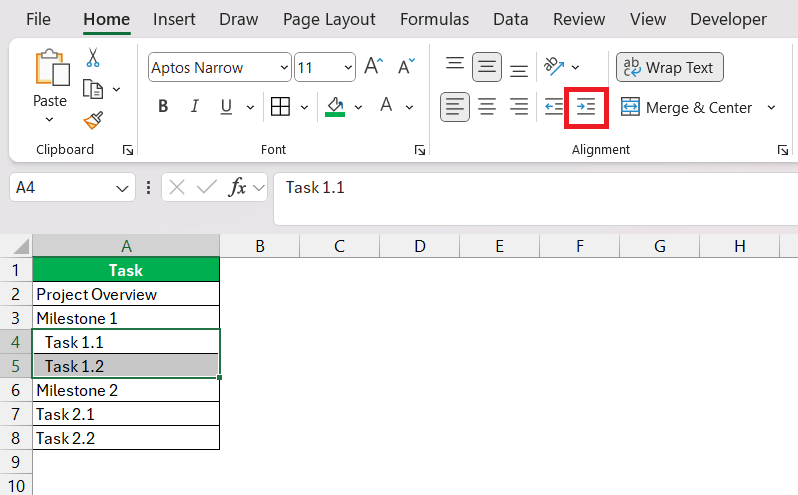
To make quick and easy indents in Excel, look no further than the Increase and Decrease Indent buttons on the Home tab. Here’s how you dive into it:
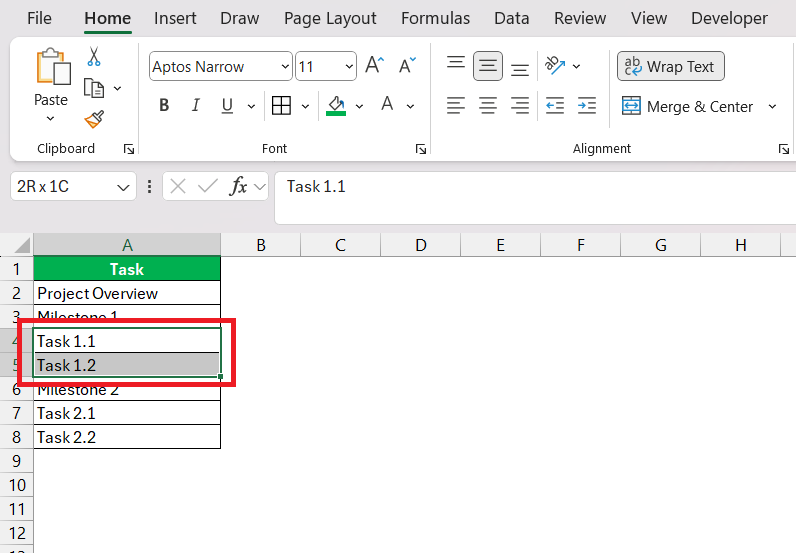
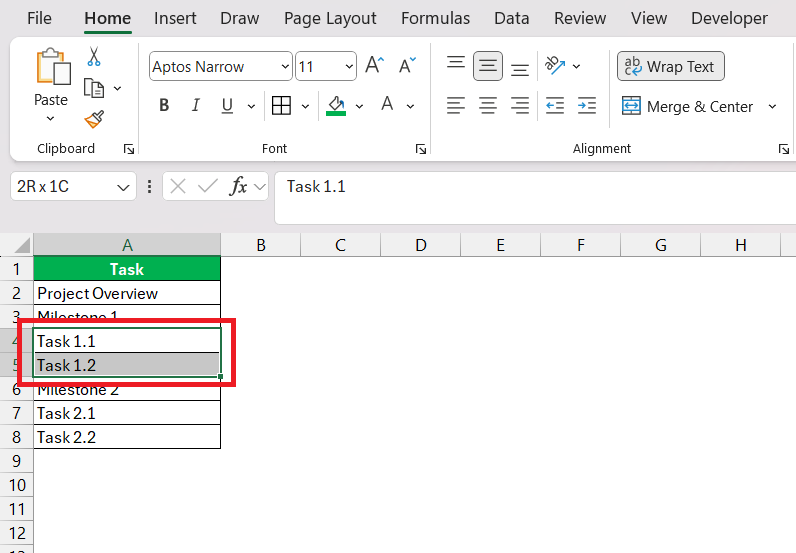
Firstly, select the cells that need a bit of space.
Once highlighted, click on the Increase Indent button in the Alignment group.
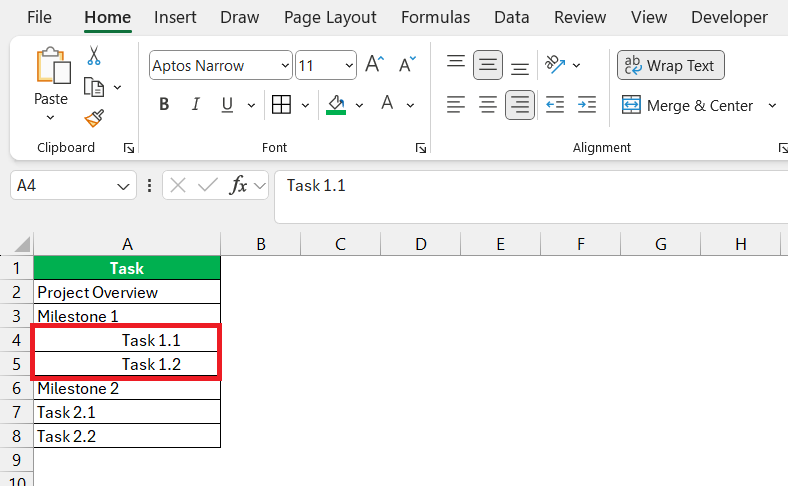
Every click will shift your text to the right by three spaces, creating a noticeable indentation. And don’t worry, if you’re feeling click-happy and go too far, use the Decrease Indent button—it will scoot your text back to the left in three-space increments, helping you find the perfect placement.
Keep in mind that if your cells contain multiple lines of text, each line will be treated to this indentation makeover, maintaining a consistent look across your document.
Using Keyboard Shortcuts for Efficiency
If you’re all about speed and efficiency, mastering keyboard shortcuts for indentation in Excel will make your workflow smoother. For Windows users, the magic sequence is Alt + H + 6 to increase the indent and Alt + H + 5 to decrease it. If you’re on a Mac, you’ll use Control + Option + Tab to indent and Control + Option + Shift + Tab to decrease the indent.
Remember, these shortcuts allow you to indent text without removing your hands from the keyboard, making the process much faster especially if you’re inputting or formatting a substantial amount of data.
Advanced Indenting Options
Customizing Indentation with Format Cells Dialog Box
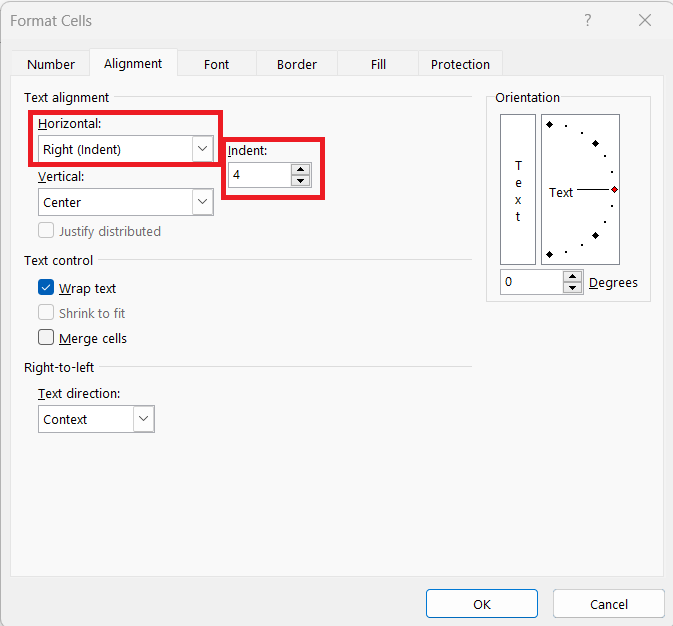
For those who like to fine-tune their indentation to the nth degree, the Format Cells dialog box is where you’ll find your groove. Here’s the lowdown on using it to get your cells looking sharp:
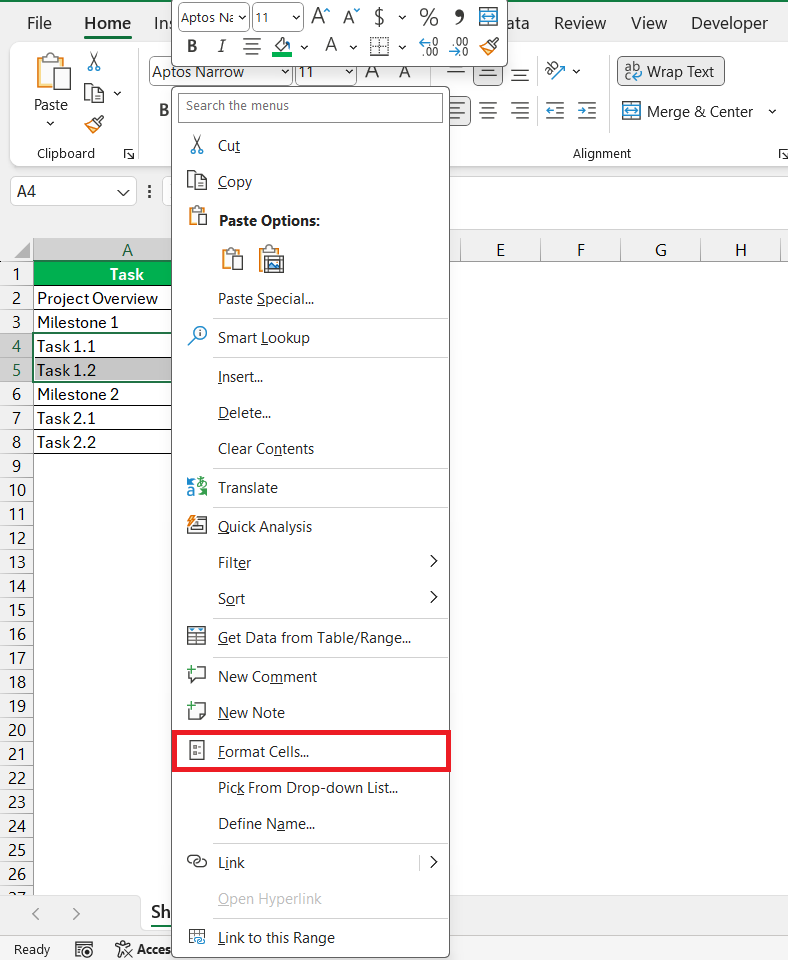
STEP 1: Start by selecting your cell or cells.
STEP 2: Then, either take a right-click and choose ‘Format Cells.
STEP 3: Once the Format Cells dialog box pops up, steer straight to the Alignment tab. Inside, you’ll find the Horizontal drop-down menu brimming with indent options.
You can pick from Left, Right, or Distributed indent styles depending on your need. Then, use the Indent field next to it to set your specific indent size—use the handy arrows or just type in your number. Hit OK.
STEP 4: Voilà, you’ve just applied a custom indent!
Remember, this method is perfect for when you need specific indentation sizes that the standard Increase/Decrease buttons can’t offer. Plus, it gives your document a finely polished look that can really make your data stand out.
Crafting Precise Indents Using Spaces
Precision is key when you’re aiming for that perfectly formatted cell, and sometimes, the built-in indent functions just don’t cut it. That’s when the spacebar becomes your trusty ally. Crafting precise indents using spaces is manual, sure, but it also gives you the ultimate control—one space at a matinee, fine-tuning until your content sits just right.
To incorporate this method, double-click the cell where your text awaits that custom touch. Add a line break with Alt + Enter if you’re working with multiple lines.
Then, just tap the spacebar at the beginning of each line to move the text over as much as you’d like. This technique is particularly useful when dealing with single lines of text or when you’re formatting cells with a more artistic touch.
Spaces lend themselves to subtle adjustments that might be too small for the ribbon’s indent options. Perfect for making sure that each character is exactly where you want it.
Tips for Effective Text Presentation
Implementing Wrapping Text with Indentation
Long text strings in Excel can be a nightmare to manage, but when they’re coupled with the ‘Wrap Text‘ feature, it’s like a lullaby for your cells. By wrapping the text, you ensure it fits neatly within its designated space, spilling gracefully over multiple lines instead of one long, sprawling sentence. Now, spice this up with some indentation, and you’ve got yourself a recipe for readability.
Here’s the scoop on how to do it: after selecting the cells in need, enable ‘Wrap Text’ via the Home tab’s Alignment group. With text wrapped, you can then sprinkle in some indentation. For the first line, use the ‘Increase Indent’ button, and for subsequent lines, you might need to place the cursor at the start of the line and hit ‘Alt + Enter’—then, nudge the text over with the spacebar for that manual touch of precision.
By blending wrapping and indentation, you transform a cell from a packed suitcase into a neatly organized drawer, where everything has its perfect place.
Enhancing Your Worksheets
Adding Bullets for Clarity in Lists
Sprucing up your list with bullets can take your Excel worksheet from plain to polished, offering an immediate visual punch that helps users digest information. They’re like visual breadcrumbs, leading the eye through items in a clear, organized fashion.
To add bullets in Excel, you won’t find a dedicated bullet button like in Word—but there’s a neat workaround. Click on the cell where you want a bullet, and then tap Alt + 7 or Alt + 9 on your numeric keypad to insert a bullet symbol. After entering the first one, type out your text, and for subsequent bullets, replicate the process or copy and paste the bullet symbol.
Once your bullets are in place, you might want to finesse their appearance with indents. Combine bullet points with a well-spaced indent, and your list transforms into an easily navigable piece of art.
Additionally, if slicing through the monotony of numbers and text is your goal, the simple act of bulleting a list can work wonders for user engagement and comprehension.
Complementing Indents with Other Formatting Tools
Your spreadsheet’s potential is like a diamond in the rough—a few strategic touches with Excel’s formatting tools, and it’ll shine brilliantly. Indents are the starting block, but the race to a standout worksheet isn’t won until you pair them with other formatting features.
For starters, think about fonts and colors: Does your header pop? Is the body text easy to read? Adjust font styles and sizes for differentiation, and add a splash of color for emphasis or categorization. Conditional Formatting is another gem, magically highlighting data based on the rules you set, making patterns easier to spot.
Bring in cell shading or fill to draw attention to important areas or to alternate lines for better readability. Borders also play a crucial role, demarcating sections and making your indentations stand out with elegance.
Merge these formatting allies with your indentation skills and behold—your Excel worksheet doesn’t just store data; it tells a story, guides the observer, and perhaps most importantly, it does so with effortless style.
FAQ Section
How to do an indent in an Excel cell?
To indent text in an Excel cell, select the cell you want to format. Then, go to the Home tab, find the Alignment group, and click the Increase Indent button to move the text to the right. Each click indents the text further. If you need to reduce the indent, simply click the Decrease Indent button.
What is the shortcut key for increasing indent in Excel?
On Windows, the shortcut key to increase an indent in Excel is Alt + H + 6. For Mac users, you can indent using Control + Option + Tab. These shortcuts allow you to quickly adjust the indentation in selected cells without reaching for the mouse. Keep pressing the last key to increase the indent level further.
Can You Apply Different Indents to Multiple Lines Within a Single Cell?
Yes, you can apply different indents to multiple lines within a single Excel cell, but it has to be done manually. Double-click the cell or press F2 to edit, and then insert the desired number of space characters at the beginning of each line to create custom indents.
What is the Fastest Way to Indent Text in an Excel Cell?
The fastest way to indent text in an Excel cell is to use keyboard shortcuts: Alt + H + 6 to increase indent and Alt + H + 5 to decrease indent on Windows, or Control + Option + Tab to increase and Control + Option + Shift + Tab to decrease indent on Mac.
How Can I Keep Rows Stationary While Indenting in Excel?
To keep rows stationary while indenting in Excel, focus on editing individual cells or utilize the Shift key to select multiple cells without affecting entire rows. Click on your starting cell, press and hold Shift, then click the last cell you want to indent. Adjust indentations using the Alignment tools or keyboard shortcuts, and your rows will stay put.
John Michaloudis is a former accountant and finance analyst at General Electric, a Microsoft MVP since 2020, an Amazon #1 bestselling author of 4 Microsoft Excel books and teacher of Microsoft Excel & Office over at his flagship MyExcelOnline Academy Online Course.

