Did you know you could insert multiple rows using Macros in Excel? With just a loop and providing a number, you can do this in a single click! Make sure your Excel has the Developer Tab enabled following this tutorial. I explain how you can do this below step by step!
Key Takeaways
-
Macros Automate Row Insertion Efficiently – Macros allow you to insert multiple rows instantly, eliminating repetitive manual work.
-
Customizable Row Quantity – You can modify the VBA code to insert any number of rows as per your requirement.
-
Insert Rows Anywhere in the Sheet – Macros can be programmed to insert rows at specific locations, such as above or below the selected row or at a fixed row number.
-
Accessible with One Click or Shortcut – You can assign the macro to a button on your worksheet or a keyboard shortcut, making the process even faster.
-
Beginner-Friendly Using Record Macro – Even without VBA knowledge, you can use Excel’s Record Macro feature to easily create a row insertion macro.
Table of Contents
Quick Overview
What does it do?
Asks for a number of rows, then inserts it to the bottom of your selected cell
Copy Source Code:
Sub InsertMultipleRows()

Dim numRows As Integer
Dim counter As Integer

'Select the current row
ActiveCell.EntireRow.Select
On Error GoTo Last
numRows  = InputBox("Enter number of rows to insert", "Insert Rows")

'Keep on inserting rows until we reach the desired number
For counter = 1 To numRows
Selection.Insert Shift:=xlToDown, CopyOrigin:=xlFormatFromRightorAbove
Next counter
Last:Exit Sub
End Sub
Final Result:
How to Insert Multiple Rows Using Macros in Excel
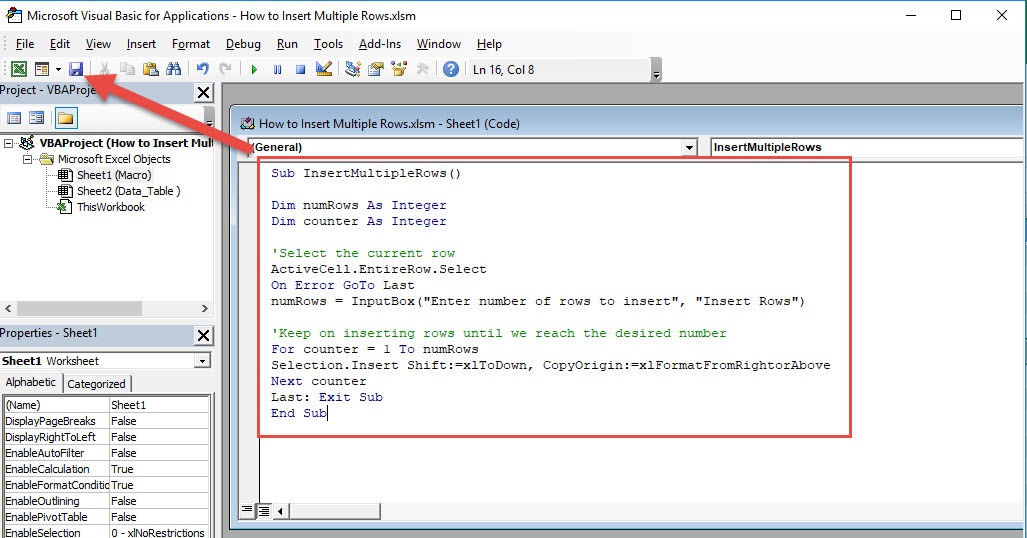
STEP 1: Go to Developer > Code > Visual Basic
STEP 2: Make sure Sheet1 is selected, paste in your code and Select Save. Close the window afterwards.
STEP 3: Let us test it out!
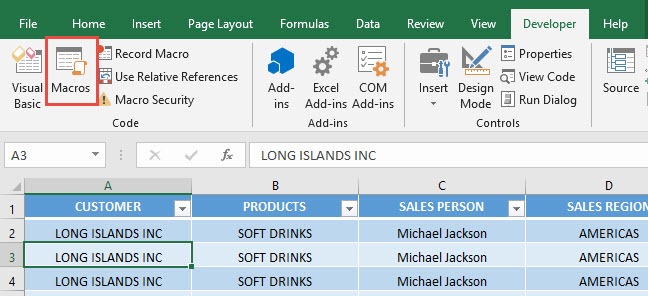
Select any cell that you want to insert rows on. Go to Developer > Code > Macros
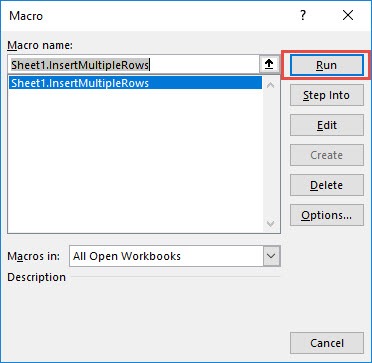
Make sure your macro is selected. Click Run.
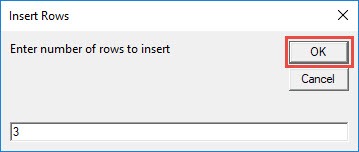
We want to insert 3 rows. Type in 3.
With that, you are now able to insert multiple rows using macros!
Frequently Asked Questions
What is a macro in Excel?
A macro is a recorded sequence of actions or a VBA script that automates repetitive tasks like inserting rows, formatting, or calculations.
How can I create a macro to insert multiple rows?
You can either record a macro manually using the Record Macro tool or write a simple VBA code to insert as many rows as needed.
Can I choose how many rows the macro inserts?
Yes! The VBA code can be edited to specify any number of rows you want to insert by adjusting the loop or row count parameter.
Is it possible to insert rows at different positions using macros?
Absolutely. You can set the macro to insert rows above, below, or at a specific row number by adjusting the code.
Do I need to enable anything to run macros in Excel?
Yes, you need to enable macros under Excel’s security settings and ensure that your workbook is saved as a Macro-Enabled Workbook (.xlsm).

Bryan
Bryan Hong is an IT Software Developer for more than 10 years and has the following certifications: Microsoft Certified Professional Developer (MCPD): Web Developer, Microsoft Certified Technology Specialist (MCTS): Windows Applications, Microsoft Certified Systems Engineer (MCSE) and Microsoft Certified Systems Administrator (MCSA).
He is also an Amazon #1 bestselling author of 4 Microsoft Excel books and a teacher of Microsoft Excel & Office at the MyExecelOnline Academy Online Course.


