Limiting the area and size of your Microsoft Excel worksheet can transform chaotic data into an organized and manageable format. This approach makes your data easier to navigate and share, ensuring the focus stays on what’s important. By optimizing Excel, you enhance performance, streamline workflow, and prevent sluggishness caused by overly complex spreadsheets. In this article, we will cover 2 methods on how to limit Excel sheet size.
Key Takeaways:
- Manage Excel’s Complexity: Limiting the area and size of your worksheet simplifies data management and navigation, making it easier to focus on relevant information.
- Improve Performance: Reducing the number of rows, columns, and worksheets enhances Excel’s speed and responsiveness.
- Use Excel VBA for Automation: Employ VBA to automate the hiding of unused rows and columns, efficiently controlling the visible area of your worksheet.
- Utilize Properties Window: The ScrollArea property restricts user navigation to specific ranges, protecting data outside the defined area.
- Optimize File Size: Compressing images, removing excess formatting, and saving in compact formats like XLSB help reduce file size without compromising data integrity.
Table of Contents
Introduction to Excel Optimization
The Importance of Setting Area and Size Limits
Ever felt overwhelmed by the vast sea of cells in an Excel worksheet? Limiting the area and size of your Excel worksheet can turn the tide, transforming chaos into order. It’s about making your data easier to manage, navigate, and share. Think of it like defining the borders of a map – you want to highlight the areas that matter most for your analysis or presentation, ensuring that the focus stays where it’s needed and distractions are pushed aside.
Quick Overview of Excel File Performance Issues
Excel’s robustness is a double-edged sword; you can create incredibly complex spreadsheets, but sometimes this complexity leads to performance issues. Large files can become sluggish, taking significantly longer to open, save, or update. This is often due to a range of factors, such as excessive formatting across millions of cells, oversized images, or an accumulation of old, unused data.
You may also encounter compatibility woes when sharing between different versions of Excel or when external links within the file become complicated webs. Knowing what bogs down Excel is the first step to reclaiming your workflow speed.
Streamline Your Spreadsheet
Limiting Rows and Columns for Efficiency
Engaging the brakes on the endless scroll of rows and columns benefits not just your workflow but your mental bandwidth. Focus on what’s essential by hiding rows and columns that you don’t need right now. It’s as easy as selecting them and opting to hide; they’re out of sight but not out of mind, ready to be summoned back when needed. This approach streamlines your data view, wheeling in a more digestible tableau for analysis and decision-making. Spot trends and patterns without the distraction of irrelevant data, and enjoy a swifter Excel experience.
Reducing Worksheet Quantity to Boost Speed
Consider each worksheet in your Excel file as a separate chapter in a book—the more chapters you have, the weightier the tome. By slimming down to the essential chapters, the content becomes more accessible, and your Excel ‘book’ becomes easier to handle. Scrutinize each sheet and bid farewell to those data pages no longer in use. Not only is this cleansing ritual good for your file’s performance, but it also means less clutter for you to sift through. Shed the excess baggage and you’ll notice quicker navigation, calculation, and overall speed enhancement in your Excel endeavors.
How to Limit Excel Sheet Size
Method 1 – Hide Rows and Columns
In Excel, hiding rows and columns is a straightforward process that can help manage the display of data on a worksheet. This feature is instrumental for keeping irrelevant data out of sight or focusing on specific areas of your spreadsheet without altering the actual data.
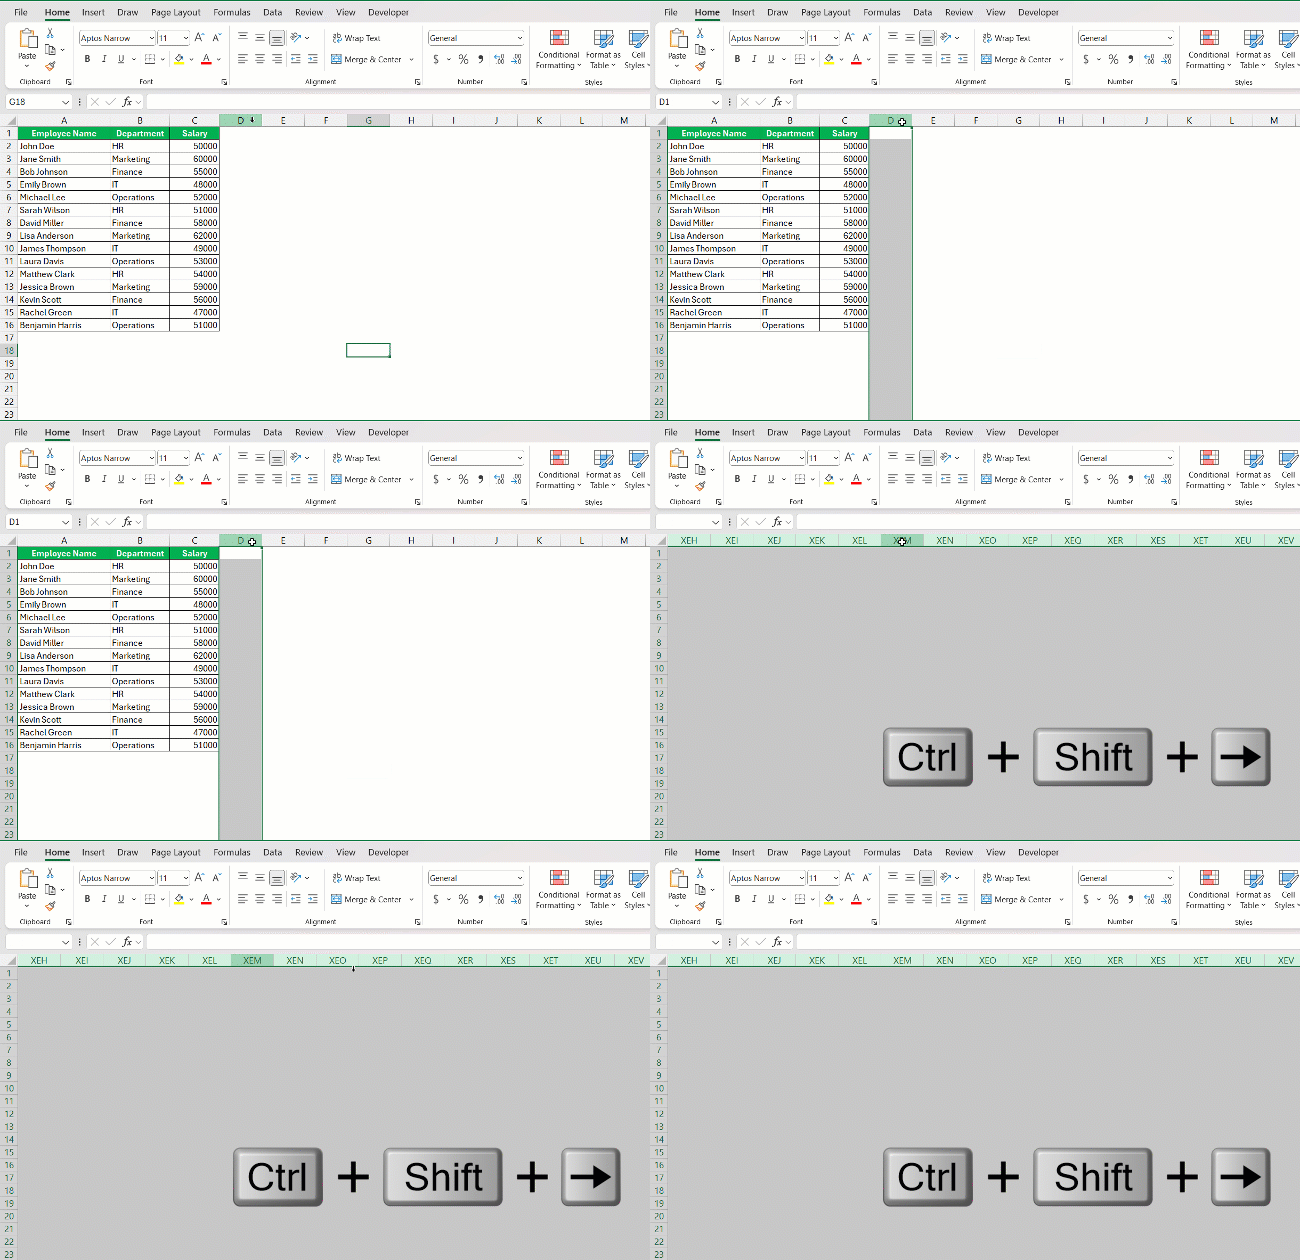
STEP 1: Select the first column that you want to hide and then press Ctrl + Shift + Right Arrow keys to highlight all unwanted columns in Excel.
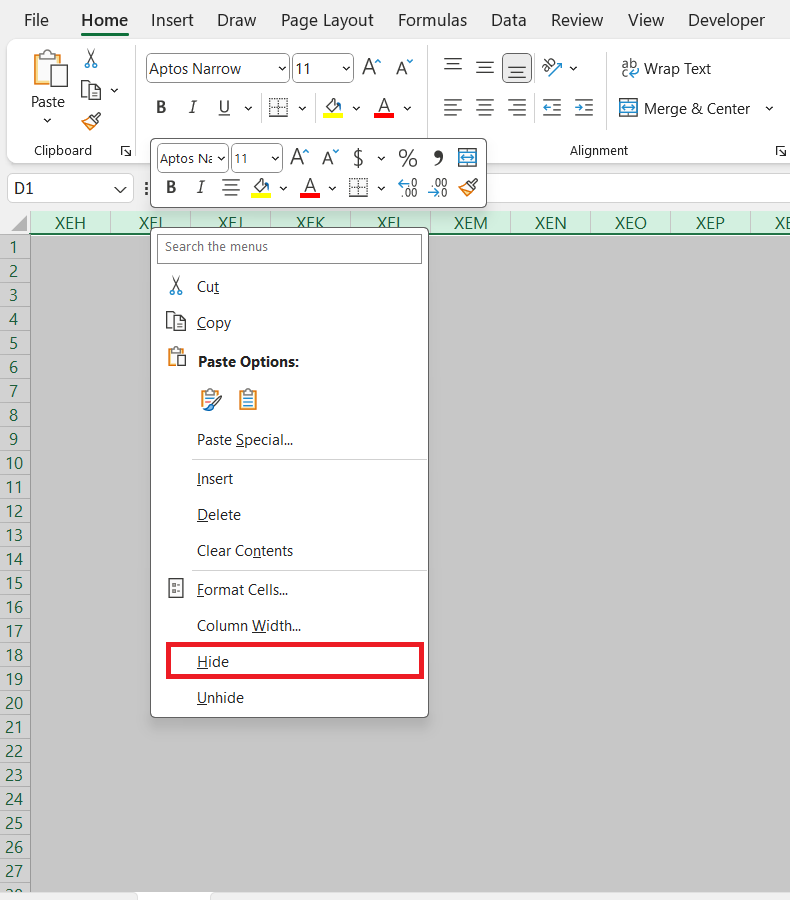
STEP 2: Right-click and select Hide.
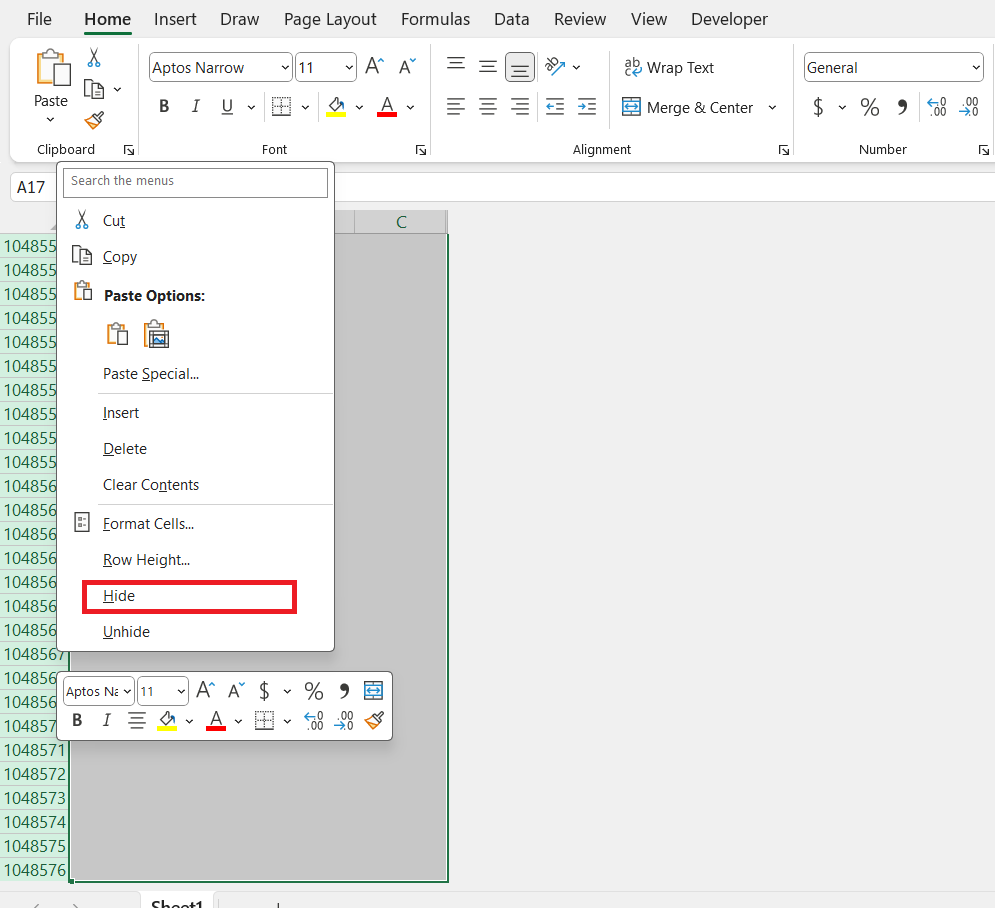
STEP 3: Repeat the same steps to hide unwanted rows.
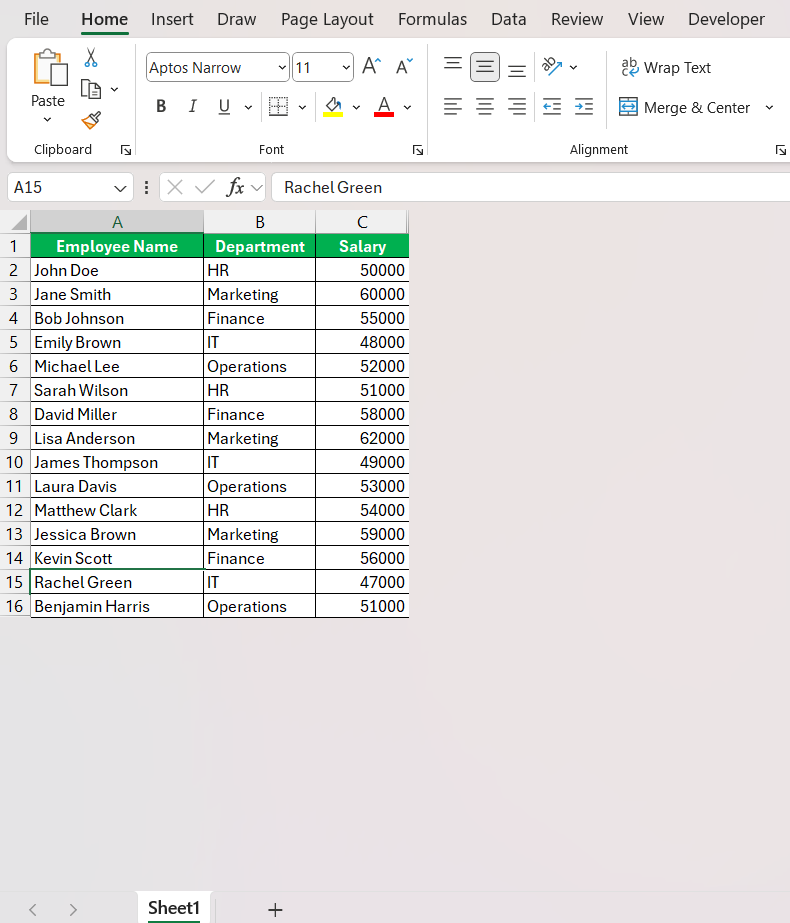
This will limit Excel sheet size.
Method 2 – Apply Excel VBA
Excel VBA (Visual Basic for Applications) allows you to automate tasks, including hiding rows/columns based on criteria or toggling visibility, thereby controlling sheet size programmatically.
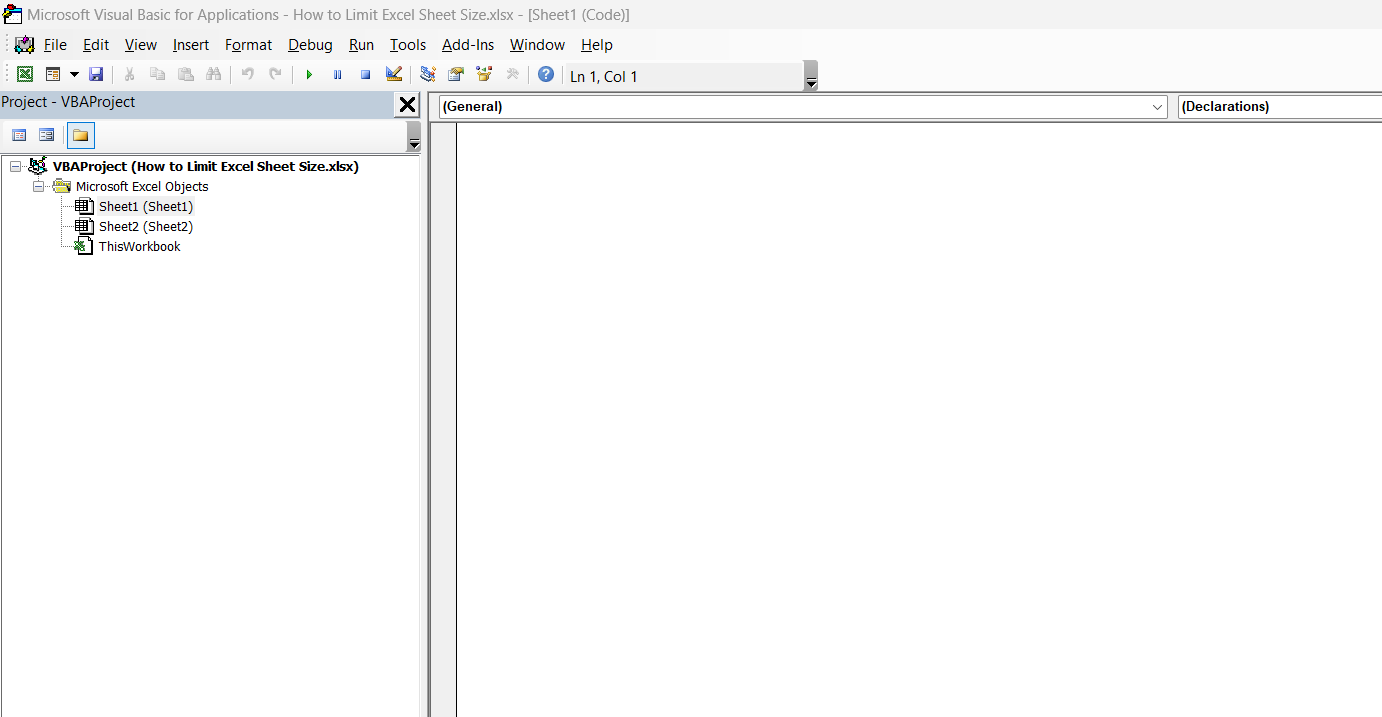
STEP 1: Press Alt + F11 to open the VBA Editor.
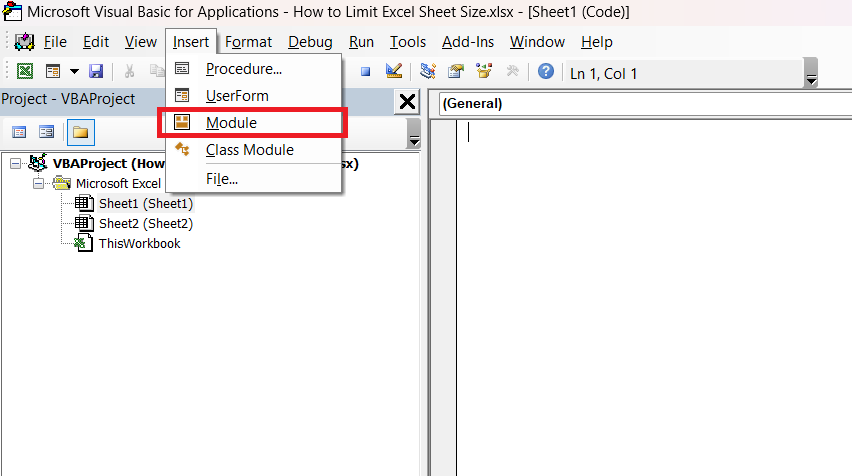
STEP 2: Insert a new module (Insert > Module).
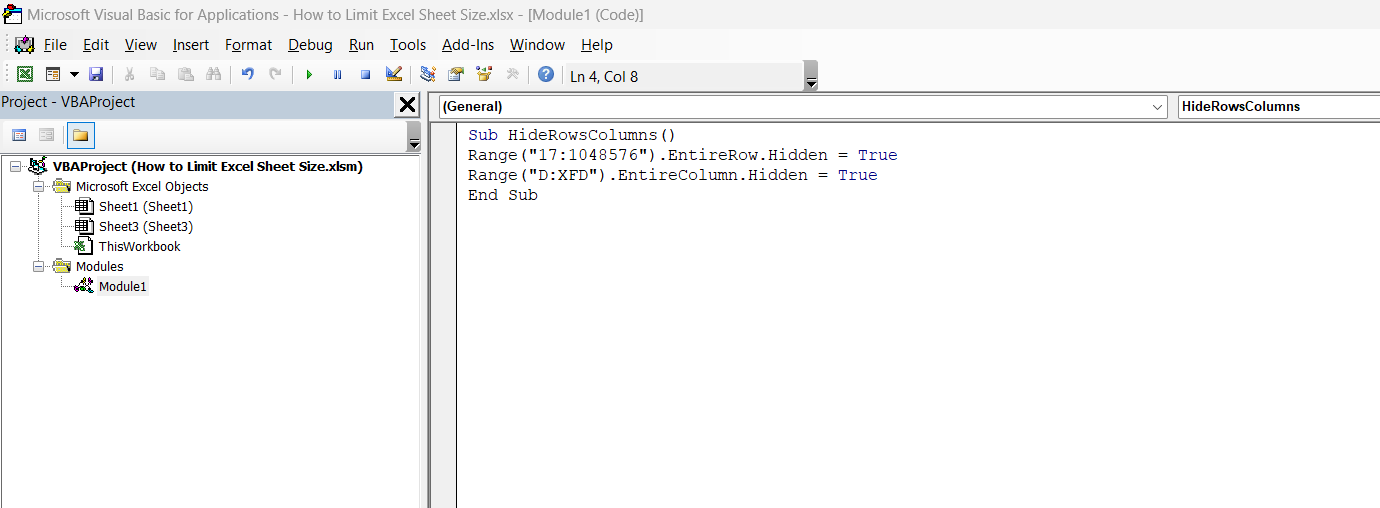
STEP 3: Write the code mentioned below –
Sub HideRowsColumns()
Range("17:1048576").EntireRow.Hidden = True
Range("D:XFD").EntireColumn.Hidden = True
End Sub
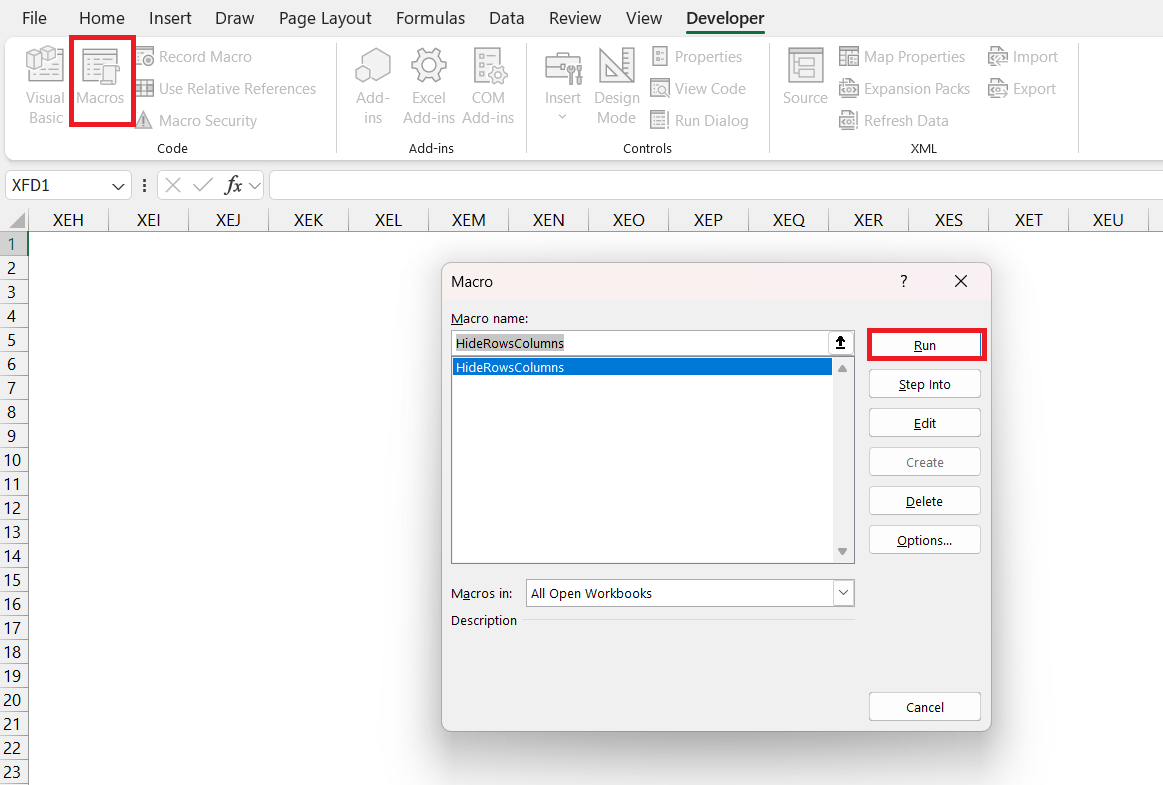
STEP 4: Go to the Developer tab and select Macros. In the Macros dialog box, select HideRowsColumns and click on Run.
The rows and columns that are mentioned in the code will be hidden.
Method 3 – Utilize Properties Window
Harnessing the Scroll Area property in Excel is like setting up a sandbox boundary—it keeps playtime tidy and helps you stay focused.
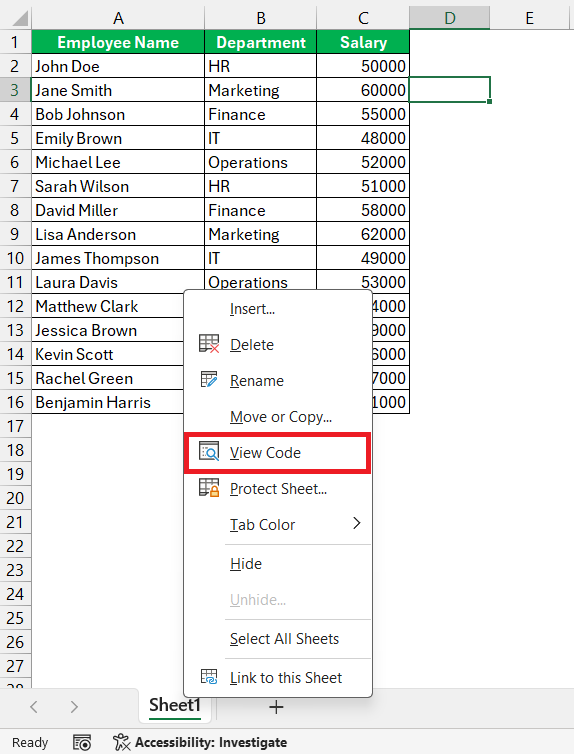
STEP 1: Just right-click on the sheet tab, select ‘View Code’, and the VBA stage opens.
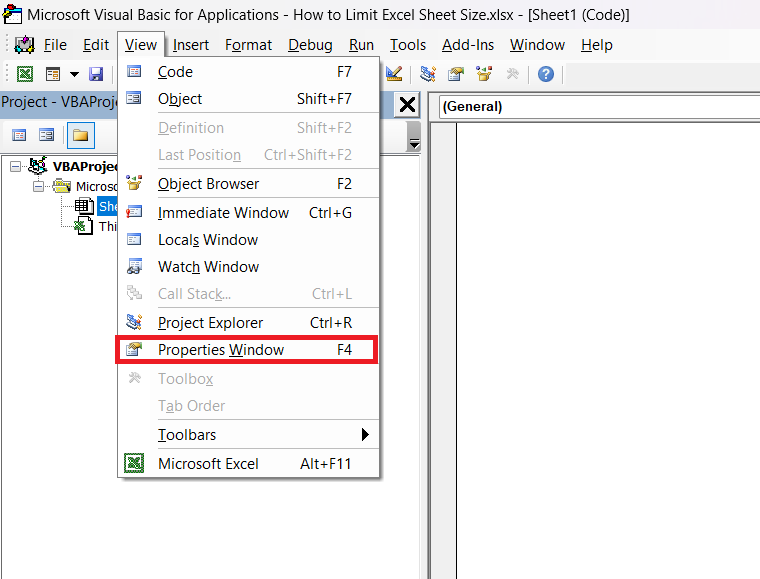
STEP 2: Click on the View tab and select Properties Window.
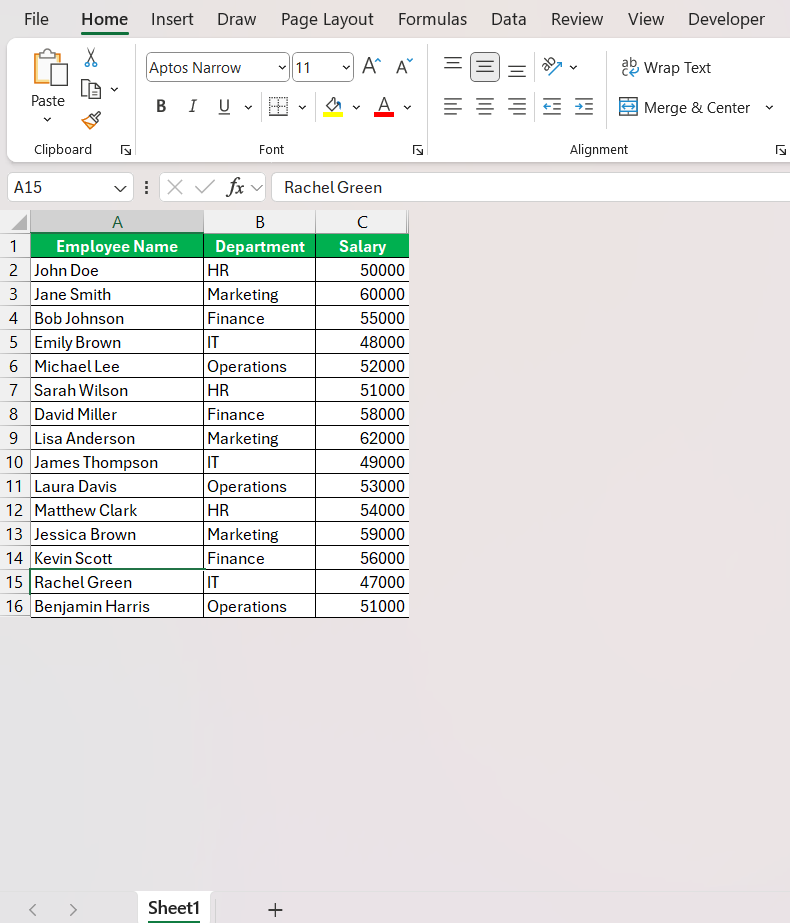
STEP 3: Here, you’ll find the ‘ScrollArea’ property in the Properties window. Type in your desired range—for instance, “A1:C16″—to craft your sandbox.
Save your workbook to make it official. Now, when users navigate the worksheet, they’re limited to this cozy corner of your Excel universe. It’s a nifty way to protect data outside the range while directing attention to what’s important.
FAQs About Excel Optimization
How do I restrict sheet size in Excel?
To restrict the sheet size in Excel, hide all the unused rows and columns. First, select the row or column after your data ends. Then, press Ctrl + Shift + Down (for rows) or Ctrl + Shift + Right (for columns) to select all the remaining cells. Right-click and choose ‘Hide’. For a more tailored approach, use VBA to set the ScrollArea property of the worksheet. This way, you determine exactly where users can and cannot go, offering more precision and control.
How Do I Compress My Excel File Without Compromizing Data?
To compress an Excel file without losing data, save it in a more compact format like XLSB, or use the built-in ‘Compress Pictures’ feature for any images within the file. Additionally, removing excess formatting and pivot tables can reduce file size. If all else fails, create a ZIP file to compress it further. These steps ensure your data stays intact while shrinking the file for easier management and sharing.
What Steps Can I Take if my Excel File is Still Slow After Area Limits?
If your Excel file is still slow after setting area limits, try a few more steps: remove unused formulas and formatting, compress images, clear Pivot Table caches, and disable automatic calculations if they’re not needed in real time. Also, check for any external links that may be causing delays and consider converting formulas to values where possible. These actions should help in enhancing your Excel file’s responsiveness.
Is There a Way to Limit User Access to Only Certain Areas of My Excel Workbook?
Absolutely! To limit access, protect your workbook with a password and only grant permission for certain areas. Go to the Review tab, click on ‘Protect Sheet’ or ‘Protect Workbook’, and set your restrictions. For a more customized approach, use VBA macros to set a defined ScrollArea, limiting navigation to specified cells. This way, users stay within the designated playpen, and your data remains secure.
How do I get rid of infinite columns in Excel?
To get rid of infinite columns in Excel, simply select the first column you’d like to hide, press Ctrl + Shift + Right Arrow to select all columns to the right, then right-click and choose ‘Hide’. This conceals the ‘infinite’ columns, keeping your worksheet neat and focused. If you need a more permanent solution, you can use the VBA editor to set the ‘ScrollArea’ property, strictly confining the user’s navigation to the specified range.
John Michaloudis is a former accountant and finance analyst at General Electric, a Microsoft MVP since 2020, an Amazon #1 bestselling author of 4 Microsoft Excel books and teacher of Microsoft Excel & Office over at his flagship MyExcelOnline Academy Online Course.

