Picture this: you’re working with an extensive Excel sheet filled with crucial data. One wrong move and those critical numbers could be altered, throwing off your entire dataset. That’s where you should consider to lock columns in your workbook They provide an essential checkpoint, preventing accidental keystrokes or well-meaning edits from tampering with your information.
Key Takeaways:
- Locking columns in Excel is an essential practice to protect sensitive information and prevent accidental modifications. Columns that typically should be locked are those containing formulas, critical calculations, or any data that must remain constant, such as financial figures or report identifiers. By securing these columns, you maintain data integrity and ensure that pivotal information is not inadvertently altered, which could lead to inaccurate results or analyses.
- Before applying locks to columns in Excel, it’s important to have a well-organized spreadsheet. This preparation includes structuring your data logically and removing any clutter that could complicate the locking process. A tidy Excel sheet not only facilitates the identification of columns that need protection but also enhances data management and readability, leading to improved efficiency and fewer errors during data manipulation.
- Organizing and structuring your Excel data is a foundational task that precedes the column locking process. This ensures clear identification and correct selection of columns that require protection. Proper organization aids in simplifying the process of column locking and enhances overall data management, leading to a more efficient workflow and reduction of potential errors when working with intricate datasets.
Table of Contents
Mastering the Art of Column Locking
A Step-by-Step Guide to Locking Specific Columns in Excel
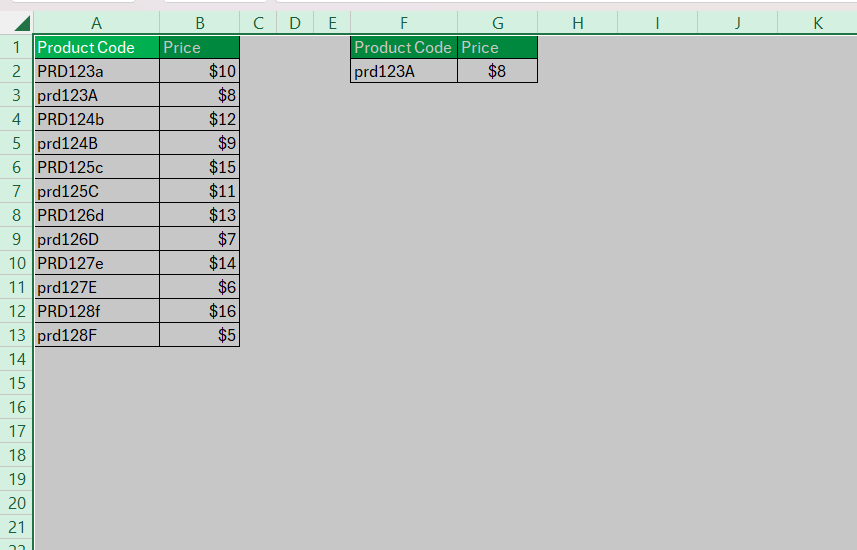
To lock columns in Excel, one needs to navigate the typically unlocked terrain of a fresh worksheet, selectively preserving the sanctity of specific cells. Here are the footsteps I follow to achieve this:
STEP 1: Begin with a grand selection of all cells by pressing CTRL + A.
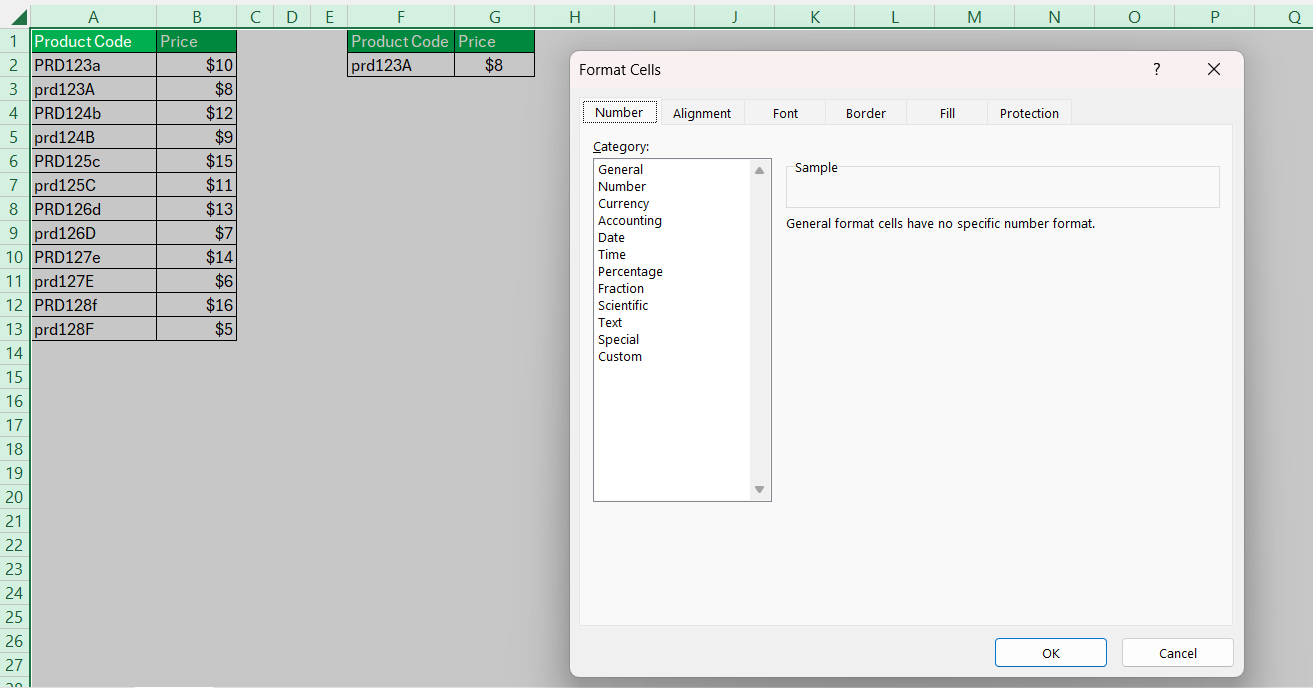
STEP 2: Offer a right-click on any cell, or if you’re partial to keyboard strokes, CTRL + 1 will summon the Format Cells dialogue.
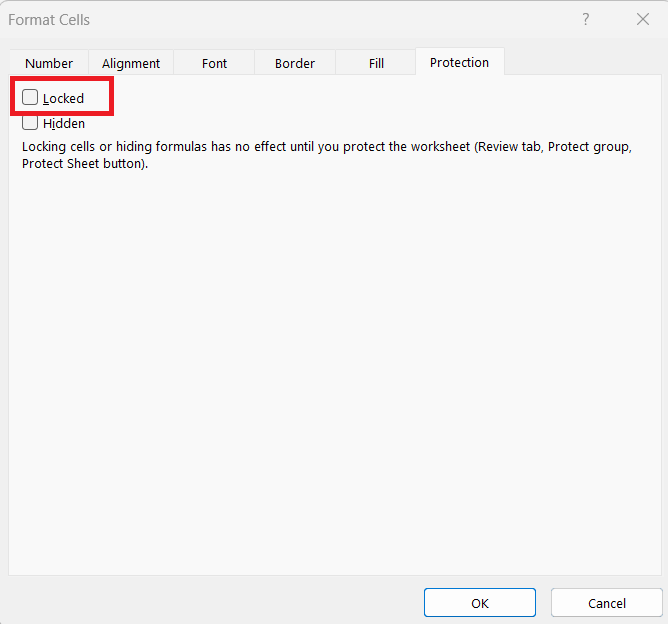
STEP 3: Gracefully uncheck the Locked option under the Protection tab and click OK.
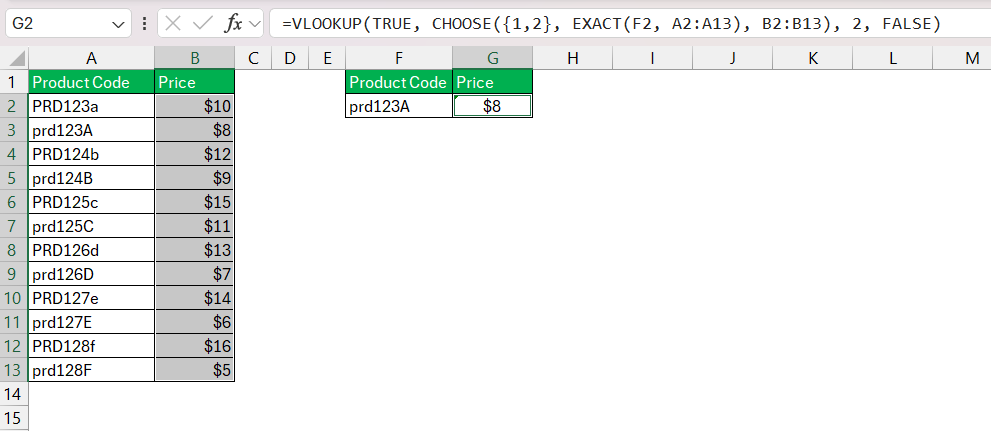
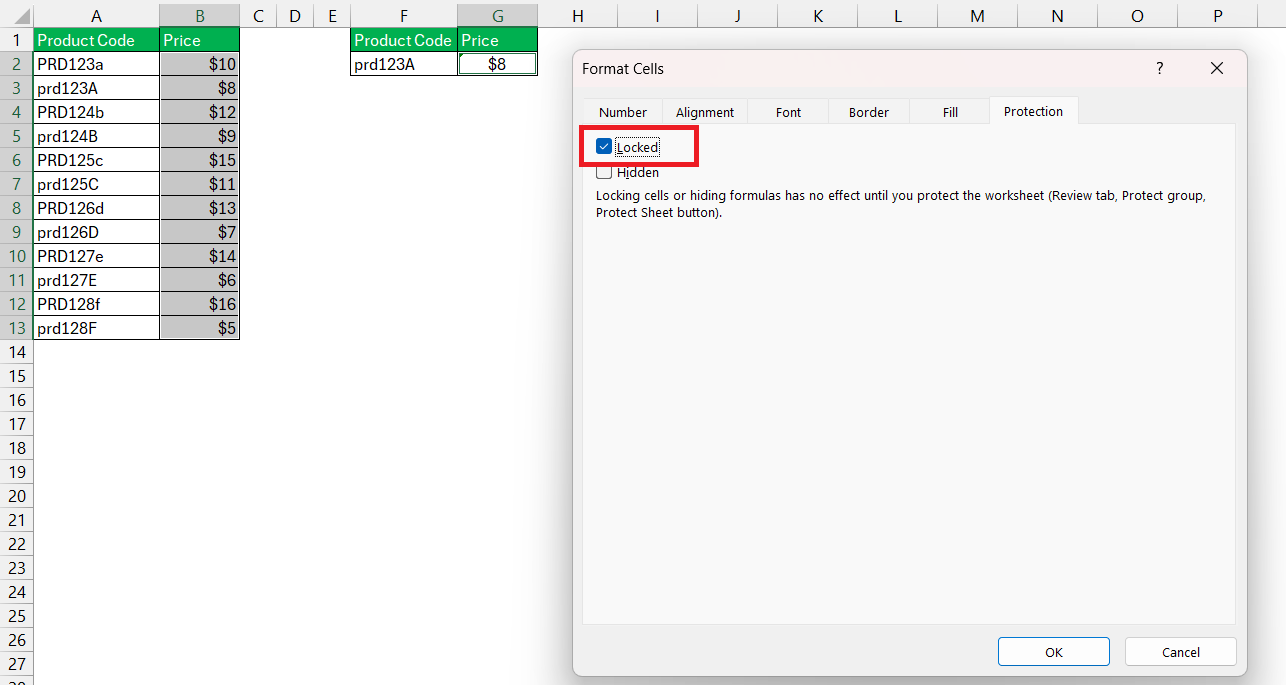
STEP 4: Now, let’s say range B2:B13 and G2 are the columns with data that have data you want to be protected.
STEP 5: A right-click once more, CTRL + 1 for the Format Cells, and this time, under Protection, bestow upon them the check of ‘Locked’.
Remember, until the worksheet is protected, these cells are as vulnerable as any other.
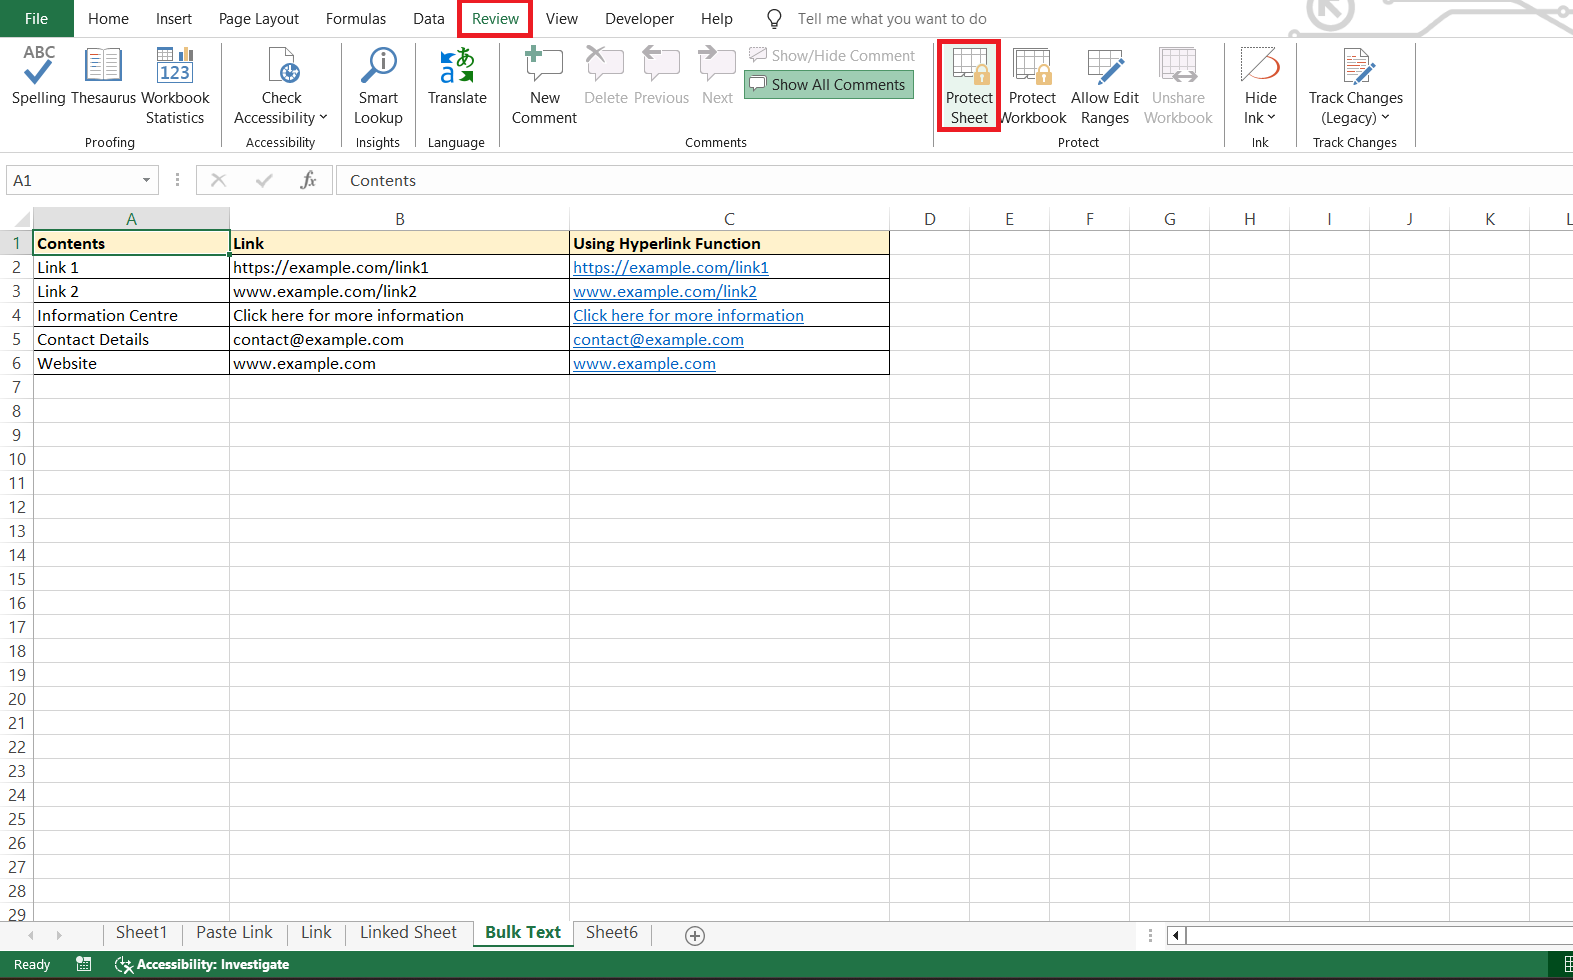
STEP 6: Finally, protect the sheet under the Review tab or using the ALT + R + P keyboard shortcut.
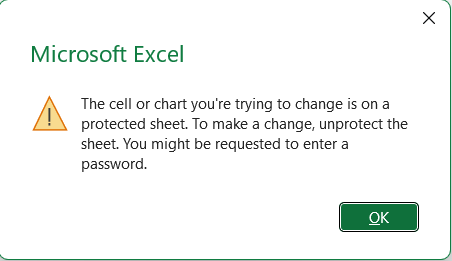
When we try to edit those locked cells, we will see the error message as shown below –
Techniques for Securing Entire Columns for Added Safety
When it’s not just about the view but ensuring complete security, locking entire columns is your go-to strategy. Begin by right-clicking the column you wish to protect, and then choose ‘Format Cells.‘ Click on the ‘Protection’ tab, and ensure the ‘Locked’ option is checked. This doesn’t activate the lock just yet – think of it as arming the security system.
Now, saunter up to the ‘Review’ tab like a data guardian and click ‘Protect Sheet.’ You can add a password here for a fort Knox level of security. Once you confirm the password, the lock snaps into place, shielding your entire column from unwanted changes. It’s simple, yet effective, much like a secret combination that only you know.
Enhancing Worksheet Protection
How to Secure Your Entire Excel Worksheet from Intruders
Turning the security dial up to its maximum, you might opt for safeguarding your entire Excel worksheet. It’s like putting up a “No Trespassing” sign on your data playground to ensure that no one messes with your swing set of numbers. Begin by jumping to the ‘Review’ tab and spiking your data volleyball over to ‘Protect Sheet.’ Here lies the gate to your worksheet fortress.
You’ll be greeted by a box where you can conjure up a password – your spell of protection. Once you weave your password magic and confirm it, your entire worksheet bows to your command, becoming impervious to unwarranted access. Now, you can rest easy knowing that every cell, every formula, and every bit of data is snug under your watchful eye.
Additional Worksheet Protection Features You Should Know
Beyond the basic lock and key, Excel’s wizardry includes a suite of features ready to tailor your sheet’s armor to suit your data’s needs. When you choose to ‘Protect Sheet,’ a list unfurls, offering permissions for selective actions. You can allow filtering and sorting for some while keeping others out, like inviting guests to a dinner party but asking them to stay out of the kitchen.
For the collaborators among you, you can set up a VIP list of cells using ‘Allow Users to Edit Ranges’. This is akin to giving special access badges to trusted colleagues, granting them permission to edit specific sections of your data mansion while the rest remains untouched.
Consider using ‘Protect Workbook’ as a double bolt on your data’s doors, safeguarding the very structure of your work against shifts and shuffles.
Fine-Tuning Your Data Protection Approach
Tips and Tricks for Advanced Users on Excel Security
For you, Excel maestros who know your way around a spreadsheet, there are more arcane secrets to bolster your data defenses. For instance, utilizing ‘Conditional Formatting’ combined with protection can highlight alterations, serving as an early warning system that something’s amiss in your data realm.
Creating dummy “decoy” cells or hidden sheets can act as a siren’s call for the unwary intruder, not only keeping your primary data safe but also tracing where unwanted attempts are being made.
Consider also the art of encryption with ‘File’ > ‘Info’ > ‘Protect Workbook’ and ‘Encrypt with Password.’ This doesn’t just lock your data vault—it encases it in a digital enigma, accessible only to those in the know.
With these power-user maneuvers in your Excel toolkit, your spreadsheets won’t just be protected—they’ll be a veritable data stronghold, with layers upon layers of cunning safeguards.
Unlocking Cells Without Compromising Overall Security
Sometimes, you may need to grant access to just a peek of your Excel vault, allowing for specific edits without revealing all your secrets. Start by selecting the cells or range you want to make exceptions for, then journey to the ‘Format Cells’ dialog box once more and stand down the ‘Locked’ option within the ‘Protection’ tab, disabling their guard.
After arming the rest of the sheet with ‘Protect Sheet’, these selected cells remain editable, almost like hidden passages in a fortress, invisible to the uninitiated. This way, you can unshackle particular cells for updates or inputs, while maintaining the stronghold’s integrity elsewhere.
Solving Common Challenges in Excel Column Locking
Troubleshooting Issues When Locking and Protecting Data
Even when you think you’ve got it all locked down, issues can appear like unwelcome plot twists in your Excel narrative. Perhaps you’ve locked cells but find they’re still editable, or you’ve set a password that seems to have a mind of its own. Don’t fret; these can often be remedied by double-checking that the ‘Protect Sheet’ feature is activated because locking cells is like putting your treasures in a safe – it doesn’t make much difference if the safe isn’t locked!
If the sheer thought of forgotten passwords sends shivers down your spine, Excel’s stubbornness at retrieving these can be daunting. However, third-party software tools may step in as your valiant data knights to help recover lost passwords, although use them with caution and ensure their reliability first.
Remember, troubleshooting is about staying calm in the Excel storm, re-tracing your steps, and keeping an open mind towards solutions that keep your data secure and accessible.
Best Practices to Efficiently Manage Protected Ranges
To manage your kingdom of protected ranges efficiently, wisdom and a touch of foresight go a long way. It’s best to document your protected ranges, almost like a map to a hidden treasure, to ensure that you, or another entrusted navigator, can easily find and adjust these protections as needed.
Lean on the ‘Allow Users to Edit Ranges’ feature thoughtfully. This is like assigning keys to trusted knights in your realm, enabling them to access certain data doors without jeopardizing the security of the entire castle.
Resist the urge to over-protect, for a fortress with too many locks may impede its own allies. Strike a balance where productivity and security waltz in harmony, protecting your Excel realm while allowing it to thrive.
In managing your protected ranges, wield these best practices not as a hammer but as a surgeon’s scalpel—precisely and thoughtfully—for the smooth administration of your data’s defenses.
Frequently Asked Questions (FAQs)
How do I lock certain columns in Excel?
To lock columns in Excel, first choose your target column. Right-click to select ‘Format Cells,’ and under the ‘Protection’ tab, tick the ‘Locked’ box. Then, unleash the ‘Protect Sheet’ option under the Review tab. Confirm your settings (add a password if you like), and voilà, your column stands fortified against unwelcome meddling.
What are the steps to lock columns in Excel without restricting all cells?
To lock specific columns in Excel without restricting all cells, navigate to the column right next to the one you wish to lock. Then, under the ‘View’ tab, select ‘Freeze Panes’ and click on ‘Freeze Panes’ option again. This will lock your selected column, keeping the rest of the sheet freely navigable.
Can I lock columns and still allow certain functions, like sorting or filtering?
Yes, indeed! You can lock columns in Excel and still preserve the functionality of sorting or filtering. After locking the desired columns, when you go to ‘Protect Sheet’, simply check the options that allow sorting and filtering. This gives you the power to keep data secure, while not sacrificing the dynamism of interactive features.
Is there a way to password-protect locked columns exclusively?
Absolutely, password-protecting individual columns is possible! After locking your desired columns, choose ‘Protect Sheet’ under the Review tab. Here, you can weave your protective spell by setting a password. This password applies to the entire sheet, but it effectively guards your locked columns as an exclusive treasure, leaving the rest untouched.
John Michaloudis is a former accountant and finance analyst at General Electric, a Microsoft MVP since 2020, an Amazon #1 bestselling author of 4 Microsoft Excel books and teacher of Microsoft Excel & Office over at his flagship MyExcelOnline Academy Online Course.

