Resizing cells is crucial for clear data presentation. Adjusting cell dimensions ensures information is easily digestible, akin to reading through an open door versus a keyhole. This guide on How to make cells bigger in Excel offers methods like click-and-drag, AutoFit, and keyboard shortcuts for precise adjustments.
Key takeaways:
- Importance of Cell Dimensions: Proper sizing is pivotal for clear data presentation and accessibility.
- Methods for Adjustment: Explore various techniques like click-and-drag, AutoFit, and keyboard shortcuts.
- Basic Resizing Techniques: Learn how to select cells and manually resize columns and rows.
- Using Built-in Features: Utilize Microsoft Excel‘s AutoFit and Wrap Text functions for efficient sizing.
- Pro Tips for Efficiency: Master keyboard shortcuts to expedite resizing tasks and enhance productivity.
Table of Contents
Introduction to Resizing Excel Cells
The Importance of Cell Dimensions in Data Presentation
Resizing cells in Excel can feel like a small thing, but it’s a big deal when it comes to presenting your data in a way that’s clear and accessible. Imagine trying to read a novel through a keyhole versus an open door; that’s how critical cell size can be.
Whether you’re prepping data for a presentation or organizing your monthly budget, getting the cell dimensions just right ensures that the information is easy to digest and looks as sharp as your analysis.
Overview of Methods for Adjusting Row Height and Column Width
There are several methods you might lean on to adjust the height of rows and the width of columns, tweaking the cell dimensions to your heart’s content. Some folks prefer the click-and-drag simplicity, while others go for precision with the Format Cells dialogue.
If time is of the essence, Excel’s AutoFit feature can be a handy ally, resizing cells to fit the content like a glove. And when you’re looking at broader adjustments, keyboard shortcuts can turn a slow shuffle into a quick sprint. Whatever your preference or requirements, Excel offers a tailor-made solution.
Getting Started with Basic Cell Resizing
Selecting the Cells You Want to Modify
Before embarking on the journey of resizing, you need to first round up the cells you want to adjust. You can do this by clicking and sweeping your cursor across the cells, or you could click on one, hold down the shift key, and then click on the last in the sequence to select a range.
Need to adjust an entire column or row? No problem.
Just click on the corresponding header, be it a letter for columns or a number for rows, and the whole line is selected in a jiffy.
This step is your starting block—it sets the stage for the resizing magic you’re about to perform.
Dragging to Resize Columns and Rows Manually
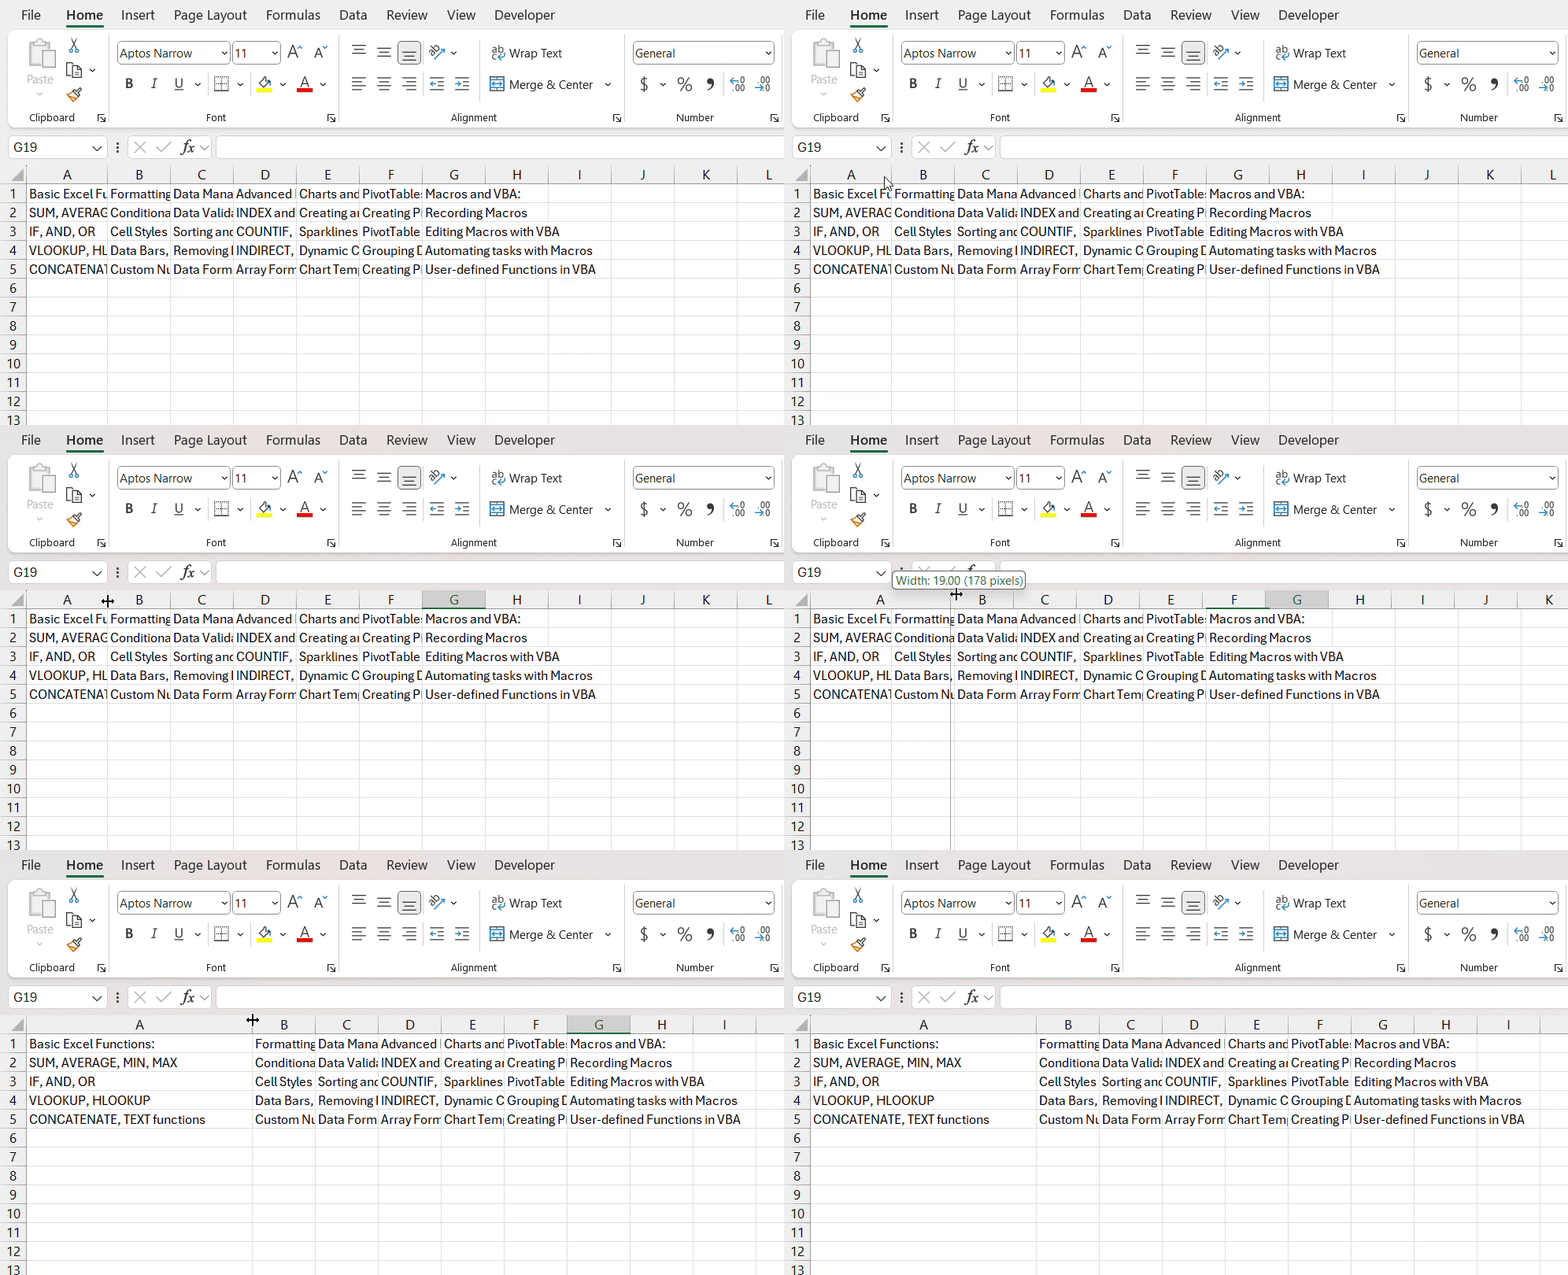
Ready to get hands-on with resizing? It’s easier than you might think. Just position your cursor over the boundary of a column or row until you see a double-sided arrow. Then, click and drag until your column or row is the size that just feels right. Release the mouse, and voilà, your cell adjusts to the new size instantly.
Sometimes playing by sight works best, especially when you want to quickly expand a cell for a better view of that lengthy text or a value with more decimals than you anticipated.
Using Excel’s Built-in Features for Optimal Sizing
Exploring the AutoFit Function for Best Fit
Let’s dive deep into the magic of Excel’s AutoFit feature—a real-time saver in your toolbox. With AutoFit, no more guessing games or eyeballing for the right cell size. When you opt for AutoFit, Excel steps in to adjust the columns or rows to snugly fit the content.
STEP 1: Hit ‘Ctrl + A’ to select all cells.
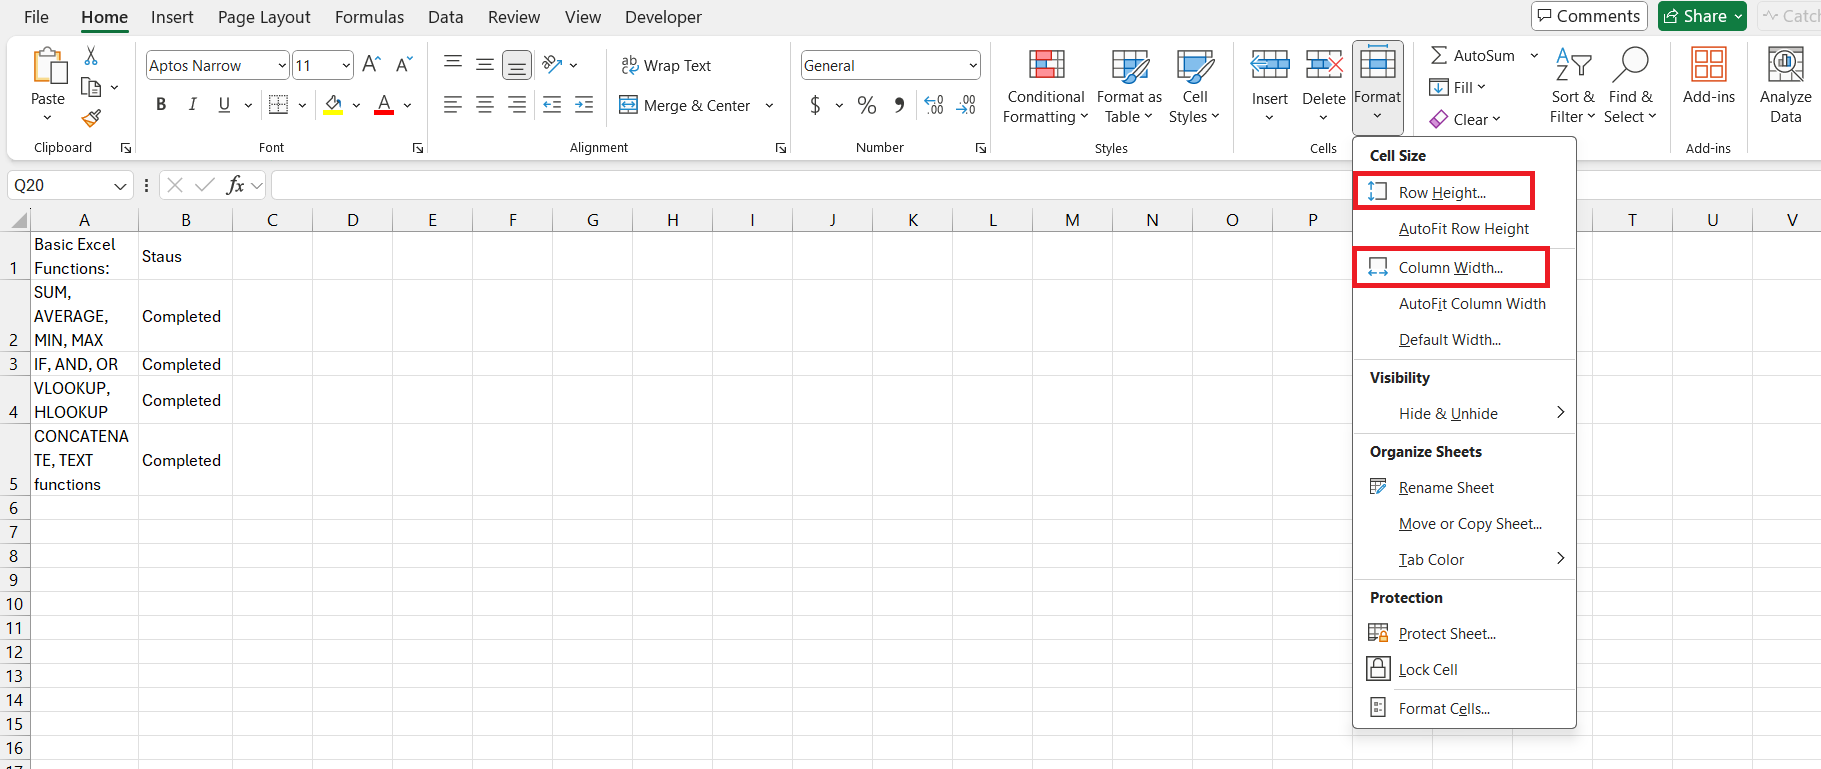
STEP 2: Simply head to the ‘Format’ drop-down under the ‘Home’ tab and choose ‘AutoFit Column Width’ or ‘AutoFit Row Height.
It’s like watching your data breathe out and settle in comfortably—easy and efficient.
You can also specify dimensions by clicking on Row height or Column Width from the dropdown.
Enter your preferred numeric values for height and width—whether it’s expanding a column to accommodate a wide header or fine-tuning a row height for better readability. Confirm your changes with a click on ‘OK,’ and watch your cells transform meticulously to your exact specifications.
Advanced Techniques in Cell Adjustment
Employing the Wrap Text Feature for Improved Visibility
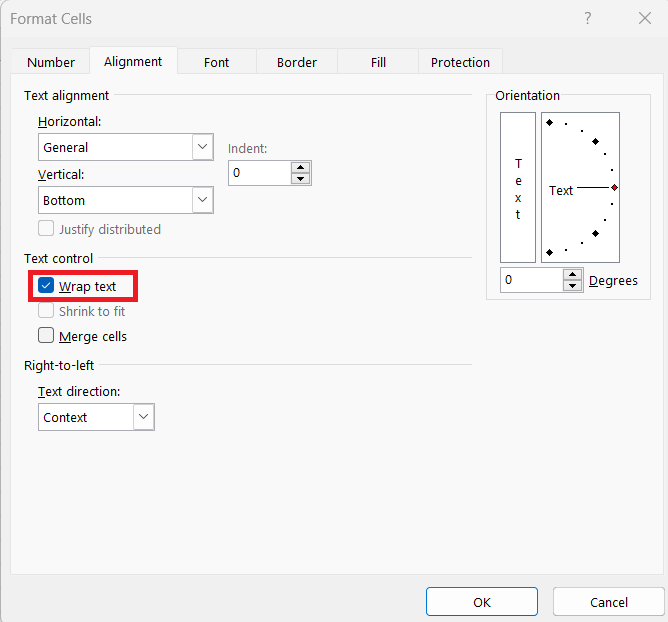
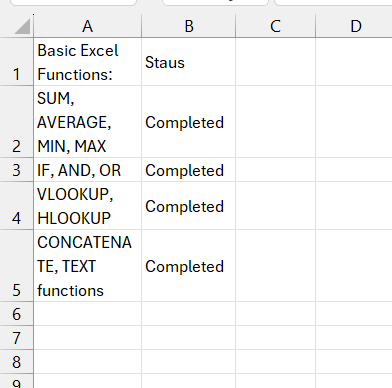
When text spills over like a waterfall, it’s time to harness the power of the Wrap Text feature to keep things neat and tidy. This tool doesn’t just increase cell height to improve visibility; it also maintains the column width, so your worksheet stays sleek and harmonized. Here’s how to do it:
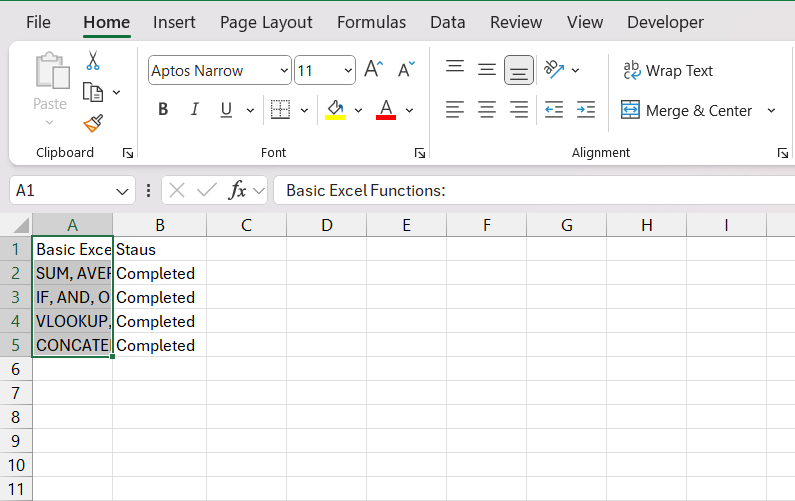
STEP 1: First, select the cells or the entire column where you’re planning on using the Wrap Text feature.
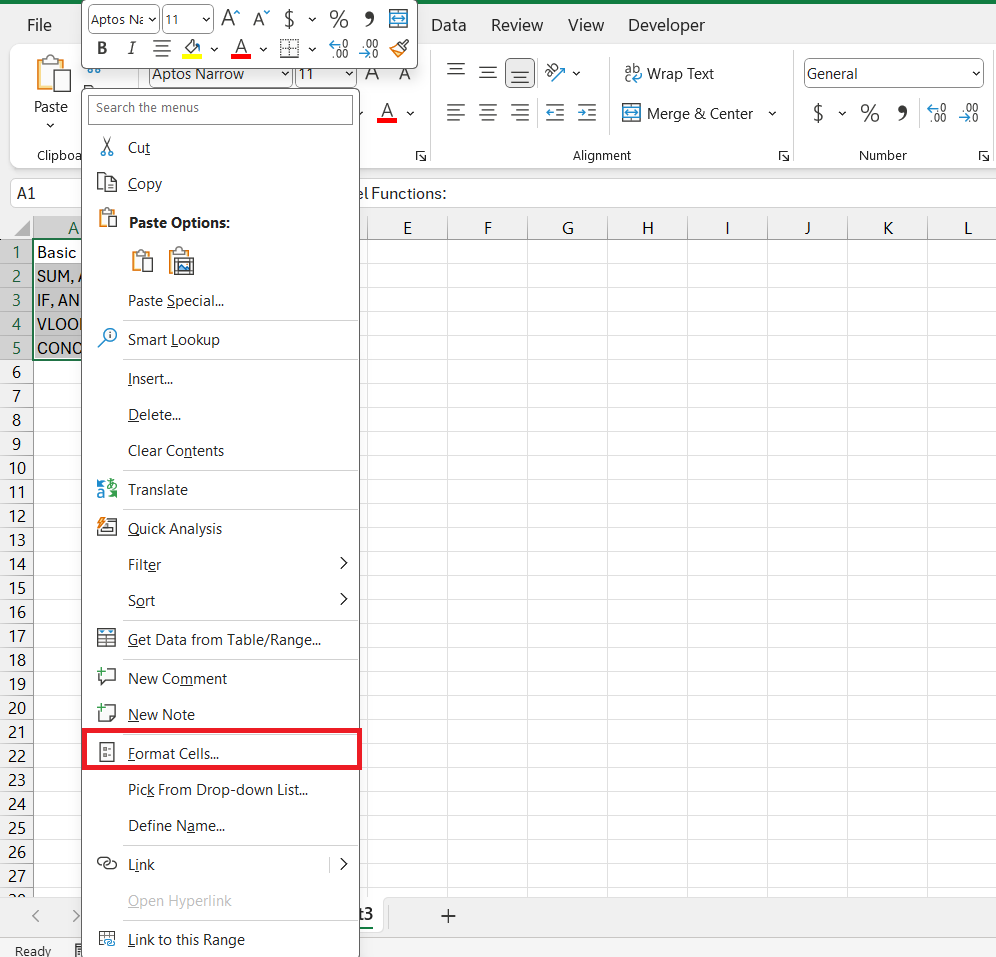
STEP 2: Right-click and choose ‘Format Cells,‘ or press ‘Ctrl + 1’ for a shortcut.
STEP 3: Find your way to the ‘Alignment’ group, and simply click on the Wrap Text button.
Like a magic wand, text that once stretched out like a marathon runner fits comfortably within the cell’s borders—visible, legible, and primed for review.
Merging Multiple Cells for Bigger Data Placement
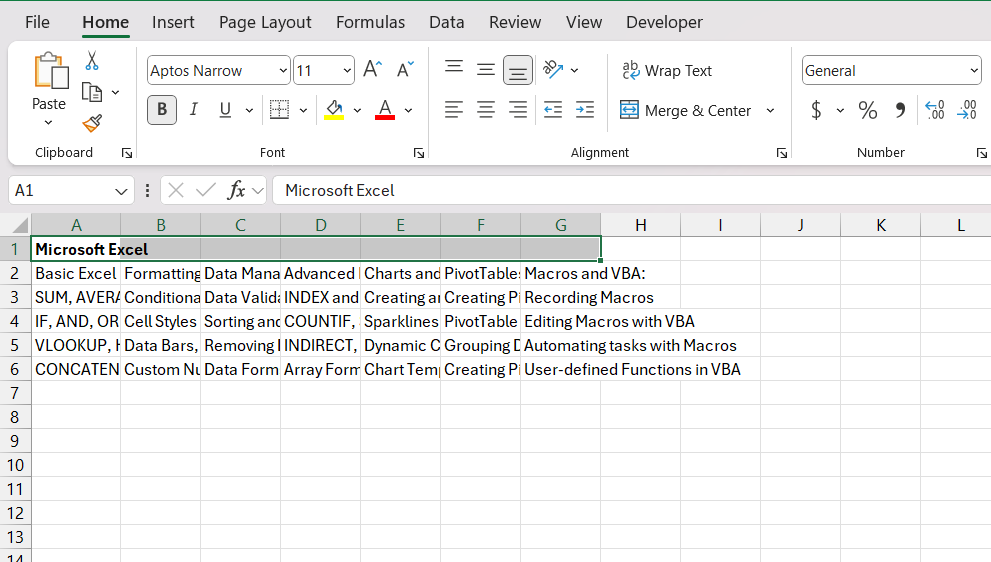
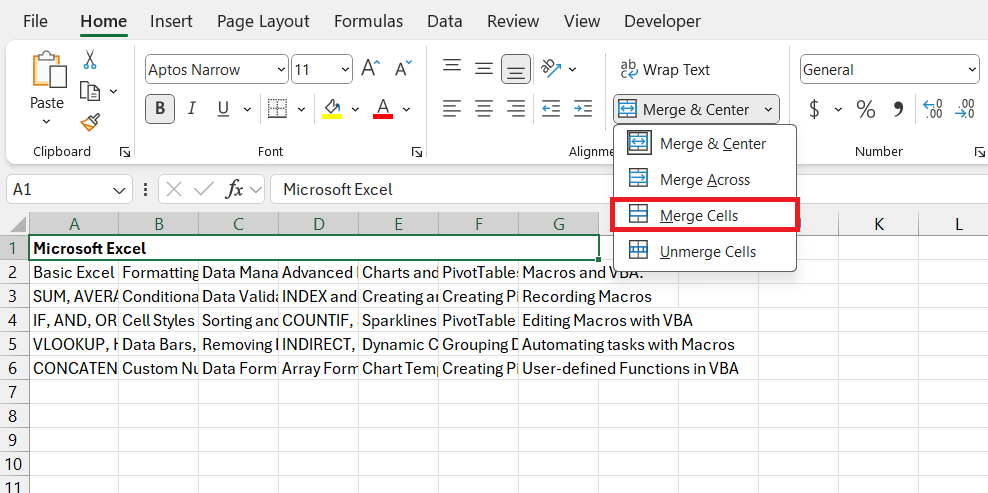
If your data deserves a grand stage or a heading needs to be the center of attention, merging multiple cells is the way to go. You create a single, larger cell that has the elbow room for bigger data placement; it’s ideal for titles or sectional headers that need to stretch across multiple columns or rows.
STEP 1: Start by selecting the cells that need to come together as one.
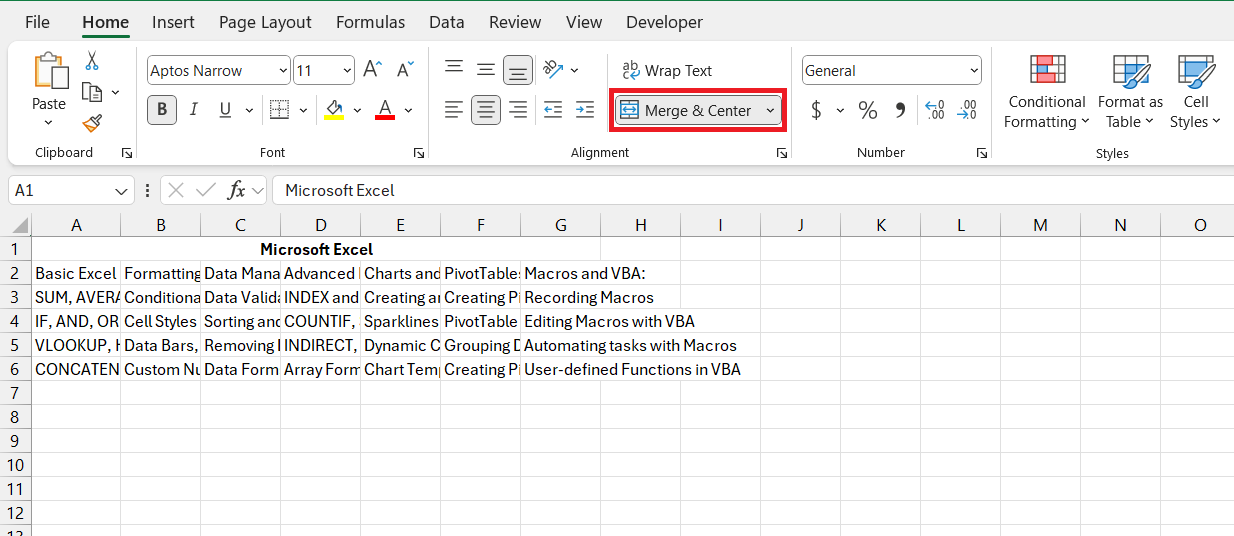
STEP 2: Click on the ‘Home’ tab and locate the ‘Merge & Center‘ button within the ‘Alignment’ group for a centered look.
STEP 3: Want to keep the current alignment? Click on the little arrow next to ‘Merge & Center’ and select ‘Merge Cells’ from the drop-down menu.
Merging is a powerful function but remember, it’s like a group project; all data in the secondary cells will bow out, leaving only the content from the top-left cell to take the spotlight.
Pro Tips for Efficient Use of Excel Cell Resizing
Keyboard Shortcuts to Speed Up Resizing Tasks
Are you ready for an efficiency upgrade? Keyboard shortcuts are your friends when it comes to speeding up cell resizing tasks in Excel. Say goodbye to the mouse and let your fingers do the swift walking. To auto-fit column width without breaking a sweat, press Alt + H + O + I.
And, for getting those row heights just right with auto-fit, the magic sequence is Alt + H + O + A. Remember, the key is the sequence – you must press these keys one after another, not all at once, for the Excel wizardry to work.
Embrace these shortcuts and watch your productivity soar – you’ll wonder how you ever got by without them.
Frequently Asked Questions
What are the limitations of Excel’s AutoFit feature?
The AutoFit feature in Excel is pretty handy, but it does have limits. For instance, it can’t extend a column’s width beyond 255 characters, that’s the max space for data Excel offers per column. If you’re using a larger font or bold and italics, that max-width shrinks even further. And for rows, the height won’t go past 409 points. Large text strings are a no-no for AutoFit; for those, you’d better wrap the text instead. Oh, and one more thing, all that auto-adjustment magic won’t work if you’ve got cells merged across columns or rows, just so you know.
How can I make all columns or rows the same size quickly?
To make all your columns or rows one uniform size lickety-split, you start with selecting them all – just hit that corner button between “A” and “1”. Then move the cursor just between any two column headers or row numbers until you spot that tell-tale double arrow – click and drag to the size you want, and like a well-oiled machine, all your columns or rows will match up to that size. It’s a simple way to get your data looking neat and standardized without a whole lot of fuss.
How do I increase cell size in Excel equally?
When you need to increase cell size equally, select one row or column, then hold down ‘Ctrl’ while selecting others to keep things even. Once your selection is made, adjust one row or column to your preferred size, and the rest will follow suit. A seamless way to maintain uniformity across your data set, it makes sure that readability and appearance are spot on.
How do you make Excel cells expand to fit text automatically?
To make cells in Excel automatically expand to fit text, go to the ‘Home’ tab, click on ‘Wrap Text’ in the ‘Alignment’ group, and voila! This tells Excel to expand the cells vertically to accommodate the text. For columns or rows, use ‘AutoFit.’ Choose your cells, then under ‘Home’ go to ‘Format’ and pick ‘AutoFit Column Width’ or ‘AutoFit Row Height.’ It’s a breeze and ensures all your content is visible without manually adjusting each time.
What is the keyboard shortcut to use autofit feature in Excel?
The keyboard shortcuts to use the AutoFit feature in Excel are as follows:
- To AutoFit column width: Press ALT + H + O + I.
- To AutoFit row height: Press ALT + H + O + A.
When using these shortcuts, remember to press and release each key or key combination in turn, not all at the same time.
John Michaloudis is a former accountant and finance analyst at General Electric, a Microsoft MVP since 2020, an Amazon #1 bestselling author of 4 Microsoft Excel books and teacher of Microsoft Excel & Office over at his flagship MyExcelOnline Academy Online Course.


