In Excel, sometimes you need to move columns to enhance readability or to align with specific requirements. In this article, we will go through the 3 Main Methods on How to Move Columns in Excel:
Let’s look at these methods thoroughly!
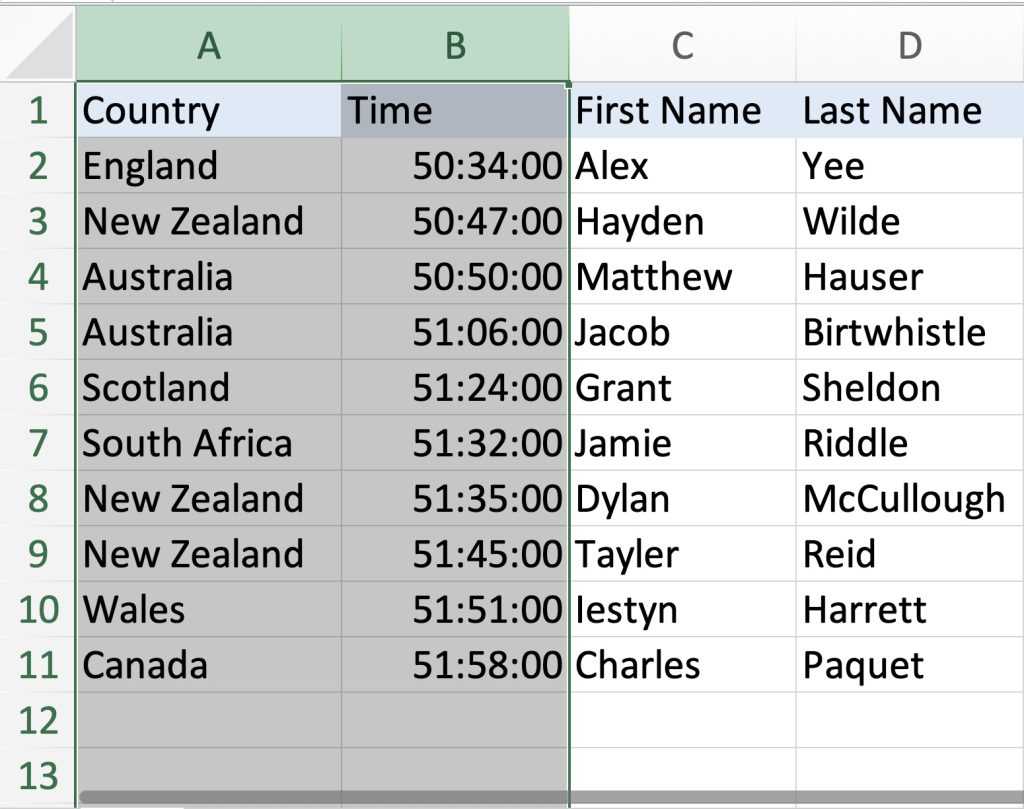
Select and Drag Columns
By far the easiest and most straightforward way to move columns in Excel is the Select and Drag Method. Here’s how to do it:
Right-click on the first column and click on Insert to insert 2 blank columns.
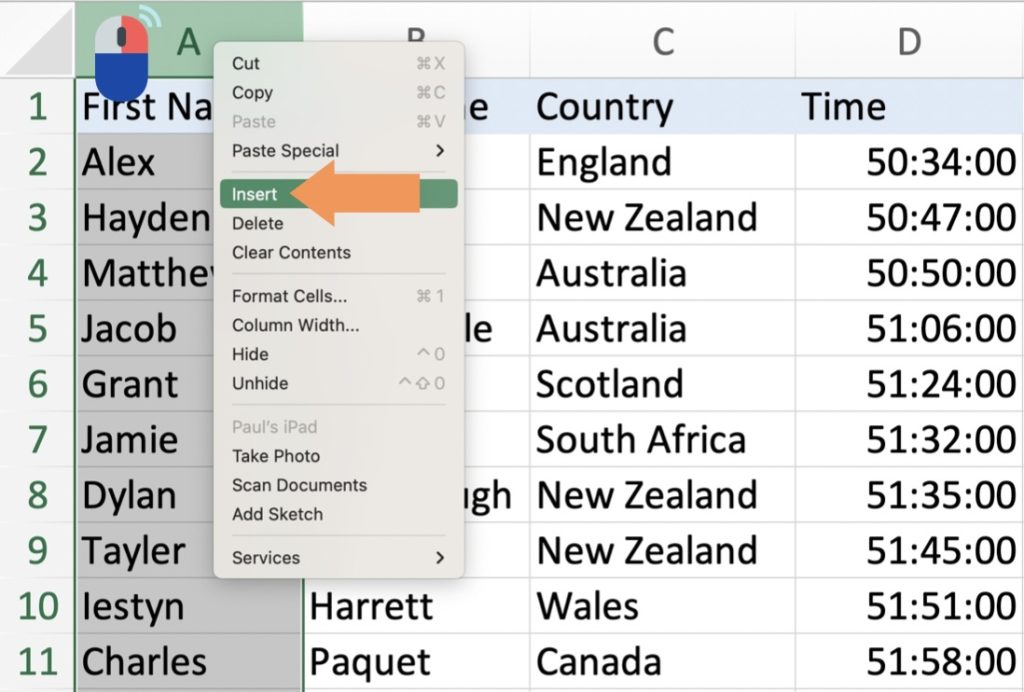
Select the column(s) you want to move. To select a single column, click on the header letter of the column. To select multiple columns, hold down the “Ctrl” key while clicking on the column headers.
Position your cursor over the selected column(s) until it turns into a four-sided arrow. (Or the gloved hand cursor on a Mac.)
Click and hold the left mouse button, then Drag the column(s) to the desired location.
Release the mouse button to drop the column(s) into the new position.
Cut and Paste Columns
Another useful way to move columns in Excel is the Cut and Paste method. Here’s how to do it:
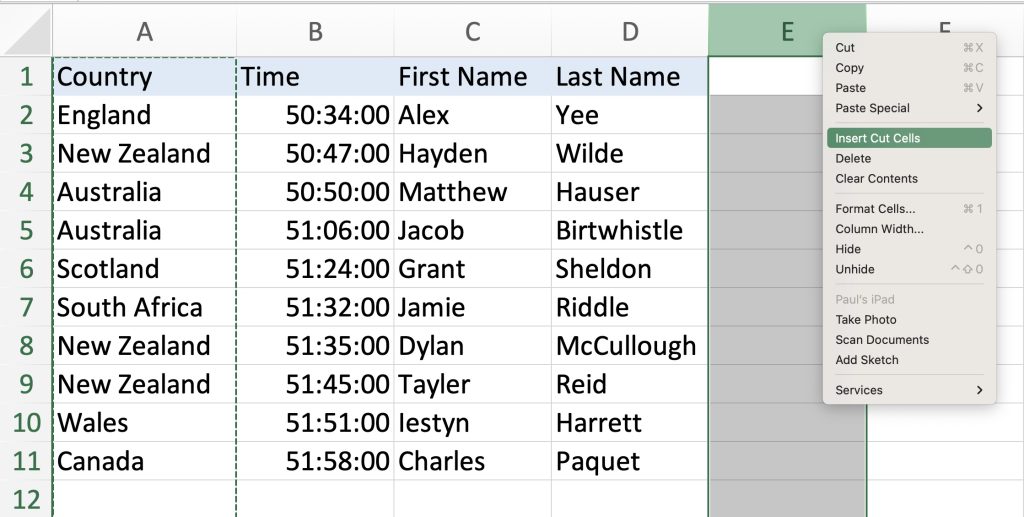
Select the first column you want to move. Click on the header letter of the column to select it. Right-click on the selected column and choose “Cut” from the context menu, or use the keyboard shortcut “Ctrl + X” to cut the column.
Select the column where you want to place the cut column. Click on the header letter of the target column. Right-click on the target column header and choose “Insert Cut Cells” from the context menu, or use the keyboard shortcut “Ctrl + Shift + V” to paste the cut column.
The original column will be inserted into the new position, pushing the existing columns to the right.
Using Sort Data Feature
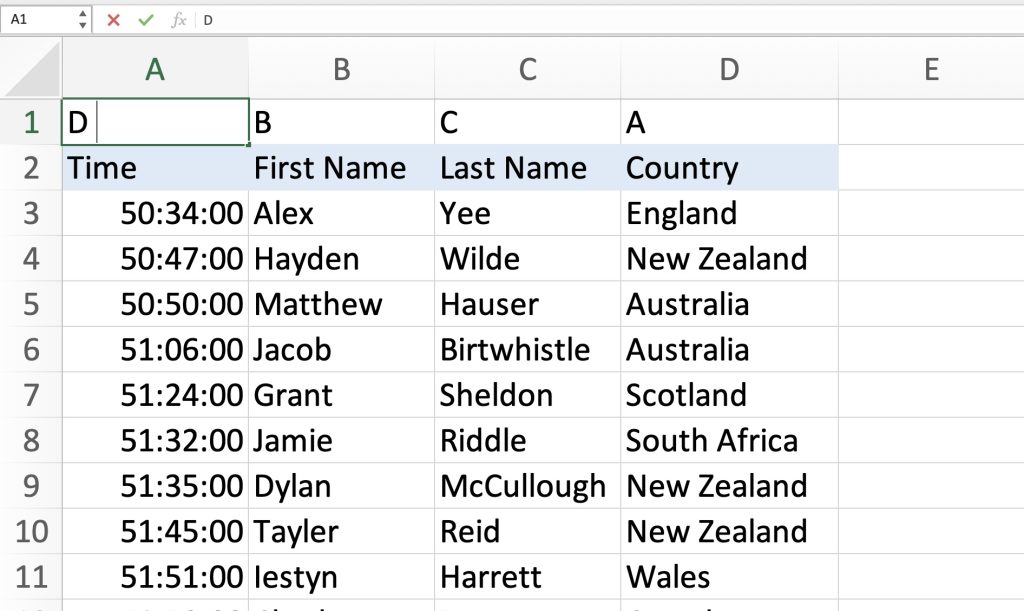
Let’s say you want to move all of the columns this exact order: Country, First Name, Last, and Time. To move columns in Excel using the sort feature, you can follow these steps:
Right-click on the first row and click Insert.
Label the columns in the order you want them to appear. In our case it will be Country (A), First Name (B), Last Name (C), and Time (D).
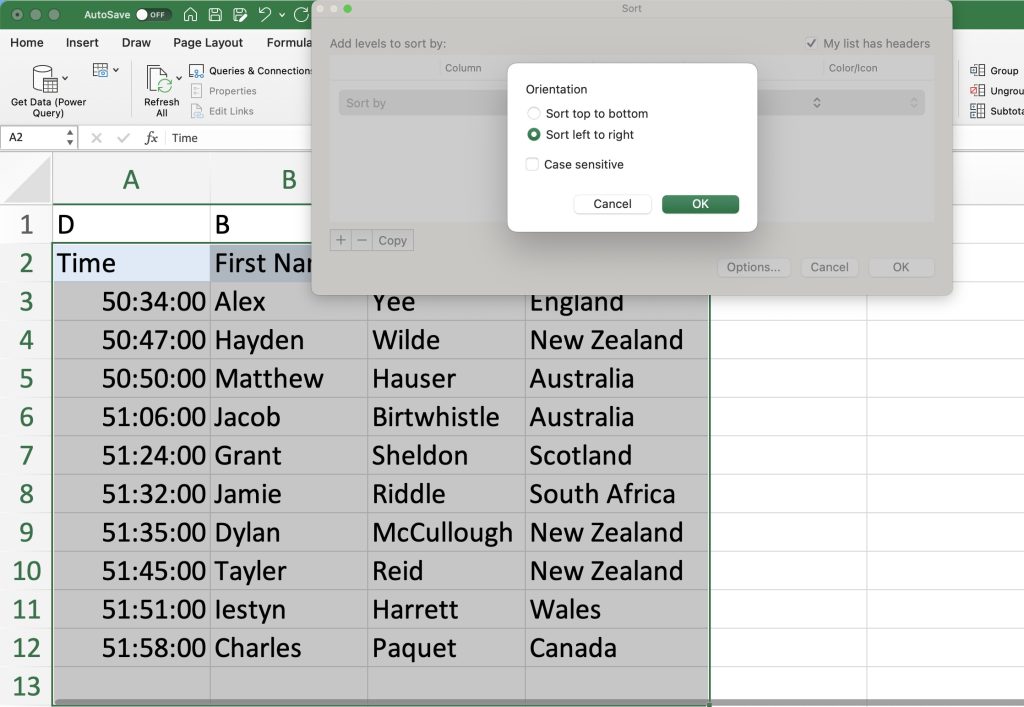
Select the entire dataset that contains the columns you want to move. You can click and drag the mouse pointer to select the range, or you can press Command+A (⌘+A) to select the entire sheet if your dataset occupies the entire sheet.

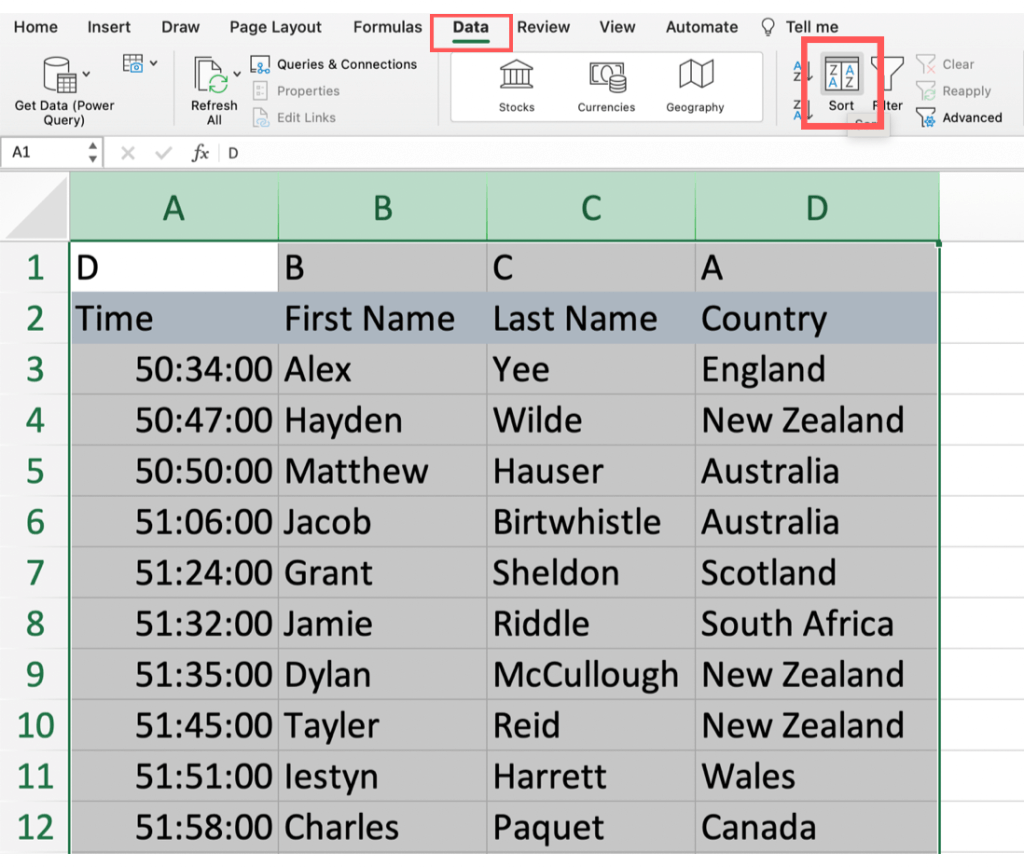
Click on the “Sort” button in the Sort dialog box to sort the data based on your selection. The column you chose to sort by will now be moved accordingly within the dataset.
Note: The sort method can be useful when you want to move a column to a specific position relative to other columns in the dataset.
There you have it! By using the three main techniques described in this article you can effectively rearrange columns to enhance data organization and streamline your Excel workflow.
John Michaloudis is a former accountant and finance analyst at General Electric, a Microsoft MVP since 2020, an Amazon #1 bestselling author of 4 Microsoft Excel books and teacher of Microsoft Excel & Office over at his flagship MyExcelOnline Academy Online Course.

