Get ready to elevate your Microsoft Excel printing game. Understanding how to harness Excel’s features ensures your printed documents maintain the same clarity and structure as they do on-screen. In this article, we will cover a detailed guide on how to print Excel with lines.
Key Takeaways:
- Gridlines as Guideposts: Gridlines provide essential structure, aiding in the navigation and analysis of data-heavy spreadsheets.
- Setting the Stage: Enable gridlines before printing to ensure your spreadsheets retain their navigability on paper.
- Page Setup Precision: Fine-tune your page setup for flawless output by marking print areas, adjusting scaling options, and optimizing margins.
- Customizing Gridlines: Tailor gridlines to your preference by changing color for visibility and adjusting thickness for better definition.
- Troubleshooting Tactics: Troubleshoot common printing hiccups like misaligned gridlines with adjustments to print area, orientation, and scaling options.
Table of Contents
Unlocking the Secrets of Excel Printing
Harnessing Excel’s Full Potential for Clear Prints
When you want your data to look just as tidy on paper as it does on your screen, tapping into Excel’s full potential is key. Crisp, clear printouts start with understanding the nuances of the program’s print features.
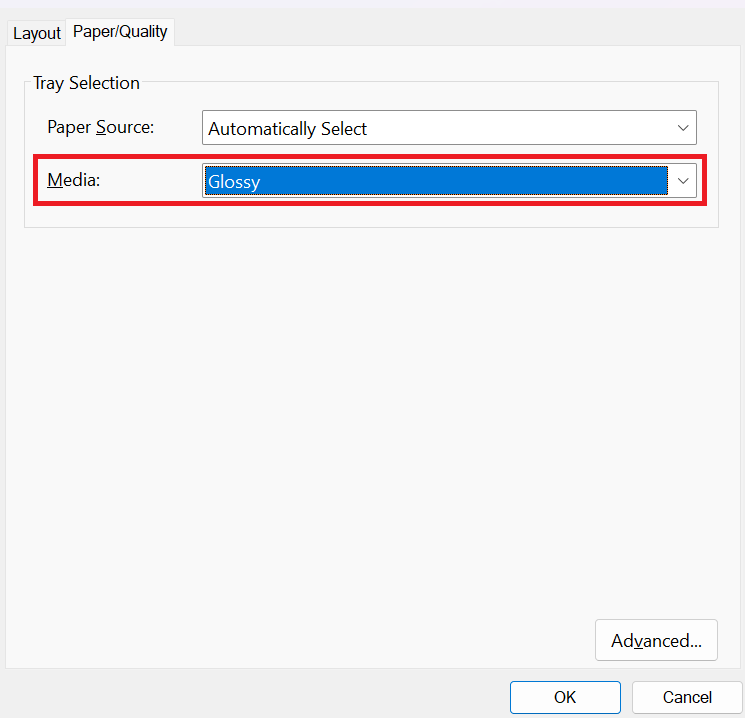
By ensuring you’ve selected the best quality settings, you’re already a step closer to professional-looking documents. Don’t forget, when in the ‘Print’ menu, to navigate to ‘Printer Properties’ and choose right ‘Media’ option for the Quality option.
Why Do Gridlines Matter?
Gridlines act as your guiding stars in the vast universe of Excel’s data-heavy spreadsheets. They’re crucial because they offer a clear structure, separating and defining the demarcations between rows and columns.
When you’re dealing with an abundance of information, having this visual assistance makes it far less daunting to analyze or track specific data points.
Setting the Stage for Perfect Prints
How to Print Excel with Lines
To ensure your printed spreadsheets are as navigable as they are within Excel itself, enabling gridlines is pivotal. Before even thinking about hitting ‘Print’, take a quick dive into your settings using the following steps:
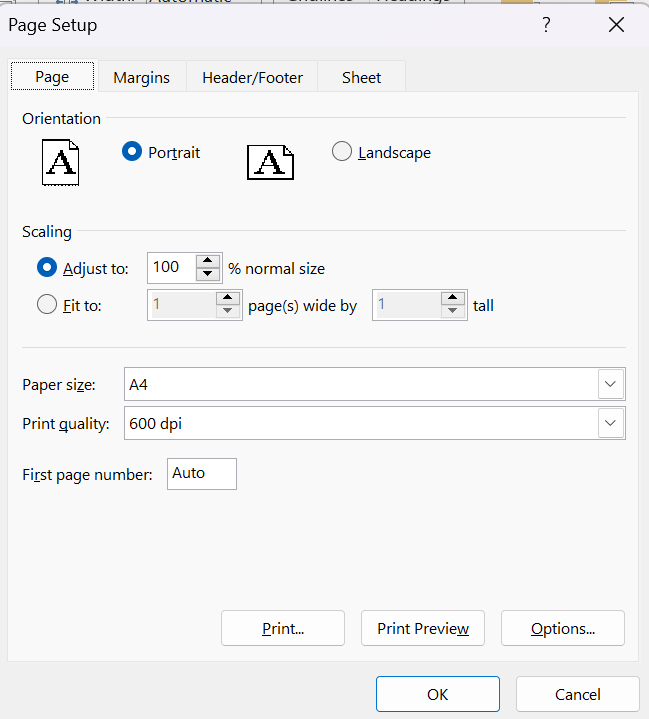
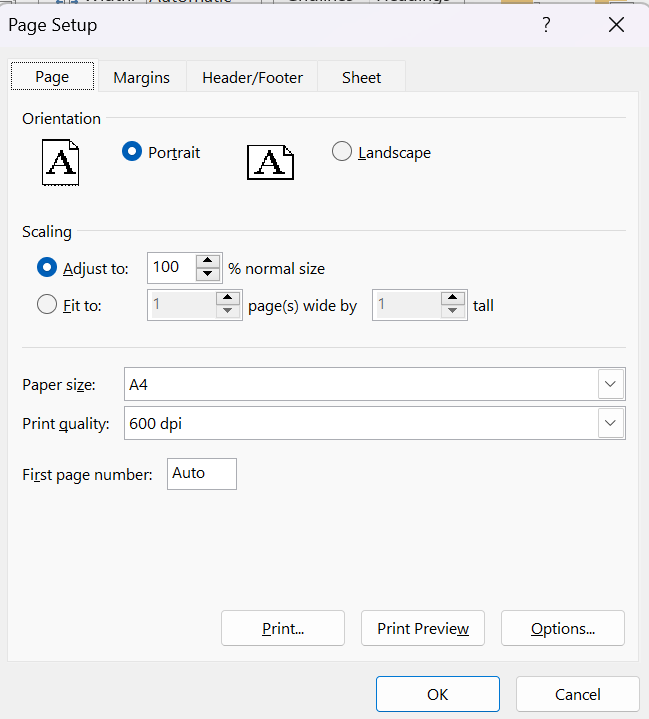
STEP 1: Go to “Page Layout” and click on the arrow icon under the ‘Page Setup’ group.
STEP 2: Page Setup dialog box will appear.
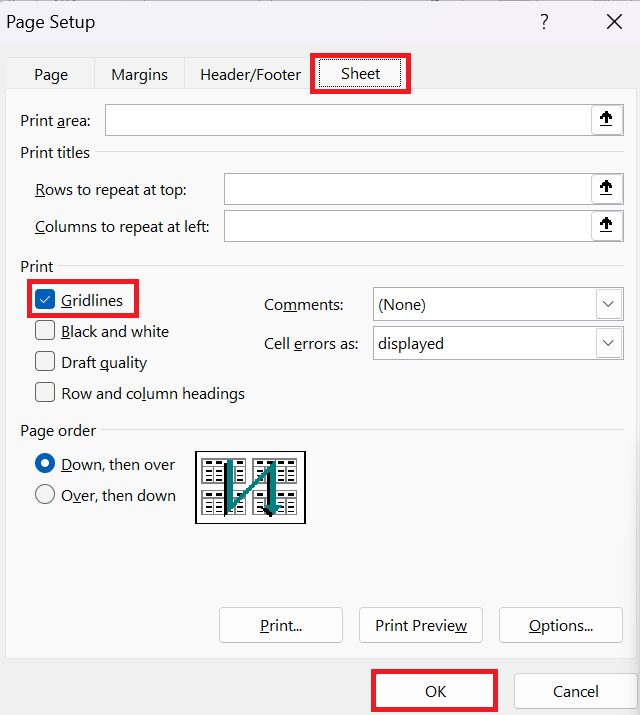
STEP 3: Go to the ‘Sheet’ tab, and there, tick the ‘Gridlines’ checkbox under the ‘Print’ section and click OK. Voilà, you’re all set to witness those lines come to life on paper.
Adjusting Page Setup for Flawless Output
For that flawless printout, a little prep work in Page Setup goes a long way. Get things rolling by checking that your print area is correctly marked.
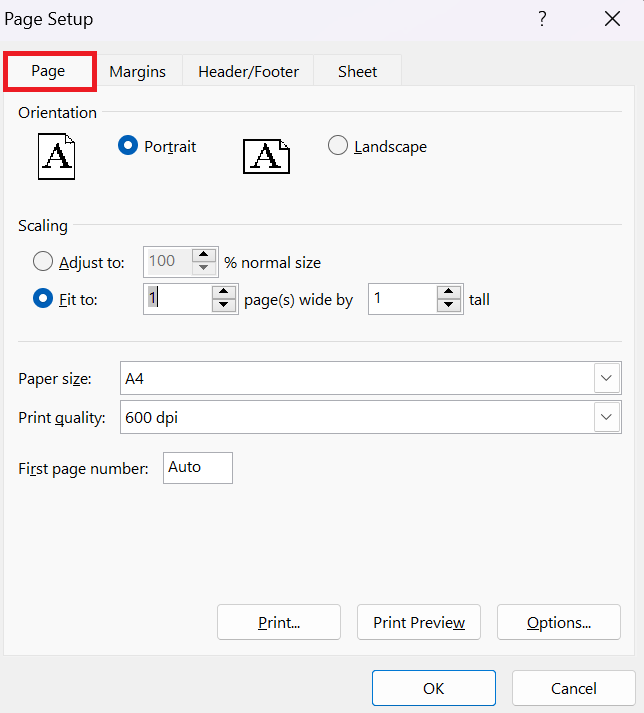
Then, bring your attention to scaling options— ‘Fit Sheet on One Page’ can be a lifesaver for those wide sheets, or if precision matters more, ‘Adjust to’ with a percentage can give you full control.
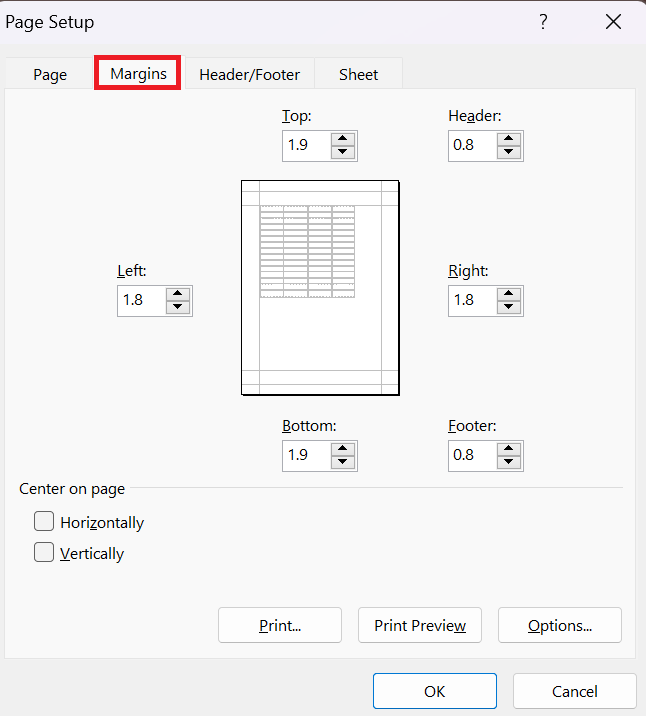
Lastly, margins. Margins are the invisible frame that can make or break the symmetry of your printout, so adjust them to keep your data comfortably in the spotlight.
Customizing Gridlines for Readability
Changing Gridline Color for Enhanced Visibility
If you’re eager to add a splash of color to your gridlines for better visibility, Excel’s got your back! Let creativity take the wheel and alter the gridline color with a few easy steps.
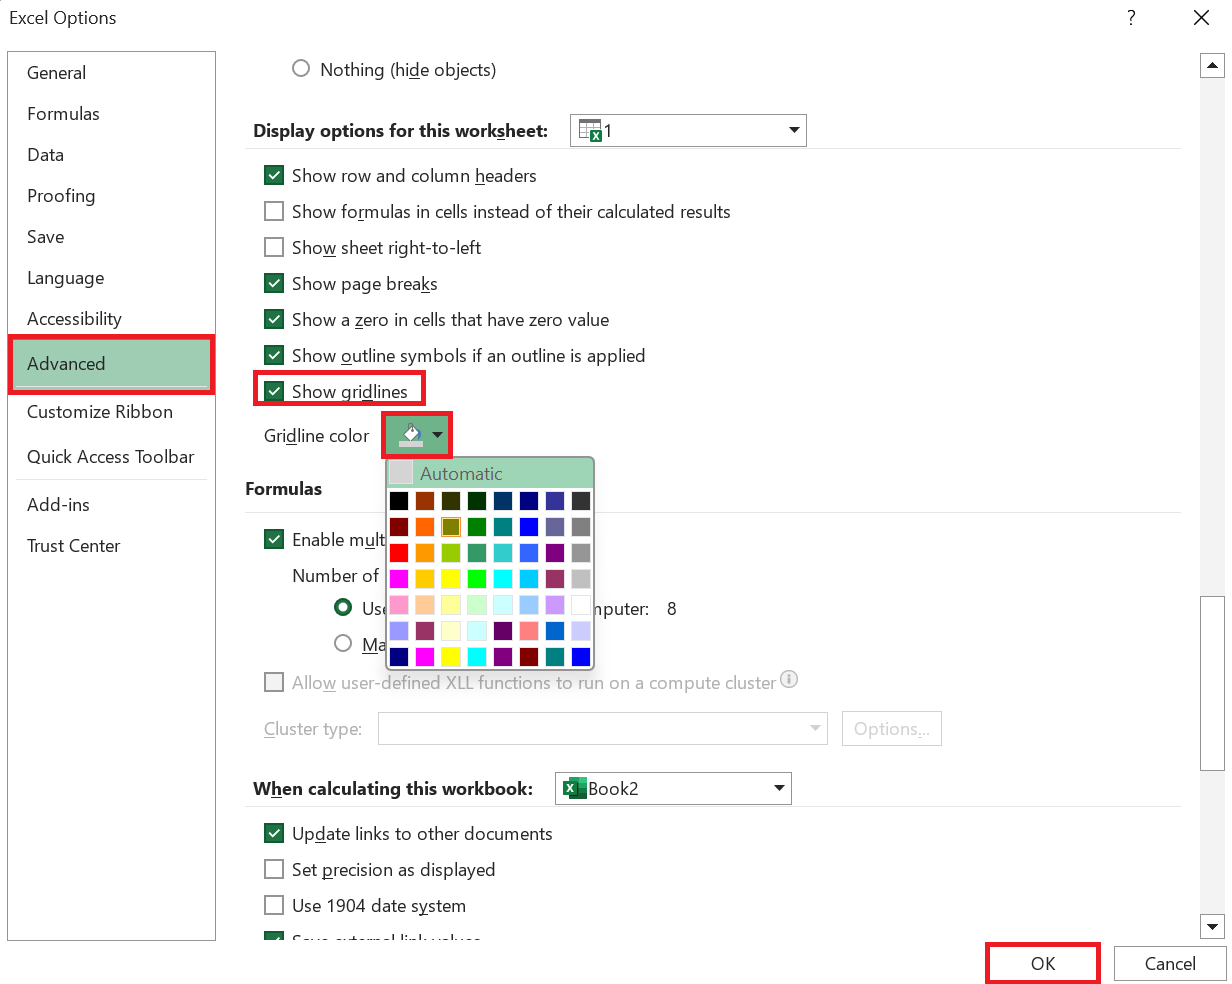
STEP 1: Navigate to the ‘File’ tab and leap into ‘Options’.
STEP 2: In the ‘Advanced’ section, look for ‘Display options for this worksheet’ and tick the option ‘Show gridlines’ if necessary.
STEP 3: Tap the color well next to ‘Gridline color’, pick a shade that speaks to you, hit ‘OK’, and watch your gridlines transform!
Modifying Gridline Thickness for Better Definition
For those times when the default gridline just doesn’t cut it, and you need thicker lines for better definition, Excel lets you adjust them with ease with the following steps:
STEP 1: Start by selecting your desired cells.
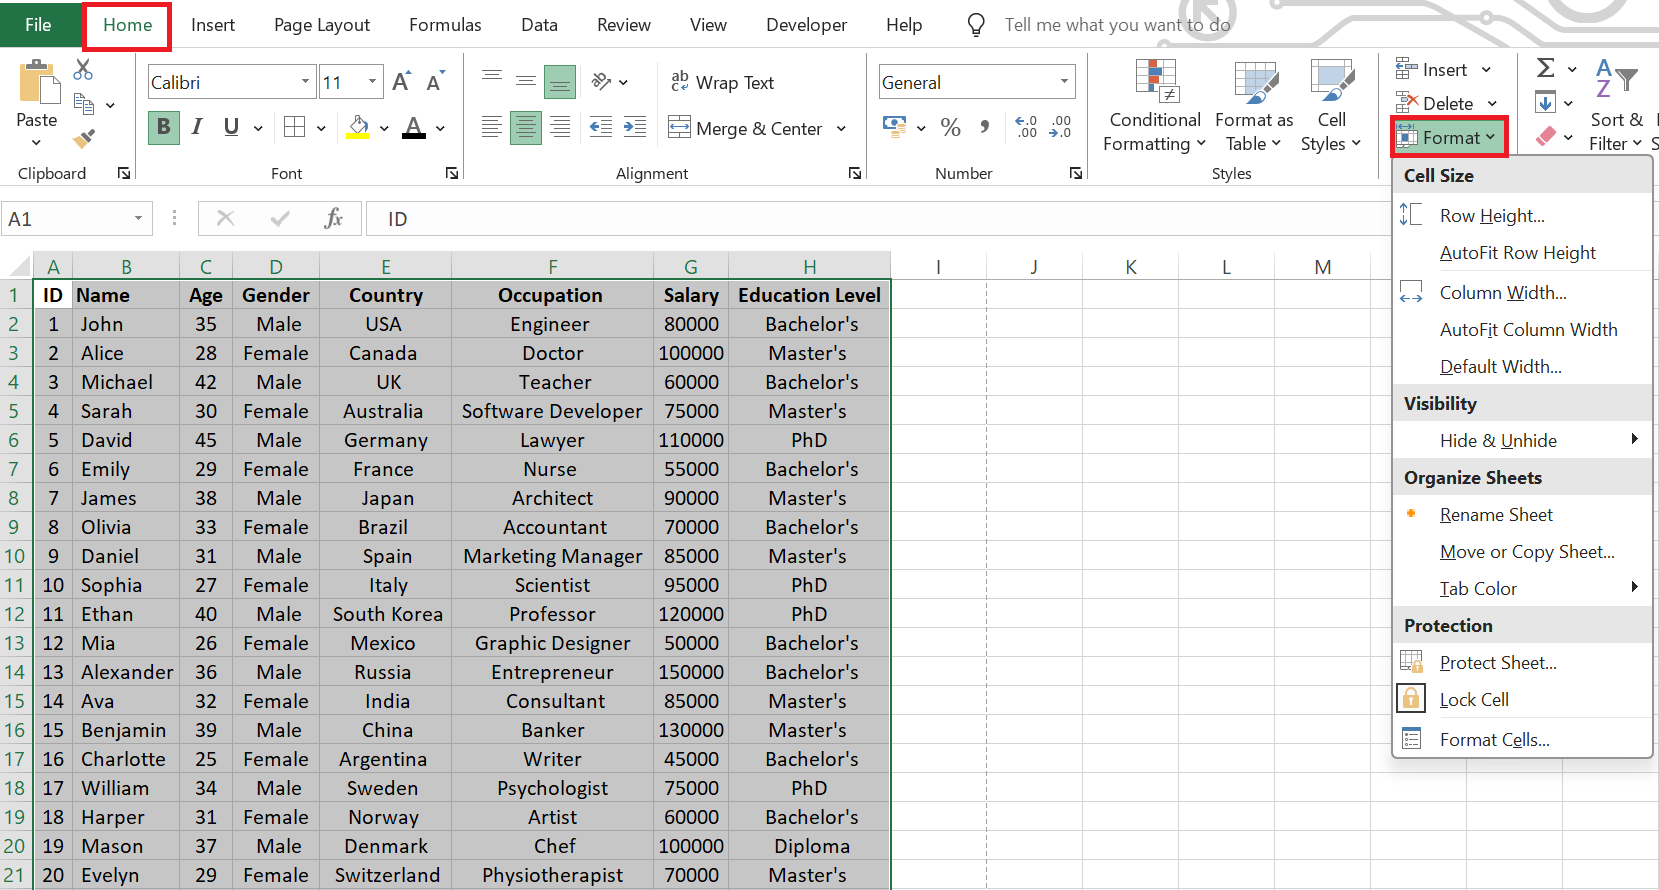
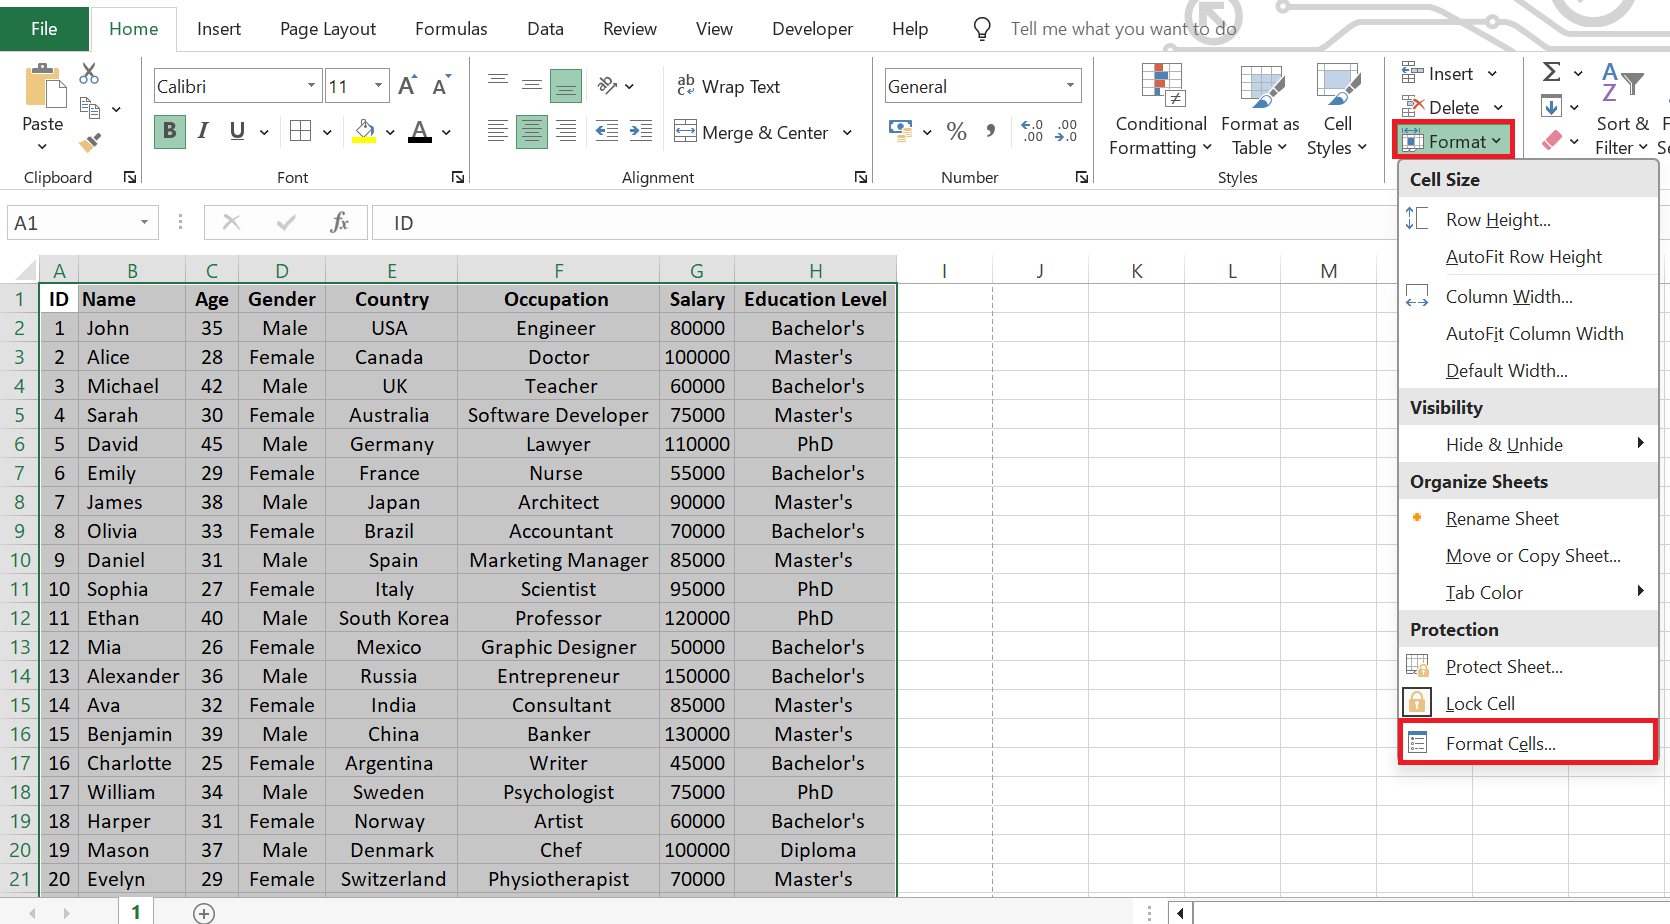
STEP 2: Then march on over to the ‘Home’ tab and find ‘Format’ in the ‘Cells’ group.
STEP 3: Upon clicking, a dropdown menu arises, click on ‘Format Cells’.
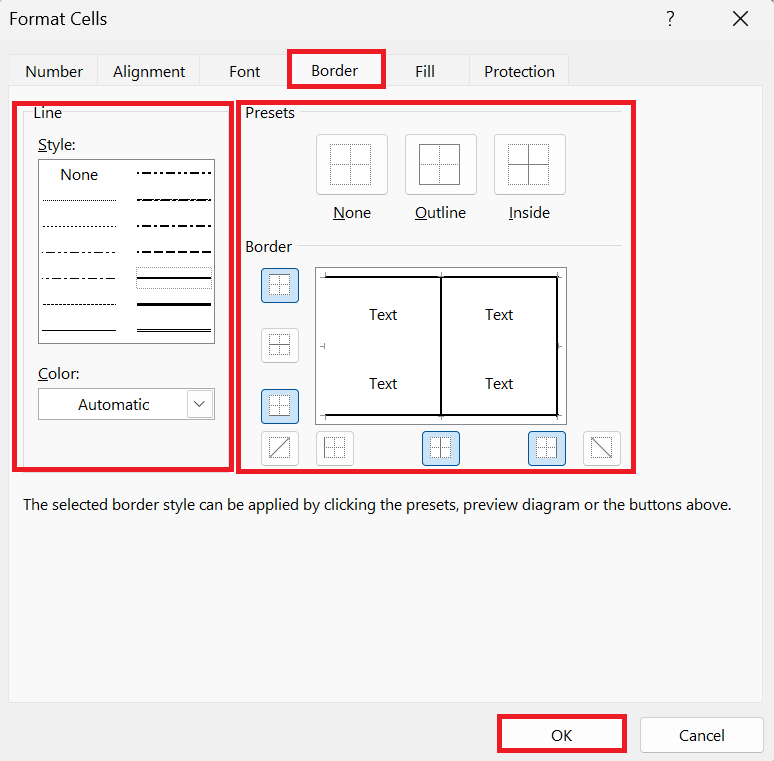
STEP 4: In the ‘Border’ tab, you’ll spot the ‘Line Style’ options where you can thicken those lines to your heart’s content by selecting a bolder style. Remember to hit ‘OK’ to set your masterpiece in stone.
Troubleshooting Common Printing Hiccups
Ensuring Gridlines Align Properly on Paper
When gridlines hesitate to align properly on paper, a little bit of troubleshooting is in order. Start by double-checking the print area — you want to confirm that all cells meant to dance on paper have an invitation. If that’s in check and problems persist, scrutinize the page orientation; switching between portrait and landscape can often realign those wayward lines.
Lastly, play around with the scaling options to fine-tune the alignment. Find solace in the ‘Scale to Fit’ options in the ‘Page Layout’ tab, it could be the key to harmony between your data and those gridlines seeking proper placement.
Advanced Techniques for Power Users
Fine-Tuning with ‘Print Preview’ Mode
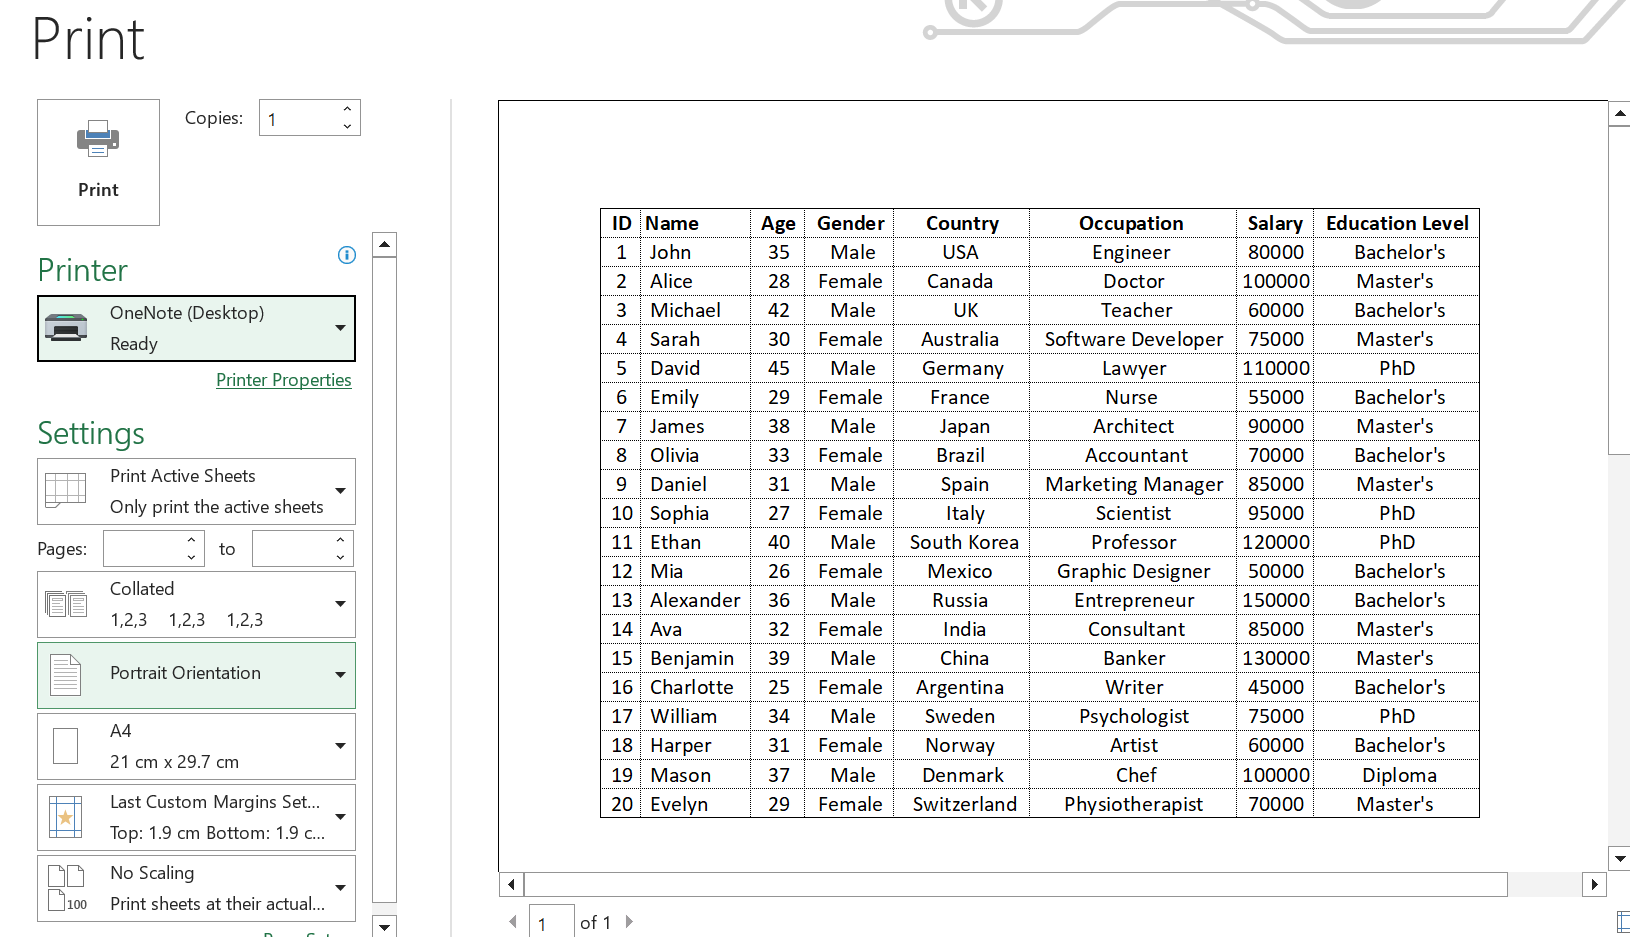
Dive into ‘Print Preview’ mode for the finishing touch on your document — it’s like a dress rehearsal before your spreadsheet takes center stage in the printer. This mode is your crystal ball, showing precisely how your document will emerge from the printer’s backstage.
Use it to fine-tune margins, orientation, and scaling, ensuring that each gridline aligns exactly as planned, paving the way for a standing ovation when your printed document is finally in hand.
FAQ: Answers to Your Burning Questions
How do I change the color of the gridlines in Excel?
To change the color of gridlines in Excel, go to ‘File’ > ‘Options’ > ‘Advanced’. Scroll to “Display options for this worksheet”, choose your worksheet, and click the color next to “Gridline color”. Select your new color and press ‘OK’.
Why are my gridlines not printing even though they are visible on the screen?
Gridlines not printing could be due to unchecked ‘Gridlines’ in the ‘Page Layout’ tab under ‘Sheet Options’. Ensure it’s selected under ‘Print’. Also, check for the correct print area and no conflicting cell formatting.
How can I print gridlines in Excel for iPad?
To print gridlines in Excel for iPad, open your workbook, tap ‘Share’, select ‘Print’, turn on ‘Gridlines’ in print settings, adjust other settings as needed, and press ‘Print’ to finish.
Can you print an Excel sheet with gridlines on a Mac?
Yes, you can print an Excel sheet with gridlines on a Mac. Enable gridlines by clicking ‘Page Layout’, checking ‘Gridlines’ under ‘Print’, and then proceeding to ‘File’ > ‘Print’ to finish the job.
Why do lines disappear in Excel when printing?
Lines might disappear when printing from Excel due to several reasons: ‘Gridlines’ may be unchecked in the ‘Page Layout’ print settings, and there might be overriding cell formatting or incorrect printer settings. Always preview before printing to check line visibility.
How to print an Excel sheet with rows and columns?
To print an Excel sheet with rows and columns, select ‘Page Layout’, check ‘Print’ under ‘Headings’ in the ‘Sheet Options’ group, and then use CTRL+P to open the ‘Print’ dialog box and print your document.
John Michaloudis is a former accountant and finance analyst at General Electric, a Microsoft MVP since 2020, an Amazon #1 bestselling author of 4 Microsoft Excel books and teacher of Microsoft Excel & Office over at his flagship MyExcelOnline Academy Online Course.

