When working in Excel, hidden rows can sometimes disrupt the flow of your data analysis or make it difficult to find important information. I’ve found myself in this situation more times than I can count, and fortunately, unhiding rows is a quick fix. Let me walk you through how to unhide rows in Excel so you can get back to your work seamlessly.
Key Takeaways:
- Unhiding rows in Excel is essential for a complete data view and analysis.
- You can easily unhide rows by selecting the adjacent rows and using the ‘Unhide’ option.
- Keyboard shortcuts, like ‘Ctrl + Shift + 9’, make unhiding rows faster.
- Troubleshooting issues such as stubbornly hidden rows can be done by adjusting row height.
- Automating row visibility using VBA macros can save time with large datasets.
Table of Contents
Introduction to Unhiding Rows in Excel
The Art of Revealing Hidden Data
Unhiding rows in Excel is akin to unveiling the unseen, filling in the gaps that might otherwise lead to incomplete analysis. I understand that sometimes in the maze of numbers and formulas, crucial data can play hide and seek. The ability to unhide rows is essential, as it transforms your data set from a partial display to a complete narrative.
When and Why You Might Need to Unhide Rows
There are several instances when we need to pull back the curtain on hidden rows in Excel. You might hide rows to streamline datasets, making them easier to navigate during analysis or presentation. Consequently, unhiding becomes necessary to modify data, review comprehensive information, or prepare for a detailed report.
Also, if colleagues have hidden rows without marking their content, you’ll need to unhide them to ensure nothing important is missed. Common scenarios include data validation, auditing formulas, or simply regaining a full view of your dataset.
How to Unhide Rows in Excel
Basic Steps to Unhide Individual or Multiple Rows
To unhide individual or multiple rows in a flash, I follow a simple method that works every time. First, I identify the rows above and below the hidden section – these are my markers.
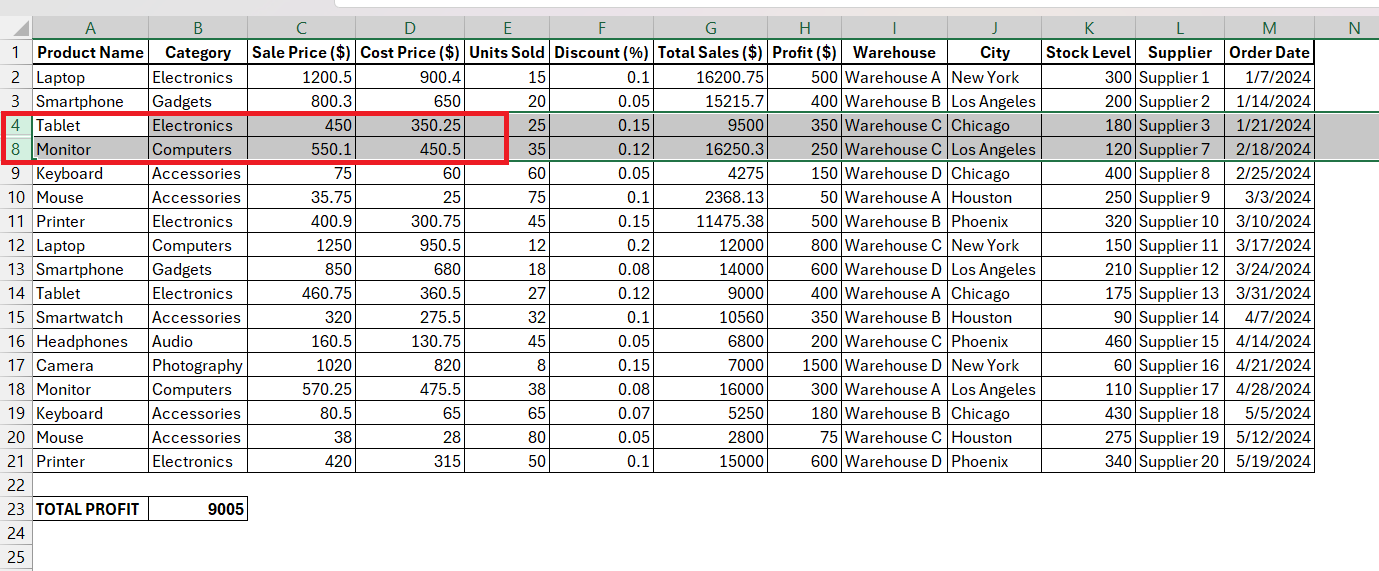
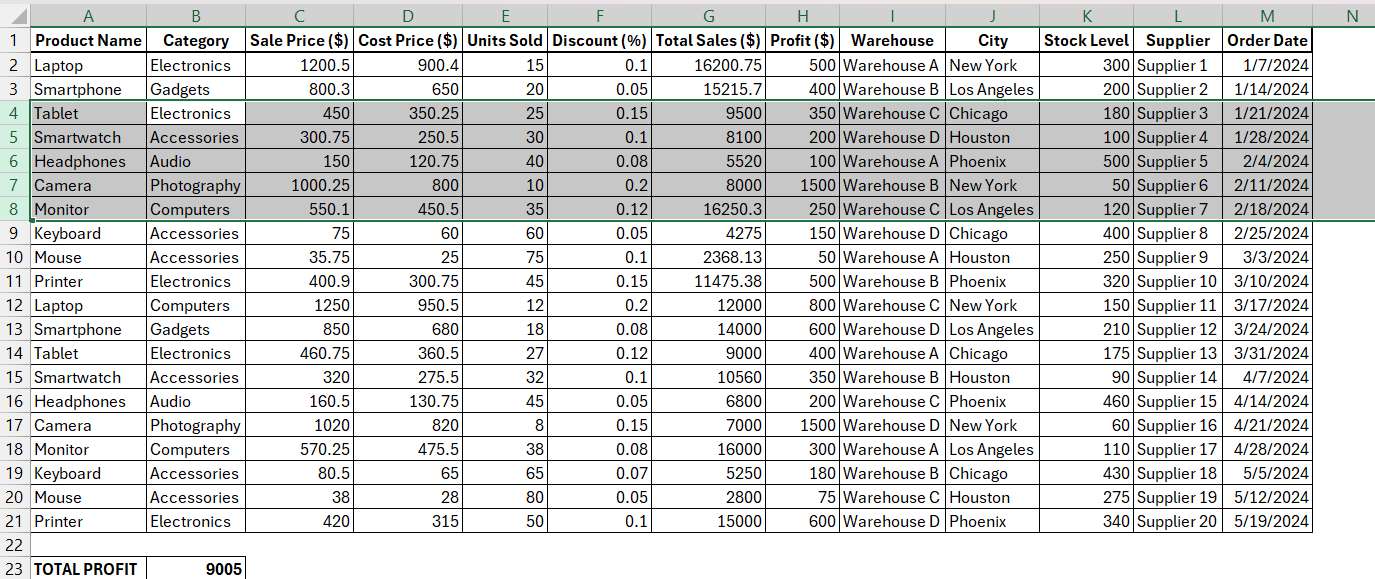
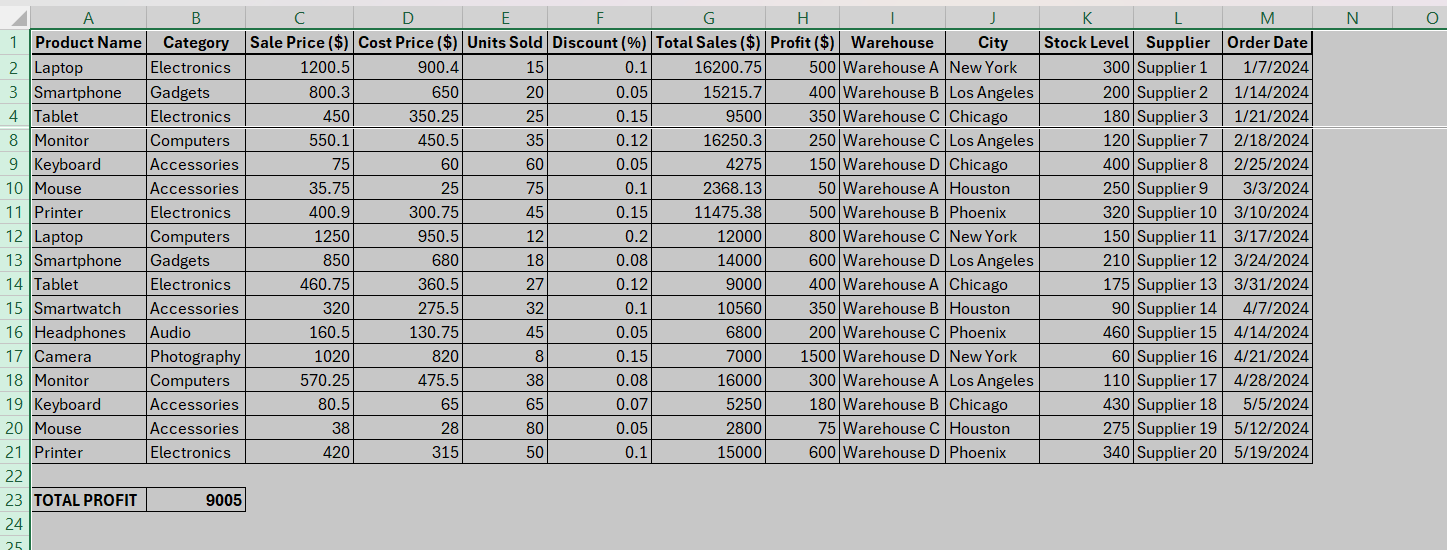
For instance, if rows 5 to 7 are playing hide-and-seek, I select rows 4 and 8 by clicking on the row numbers while holding down the ‘Shift’ key.
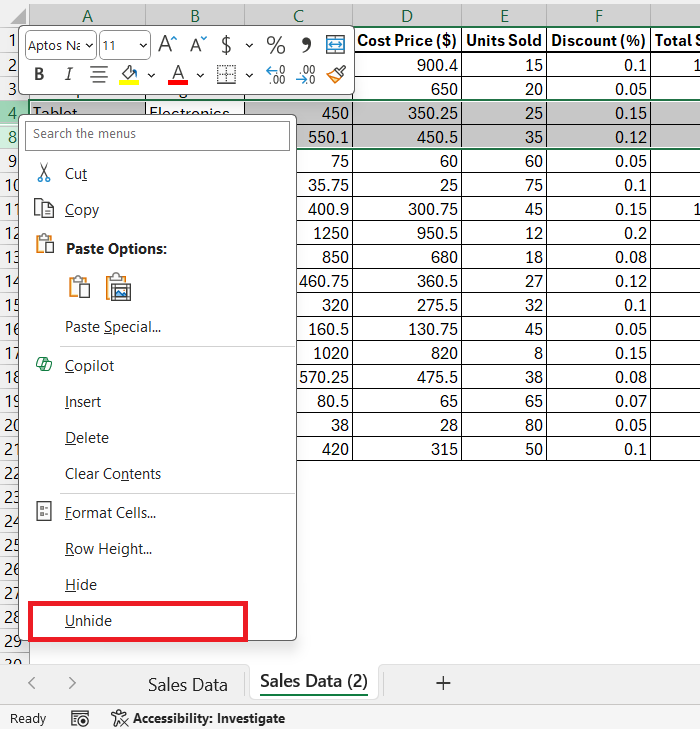
Then, I simply right-click on the row header and choose ‘Unhide’ from the context menu.
Voilà! The hidden rows reappear.
This technique is foolproof whether you’re revealing one row or a block of several.
Keyboard Shortcuts to Speed Up the Process
Every second counts when I’m navigating through a sea of data in Excel, and keyboard shortcuts are the jet skis that get me there faster. To swiftly unhide selected rows, I use the power combo of ‘Ctrl + Shift + 9’. It feels like magic when rows resurface with such a simple chord of keys!
This shortcut keeps my hands on the keyboard and my mind focused on the task, not the mouse. Remember, efficiency is not just about speed; it’s about streamlining the way we work to create more time for life outside spreadsheets.
Advanced Techniques for Managing Hidden Rows
Troubleshooting Common Issues When Unhiding Rows
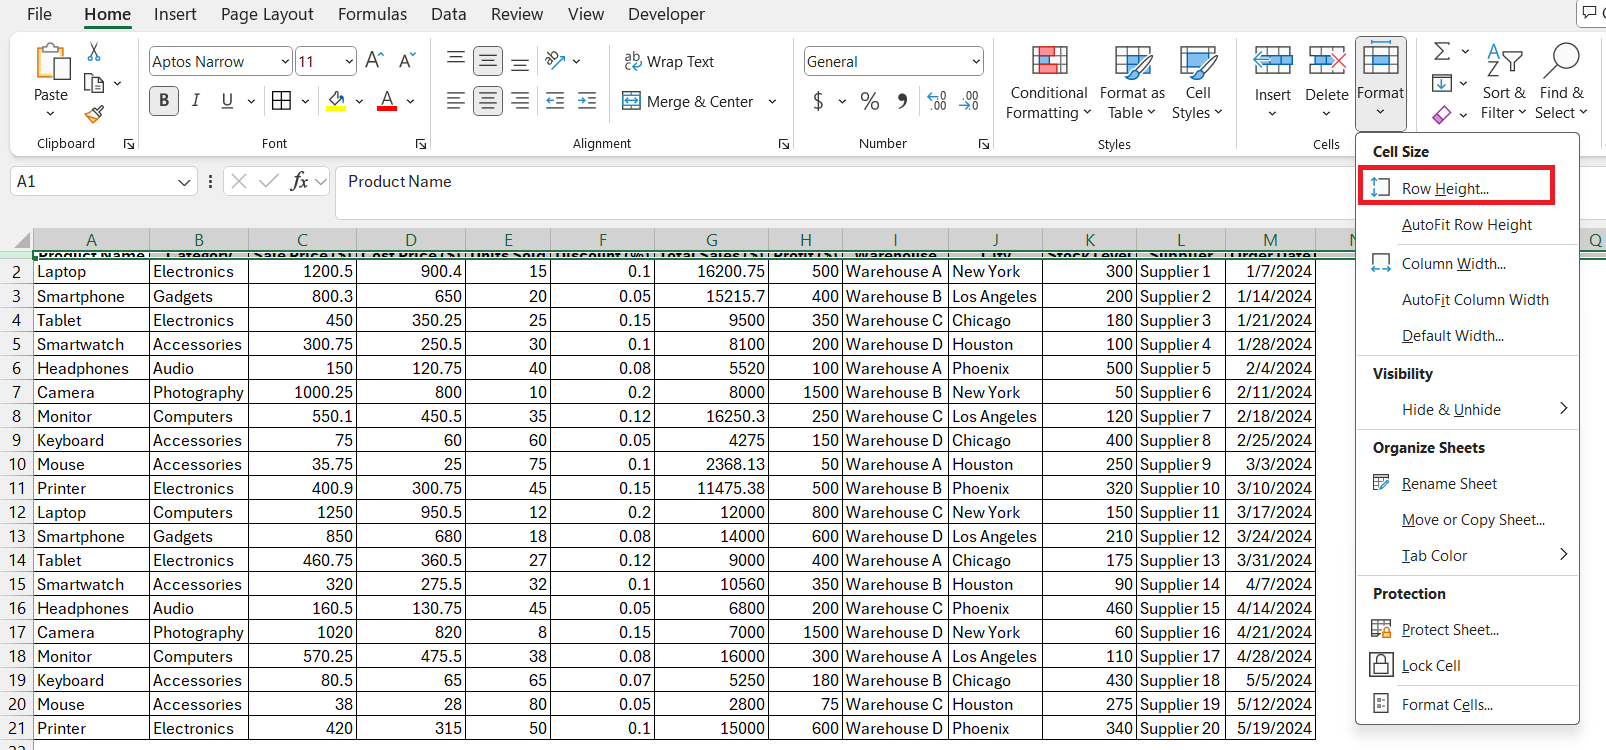
As we dive deeper into Excel’s capabilities, we sometimes hit a snag – rows that refuse to unhide. I’ve encountered instances where the first row remains stubbornly hidden, but a trick to tackle this is to go to the ‘Home’ tab, select ‘Format’ in the ‘Cells’ group, choose ‘Row Height’, and then set a nonzero height.
Another curious case is row height being set to a minimal value, making it appear hidden. To fix this, I adjust the row height manually by right-clicking on the edge of the row number and dragging it down or setting a specific height value.
Always keep an eye out for these sneaky issues to maintain a flawless database.
Automating Row Visibility with VBA Macros
When you’re faced with the challenge of managing complex Excel workbooks, mastering VBA macros can feel like learning an ancient art of sorcery. They can make repetitive tasks like hiding and unhiding rows a breeze. I create macros to toggle the visibility of specific rows or sections with a single click.
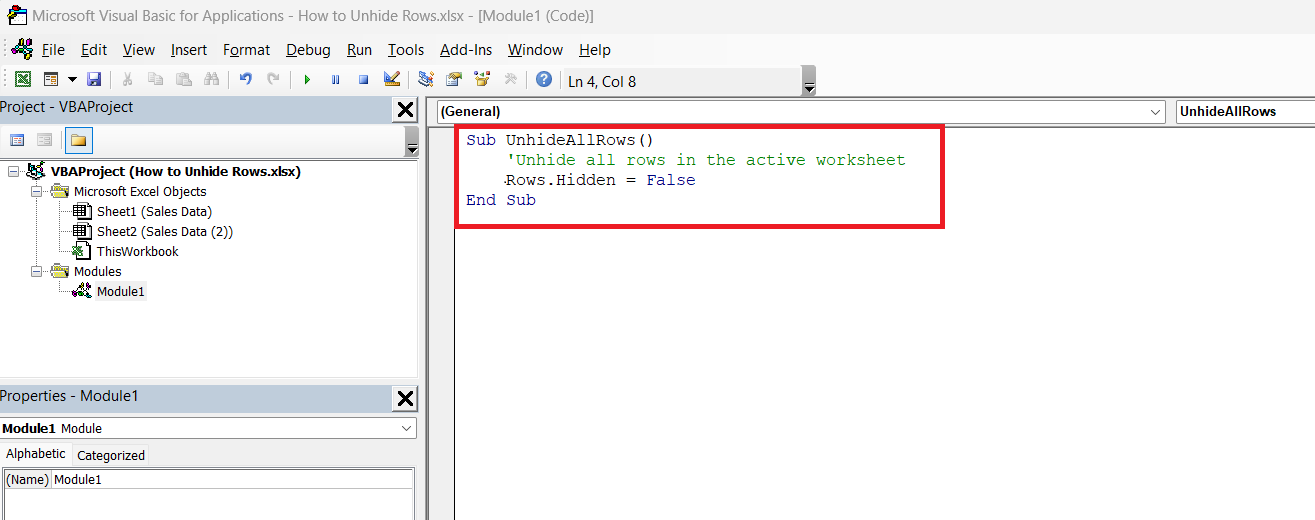
To do this, I press ‘Alt + F11’ to open the Visual Basic for Applications editor and insert a new module. Type in a simple VBA code snippet that can unhide rows based on my requirements.
Sub UnhideAllRows()
'Unhide all rows in the active worksheet
Rows.Hidden = False
End Sub
The beauty of this approach? It saves an immense amount of time, especially with large datasets that require frequent and specific row manipulations.
Enhancing Your Skills
Tips to Efficiently Locate All Hidden Rows
To quickly lock onto hidden rows in sprawling spreadsheets, I use a blend of observation and Excel’s “Go To Special” feature. The first tip is to look for breaks in row numbers, which is like playing ‘spot the difference’—a direct giveaway of hidden rows. If that feels akin to finding a needle in a haystack, especially in vast datasets, I switch to the ‘Go To Special’ function.
Through the ‘Home’ tab, within the ‘Find & Select’ dropdown, I choose ‘Go To Special’, and then select ‘Visible cells only’.
This illuminates the cells next to the hidden rows, revealing their locations instantly.
Best Practices for Row Visibility Management
For maintaining a crystal-clear view of your spreadsheet, I cannot stress enough the importance of a few best practices. First, limit the use of hiding rows: it’s like keeping secrets in your data, and too many secrets can lead to confusion. If you must hide rows, keep a log or use cell comments to note what’s hidden and why.
An additional safeguard is to color-code row headings, signaling a hidden treasure beneath. Finally, review hidden rows periodically to determine if they still warrant invisibility or if it’s time to bring them into the light permanently. This ensures your data remains accessible and manageable, no matter how complex your workbook grows.
FAQ Section
How do I unhide all rows in Excel?
To unhide all rows in Excel, click on the select-all triangle icon at the upper-left corner to highlight everything. Then simply right-click any row number and choose ‘Unhide’. If you prefer keyboard shortcuts, ‘Ctrl + Shift + 9’ will reveal all hidden rows. This ensures you’re not missing out on any data tucked away in your spreadsheet.
What is the shortcut for unhide hide rows in Excel?
The shortcut to unhide rows in Excel is ‘Ctrl + Shift + 9’ on Windows and ‘Cmd + Shift + 9’ on Mac. If you need to unhide columns instead, it’s ‘Ctrl + Shift + 0’ for Windows and ‘Cmd + Shift + 0’ for Mac. These shortcuts are swift tools in your Excel arsenal, making the task of revealing data as quick as a keystroke.
What should I do if I cannot unhide the top row in Excel?
If the top row remains hidden in Excel and standard methods fail, an effective workaround is to select the ‘Name Box’ to the left of the formula bar, type “A1”, and press Enter to select the first cell. Then right-click on the row number of the following visible row, and choose ‘Unhide’. This little trick forces the top row to come out of hiding. It’s particularly useful because there’s no row above the first one to select directly.
Why are some of my rows not showing in Excel?
Rows can become invisible in Excel for reasons like explicit hiding, filters being applied, or row heights set to the minimum. To reveal them, check for filters—lines of blue numbers mean some rows are filtered out. You can clear this by clicking the ‘Clear’ button next to the filter icon. If rows were manually hidden, select the adjacent rows, right-click, and choose ‘Unhide’. Lastly, if the row height is the culprit, set a new height either from the context menu or using the ‘Row Height’ option under ‘Format’ in the ‘Home’ tab.
How do you make them visible again, given that there is nothing above to select?
When there’s nothing above the topmost hidden row to aid selection, you can use the Name Box trick. Click on the Name Box at the left of the formula bar, type “A1”, and press Enter to select the first cell in the worksheet. From there, access the ‘Format’ options on the ribbon under the ‘Home’ tab, and choose either ‘Unhide Rows’ or ‘Row Height’ to set a specific height. Alternatively, using the ‘Find & Select’ tool and choosing ‘Go To…’ allows you to directly navigate to and unhide the first row. These methods ensure that even without a visible selector above, your data won’t stay hidden for long.
John Michaloudis is a former accountant and finance analyst at General Electric, a Microsoft MVP since 2020, an Amazon #1 bestselling author of 4 Microsoft Excel books and teacher of Microsoft Excel & Office over at his flagship MyExcelOnline Academy Online Course.

