When working with Excel, managing cell content efficiently is crucial for clarity and organization. One essential technique is wrapping text, which allows you to display lengthy text within a cell without overflowing into adjacent cells. This guide will walk you through the simple steps on how to wrap text in Excel, ensuring your data is neatly presented and easy to read.
Key Takeaways:
- Wrapping text in Excel helps display long entries neatly within a cell without expanding its width.
- The Ribbon and Format Cells dialog box are two effective methods to enable text wrapping.
- Common issues with text wrapping include problems with merged cells and row height adjustments.
- Keyboard shortcuts like Alt + H + W can speed up the process of wrapping text.
- Ensuring proper text wrapping improves data readability and presentation in spreadsheets.
Table of Contents
Unraveling the Wrap Text Feature in Excel
Understanding the Basics of Text Wrapping
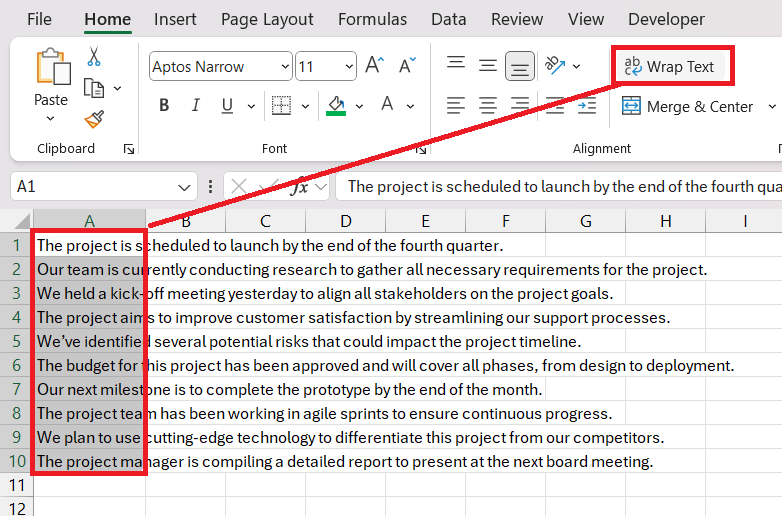
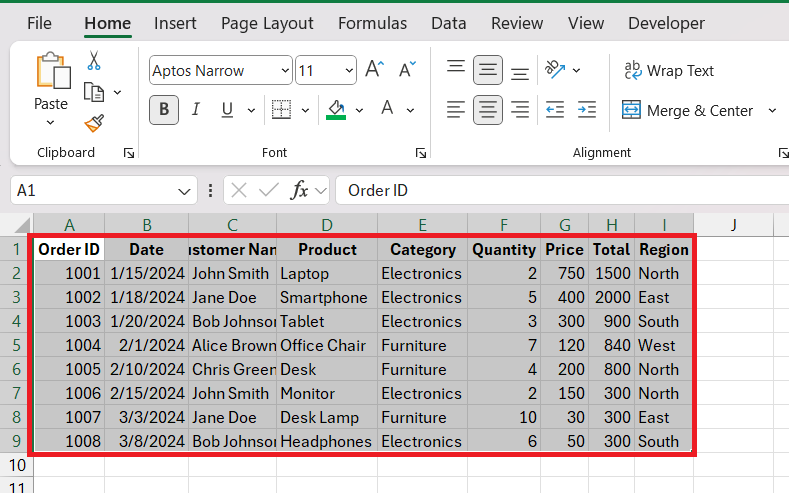
In Excel, wrapping text is a function that comes to the rescue when we’re faced with lengthy entries that defy the constraints of a single cell’s width. Through text wrapping, Excel allows the overflow of text to spill over into multiple lines within the same cell, ensuring every character is displayed without expanding the cell horizontally. This powerful feature is crucial when I want to include complete sentences or even paragraphs without compromising the spreadsheet’s structure.
Exploring the Importance of Text Wrapping for Data Presentation
Text wrapping in Excel is more than a mere aesthetic choice; it’s essential for presenting data cleanly and professionally. When we wrap text, we make sure our data is easily readable, which is crucial when sharing spreadsheets with colleagues or presenting figures to stakeholders. It’s all about maximizing the impact of our data by ensuring that every word can be read without adjusting column widths or row heights manually, preserving the integrity of our layout. Text wrapping proves its value further when I’m printing Excel sheets, as it ensures critical information isn’t cut off or overlooked due to formatting constraints.
How to Wrap Text in Excel
The Ribbon Technique: Quick Text Wrapping
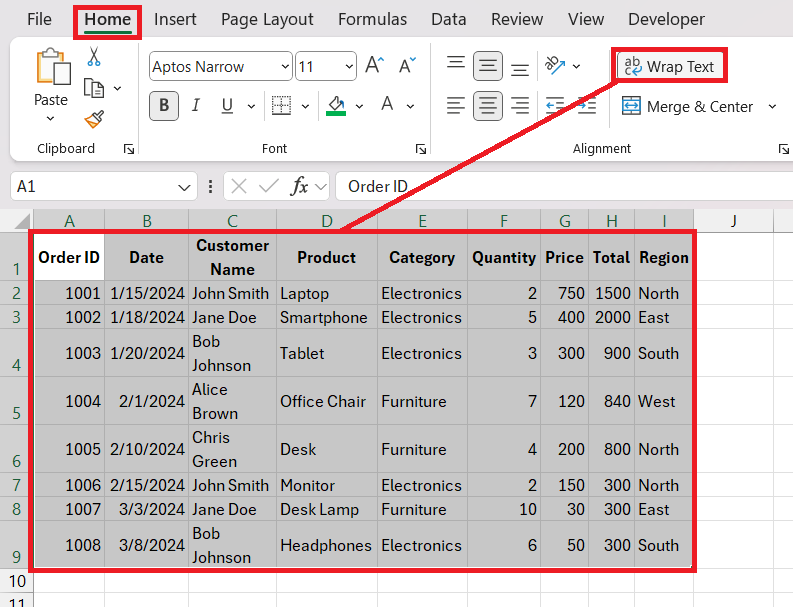
Using the Ribbon technique is my go-to for quick text wrapping in Excel. It’s straightforward and doesn’t require us to navigate complex menus or remember any shortcuts. Steps I followed:
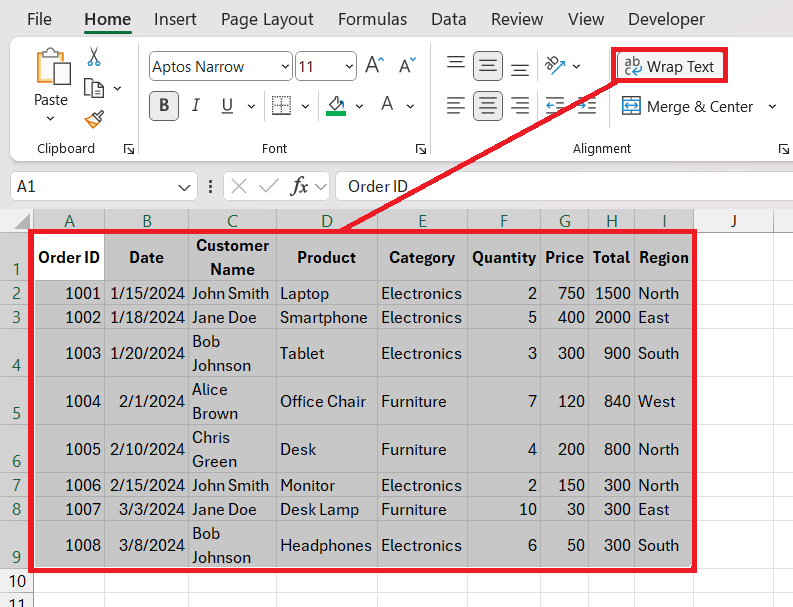
STEP 1: Select the relevant data which you want to be wrapped.
STEP 2: Accessible directly from the Home tab, the text will be wrapped by clicking the Wrap Text button in the Alignment group. It’s as simple as that.
This method transforms a lengthy string into multiple lines within the cell, ensuring all content is visible while maintaining the column width.
Delving into the Format Cells Dialog Box
For more control over text presentation, I often delve into the Format Cells dialog box. I used the Format Cells to enable text wrapping. Which is also helping and adjusting alignment settings and manage other text attributes with precision. Let’s check the steps:
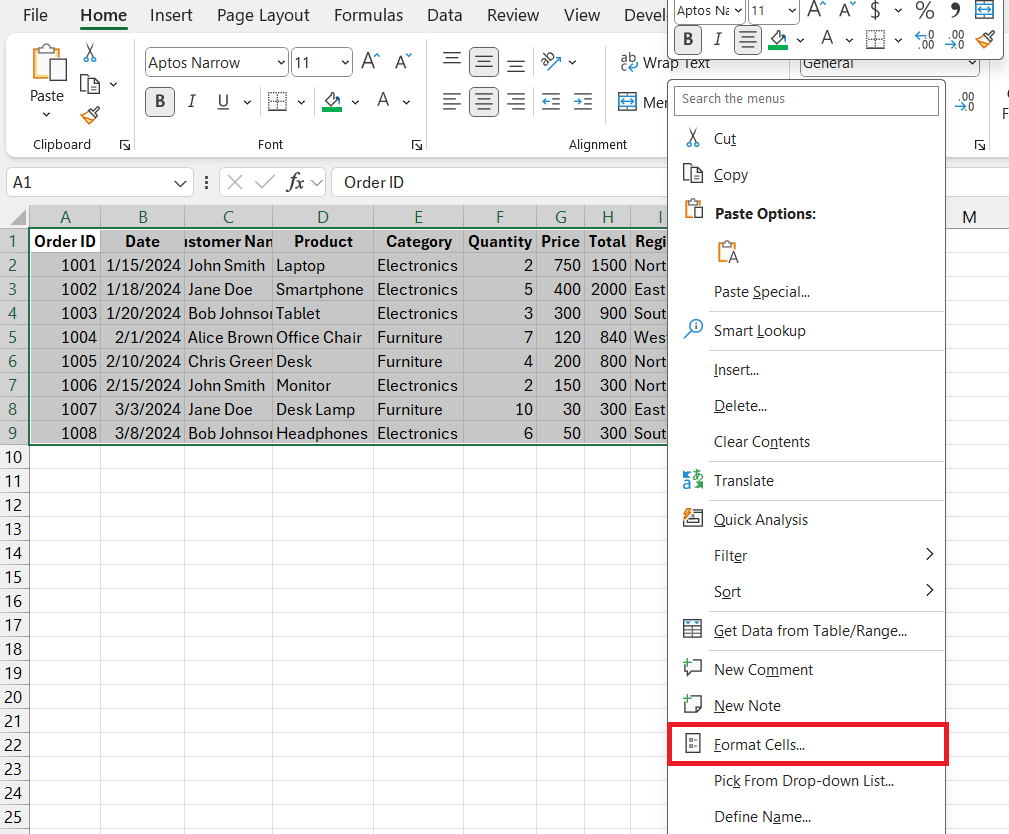
STEP 1: To do so, I either right-click and choose ‘Format Cells’, or use the nifty keyboard shortcut, CTRL+1.
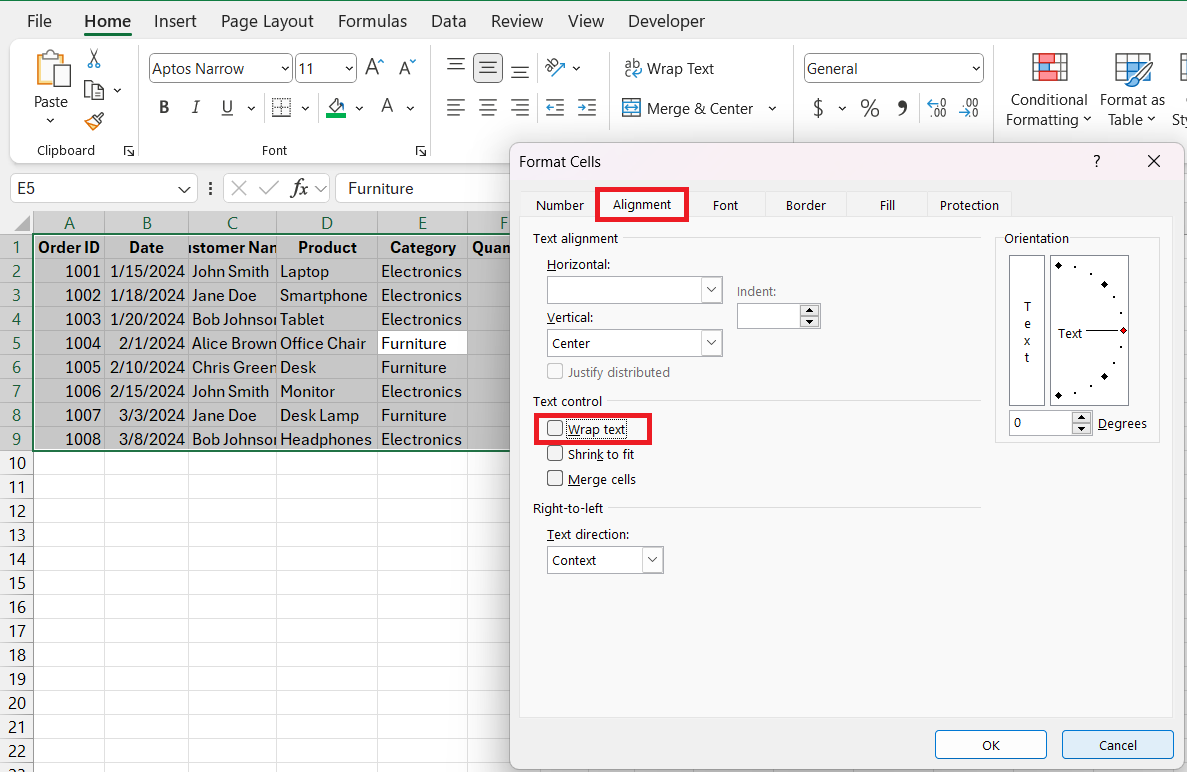
STEP 2: Once the dialog box is open, navigating to the Alignment tab presents me with the ‘Wrap text’ checkbox.
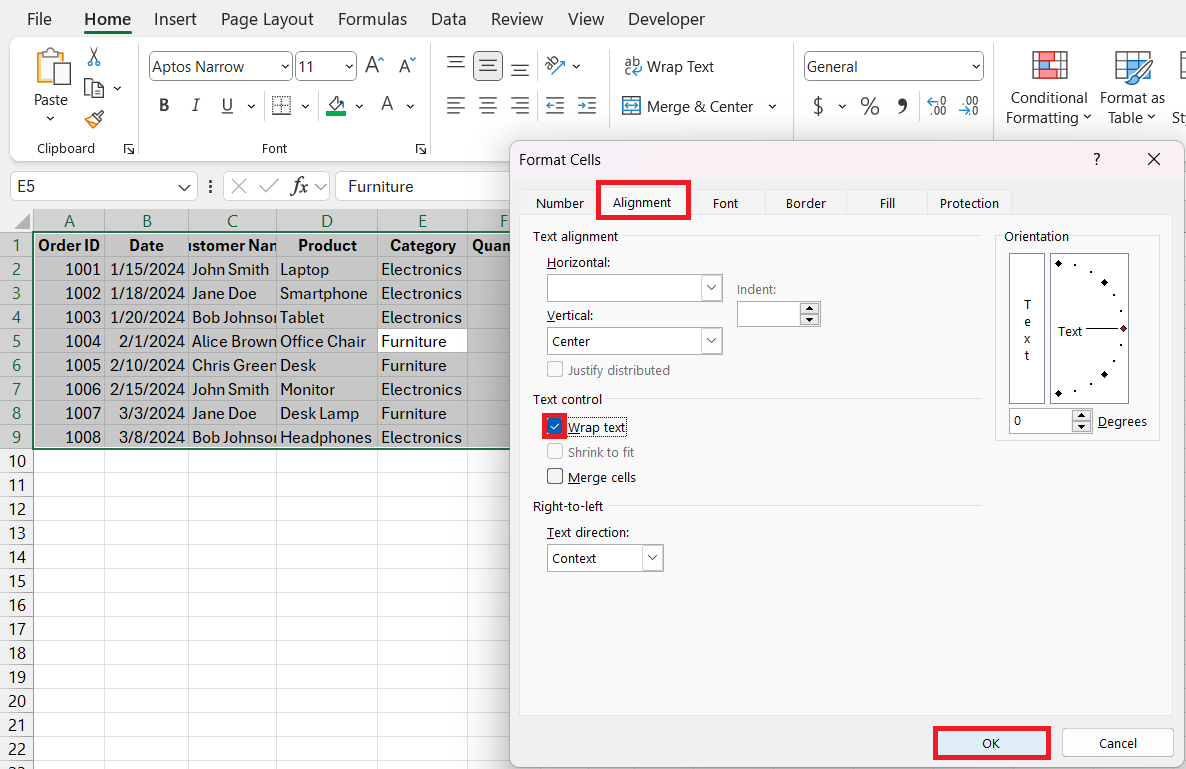
STEP 3: A simple check of the Wrap Text checkbox, followed by clicking OK.
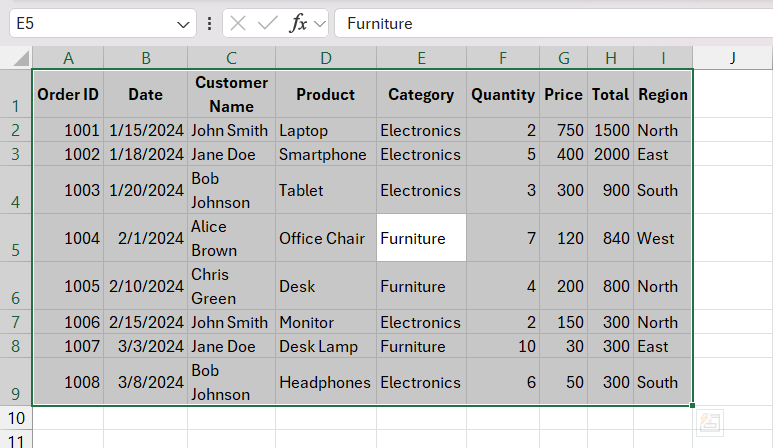
STEP 4: Check the result as the above steps ensure the text wraps neatly within the selected cell or range of cells.
Overcoming Common Text Wrapping Conundrums
Dealing with Excel Wrap Text Not Working
When I come across issues with Excel’s wrap text feature not functioning as expected, there are a few typical culprits I investigate. It doesn’t work on merged cells; hence, I need to unmerge them before applying wrap text. Also, if the text is already fitting within the cell’s width, wrapping will appear ineffective. In such cases, I manually add line breaks to format the text appropriately.
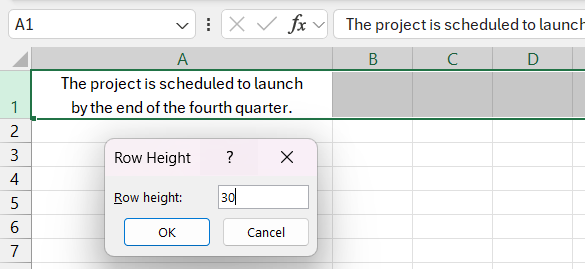
Another factor I check is the row height; ensuring the row adjusts automatically or enlarging it manually guarantees that the wrapped text will be visible. I’m always on the lookout for these scenarios to ensure efficient data representation.
Advancing Your Skills with Shortcuts and Tips
Mastering Keyboard Shortcuts for Speedy Wrapping
I’ve found that mastering keyboard shortcuts for wrapping text can significantly expedite the process in Excel. Speed and efficiency are crucial, and knowing the right keys to press is a game-changer. For instance, the shortcut Alt + H + W quickly enables wrapping text for the selected cells, streamlining tasks and reducing the need to remove my hands from the keyboard.
When I’m aiming for peak productivity, I rely on these hotkey sequences to navigate Excel’s features seamlessly and perform text wrapping without the mouse slowing me down.
FAQs on Mastery of Text Wrapping in Excel
How do I wrap text in a cell size in Excel?
To wrap text within a cell to fit its current size in Excel, you just need to select the cell you want the text to be wrapped in, go to the ‘Home’ tab, and click on the ‘Wrap Text’ button in the ‘Alignment’ group. Excel will automatically break the text into lines to fit the cell’s width. If the text doesn’t display fully, adjust the row height to accommodate the wrapped text.
How Can I Set a Default Wrap Text Option?
Setting a default wrap text option isn’t available directly in Excel, but you can create a template with pre-formatted cells. Just set up a spreadsheet with wrap text enabled for the desired cells, save it as a template, and then use this template whenever you start a new workbook to keep wrap text as your default setting.
Why Does Excel Sometimes Ignore My Text Wrapping?
Excel may ignore text wrapping if there’s an issue with cell formatting. This often happens with merged cells or when a specific row height is set, which limits automatic adjustment. Check for and undo merging or clear any explicit height settings to ensure text wrapping works correctly.
How to automatically fit text in Excel?
To automatically fit text in Excel, select the cells and apply the ‘Wrap Text’ feature from the Home tab for line breaks. For adjusting column widths or row heights, select the cells and go to Home > Format to choose ‘AutoFit Column Width’ or ‘AutoFit Row Height’. Excel will adapt cell dimensions to fit the text.
What if text is still partly hidden?
If text is still partly hidden after wrapping, it’s likely that the row height hasn’t adjusted. To fix it, go to the ‘Home’ tab, open the ‘Format’ drop-down in the ‘Cells’ group, and choose ‘AutoFit Row Height.’ This should make all wrapped text visible within the cell. If needed, adjust row height manually by dragging the row border.
John Michaloudis is a former accountant and finance analyst at General Electric, a Microsoft MVP since 2020, an Amazon #1 bestselling author of 4 Microsoft Excel books and teacher of Microsoft Excel & Office over at his flagship MyExcelOnline Academy Online Course.

