Wrap Text in Microsoft Excel is a fantastic feature that allows long text to fit within a single cell by wrapping it into multiple lines. This ensures no text is cut off, keeping your spreadsheet neat and organized. Whether it’s for readability or aesthetics, mastering this feature helps make your data clear and comprehensible. In this article, we will cover a detailed guide on How to Wrap Text in Excel.
Key Takeaways:
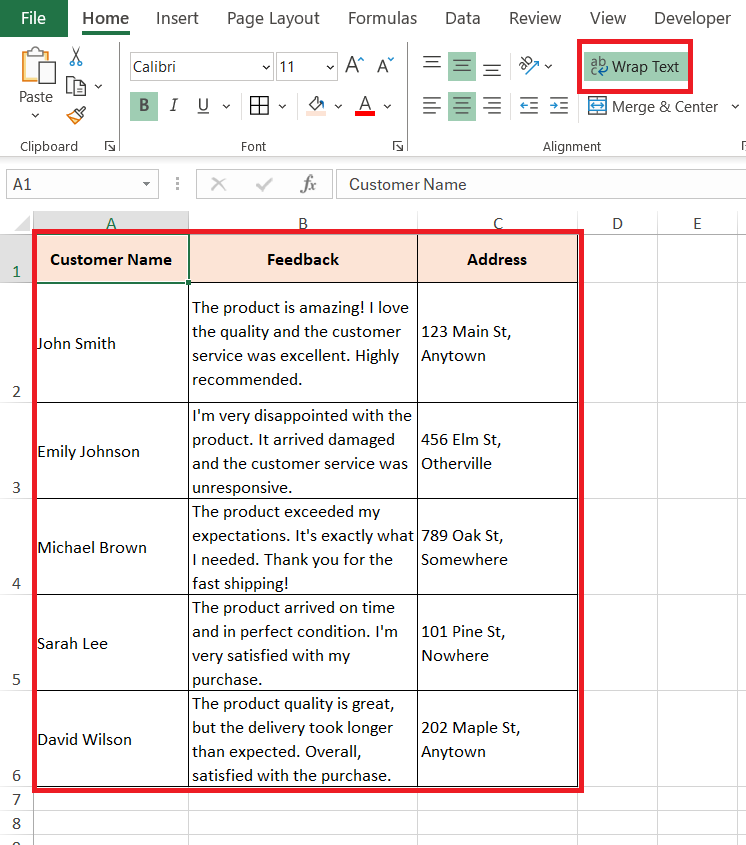
- Use the Wrap Text button in the Home Tab’s Alignment Group to wrap text within selected cells, ensuring it fits without overflowing.
- Save time with the shortcut Alt + H + W to wrap text, keeping your workflow fast and efficient.
- Insert line breaks with Alt + Enter while editing a cell for precise control over text wrapping and readability.
- Use the AutoFit feature to adjust row height and column width, ensuring all wrapped text is visible.
- If wrapping doesn’t work, unmerge cells and set row heights to AutoFit. Clear adjacent cells or adjust column widths to prevent overlapping text.
Table of Contents
Introduction to Text Wrapping in Excel
Understanding What Wrap Text Means
Wrap Text in Excel is a fantastic feature you need to know about! It lets you fit long text in a single cell by wrapping it into multiple lines. This ensures you don’t miss any text, and it helps your spreadsheet stay tidy and well-organized. Imagine writing a long sentence and, instead of it spilling over into the next cell, Excel neatly tucks it into the space of one cell by expanding downwards.
The Importance of Mastering Text Wrapping
Being able to wrap text is not just about making your spreadsheets look nice—it’s about making them work effectively for you. Mastering this skill means ensuring that your data is fully visible, accessible, and presented in a way that others can understand at a glance.
It’s all about maximizing the use of space and maintaining the integrity of your data without having to resize columns or rows to excessive widths or heights. Whether it’s a packed financial report or a detailed inventory list, mastering text wrapping helps keep your data clear and your presentations top-notch.
Quick Guide to Using Wrap Text Function
Wrap Text from the Ribbon Toolbar
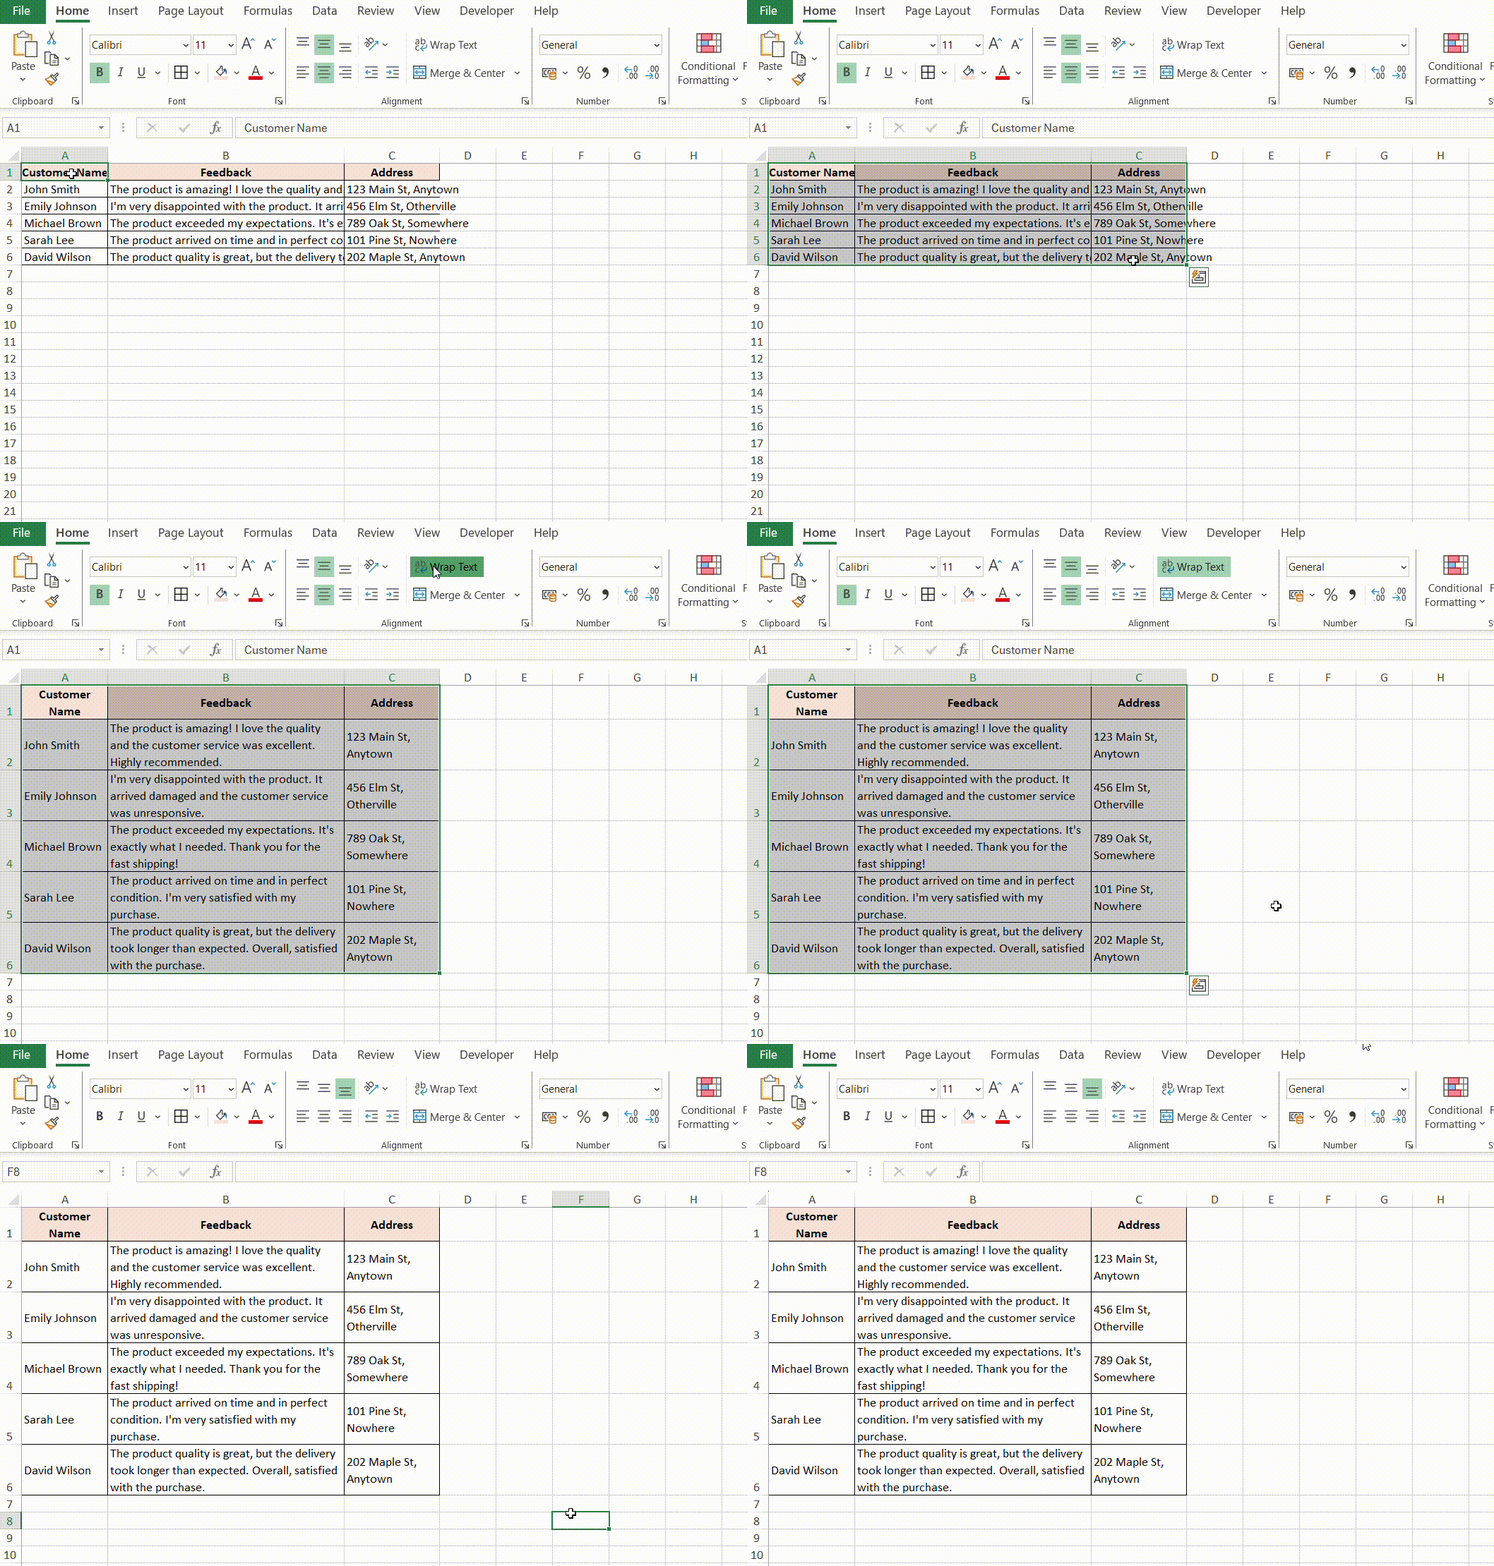
When you want to wrap text in Excel, the Ribbon Toolbar is your best friend. It’s as simple as selecting the cells where your lengthy text is waiting to be tidied up, and then taking a quick trip to the Home Tab.
Here, in the Alignment Group, you’ll find a helpful ‘Wrap text’ button just waiting for your click. With one simple press, your text snuggles neatly into the selected cell, automatically adjusting so everything is visible and orderly.
It’s almost like magic, transforming your overwhelmed cells into perfectly presented parcels of information!
Keyboard Shortcuts for Efficient Wrapping
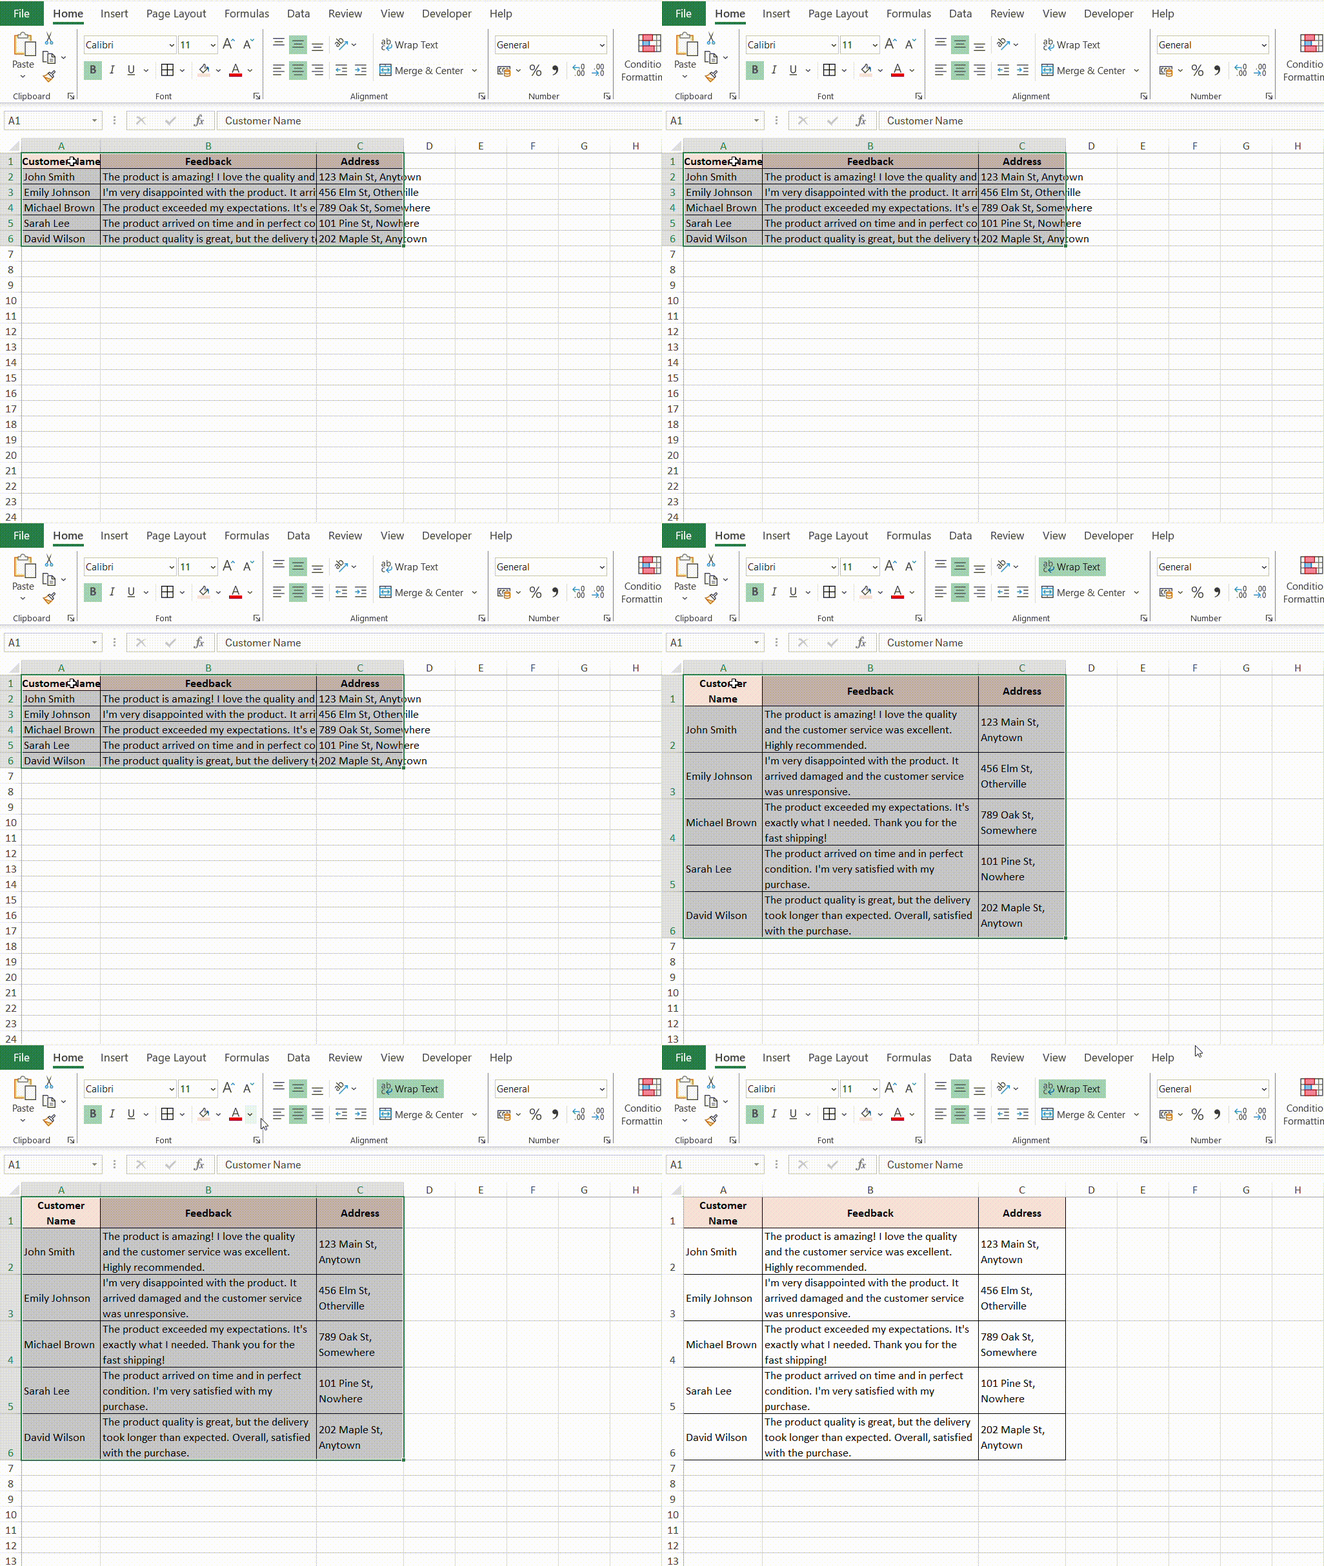
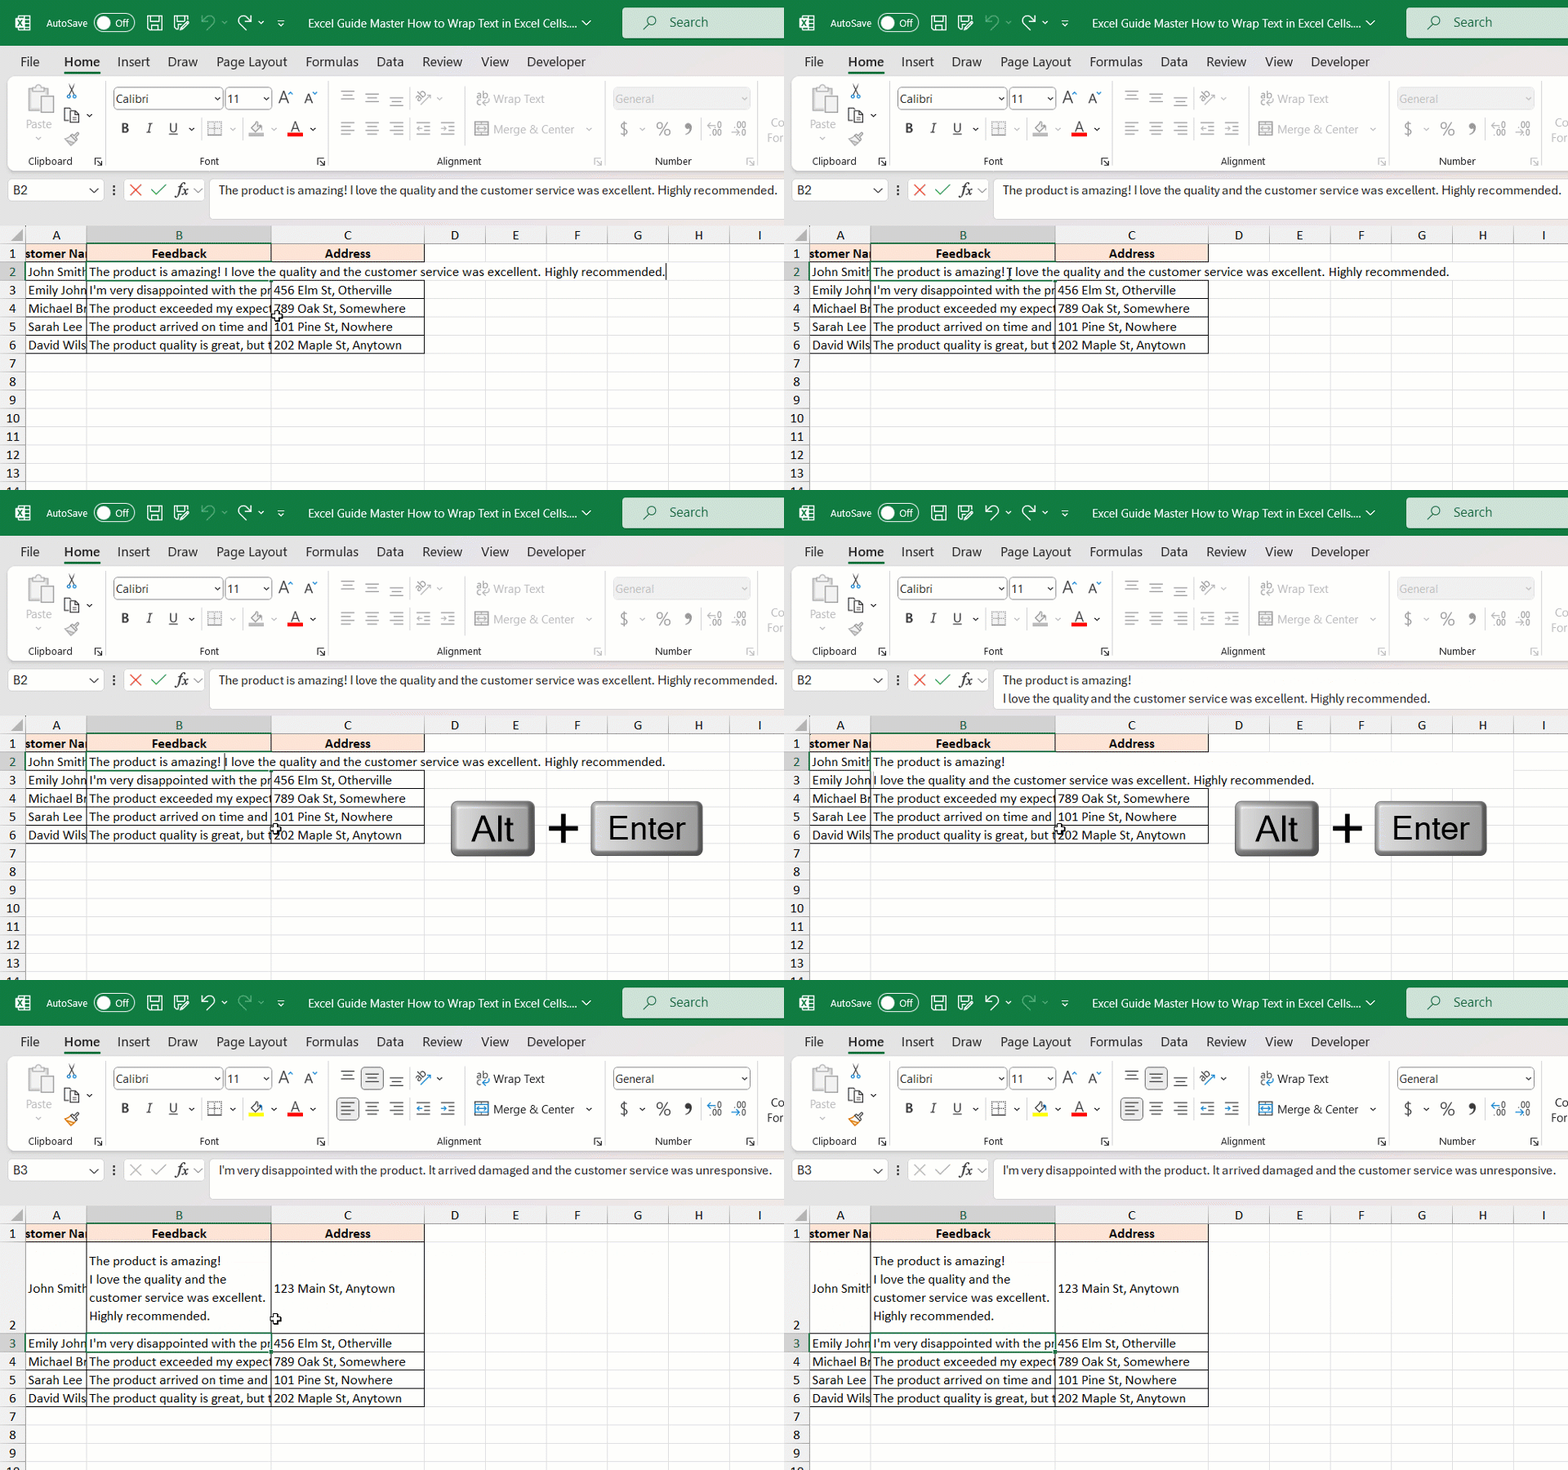
Who doesn’t love saving time with keyboard shortcuts? In Excel, they can make wrapping text a breeze. To wrap text without leaving your keyboard, select the target cell and press Alt, followed by H, and then W. Voilà! Your text is snugly wrapped within the cell.
These quick steps activate the Wrap Text feature without the need to navigate through the Ribbon Toolbar, speeding up the formatting process. It’s a clever trick that keeps your hands on the keyboard and your workflow streamlined.
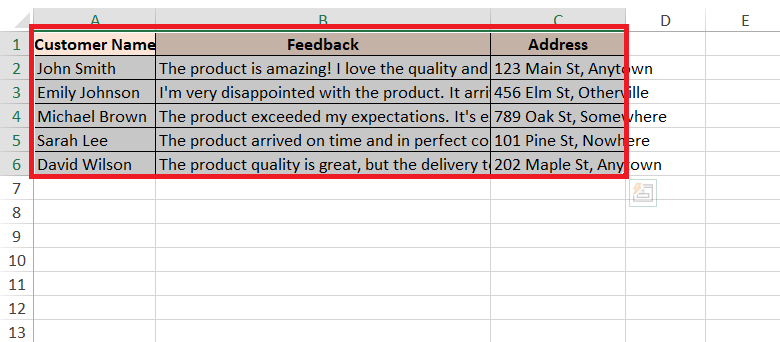
STEP 1: Select your data.
STEP 2: Press keys ‘Alt+H+W‘ to text wrap the data in a second.
Advanced Text Wrapping Techniques
Manually Inserting Line Breaks for Custom Text Fit
Sometimes, you need a tailored touch to make your text fit just right. Manual line breaks allow you to control exactly where your text wraps, giving you the custom fit you’re after. If the automatic wrapping isn’t doing the trick, just double-click the cell or tap F2 to edit directly, click where you want the new line to start, and simply press Alt + Enter.
Excel will dutifully obey, wrapping the text from the point you choose. It’s the perfect way to make sure key points jump to a new line for emphasis or clarity.
Adjusting Rows and Columns for Better Text Display
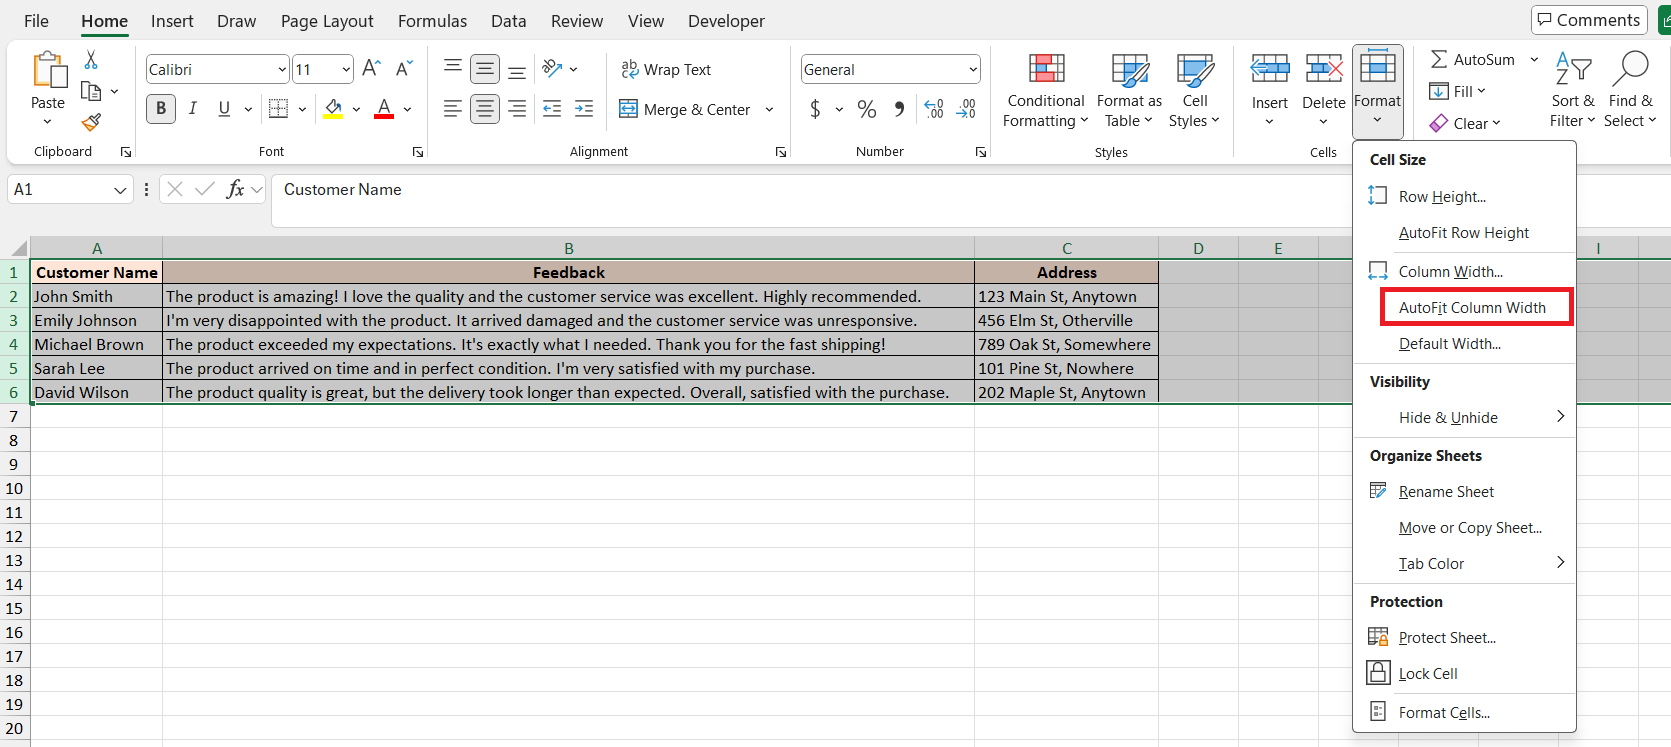
For text to shine in Excel, adjusting the rows and columns might be necessary. Let’s say you’ve wrapped your text, but still, not all of it is visible because the row isn’t high enough. No problem at all! Head over to the Format option within the Home tab, and choose ‘AutoFit Column Width‘. Excel stretches the column width to make sure all your wrapped text is displayed.
The same goes for row height – select ‘AutoFit Row Height’, and watch rows expand to accommodate your text. Remember, for the ultimate in clarity, wrapped text plus well-adjusted rows and columns make all the difference.
Troubleshooting Common Text Wrap Issues
Solutions When Wrap Text Won’t Apply
Trouble in paradise? Sometimes wrap text just won’t play nice, but don’t worry, there are solutions! If your text refuses to wrap, check first if you’ve accidentally merged the cells – wrap text and merged cells are not the best of friends. Unmerge them, and try wrapping them again.
Next, peek at your row height to ensure it’s set to ‘AutoFit’. If it’s too low, even wrapped text won’t show up completely.
Lastly, it’s worth a look to see if manual line breaks can solve your woes – they offer precision that the wrap feature may not. With these fixes, you’ll be back to smooth sailing!
Resolving Overlapping Text After Wrapping
Wrapped your text but now it’s jumbled up with the neighbors? Overlapping text can happen if cells next to the wrapped text aren’t empty. Don’t fret–a bit of housekeeping is all you need. Ensure that the cells adjacent to your wrapped text are clear, or if they must contain data, consider increasing the column width or row height to give your text some breathing room.
If overlapping persists, check for any specific cell formatting that may be forcing the issue, and reset to the default if needed. With these tweaks, your text will be neatly presented, each cell distinct and easy to read.
FAQs on How to Wrap Text in Excel
How to wrap the text in Excel?
To wrap text in Excel, simply select the cells you wish to format, go to the Home tab, and click on the Wrap Text button in the Alignment group. Your text will automatically wrap to fit the column width, and Excel will adjust the row height to accommodate the wrapped text.
How to automatically fit text in Excel?
Automatically fitting text in Excel is a snap with the AutoFit feature. For row height, select the cells, then choose ‘Format’ in the Home tab’s Cells group, and pick ‘AutoFit Row Height’. For column width, follow the same steps but select ‘AutoFit Column Width’. This ensures your content fits perfectly within the cell’s dimensions.
Can You Wrap Text Across Multiple Cells?
Wrapping text across multiple cells directly isn’t possible in Excel because wrapping works within individual cells. However, merging cells first allows you to wrap text within this new larger cell. Just remember that merging can affect the functionality of your spreadsheet, so use this feature judiciously!
Why Isn’t My Wrap Text Option Working Properly in Excel?
Your Wrap Text option might not work if the cells are merged or if the row height isn’t set to automatically adjust. Try unmerging cells or setting the row height to ‘AutoFit’. Also, make sure the cell isn’t already wide enough to show the whole text without wrapping.
Why is my text not wrapping in Excel?
If your text isn’t wrapping in Excel, check if the cells are merged or there’s a fixed row height. Unmerge cells or choose ‘AutoFit Row Height’ to fix this. Additionally, look for any cell-specific formatting that could be affecting text wrap, and reset it as needed.
John Michaloudis is a former accountant and finance analyst at General Electric, a Microsoft MVP since 2020, an Amazon #1 bestselling author of 4 Microsoft Excel books and teacher of Microsoft Excel & Office over at his flagship MyExcelOnline Academy Online Course.

