When working with Excel, I often find myself needing to insert additional rows to accommodate new data. Whether I’m organizing a dataset, adding new entries, or restructuring a spreadsheet, inserting a row in Excel is a simple yet essential skill. In this guide, I’ll walk you through different ways to insert a row in Excel quickly and efficiently.
Key Takeaways:
- Inserting rows in Excel is essential for managing and organizing data efficiently.
- Keyboard shortcuts like Ctrl + Shift + + can significantly speed up row insertion.
- Selecting multiple rows before inserting allows for bulk additions, saving time.
- The Ribbon menu offers a user-friendly alternative for inserting rows.
- Common issues like protected sheets and merged cells can prevent row insertion and require troubleshooting.
Table of Contents
Excel Efficiency Unveiled: Master the Art of Row Insertion
Why Speed Matters in Excel Operations
Speed in Excel is paramount for productivity, especially when deadlines loom. Faster operations mean we can accomplish more in less time, allowing for prompt data analysis and decision-making. Efficiently managing rows keeps data organized and ensures that large datasets remain manageable without excessive time investments.
The Basics of Adding Rows in Excel
Understanding Excel’s Grid System
Excel operates on a grid system composed of cells arranged in rows and columns, creating a vast spreadsheet. Each cell is identified by its unique address, combining its column letter and row number. Understanding this system is crucial. For instance, the cell at the intersection of column B and row 3 is labeled as B3.
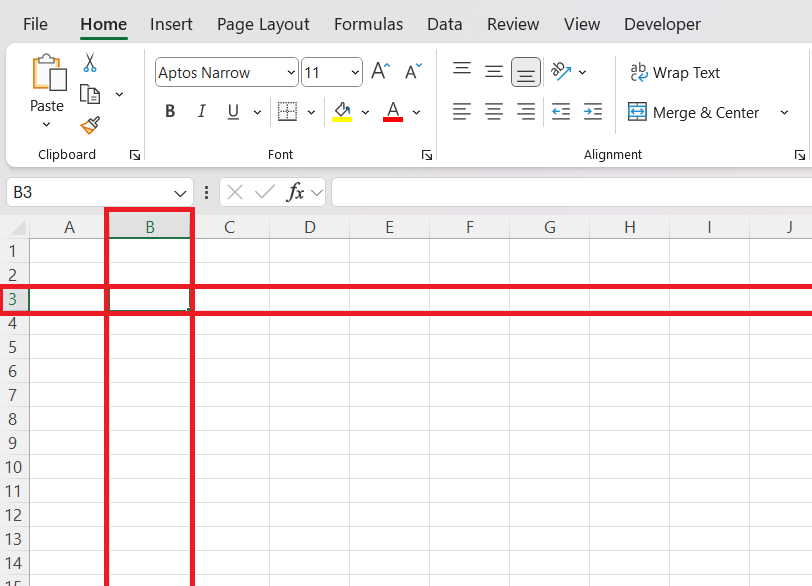
As we manipulate this grid, particularly when inserting rows, the addresses update to maintain accurate references, which is a key concept in maintaining data integrity as we work within Excel.
Quick-Start Guide to Inserting a Row
Inserting a row in Excel is straightforward once you get the hang of it. Here’s a quick guide to get you started:
STEP 1: Navigate to your Excel spreadsheet and locate the point where the new row is needed. Click on the row number located on the left-hand side, directly below where the new row will be inserted. (For example, to insert above row 6, click on row number 6).
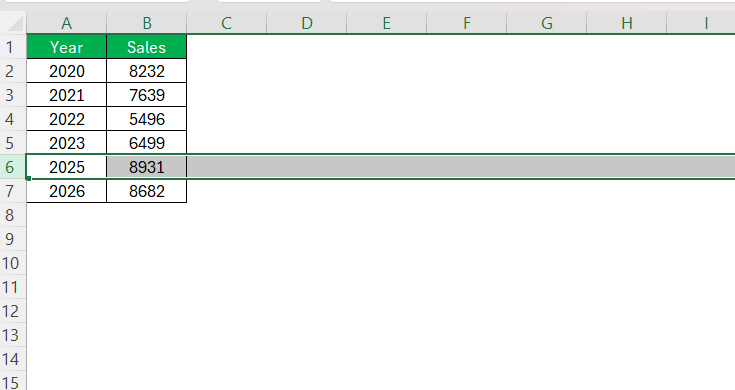
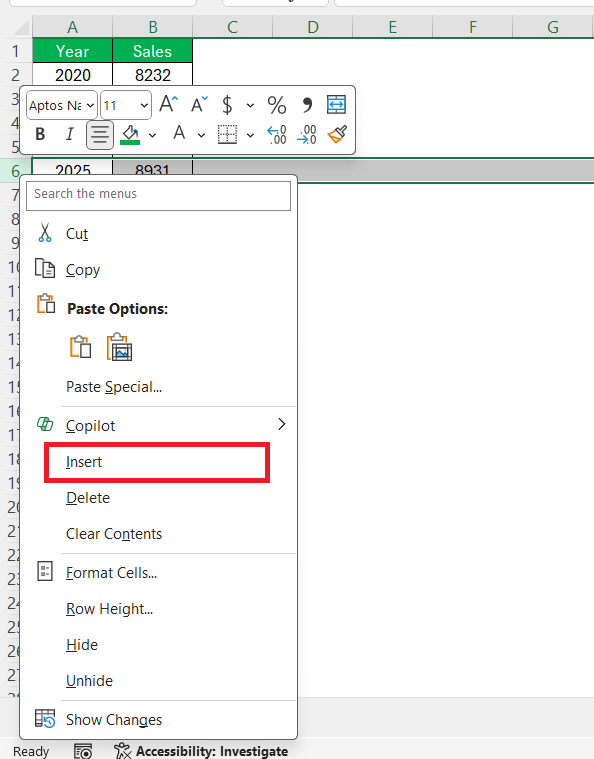
STEP 2: Right-click to bring up the context menu and select “Insert.”
Instantly, a new row appears above your selected row, and the existing rows shift downwards.
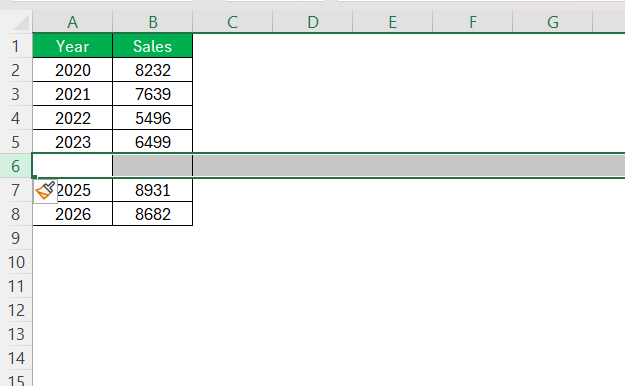
This simple process can save you time, keeping your focus on analysis rather than administration.
Advanced Techniques for Rapid Row Insertion
Keyboard Shortcuts: The Power User’s Tool
Keyboard shortcuts elevate efficiency by trimming down multiple clicks into single keystroke combinations. For inserting a row in Excel, the gold standard shortcut is Ctrl + Shift + + (plus sign). After selecting a cell or row where you want to insert a new row:
- Hold down the
Ctrlkey. - While holding
Ctrl, press and holdShift. - With both keys held down, press the
+key.
Voila! A new row is added above the cell or row you selected. Embracing keyboard shortcuts slashes the time it takes to perform recurrent tasks, accelerating overall workflow performance.
Inserting Multiple Rows at Once
When the task at hand requires adding more than one row, efficiency is key, and Excel is equipped to handle it eloquently. To insert multiple rows in one action:
STEP 1: Start by selecting the number of existing rows that corresponds to the number of new rows you want to insert. For instance, to add three rows, select three consecutive rows.
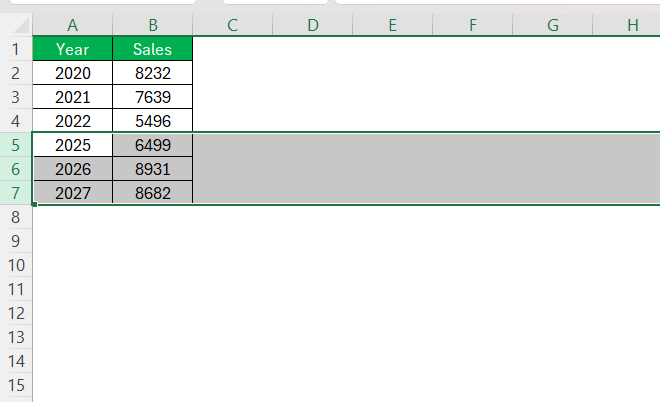
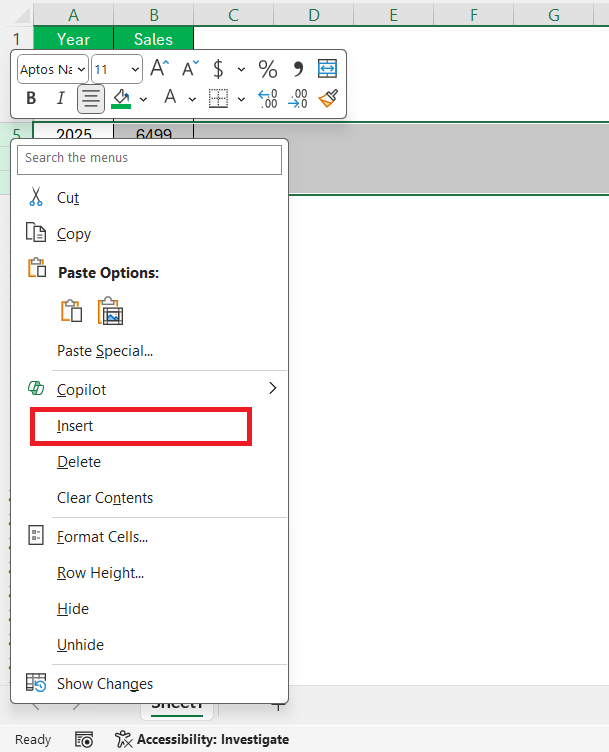
STEP 2: Right-click on the highlighted row numbers to access the context menu. Choose “Insert” from the menu.
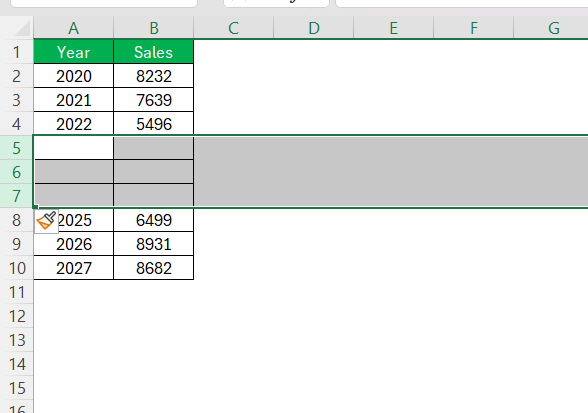
Excel will add the exact number of rows you’ve selected, directly above the highlighted section.
This clever feature is particularly useful when working with sizable datasets, ensuring data organization isn’t compromised despite rapid modifications.
Using the Ribbon Menu
For those who prefer using the Ribbon, Excel provides a straightforward way to insert rows.
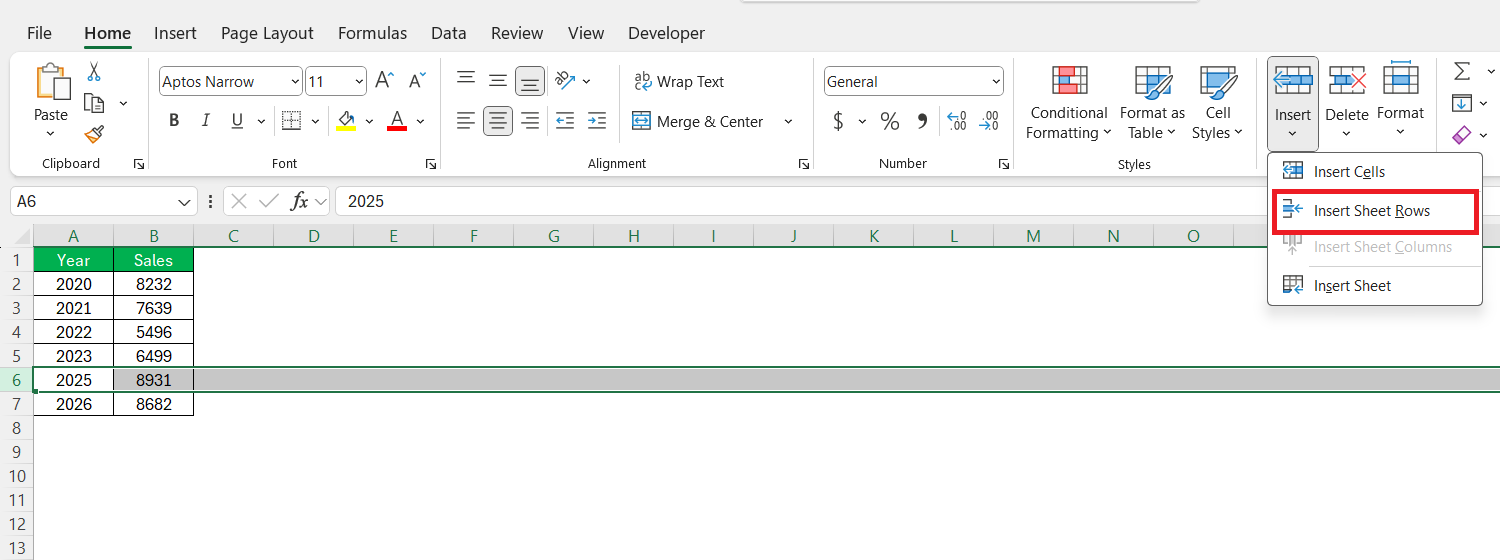
STEP 1: I click on any cell within the row where I want a new row to be inserted.
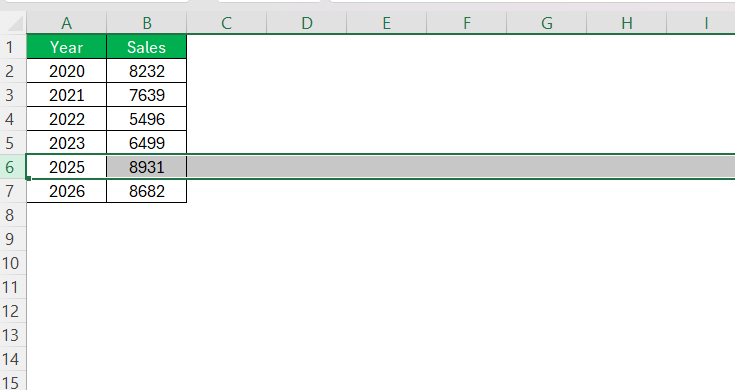
STEP 2: In the Ribbon, I navigate to the “Home” tab. Under the “Cells” group, I click the “Insert” dropdown and choose “Insert Sheet Rows.”
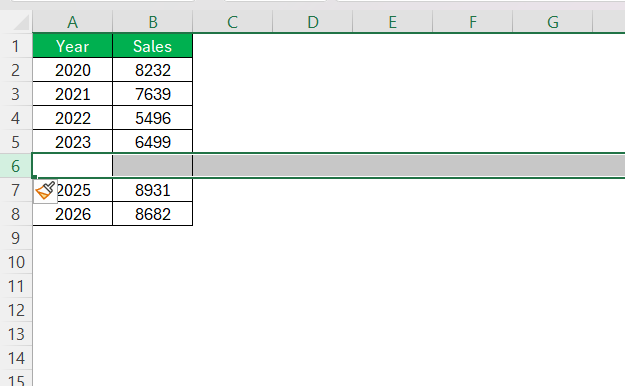
A New Row is Inserted – Just like that, a new row appears above the selected row.
Troubleshooting Common Hurdles
When Excel Puts Up a Fight: Removing Obstacles
Sometimes Excel may resist our commands due to protected sheets or data conflicts. If a row isn’t inserting as expected:
- Check for cell protection. If the sheet is protected, you’ll need to unlock it by selecting “Review” > “Unprotect Sheet.”

- Look for merged cells that span across multiple rows; these can prevent row insertion. Unmerge any problematic cells before trying again.

- Review data validation settings that sometimes block changes to the structure of a worksheet.
Addressing these potential roadblocks enables us to maintain workflow fluidity, ensuring that Excel works for us, rather than us contending with Excel’s idiosyncrasies.
Streamlining Your Workflow with Excel Tips and Tricks
Practice Makes Perfect: Efficient Habits for Frequent Tasks
Developing efficient habits in Excel is like fine-tuning an instrument – the result is harmonious data management. Regular practice of shortcuts for inserting rows, along with consistent data organization techniques improve speed and accuracy.
Consider these habits for improved efficiency:
- Utilize keyboard shortcuts regularly to build muscle memory.
- Frequently save your work to avoid loss of data during batch operations.
- Regularly review and clean your data to simplify row additions and reduce complexity.
- Customize the Quick Access Toolbar with your most-used functions for one-click operations.
By turning these strategies into habits, we ensure smooth sailing through our Excel tasks, saving time and reducing the possibility of errors.
Frequently Asked Questions
Can I insert a row using a formula or macro?
No, you cannot insert a row using a formula in Excel as formulas cannot modify the structure of a spreadsheet. However, you can use a macro. For example, the macro will insert a row at the active cell.
Sub InsertRow()
ActiveCell.EntireRow.Insert
End Sub
Remember to save as a macro-enabled workbook to utilize this feature.
What are the limitations when inserting rows in large datasets?
When inserting rows in large datasets, performance may slow down due to the recalculation of formulas and updates to cell references. Excel also has a row limit (1,048,576), so you can’t insert a new row once you hit that ceiling. Planning and segmenting data efficiently can mitigate these limitations.
What is the shortcut for inserting a row in Excel?
The shortcut for inserting a row in Excel is Ctrl + Shift + + (plus sign) after selecting the row where you want the new row added above. On compact keyboards, you might use Ctrl + + (numeric keypad).
How to delete a row in excel?
To delete a row in Excel, first select the entire row by clicking on its row number. Then, right-click the selected row and choose “Delete” from the context menu, or go to the “Home” tab, click “Delete” in the Cells group, and select “Delete Sheet Rows.” The selected row will be removed and the rows below will shift up.
What if you need to insert multiple rows?
If you need to insert multiple rows in Excel, select the same number of rows that you want to insert. For example, to add four new rows, select four existing rows. Then right-click and choose “Insert” from the context menu. Excel will insert the new rows above your selection.
John Michaloudis is a former accountant and finance analyst at General Electric, a Microsoft MVP since 2020, an Amazon #1 bestselling author of 4 Microsoft Excel books and teacher of Microsoft Excel & Office over at his flagship MyExcelOnline Academy Online Course.


