Power Query is a new add-in that was introduced in Excel 2013 by Microsoft and was that popular that they made it backward compatible with Excel 2010. Power Query in Excel accesses, cleans and transforms all that messy data and displays it in a way that Excel loves and can work with. The best thing is that the next time you receive the same ugly file, all you need to do is press the Refresh button and your data will automatically be cleaned up and displayed the correct way!
Key Takeaways:
- Requires a Separate Add-In: Power Query is not built into Excel 2013 by default and needs to be installed as a separate add-in from Microsoft’s official website.
- Compatible with Certain Versions: Power Query is only available for specific versions of Excel 2013, such as Professional Plus, Office 365 ProPlus, and standalone editions, making it important to verify your Excel version before installation.
- Simple Installation Process: The installation process involves downloading the Power Query add-in, running the setup file, and enabling it through the COM Add-Ins section in Excel’s settings.
- Enhances Data Handling: Once installed, Power Query significantly improves Excel’s data-handling capabilities, allowing users to import, transform, and analyze data from multiple sources with ease.
- Requires .NET Framework: Power Query requires the .NET Framework to function correctly. Ensuring that your system has this framework installed and updated is essential for smooth operation.
Table of Contents
So what is Power Query?
Well you know when you get data from a file, a data dump/import or an external data source and it comes into Excel in an ugly, unworkable format? I can hear you say YEEEES!
So no more formulas, text to columns, trim spaces, vlookup, find & replace etc.
You have all that functionality in Power Query at the press of a menu command! Now your life has just become a lot…well, a hell of a lot easier 🙂
Apart from cleaning data, Power Query can append or merge two separate tables together (bye bye VLOOKUP!) as well as create extra columns in your data which can display your custom calculations!
You can use Power Query to perform transformations that would be very complex in VBA or SQL. So goodbye VBA coding 🙂 🙂 🙂
Where to get this super awesome add-in
First, you need to have Microsoft Office 2013. If you do not have this then you will need to upgrade to Office 365 using this link:
https://products.office.com/en-us/home
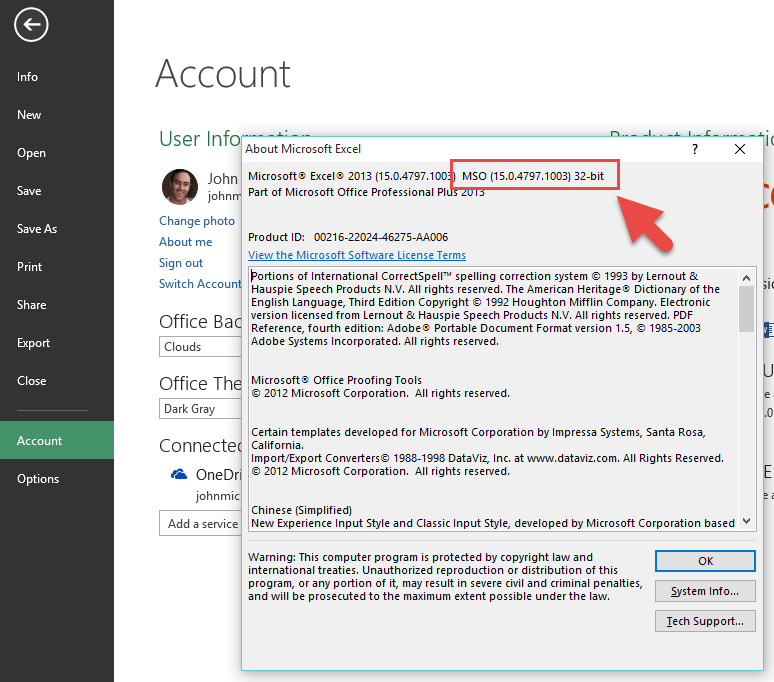
STEP 1: The first step is to check the Excel bit version that you have on your PC.
To check the bit version, you need to go and open any Excel workbook and go to File > Account > About Excel, and from the pop-up dialogue box, you will see the bit number, either 32-bit or 64-bit. Once you know this, close out of Excel completely!
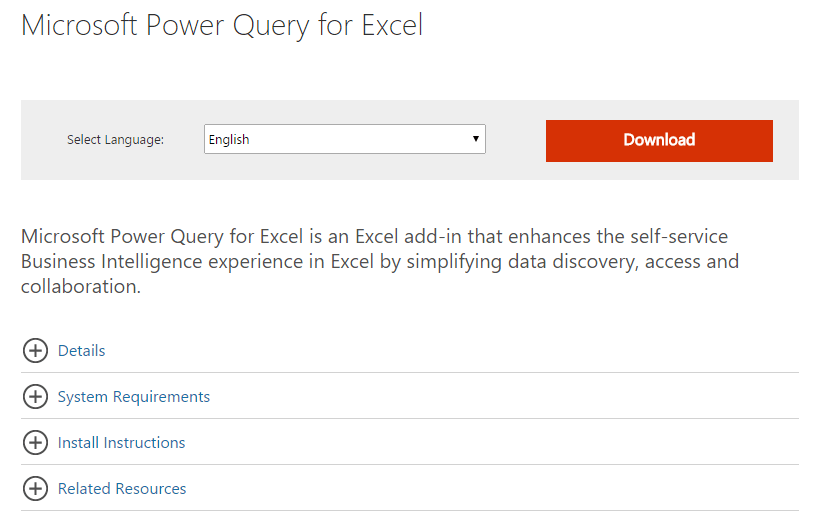
STEP 2: You will need to click on the following link and download the Power Query add-in from Microsoft’s website:
https://www.microsoft.com/en-us/download/details.aspx?id=39379
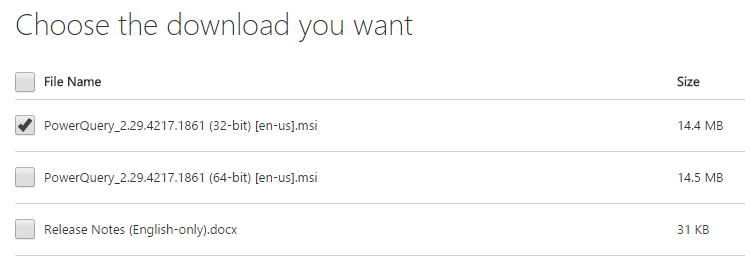
STEP 3: Press the Download button and you will need to select the download bit version based on the bit system your Excel 2013 version is running (from Step 1):
Press the NEXT button…
…and this will start the download of the add-in installer .msi file installer on your browser (if you do not see this, go to your browser’s Downloads folder).
STEP 4: Click on the .msi file to run the installer:
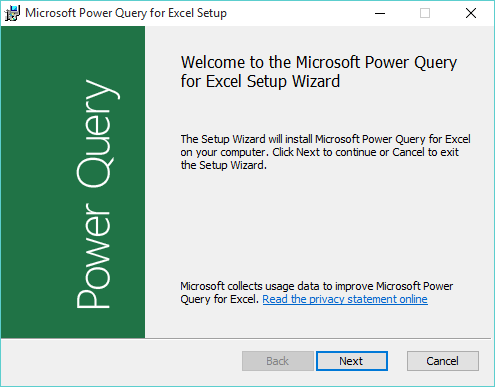
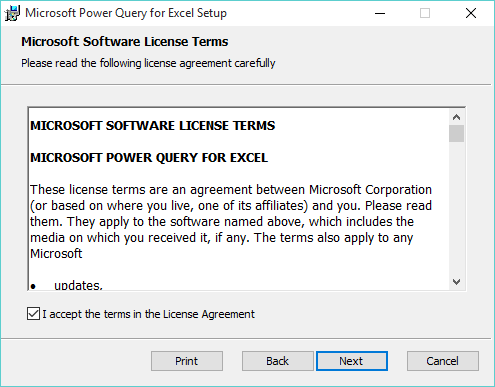
STEP 5: This will bring up the Microsoft Power Query for Excel Setup:
Click the Next button and accept the terms of the Licence Agreement and press Next again:
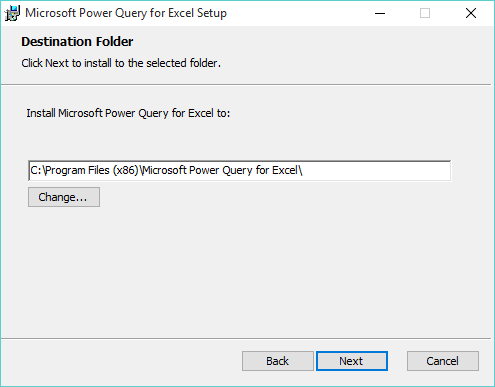
You will be asked in which destination folder you want to install Power Query Excel 2013.
Click Next for the default folder or Change if you want to install it in another folder:
Click Next and select the Install button:
Click Yes if it asks you if you want to install Power Query on your computer. The install for Power Query in Excel 2013 will now begin.
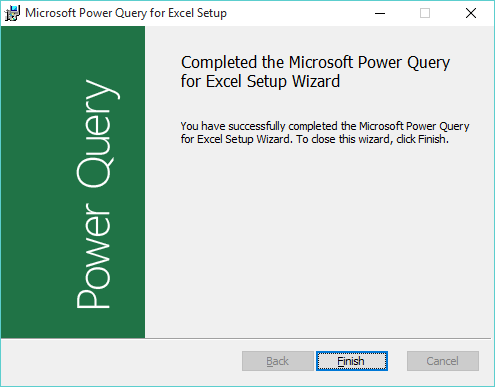
You will get the following message once your install has been completed successfully. Press Finish!
STEP 6: Open a blank Excel workbook and on the ribbon menu you should now see the Power Query tab:
STEP 7: If you do not see the Power Query tab you will need to activate this from the back end of Excel.
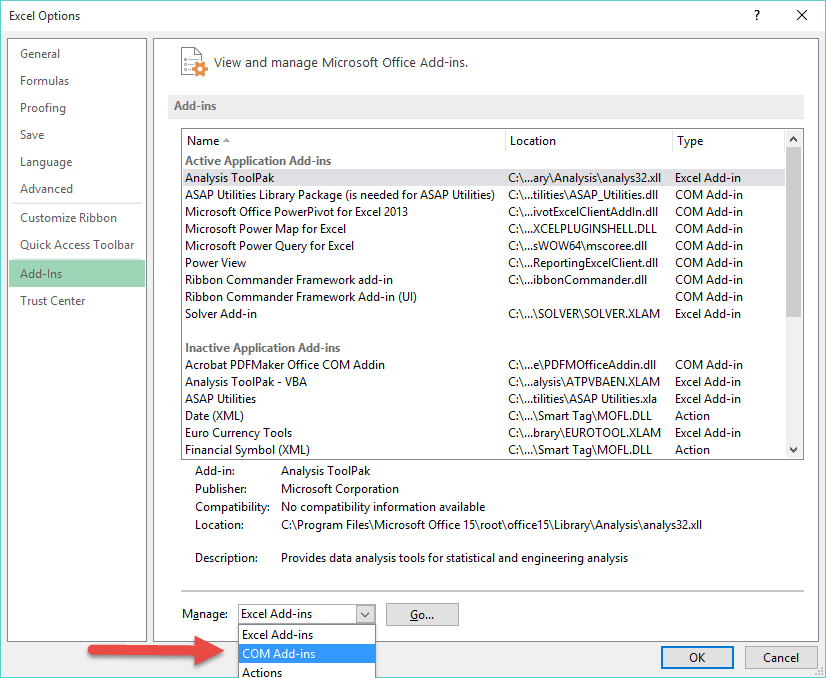
You will need to go to File > Options > Add-Ins > and at the bottom, you will need to select the Manage drop-down and choose COM Add-ins, and hit the Go button:
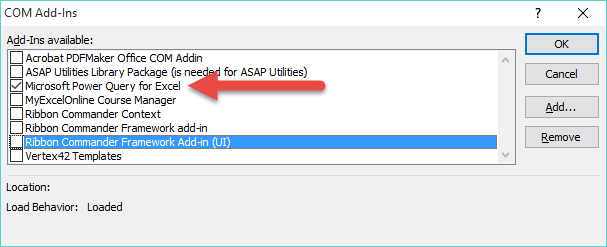
This will open the COM Add-Ins dialogue box and you will need to check the box for Microsoft Power Query for Excel and press OK.
You will now see Power Query for Excel 2013 on your ribbon!
Frequently Asked Questions
How do I install Power Query in Excel 2013?
To install Power Query, download the Power Query add-in from the official Microsoft website. Once downloaded, run the installer and follow the prompts to complete the setup. After installation, open Excel, go to File > Options > Add-Ins, select COM Add-Ins from the dropdown, and enable Power Query.
Is Power Query available for all versions of Excel 2013?
No, Power Query is only available for specific versions, such as Excel 2013 Professional Plus, Office 365 ProPlus, and standalone Excel editions. It is not supported in Excel Home & Student or Excel Home & Business editions.
What are the system requirements for installing Power Query in Excel 2013?
Power Query requires Windows operating systems with .NET Framework 4.5 or higher installed. It is important to ensure your computer meets these requirements before attempting the installation.
Where can I find the Power Query download link for Excel 2013?
The official Power Query add-in for Excel 2013 can be downloaded from the Microsoft Download Center. Searching for “Power Query for Excel 2013 download” on Microsoft’s official website will direct you to the appropriate page.
How do I enable Power Query after installation?
After installation, open Excel and navigate to File > Options > Add-Ins. From the dropdown menu at the bottom, select COM Add-Ins and click Go. Check the box for Power Query and click OK. You should now see the Power Query tab in the Excel ribbon.
John Michaloudis is a former accountant and finance analyst at General Electric, a Microsoft MVP since 2020, an Amazon #1 bestselling author of 4 Microsoft Excel books and teacher of Microsoft Excel & Office over at his flagship MyExcelOnline Academy Online Course.


