Power Pivot is an Excel add-in that was first introduced in Excel 2010 by Microsoft. Excel 2010 power pivot allows you to harness the power of Business Intelligence right in Excel.
Read the tutorial on how to enable Power Pivot in Excel 2013 here
Read the tutorial on how to enable Power Pivot in Excel 2016 here
Key Takeaways:
- Power Pivot is an Add-in – In Excel 2010, Power Pivot is not built-in but comes as a free add-in that must be manually enabled.
- Download from Microsoft – You need to download the Power Pivot add-in from the official Microsoft website before installing it in Excel 2010.
- Enable the Add-in – After installation, go to File > Options > Add-Ins, select COM Add-ins, and check Microsoft Power Pivot for Excel to activate it.
- New Power Pivot Tab Appears – Once enabled, a Power Pivot tab will be added to the Excel ribbon, allowing you to access advanced data modeling features.
- Compatibility Considerations – Power Pivot in Excel 2010 is limited compared to later versions and does not support certain advanced features available in Excel 2013 and newer.
Table of Contents
So What is Power Pivot?
In a nutshell, Excel 2010 Power Pivot allows you to use multiple data sources for analysis.
Power Pivot gives you the power to work with large sets of data that are over 1 million rows!!!
You could import, merge and perform analysis on the resulting data. The beautiful thing with Power Pivot is it allows you to work on Big Data with no limitations.
Imagine getting data from multiple sources like SQL Server, Oracle, XML, Excel, Microsoft Access, and analyzing these all into one awesome Pivot Table!
Watch the Video on How to Install Excel 2010 power pivot on Youtube and give it a thumbs-up!
So how do I get my hands on this super awesome add-in…I hear you say?
Get Office 2010 Home & Business on Amazon
Office 365 ProPlus Subscription
Install Excel 2010 Power Pivot
Follow this step-by-step tutorial on how to install PowerPivot in Excel 2010:
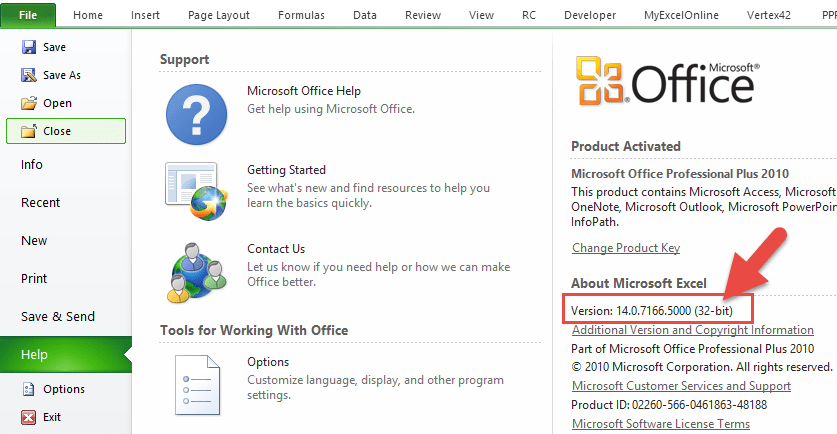
STEP 1: The first step is to check the Excel bit version that you have on your PC.
To check the bit version, you need to go and open any Excel workbook and go to File > Help and on the far right-hand side, you will see the Version and the bit number in brackets, either (32-bit) or (64-bit). Once you know this, close out of Excel completely!
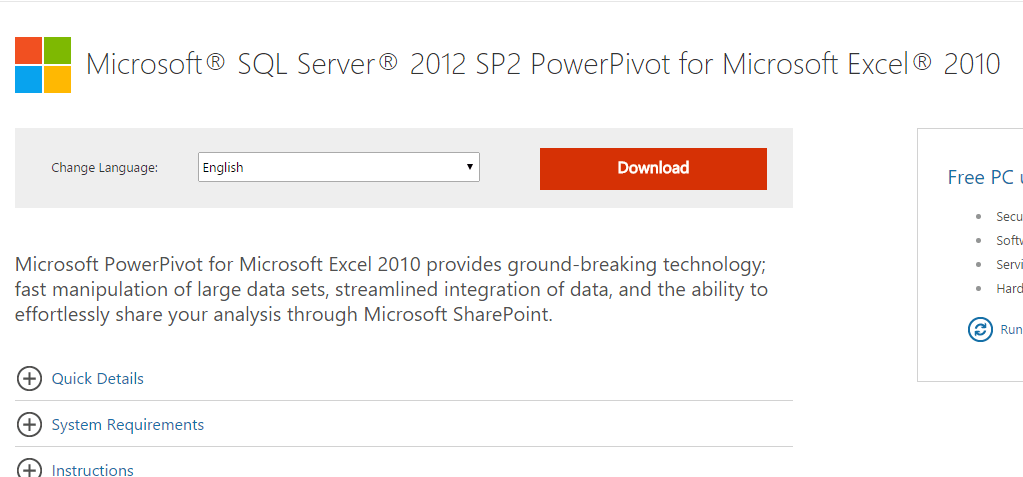
STEP 2: You will need to click on the following link and download the Power Pivot add-in from Microsoft’s website:
Download Power Pivot for Excel 2010
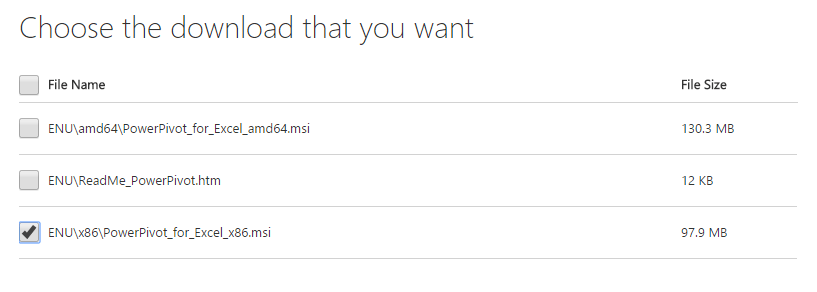
STEP 3: Press the Download button and you will need to select the download bit version based on the bit system your Excel 2010 version is running (from Step 1).
If your Excel is 32-bit, pick the x86 installer.
If your Excel is 64-bit, pick the amd64 installer:
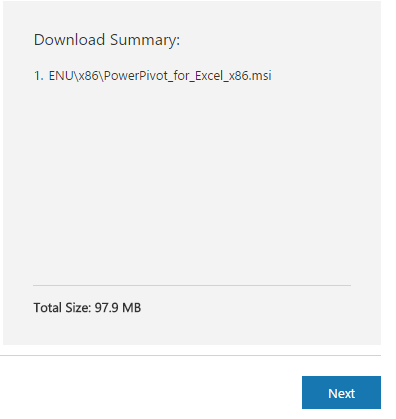
Press the NEXT button…
…and this will start the download of the add-in installer .msi file installer on your browser (if you do not see this, go to your browser’s Downloads folder).
STEP 4: Click on the .msi file to run the installer:
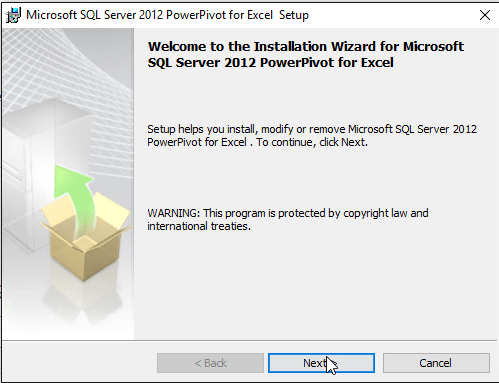
STEP 5: This will bring up the Microsoft Power Pivot for Excel Setup:
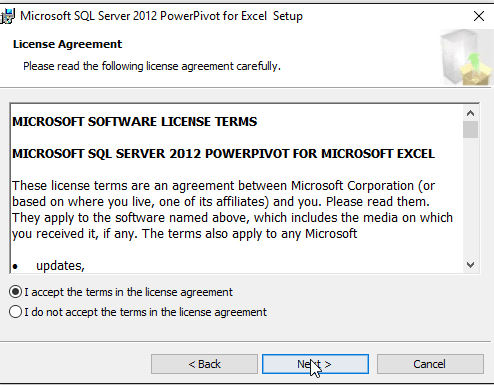
Click the Next button and accept the terms of the Licence Agreement and press Next again:
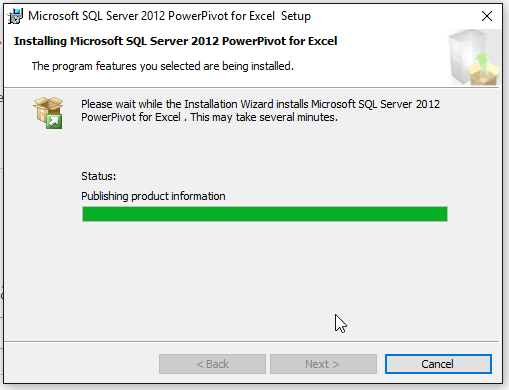
Click Next and select the Install button, wait for the Install to finish:
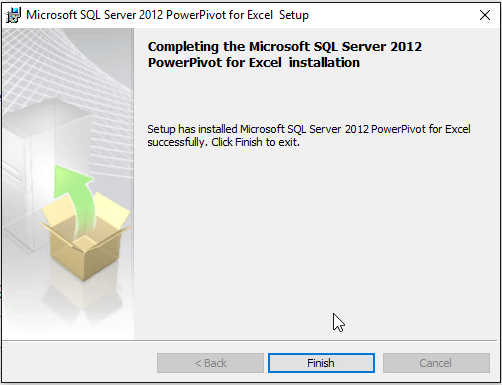
You will get the following message once your install has been completed successfully. Press Finish!
STEP 6: Open a blank Excel workbook and on the ribbon menu you should now see the Power Pivot tab:
Enable Excel 2010 Power Pivot
If you cannot see the PowerPivot tab, go through the steps below to activate it:
STEP 1: Go to File > Options
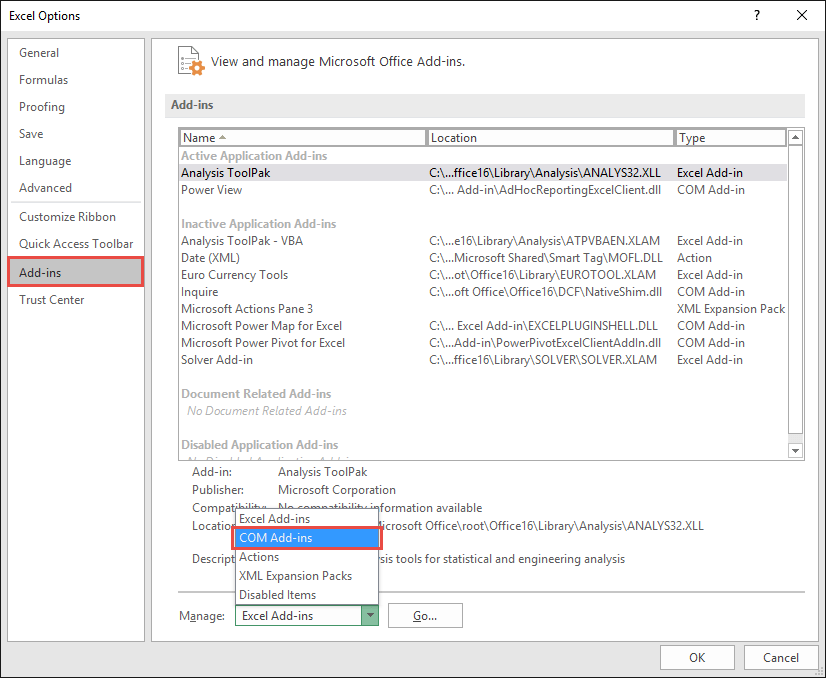
STEP 2: Go to Add-Ins, for the Manage dropdown select COM Add-ins. Click Go once set.
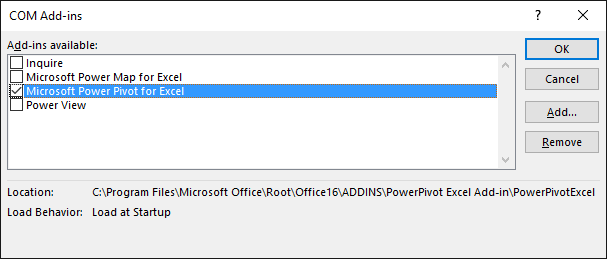
STEP 3: Check Microsoft Power Pivot for Excel. Click OK once done.
You can easily enable Pivot Excel 2010 download and make the tab appear in the menu ribbon.
STEP 4: You should now have the Power Pivot Tab. Click Manage to see the Power Pivot Window.
This will open Power Pivot in Excel 2010!
Power Pivot Window (click on the image to expand):
To work on Power Pivot, you must first understand how to open the Power Pivot window.
STEP 1: Click on the Power Pivot Tab in Menu Ribbon.
STEP 2: Select the Manage option under Data Model.
This opens the Power Pivot window and here you can explore all of its features!
Frequently Asked Questions
How do I install Power Pivot in Excel 2010?
To install Power Pivot, you need to download the Power Pivot for Excel 2010 add-in from Microsoft’s official website. After downloading, run the installer and follow the on-screen instructions.
How do I enable Power Pivot after installation?
Once installed, open Excel, go to File > Options > Add-ins, select COM Add-ins from the dropdown, click Go, check Microsoft Power Pivot for Excel, and click OK.
Why don’t I see the Power Pivot tab after enabling the add-in?
If the Power Pivot tab is missing, check if the add-in is disabled. Go to File > Options > Add-ins, select Disabled Items, and re-enable Power Pivot if necessary. Restart Excel for the changes to take effect.
Is Power Pivot available in all editions of Excel 2010?
No, Power Pivot is only available in Excel 2010 Professional Plus and higher editions. It is not included in standard or home versions.
Can I use Power Pivot in Excel 2010 files in newer Excel versions?
Yes, Excel files using Power Pivot from Excel 2010 can be opened in newer versions, but some features may not be fully compatible. It’s recommended to upgrade for full functionality.

Bryan
Bryan Hong is an IT Software Developer for more than 10 years and has the following certifications: Microsoft Certified Professional Developer (MCPD): Web Developer, Microsoft Certified Technology Specialist (MCTS): Windows Applications, Microsoft Certified Systems Engineer (MCSE) and Microsoft Certified Systems Administrator (MCSA).
He is also an Amazon #1 bestselling author of 4 Microsoft Excel books and a teacher of Microsoft Excel & Office at the MyExecelOnline Academy Online Course.

