In this tutorial, we will be providing you with a brief overview of some of the features of Microsoft Word 365.
- Starting Word
- File Options
- Home Options
- Insert Options
- Layout Options
- Review Options
- View Options
- Searching for Commands
Watch it on YouTube and give it a thumbs-up!
Let’s look at each of these features in Microsoft Word one by one!
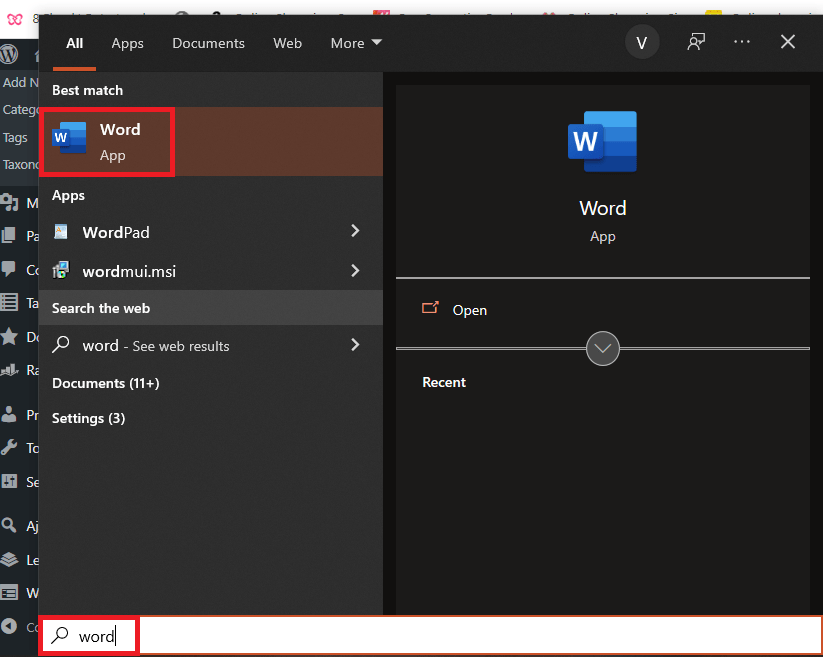
There are two ways in which you can open MS word on your system.
- Click on the MS Word icon pinned to your taskbar.
OR
- Type “Word” in the search bar of your taskbar. Click on the MS Word icon.
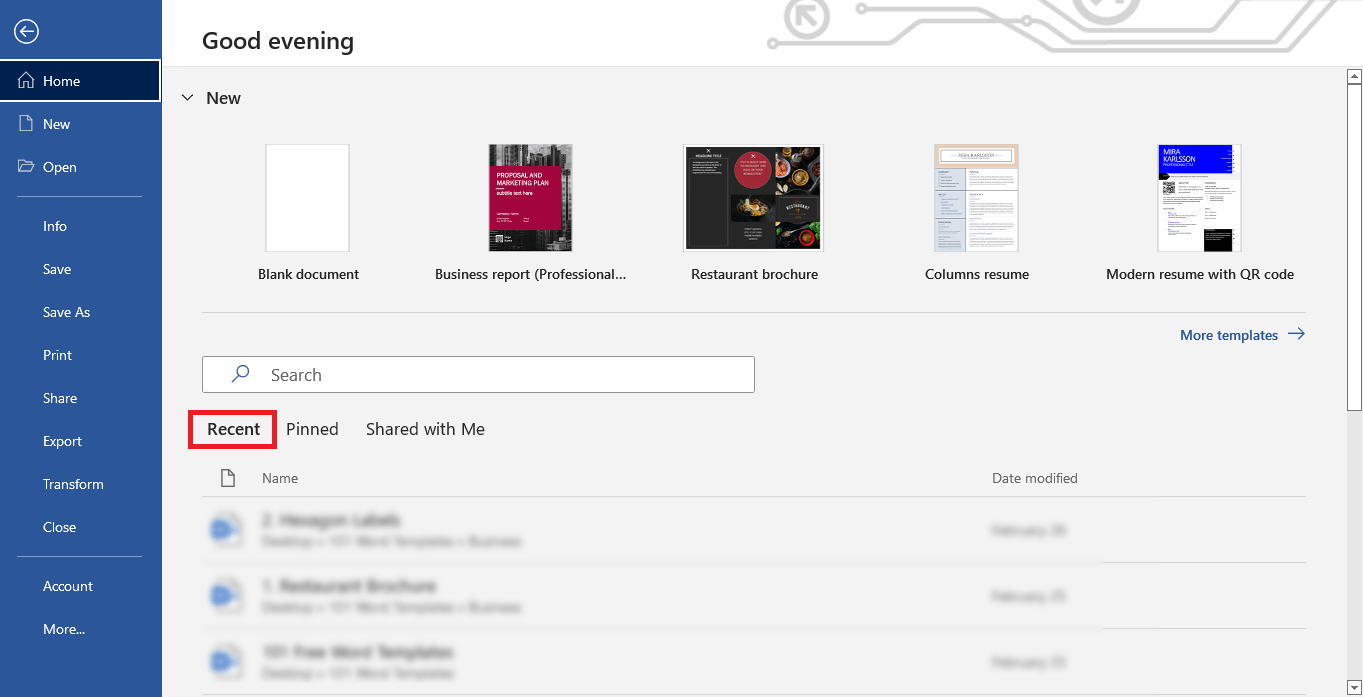
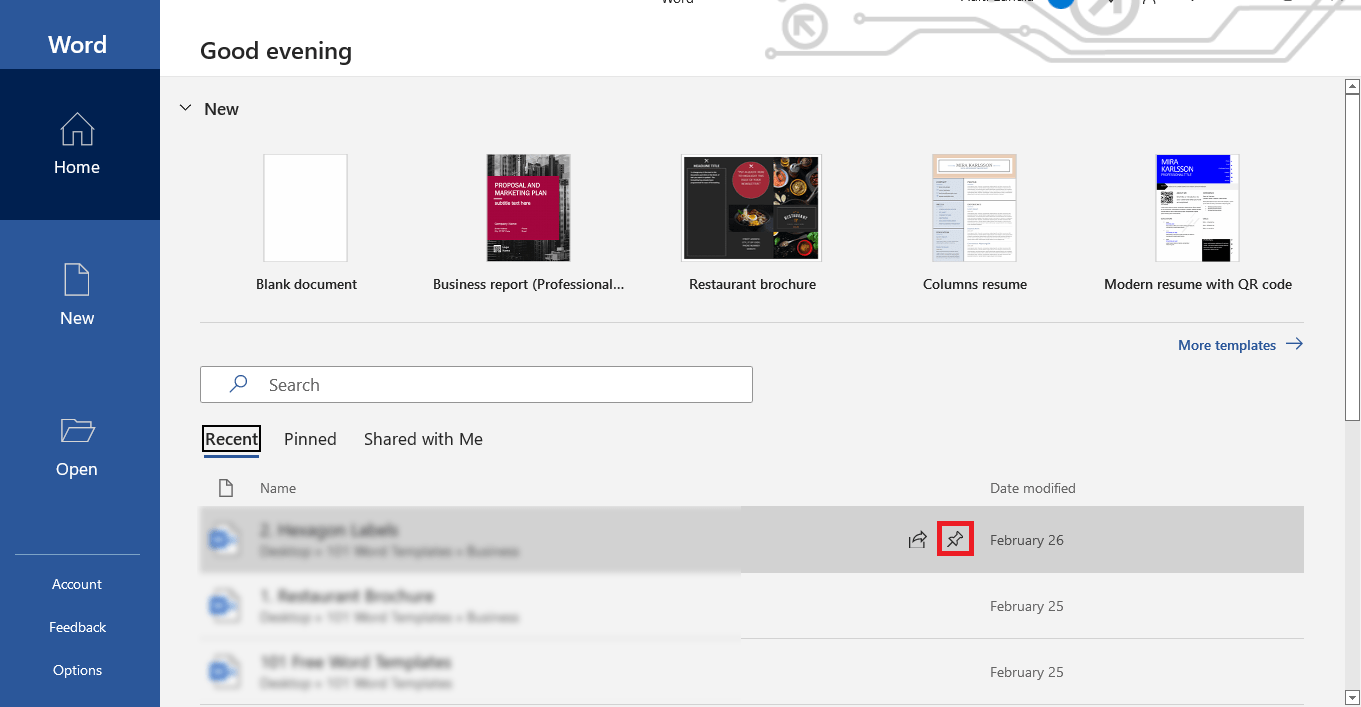
Upon opening, you would be greeted by the Home screen of MS word. Let’s break this down.
On the left side of the screen are different menus like Home, New, and Open. The Home tab is open by default.
Here you have several options for starting up your own document. The first and most widely used type is the blank document. But MS word also provides a plethora of different types and templates to choose from, depending on the purpose of your document.
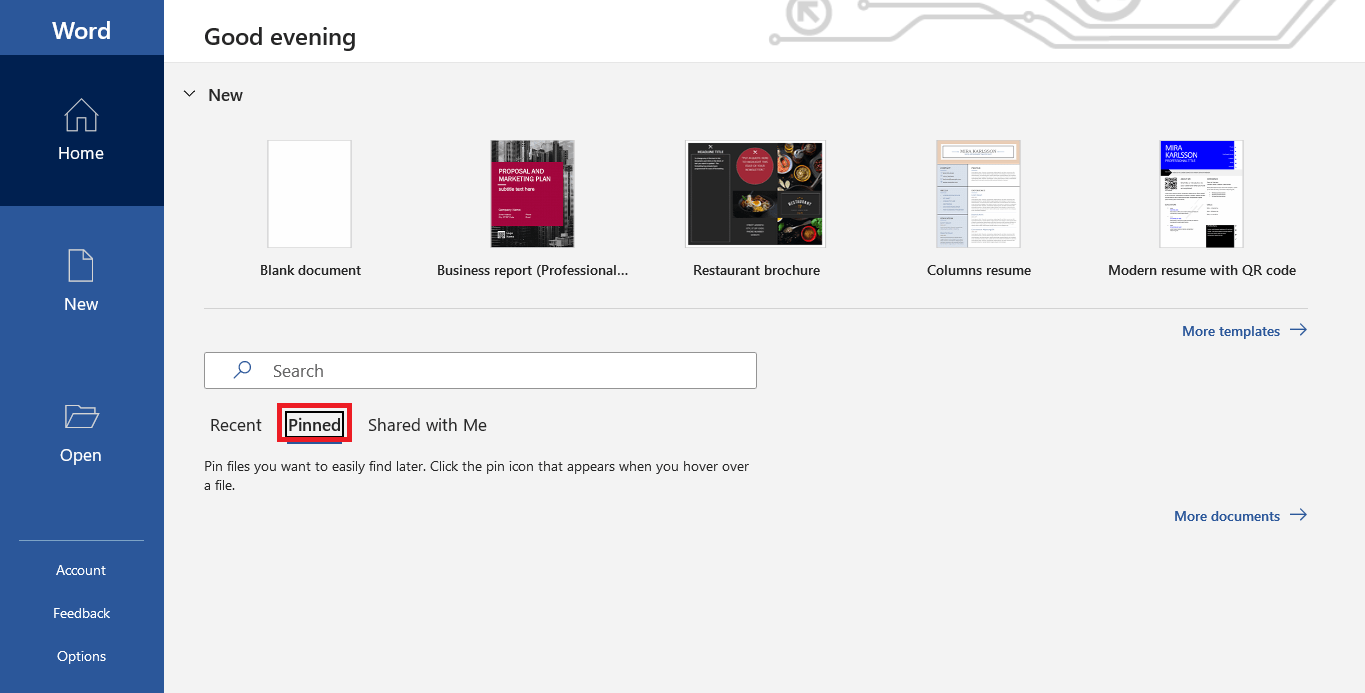
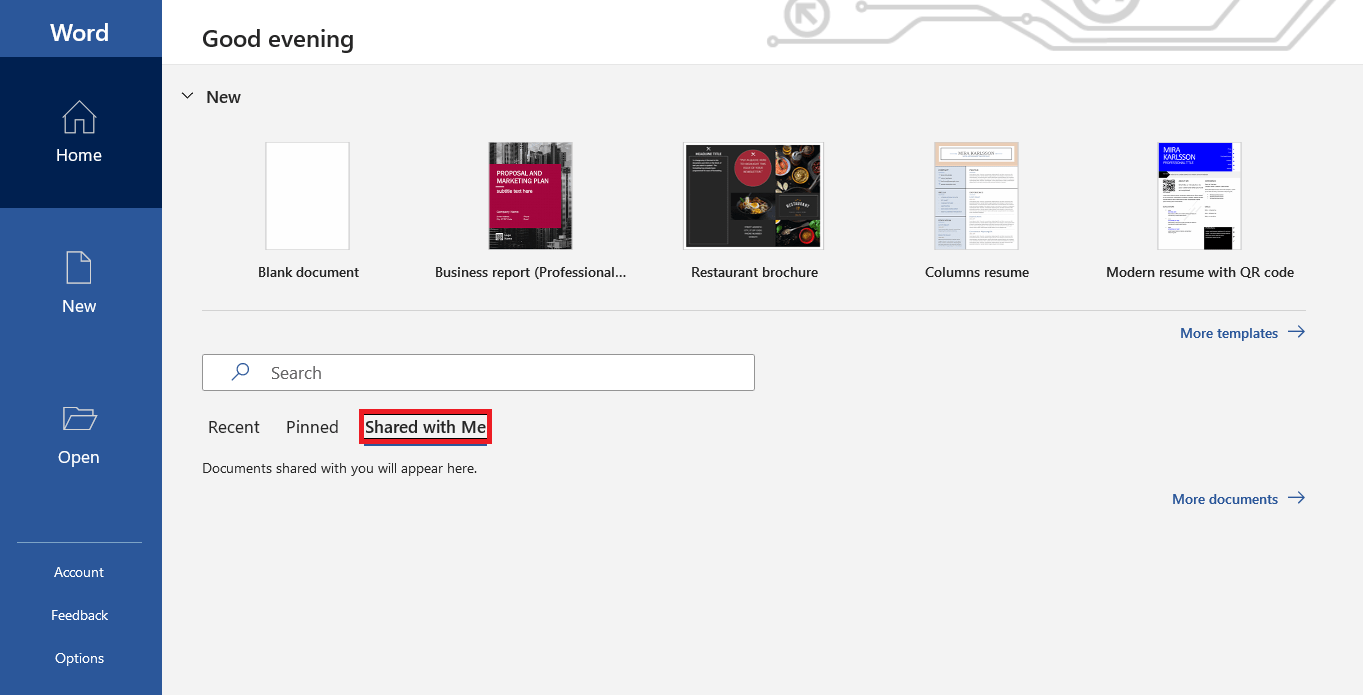
There are main three options that are useful under the File > Home – Recent, Pinned, and Shared with Me.
- Recent – Go to File Tab and then click on Recent, you will find the recent documents that have been opened.
- Pinned – Under the Pinned option, there are important documents that you have pinned and want to view often.
You can pin documents by going to Recent and clicking on the pin icon next to the file that you want to pin.
- Shared with Me – Shared with Me shows files that have been shared on OneDrive.
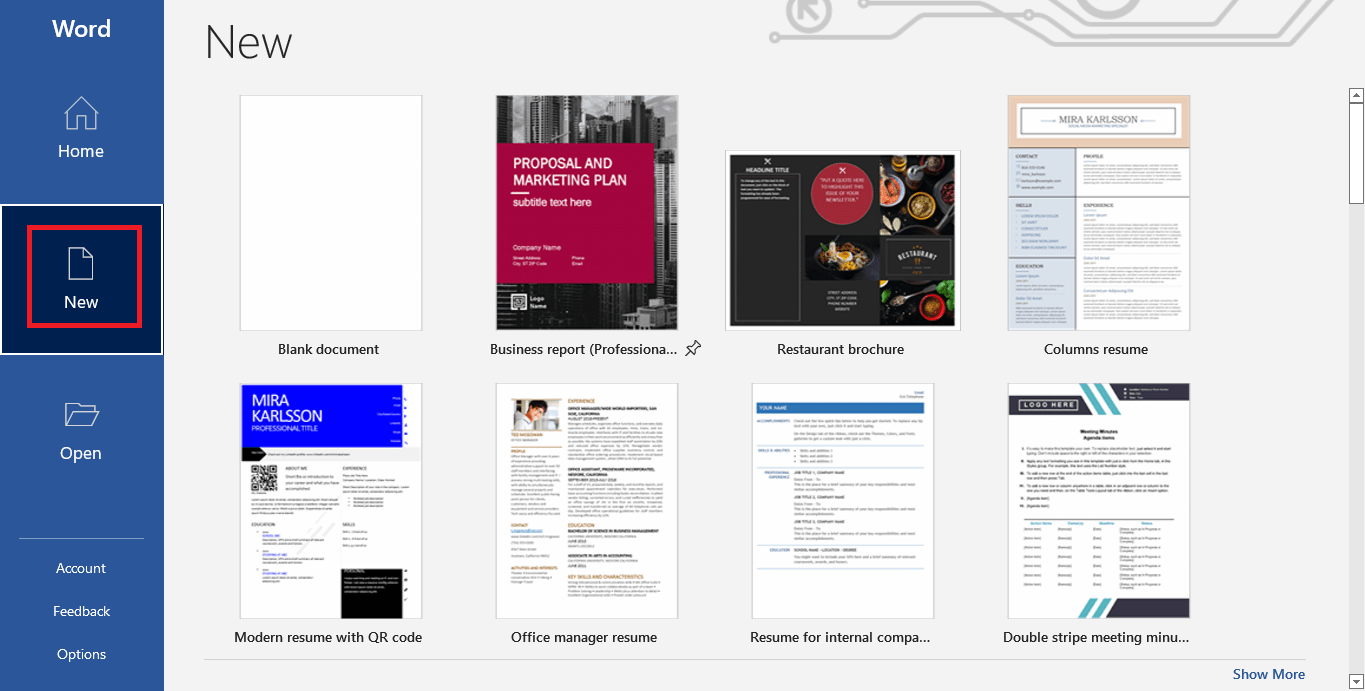
Moving on to the next menu – New.
Here you can find the different types of templates provided by Word. The templates range from resumes to calendars, to greeting templates and brochures. You can choose the appropriate template for yourself and start your document with a pre-made and structured design.
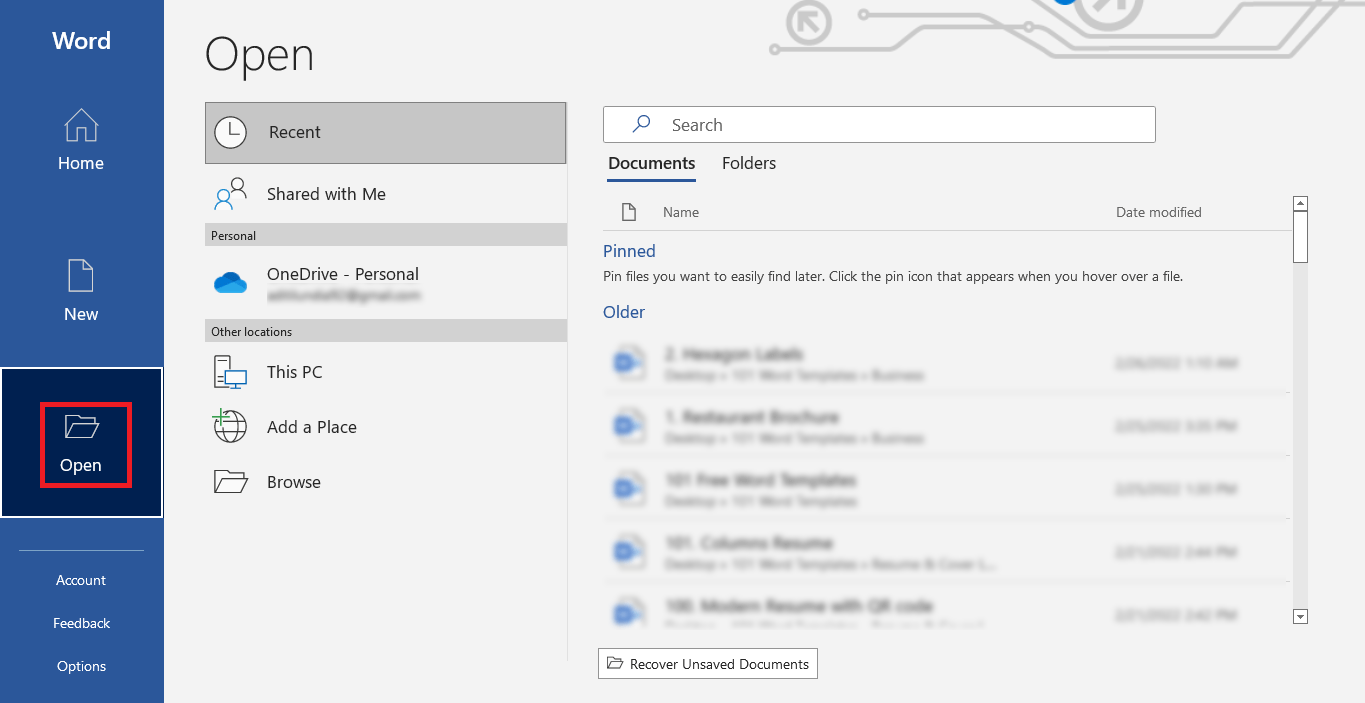
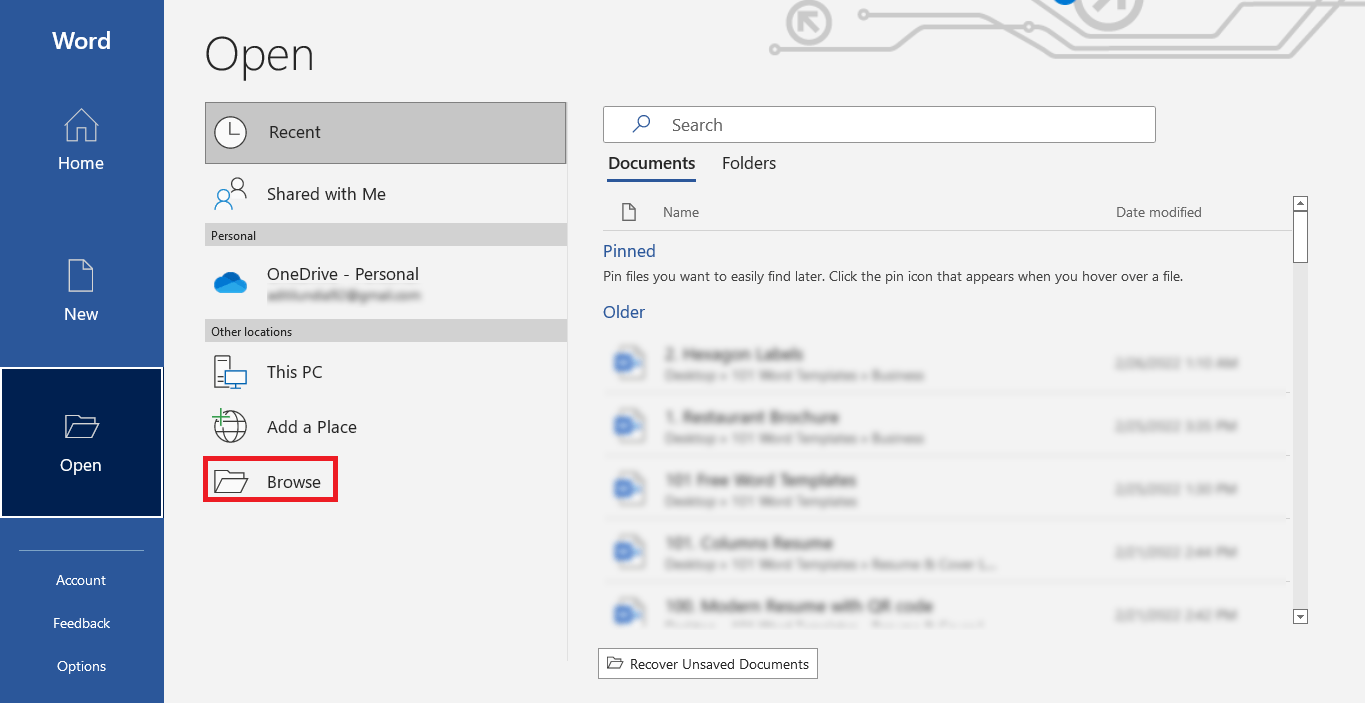
Moving on to the Open menu, you can find a list of recently opened documents. This list contains more files than the one in the Home menu.
You can click on Browse to find any document on your computer.
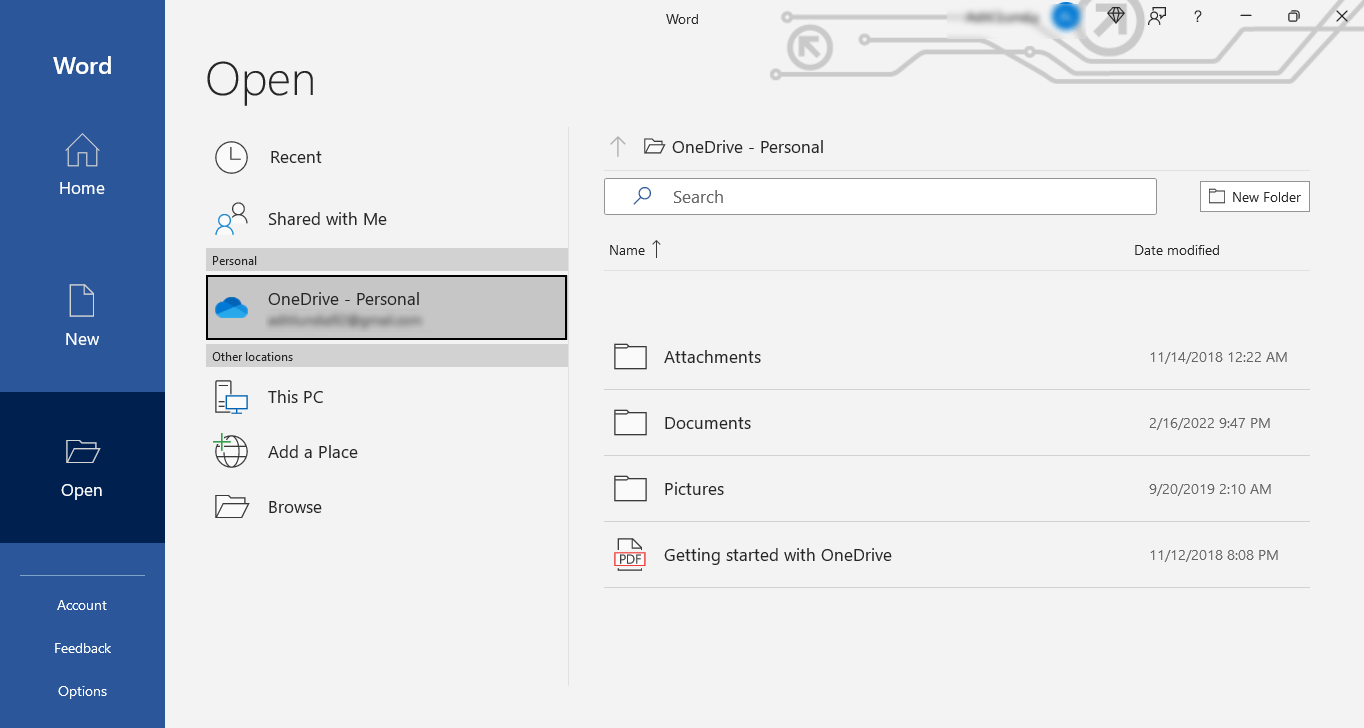
Clicking on OneDrive will show the documents that have been shared with you.
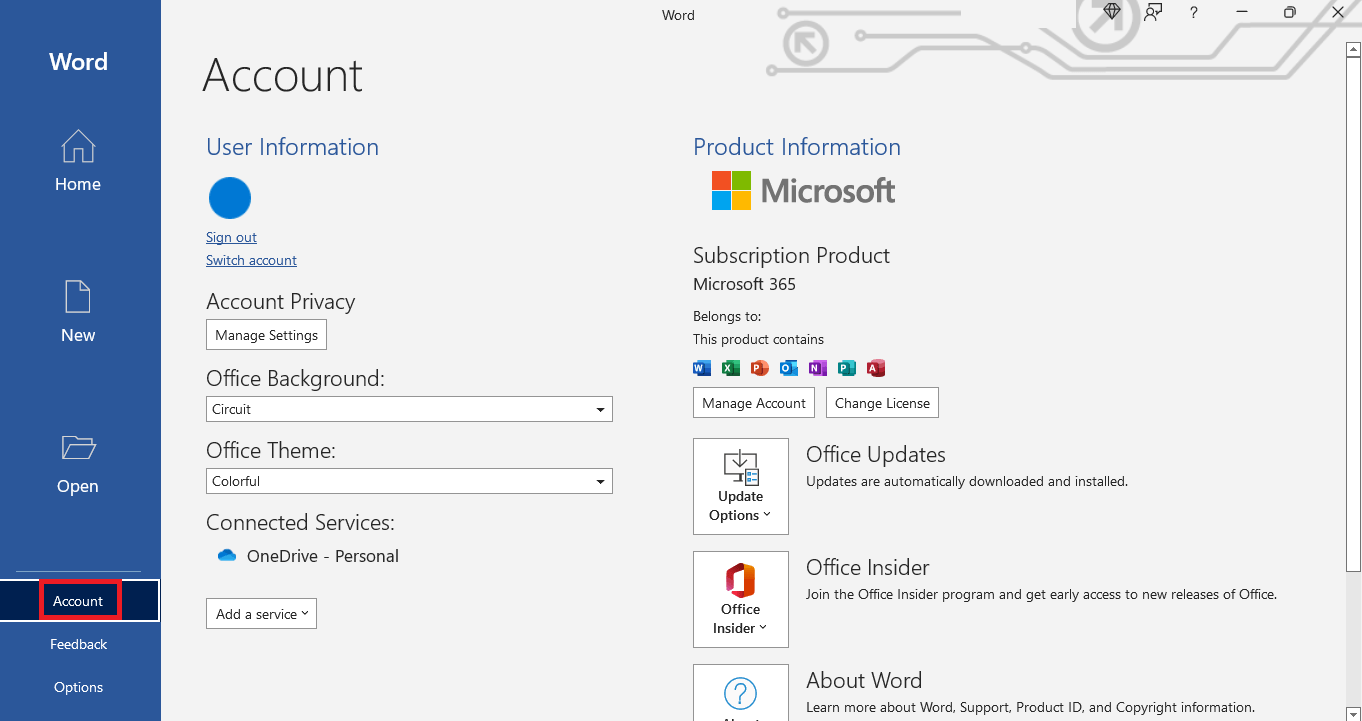
Further down, on the left side of your screen, you will find the Account menu, which shows the details of your Microsoft Office subscription.
The Options menu can be used to change different settings of MS word, most commonly used to change various default settings.
This entire page can also be accessed through the File tab after you have opened your word document. Clicking on the File tab, you will be able to access different options like
- Save
- Save as
- Export
- Share
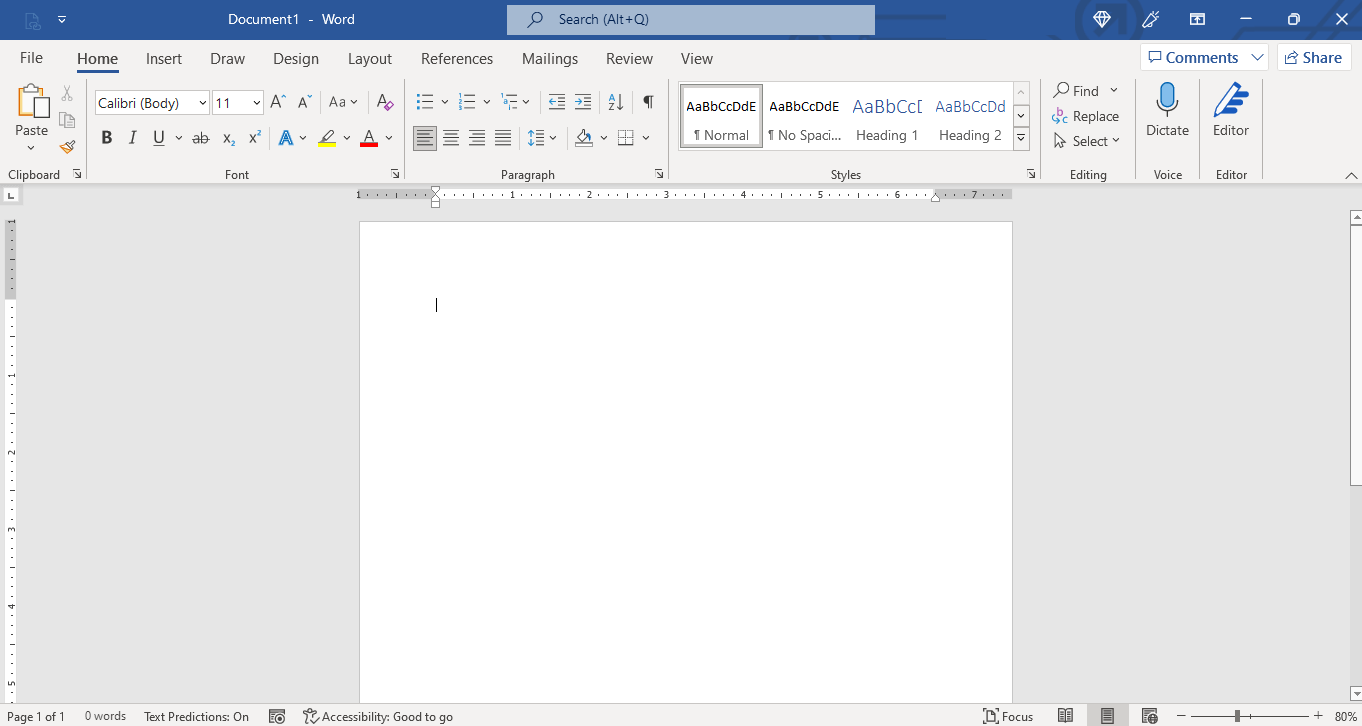
Now that you have opened up a document and started typing, you are starting to realize that you need formatting for your text to stand out. Here the Home tab will help you.
On the Home ribbon, you have different options to customize your text. Some of the commonly used features of the Home tab are:
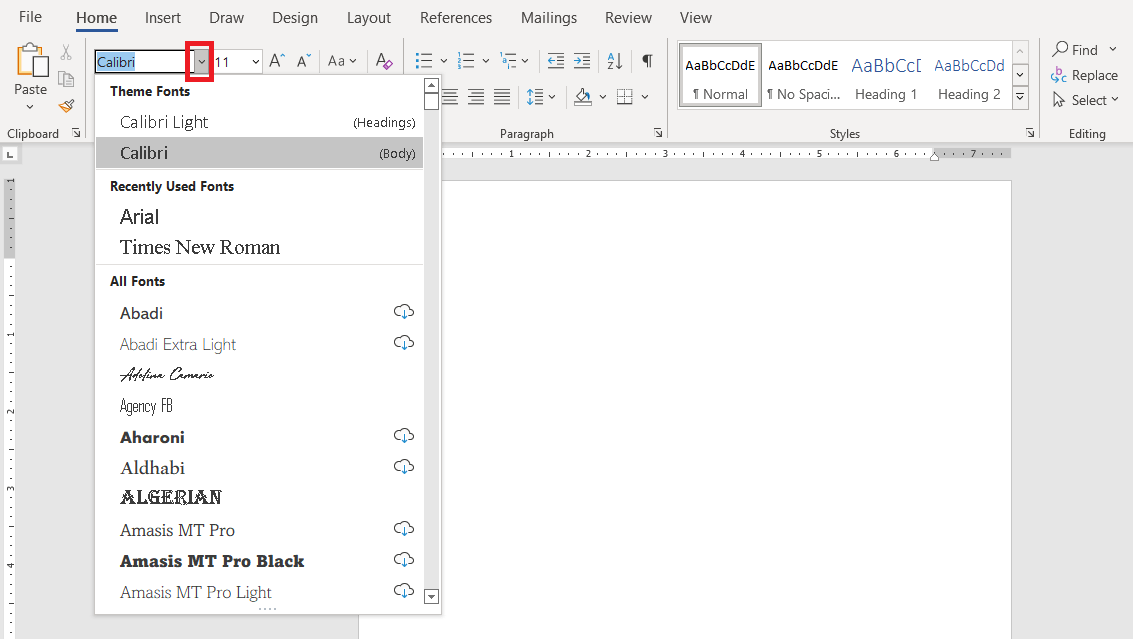
- Changing the font by choosing any style from the drop-down menu.
- Bold, italicize, underline or strikethrough words/sentences.
- Highlight any word/sentence or change the color of the font.
- You can indent or outdent your text.
- Changing the text justification to left, right, or center.
- Change the spacing between paragraphs.
- Add bulleted or number points, in one layer or multi-layered.
The Home tab also offers you to dictate the text instead of typing it. Clicking on the Dictate button will start the process. Word will automatically type out whatever you dictate. Click on the Dictate button again to stop the process.
Let us move towards the Insert tab now.
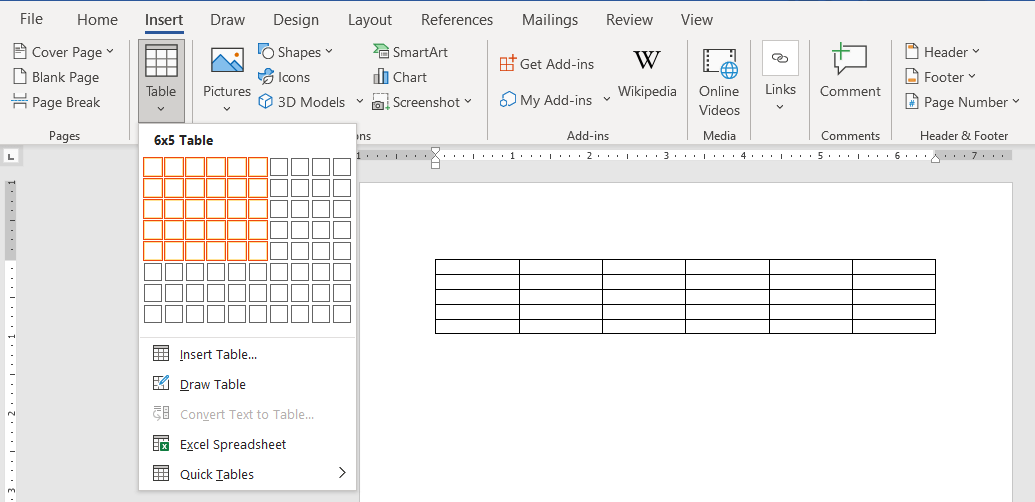
Here, you can insert a table into your word document. This can be very helpful if you want to present data in your document.
You can easily and quickly insert a table just by selecting the number of columns and rows from the given matrix under the Table drop-down button.
The table also offers all the formatting options available in the Home tab. You can bold your table headers or change their font color, add color fills to your rows, adjust the alignment of your text, and much more to make your table look pleasing as well as clean.
The table border drop-down menu also offers various customization such as thickness and color for your table’s external and internal borders.
Clicking on the Pictures icon will let you insert pictures into your word document. You can easily change the size of the image by dragging it from the corner and adjusting its size to your liking. The alignment of the image can also be changed to the right, left, or center.
You can also insert Shapes, Icons, 3D models, SmartArt, Charts and Screenshots using the Illustrations section under Insert Tab.
In the Insert ribbon, you can also find the option to insert page numbers in your document by clicking on the Page Number drop-down button. You can add the page number at the bottom of the page, the top of the page, or anywhere as per your requirements.
You can also insert Header and Footer to your document by clicking on these dropdowns.
Let’s move ahead to the Layout tab.
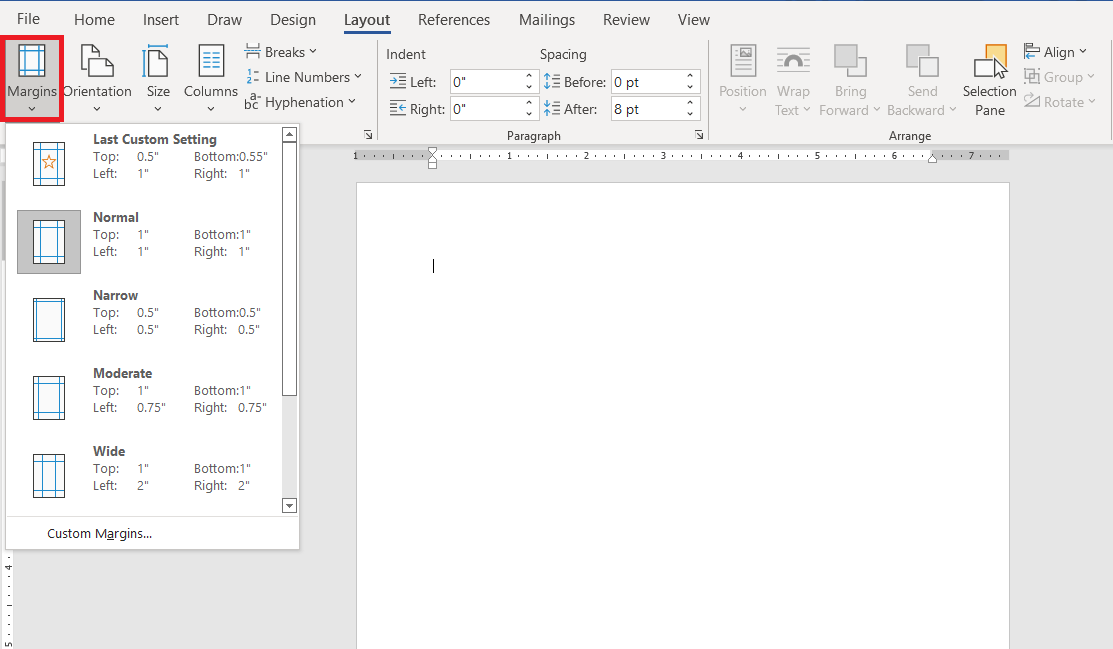
Here, you can change the size of your margins from the Margins button. The default size is 1 inch margin all around.
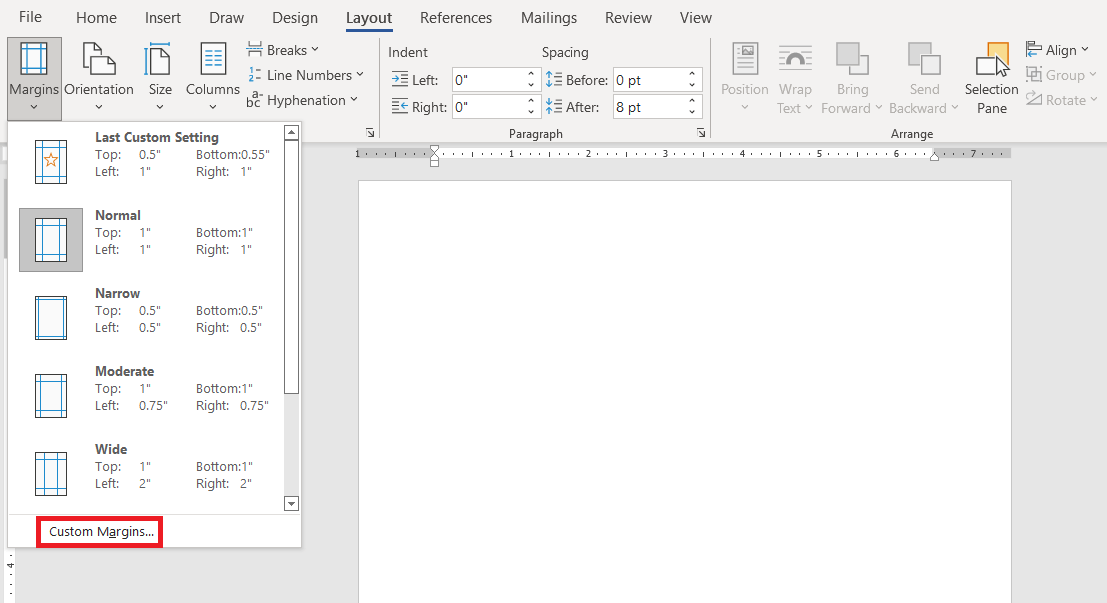
The customize option under the Margins drop down menu gives you access to change your margins freely.
You can also change the orientation of your document from portrait to landscape by clicking on the Orientation button.
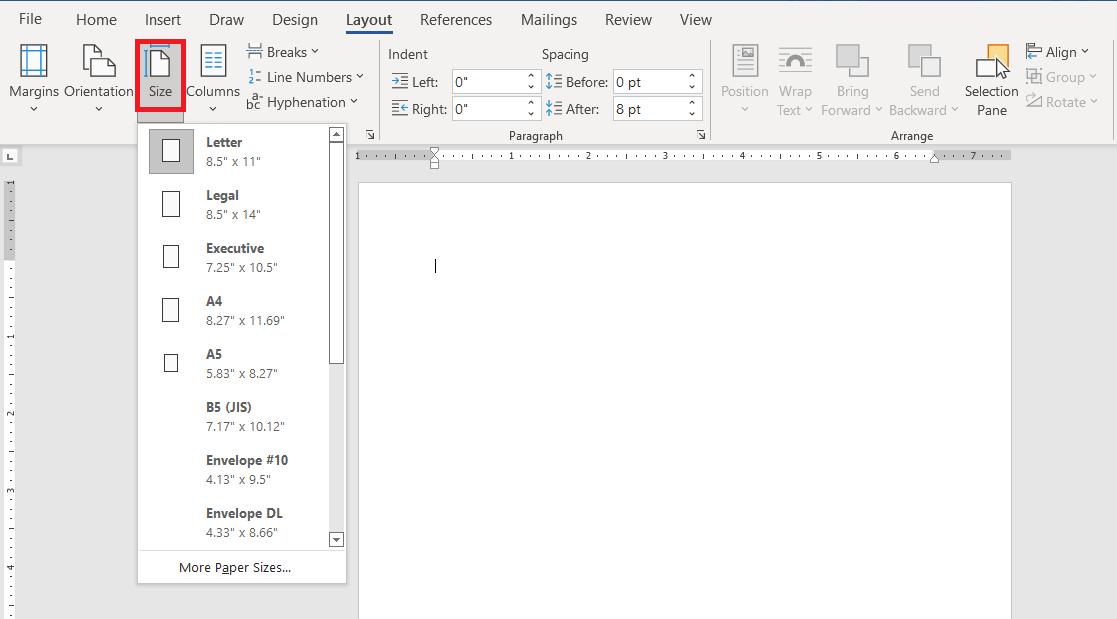
The Size button allows you to change the size of your paper to letter, A4, A5 and many more.
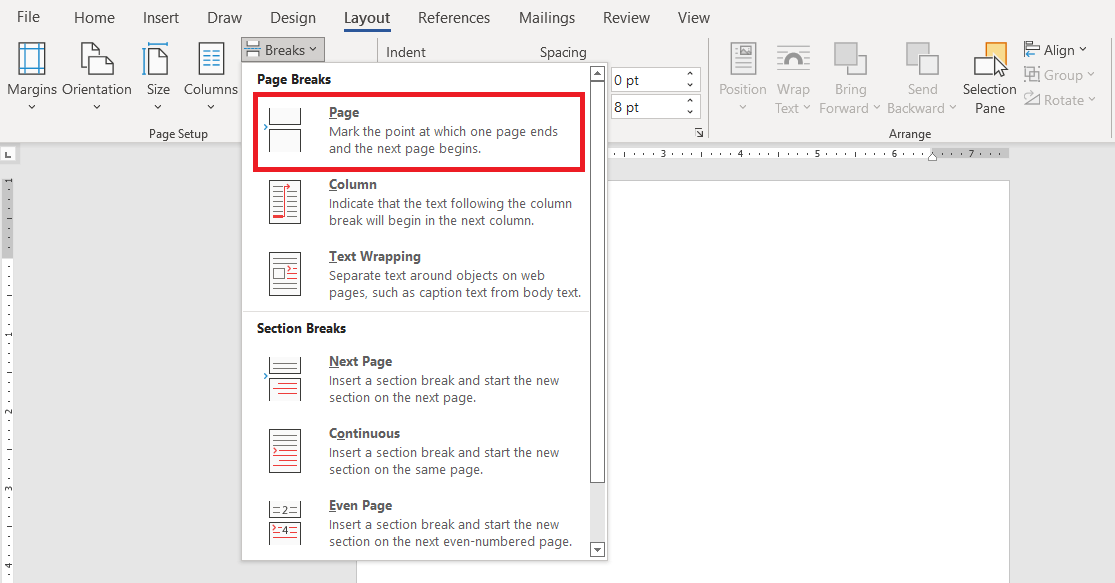
Many a time, people want to manually insert a page break so that certain information is displayed in a separate page. You can add a page break by :
- Clicking the area from where you want to insert the page break
- Click on Layout > Breaks > Page
Let’s head on over to the Review tab.
A commonly used function here is the Thesaurus. Selecting a particular word and clicking on Thesaurus will give you a list of different words that can be used in place of the word you selected. This is a very helpful tool to make your paper sound better and remove any monotonous usage of simple words.
To insert a suggested word, just click on the down arrow beside the word and click insert.
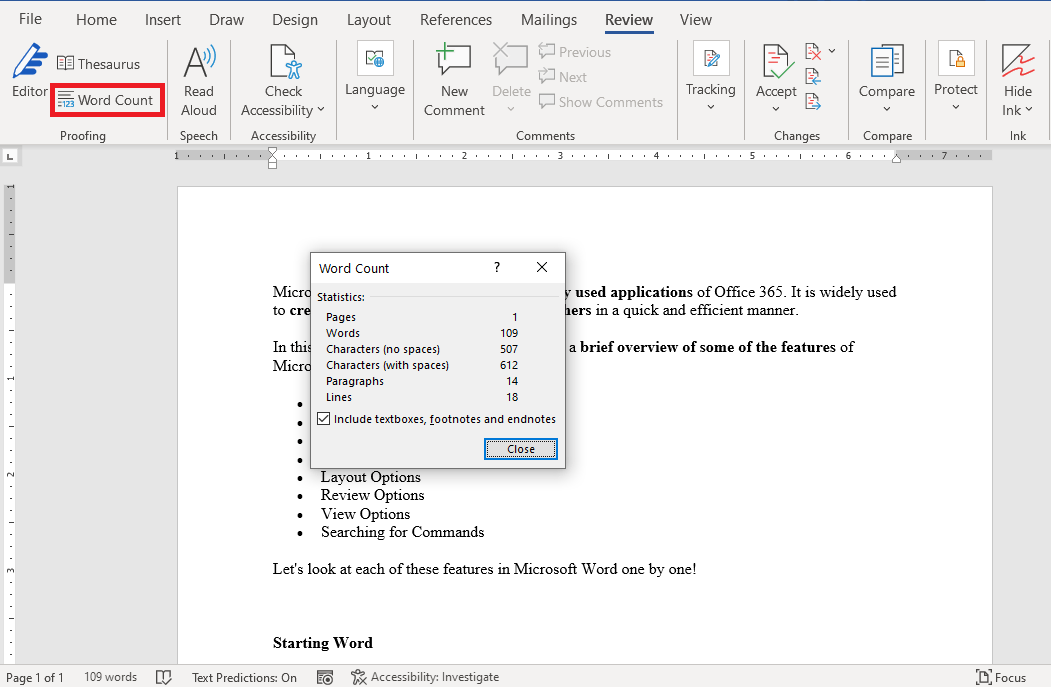
You can also find the Word Count button here, which shows you the number of words in your document.
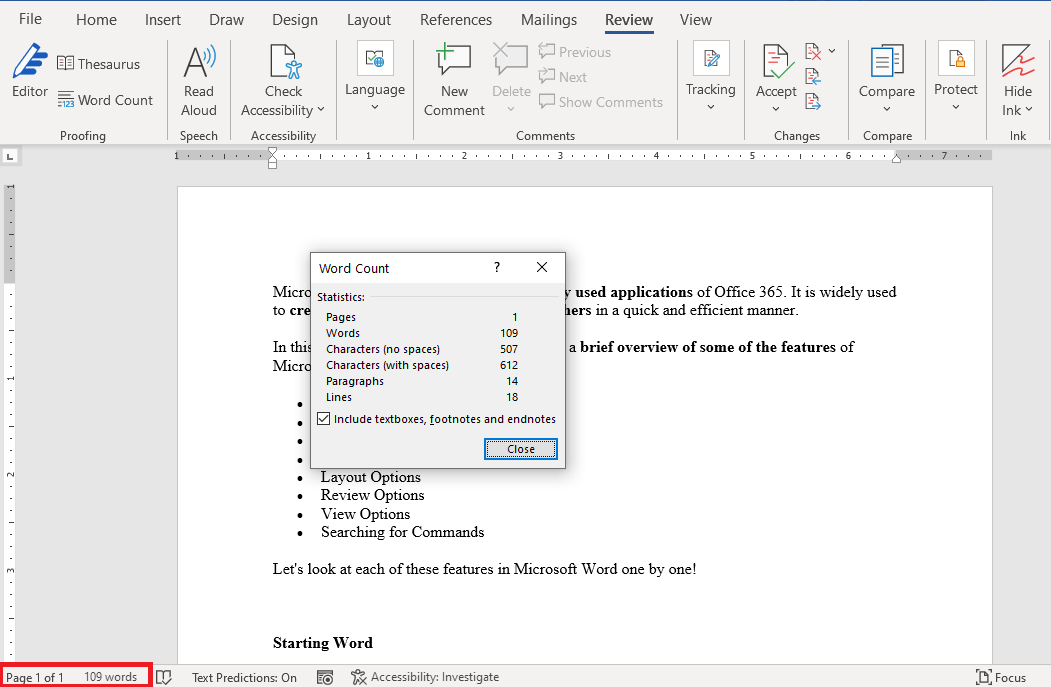
This can also be viewed on the status bar, which is at the bottom of your screen.
Let’s check out the View tab next.
You can zoom in or out of your document by simply clicking on the Zoom button and entering the amount of zoom in that you want. The default view is on 100%.
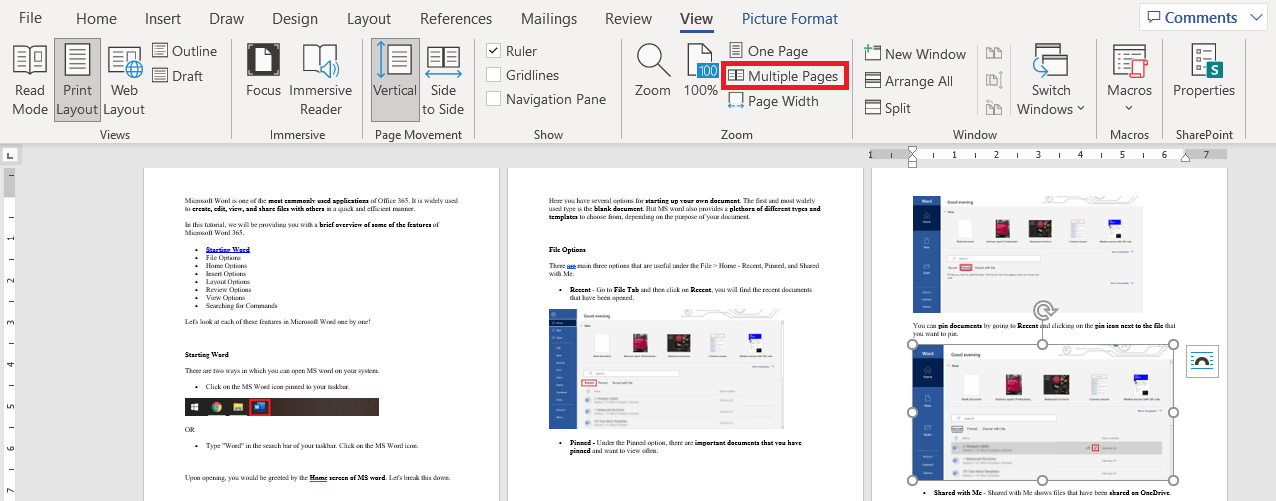
Clicking on the Multiple Pages button, you can view the different pages in your document side by side. This can also give you a tough estimate as to how your document would look like when it’s printed.
Clicking on One Page will take you back to the regular view.
You can click on the Switch Windows button to navigate to any other Words document that you have opened. Pressing Alt + Tab can also help you switch between Word documents.
Lastly, if you ever forget these tools and instructions, there is a search bar at the top of your screen, which can also be accessed by pressing Alt + Q. You can type any command here, such as Bold, and it will give you the Bold option.
This is a very helpful tool to initially work your way through MS Word until you get more familiar with it.
Hopefully, you now have a fair idea of how to use Word. You can always refer to this article if you want to brush up on your basics again.
Click here to download 101 Free Word Templates that you can use and customize!
You can learn more about how to use Excel by viewing our FREE Excel webinar training on Formulas, Pivot Tables, and Macros & VBA!
John Michaloudis is a former accountant and finance analyst at General Electric, a Microsoft MVP since 2020, an Amazon #1 bestselling author of 4 Microsoft Excel books and teacher of Microsoft Excel & Office over at his flagship MyExcelOnline Academy Online Course.

