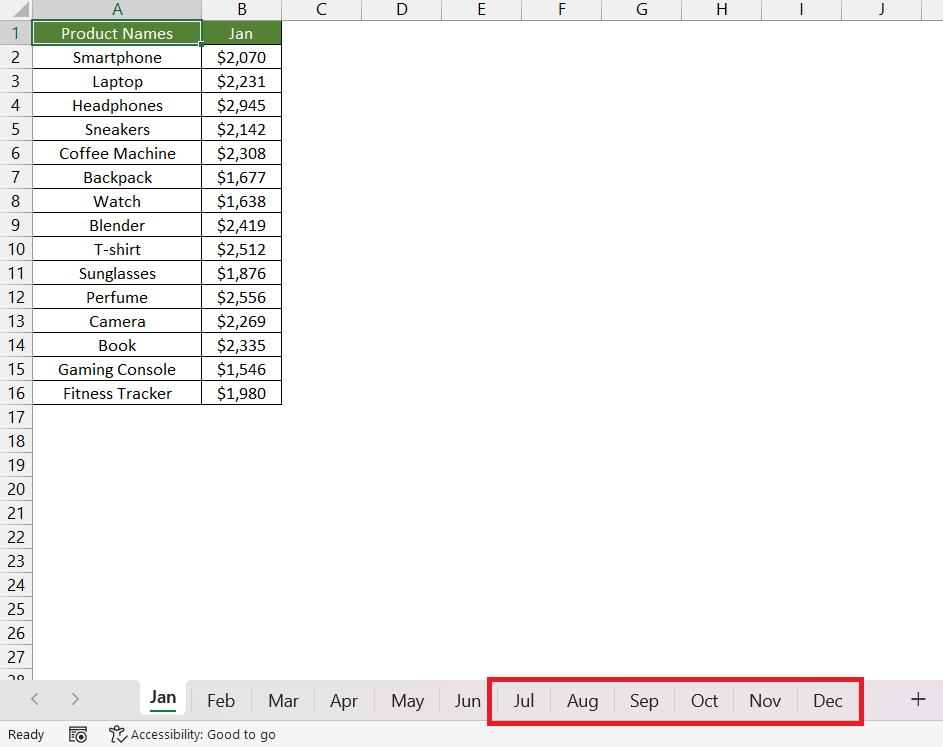
So, what is the best solution to solve this problem?
The optimal solution is to merge Excel files into a single workbook. Instead of manually copying and pasting values, you can effortlessly use any of these 3 quick and easy methods to combine Excel files.
In this article, we will cover the following methods to merge Excel files –
Table of Contents
Let us explore these methods one by one!
Download the Excel Workbook below to follow along and understand How to Merge Excel Files – download excel workbookMerge-Excel-Files.zip
Method 1 – Excel Move or Copy Features
Suppose you have bi-annual sales data of a company in 2 different workbooks and you want to combine them to get annual sales data in a single workbook. Follow the steps below to use the copy or move feature to merge Excel files –
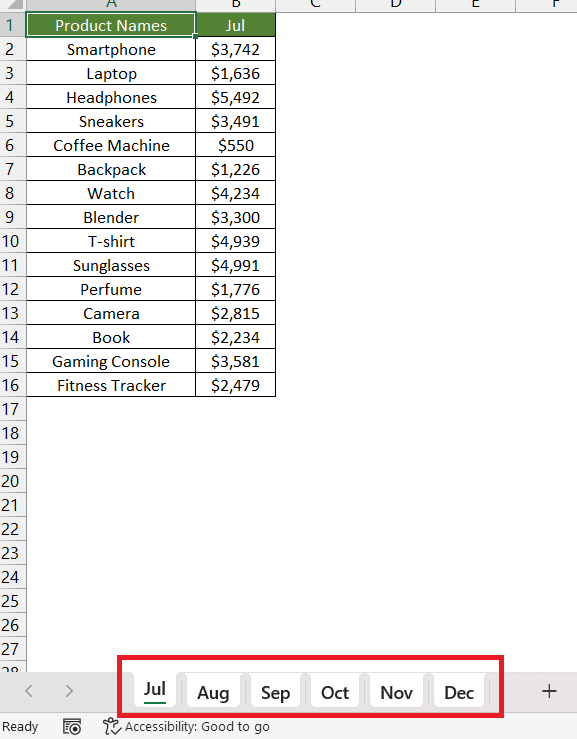
STEP 1: Open both workbooks.
STEP 2: Press Ctrl + left-click to select all the worksheets.
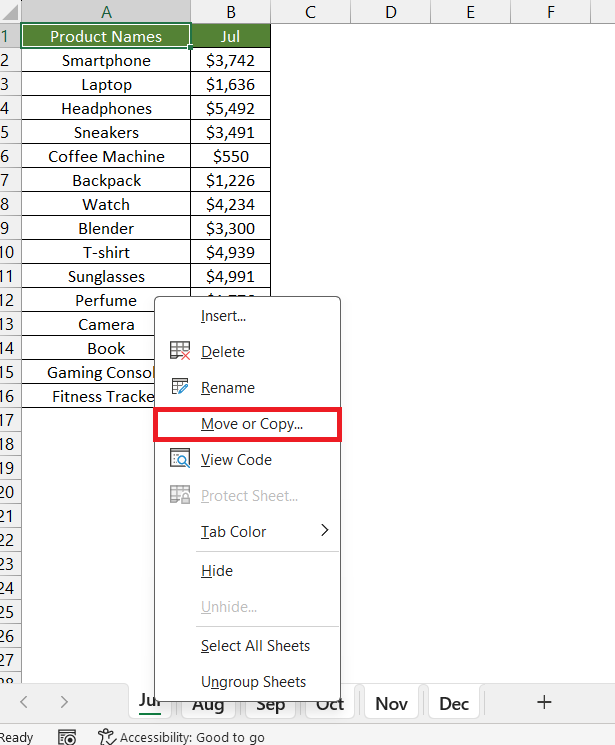
STEP 3: Right-click and Select Move or Copy.
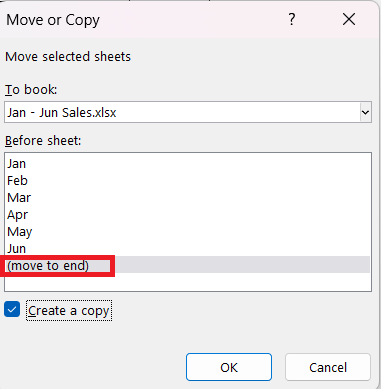
STEP 4: In the Move or Copy dialog box, Select Jan – Jul Sales.xlsx in the Move selected sheets dropdown.
STEP 5: Select (move to end) to copy the selected worksheets at the end.
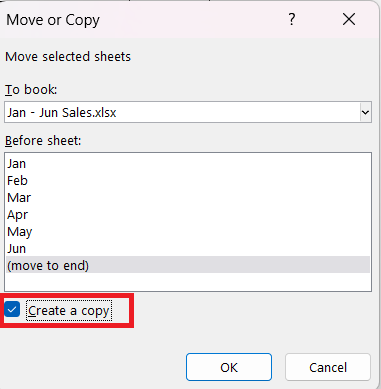
STEP 6: Check the Create a copy option if you wish to retain the original worksheets within the source file. Click OK.
All the copied worksheets will be pasted at the end.
Method 2 – Paste Link
When you copy-paste the worksheets as mentioned in the method above, only the values get pasted. To establish a connection between the values in the destination file and the source file, you should opt for pasting the values as links. In this way, when you make any change in the source file, it gets reflected in the destination file as well.
Follow the steps below to paste the value as a link –
STEP 1: Open the destination workbook and add a new worksheet named “Jul”.
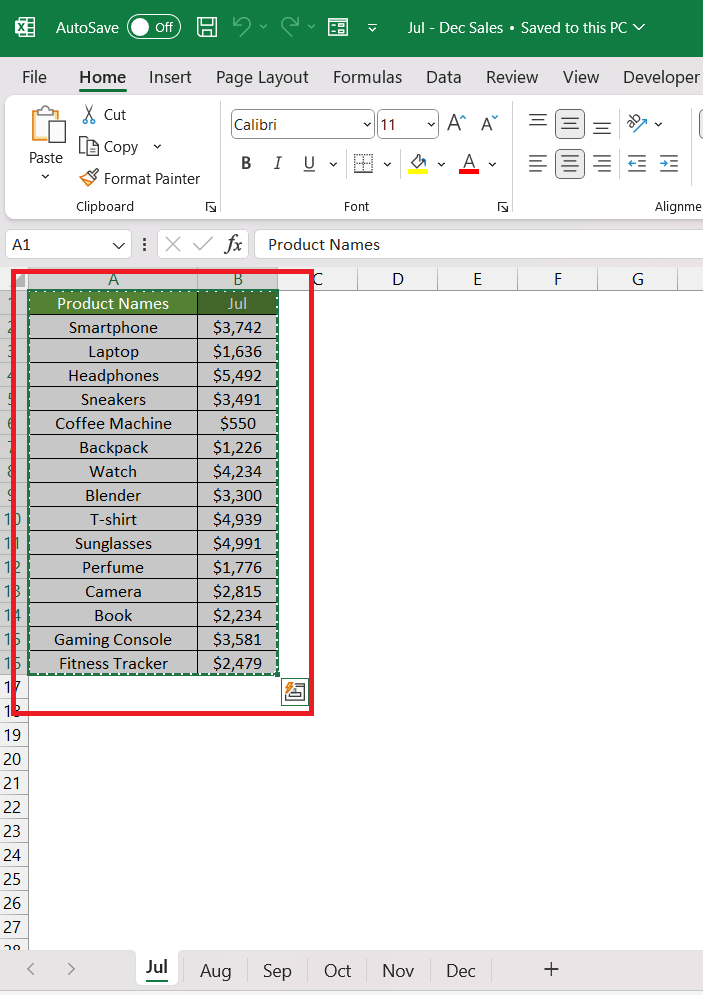
STEP 2: Open the source workbook and press Ctrl + A to select all cells and then press Ctrl + C to copy.
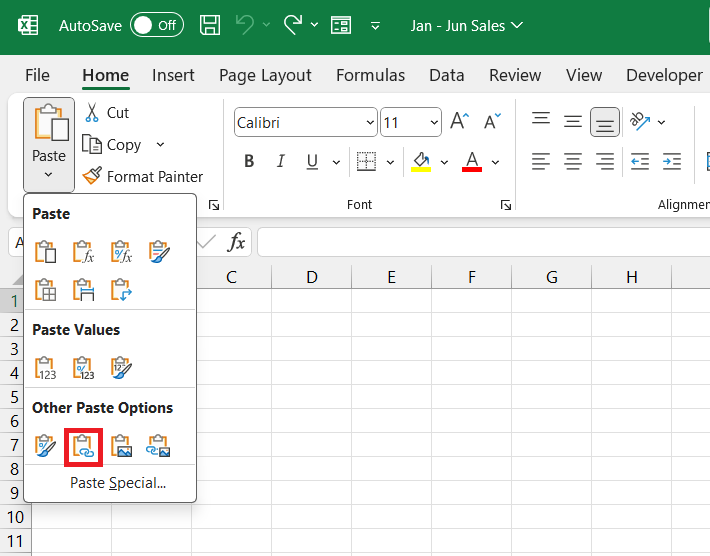
STEP 3: Go back to the destination workbook and go to Home > Paste > Paste Links.
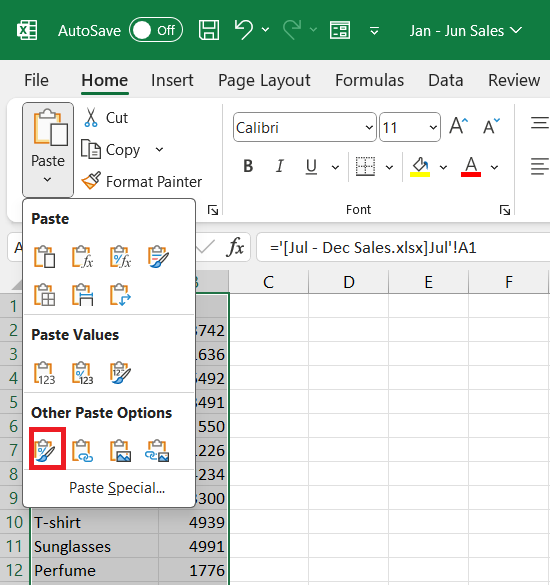
STEP 4: You can also select Paste Formatting to match the formatting in both files.
This method tells Excel to paste a link to the source data rather than just the values. Any changes made to the source data in the source workbook will automatically update in the destination workbook as well.
You can see that Excel has pasted the link to the source workbook rather than pasting the values.
Method 3 – Power Query
Microsoft Power Query is a powerful tool that allows you to transform, consolidate, and merge data from various sources. Suppose you have 3 month’s data in 3 different workbooks and you want to combine them into a single workbook.
This can be achieved by using Power Query in Excel. Follow the steps below to understand how to merge Excel files using Power Query –
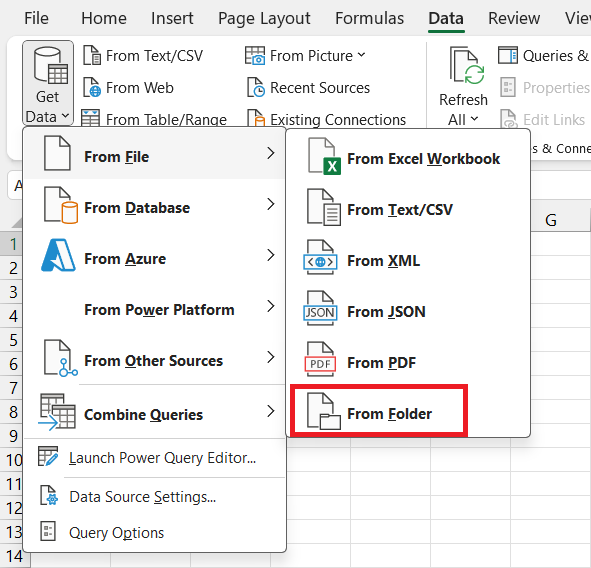
STEP 1: Open a new workbook and go to Data > Get Data > From File > From Folder.
Please Note – For this method to work, you will have to insert all the files inside a single folder and make sure that the worksheet name is the same for all.
STEP 2: Browse and select the folder. Press Open.
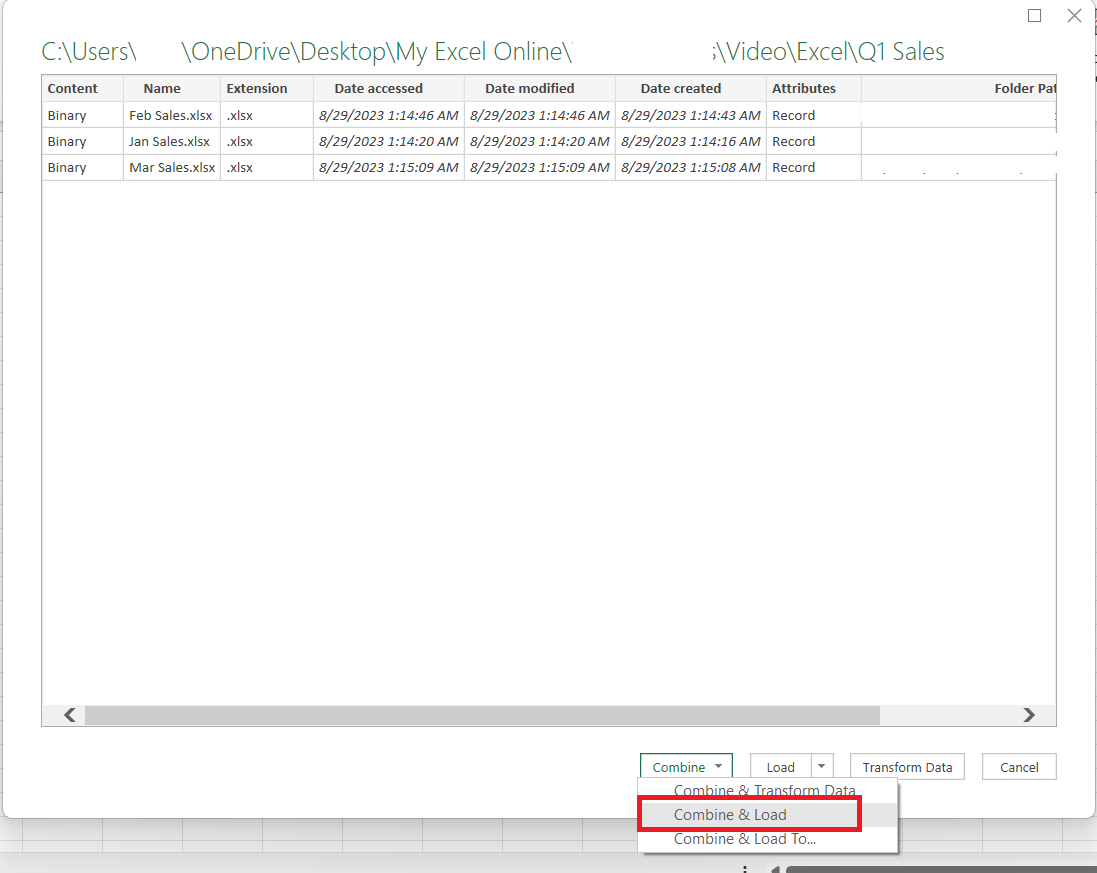
STEP 3: Double-check the names of the workbooks and press Combine & Load.
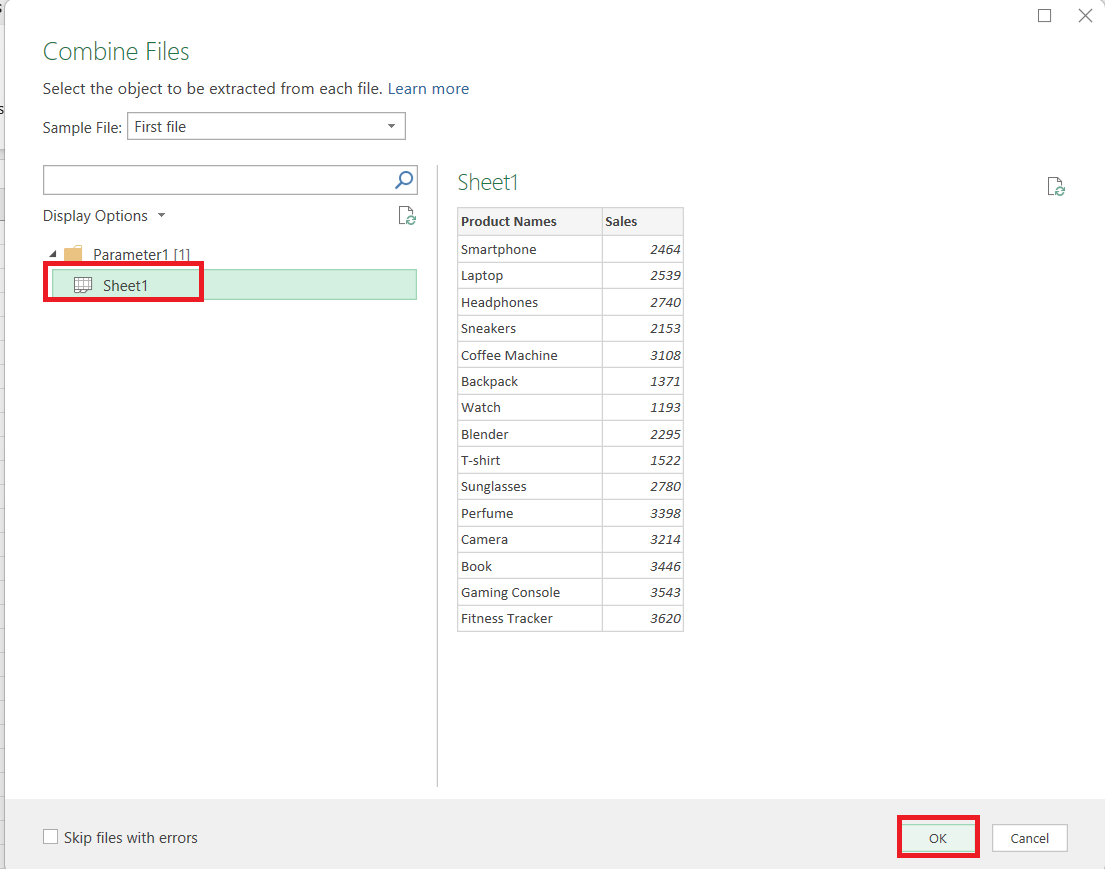
STEP 4: Select Sheet1 in the left panel and press OK.
The data from the three files will be combined into a single workbook with a new column named Source.Name. This will help you distinguish which data belongs to which workbook.
STEP 5: Go to Table Design > Summarize with PivotTable.
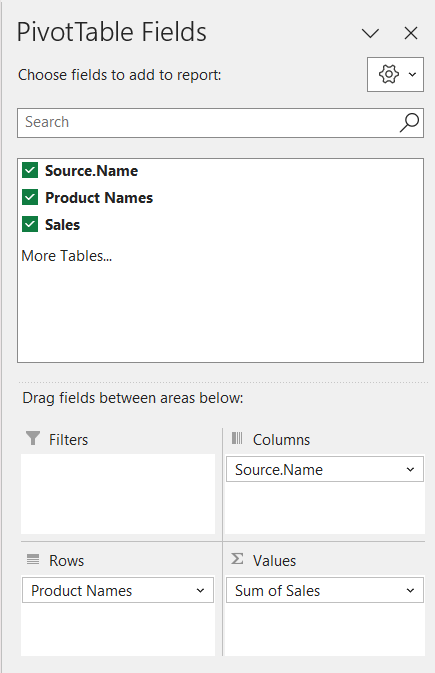
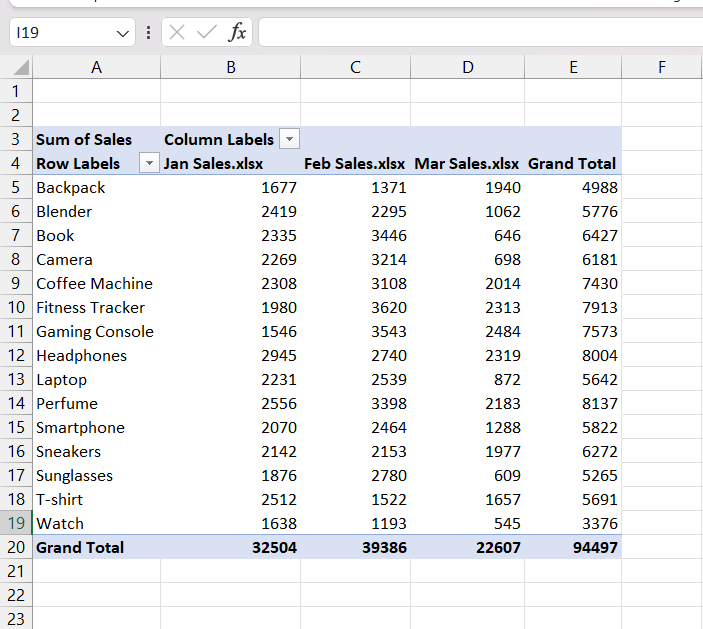
STEP 6: In the PivotTable Fields dialog box, drag and down –
- Source.Name under Columns
- Product Names under Rows
- Sales under Values
The summarized Pivot Table containing the sales data for the three months will be displayed.
Conclusion
The article discusses methods for merging data from multiple Excel workbooks into a single one. The proposed methods are using Excel’s Move or Copy feature to consolidate worksheets, pasting values as links for automatic updates, and utilizing Microsoft Power Query to combine and analyze data from various sources.
Each method has its benefits and applications, allowing you to select the method that best suits your specific needs.
Further Learning:
- 6 Simple Ways to Merge Cells in Excel
- Unmerge All Cells Using Macros In Excel
- Merge Columns Using Power Query
Click here to learn more about how to combine data from multiple worksheets.
John Michaloudis is a former accountant and finance analyst at General Electric, a Microsoft MVP since 2020, an Amazon #1 bestselling author of 4 Microsoft Excel books and teacher of Microsoft Excel & Office over at his flagship MyExcelOnline Academy Online Course.

