Microsoft Outlook is a communication management system that allows you to stay organized with personal email service, calendar, contacts, and much more. It is part of Microsoft Office and helps you to be productive and connected –at home, on the go, and everywhere in between.
Key Takeaways
- Email Management Made Easy: Microsoft Outlook provides tools to compose, organize, and manage emails efficiently. Features like folders, filters, and categories help streamline email workflows for better organization.
- Calendar Integration: Outlook’s built-in calendar enables users to schedule meetings, set reminders, and manage appointments seamlessly, all while syncing with email notifications.
- Contacts and People Management: The platform allows users to store, organize, and access contact information easily, making it simple to communicate with colleagues, clients, and teams.
- Task Tracking and To-Do Lists: Outlook includes a task management feature that helps users prioritize and keep track of tasks and deadlines, enhancing productivity.
- Customizable Interface: Beginners can personalize Outlook to suit their needs by customizing views, using Quick Steps for automation, and leveraging add-ins for added functionality.
Table of Contents
Introduction to Microsoft Outlook
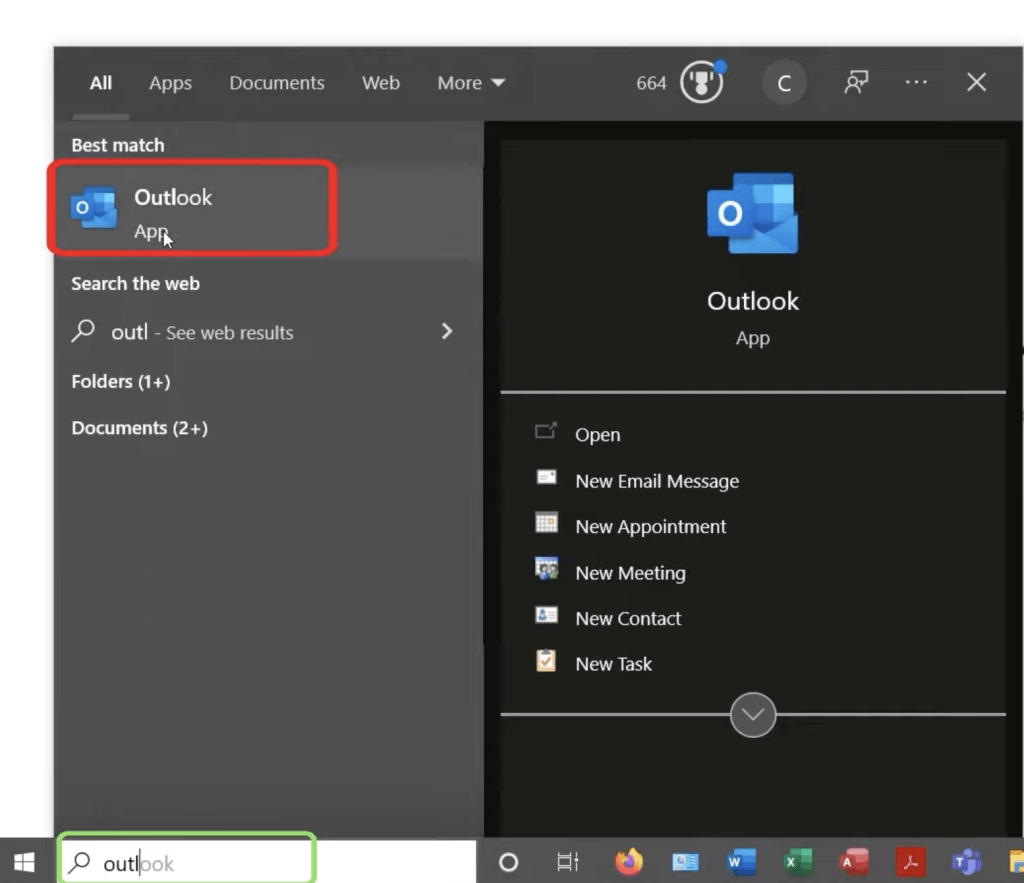
Outlook is an aggregator for your email accounts, calendars, and contacts. It provides you with all of these services in one convenient spot. If you have Microsoft Office installed on your computer, you can easily launch Microsoft Outlook –
- Click on the search bar on the taskbar
- Type in Outlook
- Click on the Outlook app
There are three major components of Outlook: Inbox, Calendar, and Contacts. Let’s look at each of these components thoroughly.
Using Microsoft Outlook Email Folders
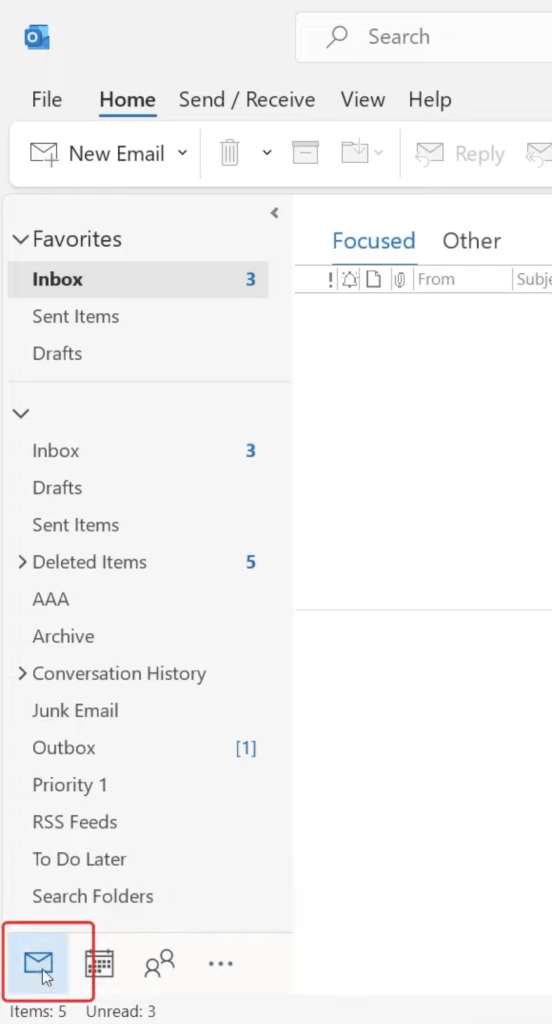
First, let’s explore the email section of outlook. Click on the envelope icon on the bottom left corner of the screen.
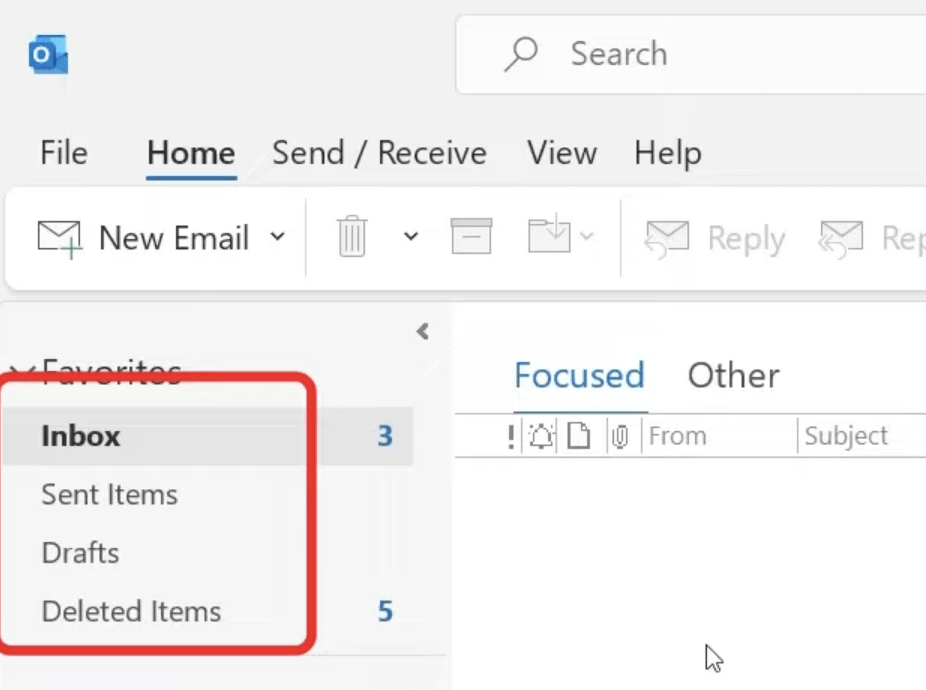
A sidebar will appear on the left-hand side of the screen. It contains different folders in it.
- Inbox – contains all the emails which have been received from other people
- Sent Items – contains all the emails that you have sent to other people
- Drafts – contains all the emails which have been composed by not yet sent
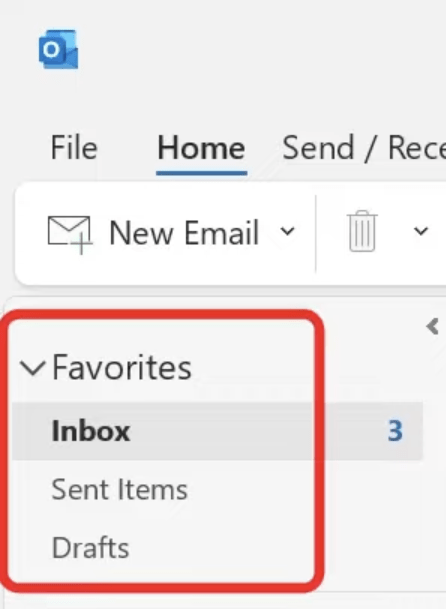
You may have noticed that these 3 folders are present under the Favourite section. If you have any other important folders that you may want under this section, you can add them too.
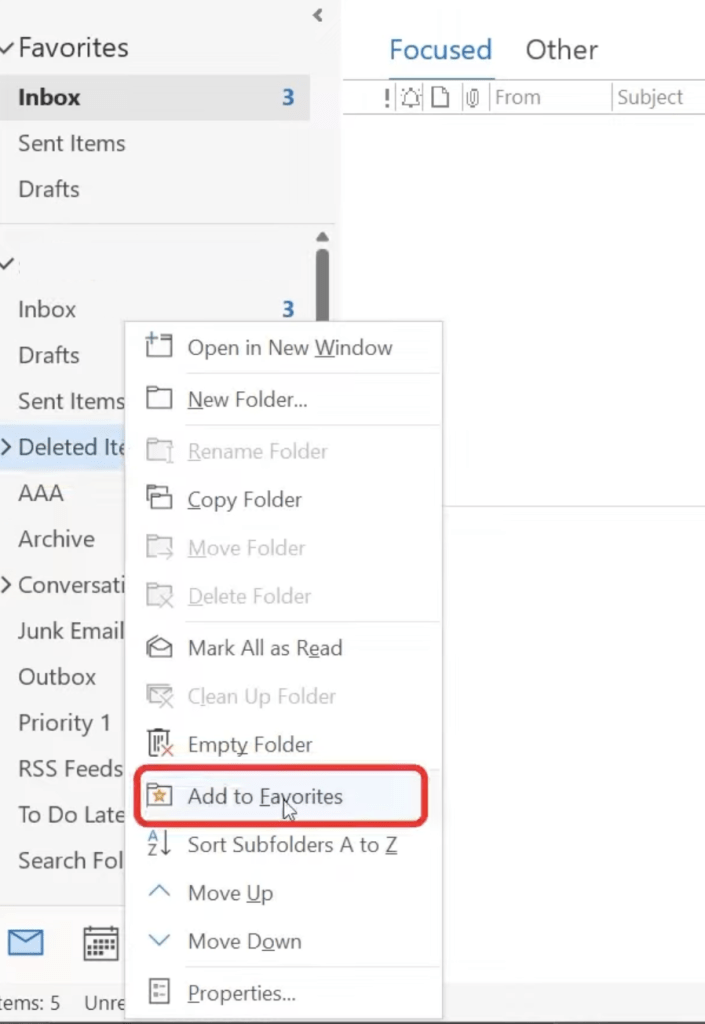
Let’s say, you want the Deleted Items folder in the Favorite section. Right-click on the folder and go to Add to Favourites.
This will pin Deleted Items folder in the Favourite section.
Linking Email Accounts to Microsoft Outlook
If you have an email account, you can easily link it to your Microsoft Outlook account. To do so, follow the steps –
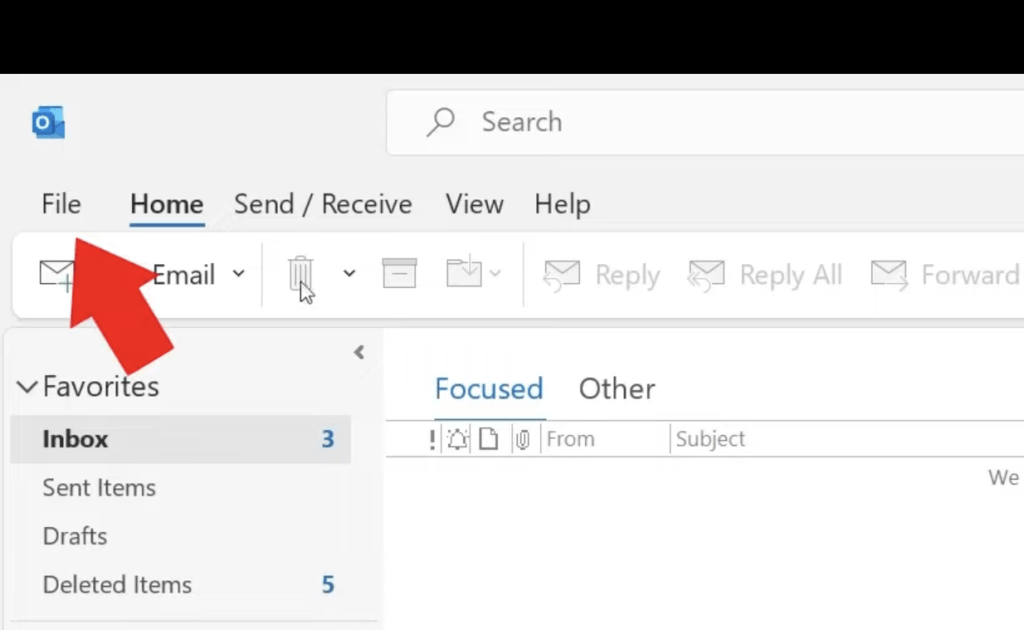
STEP 1: Go to File
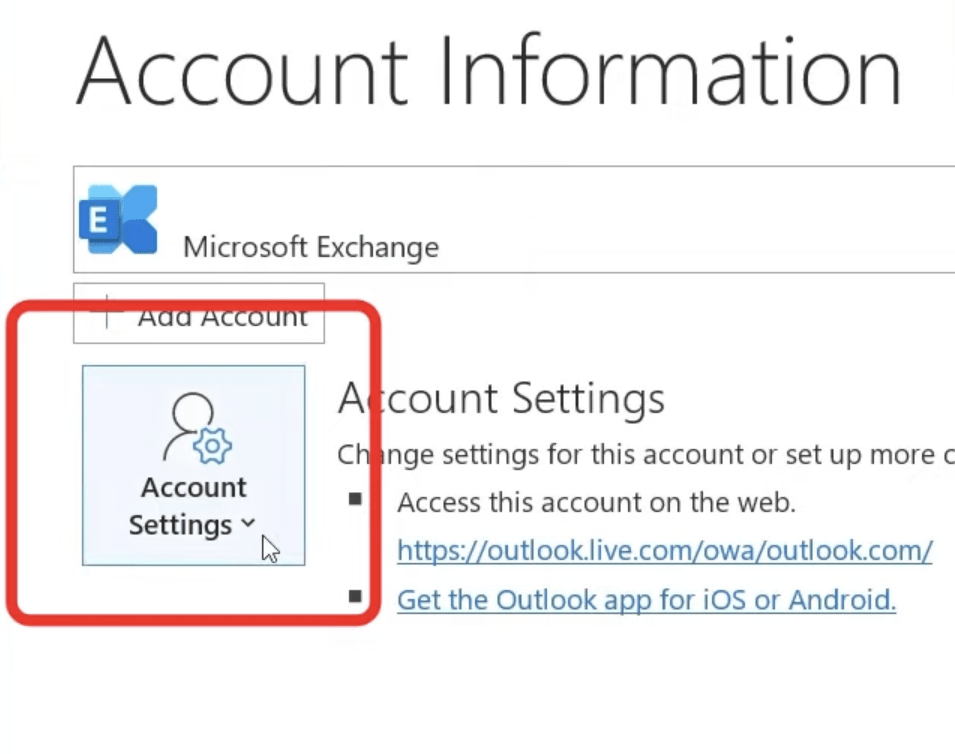
STEP 2: Click on Account Settings
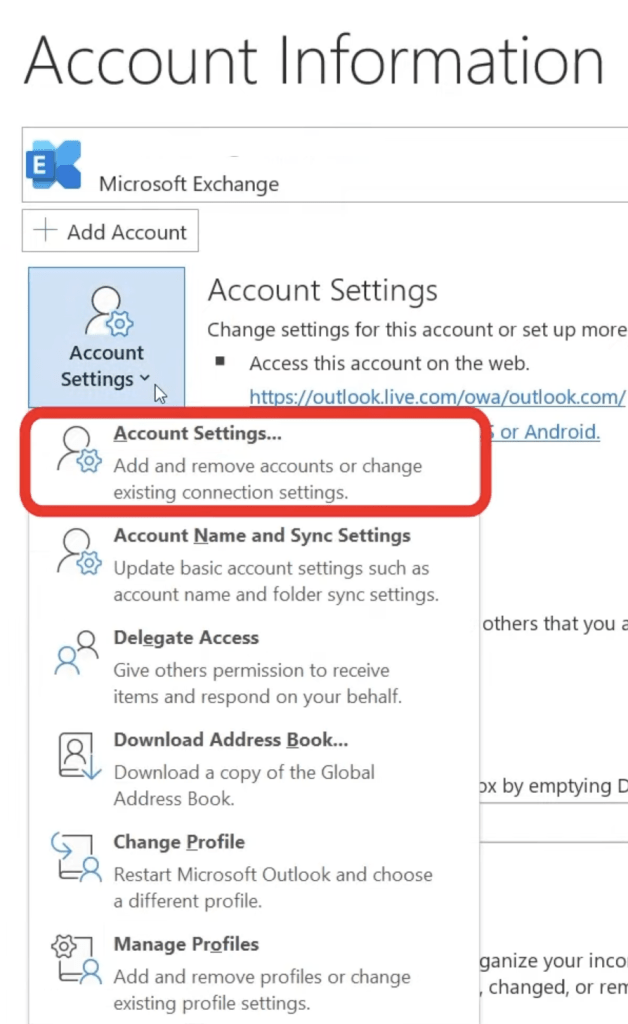
STEP 3: In the dropdown, select Account Settings again
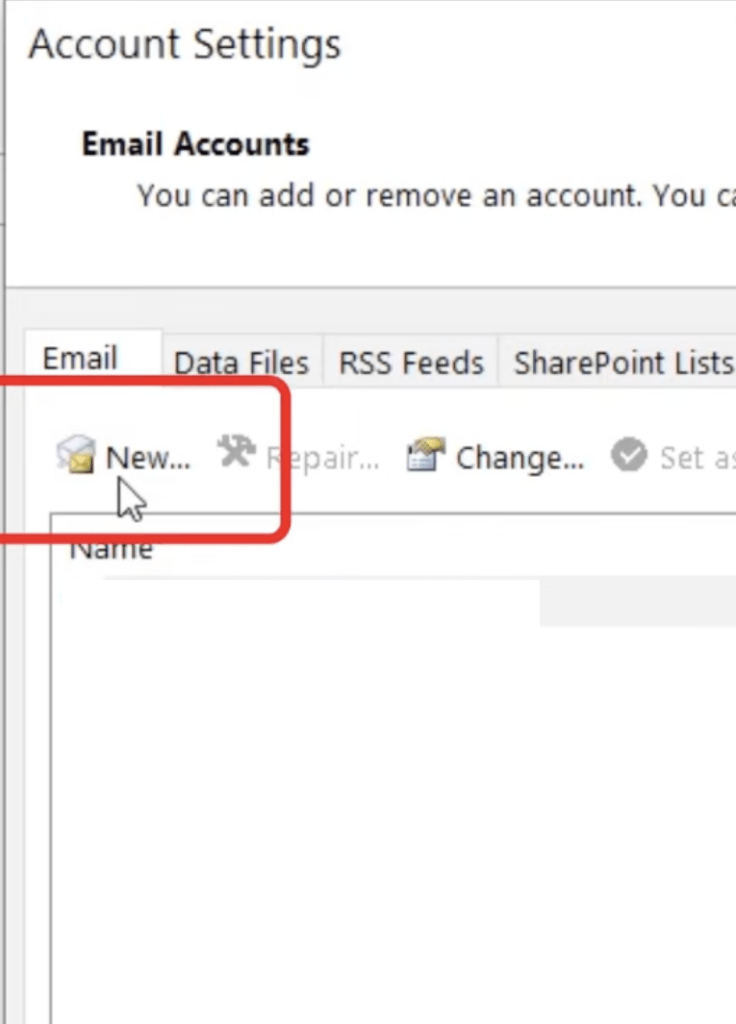
STEP 4: In the dialog box, select New
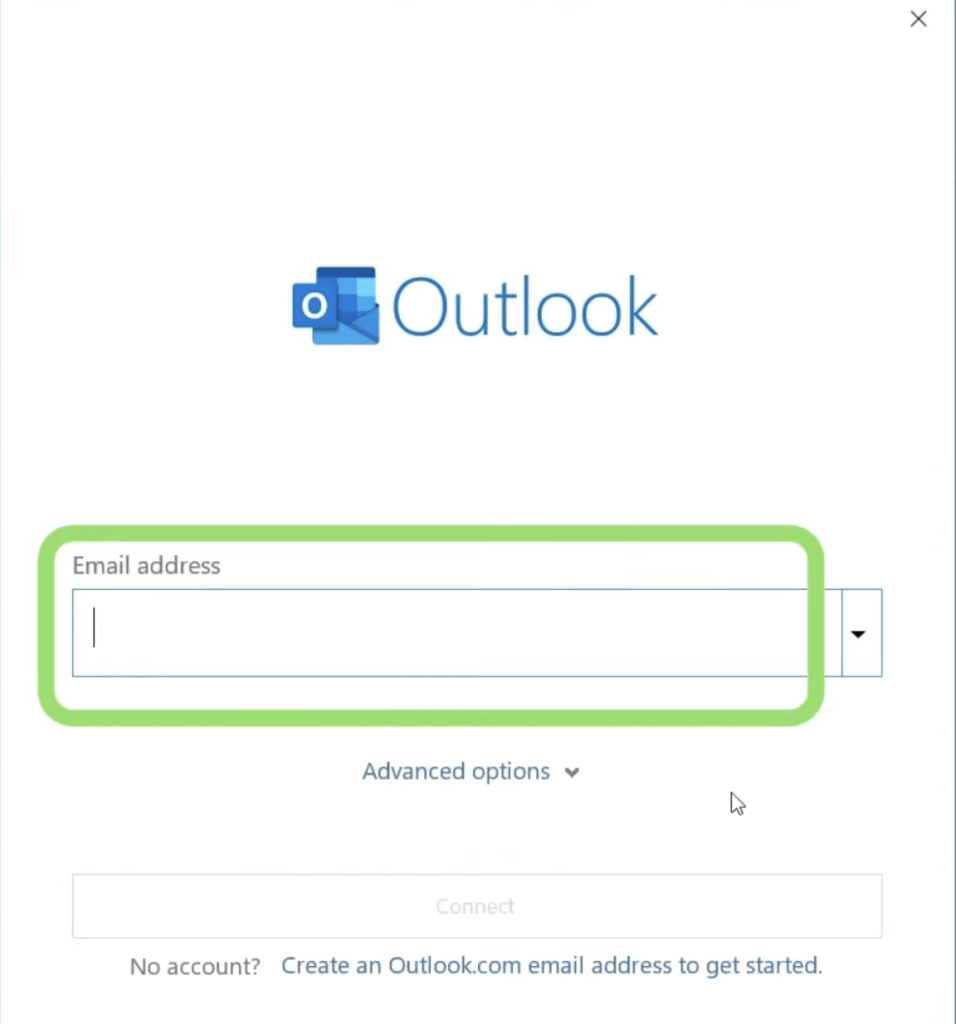
STEP 5: Enter your email address
It can also be your Gmail account, Yahoo account, iCloud account, or any account. Outlook lets you check email from multiple accounts all in one place.
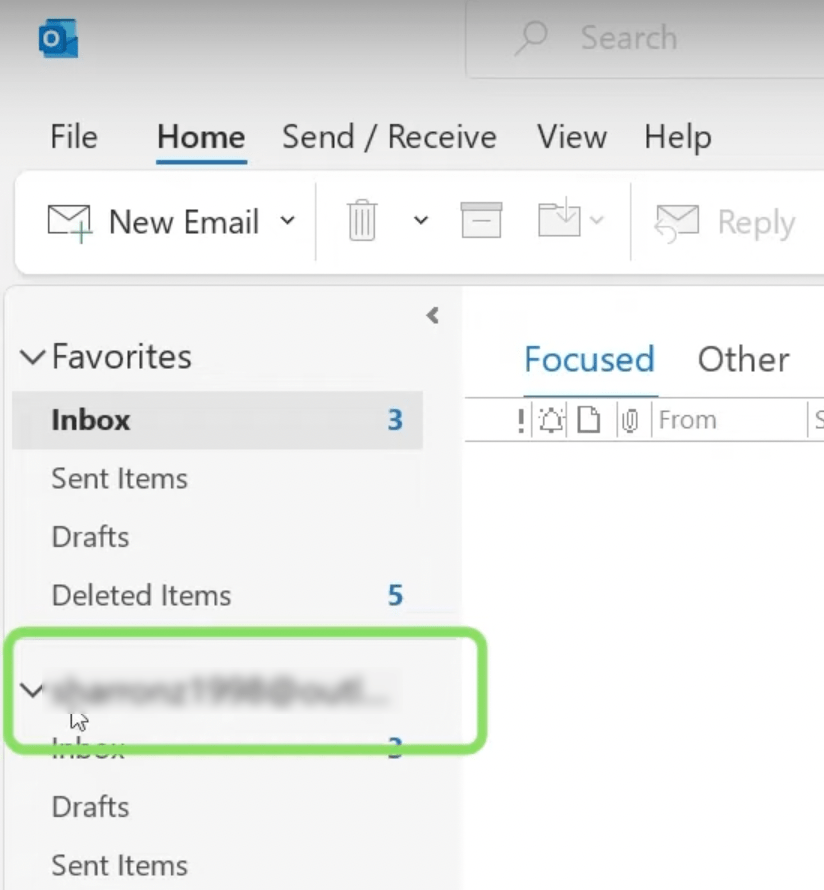
Once you have entered your password, you will be able to see your account name displayed in Outlook.
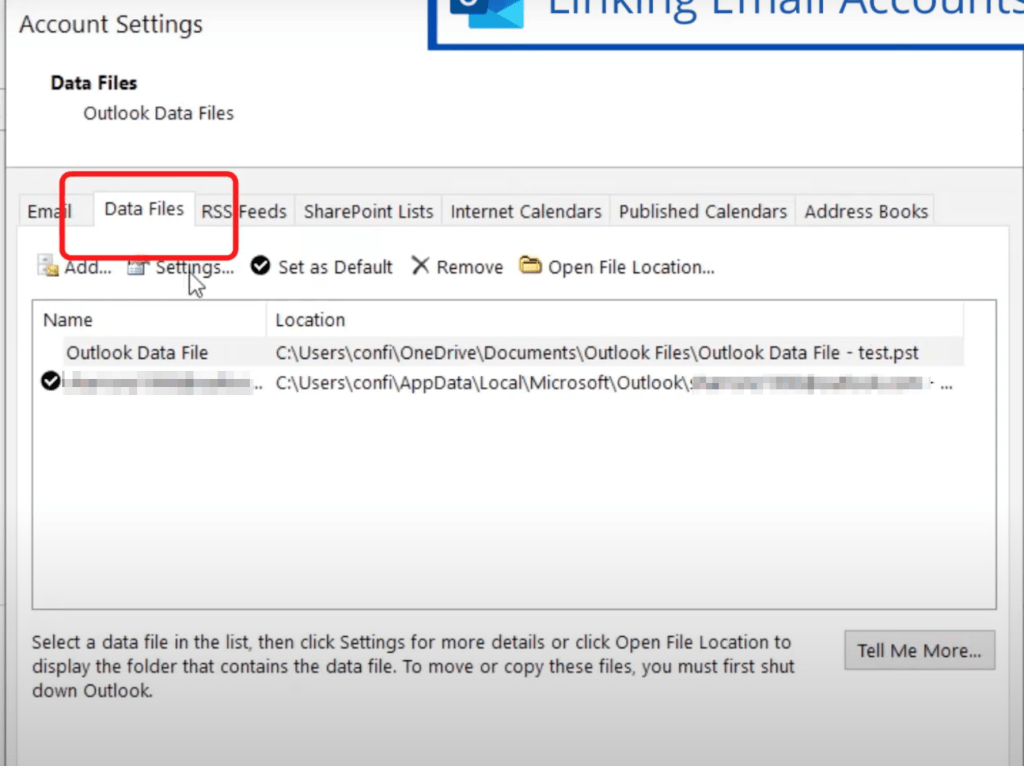
Another thing that you must know regarding Microsoft Outlook is the data files. An Outlook data file contains your messages and other Outlook items saved in OneDrive or on your computer.
Outlook Data Files can be used to:
- Archive old messages and files that aren’t being used regularly.
- Clear your mailbox by exporting items to Outlook Data files.
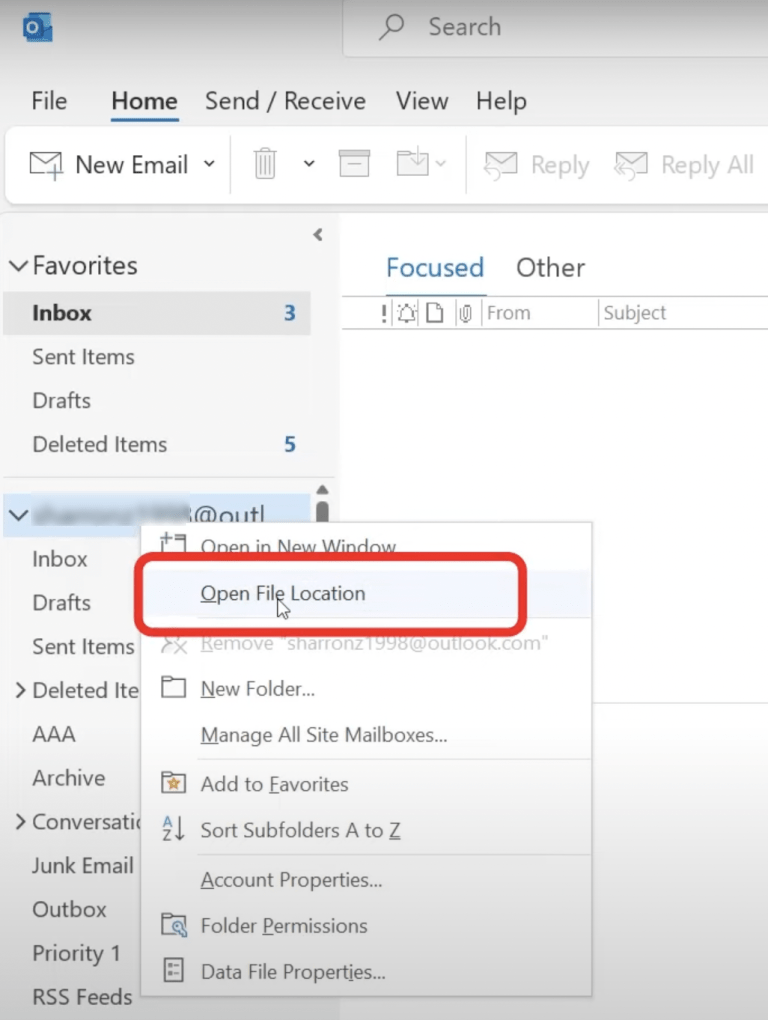
To access the data file, you can right-click on your email address and go to Open File Location.
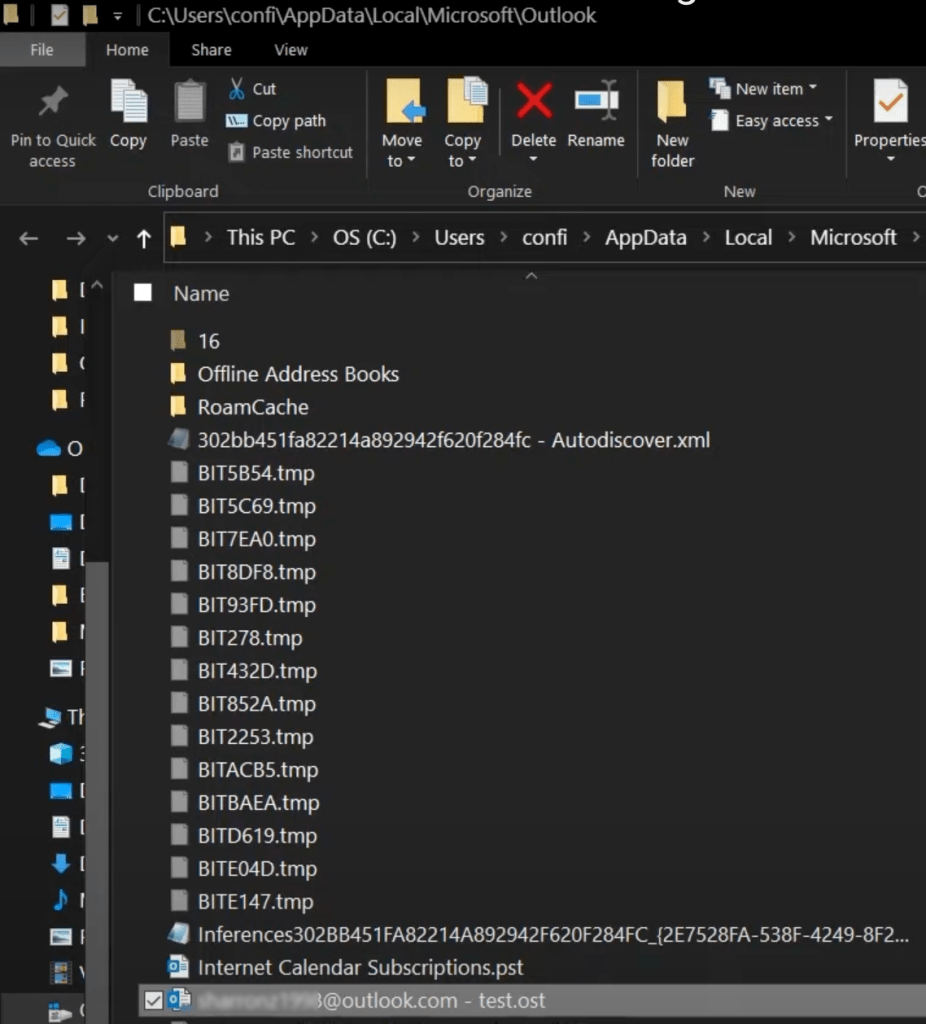
In the file explorer, you can see the .ost file where all of the data in the Outlook account including your emails, contacts, and calendar items is kept.
If you are trying to install Outlook on a new computer, you can upload this .ost file and you will be able to view all of your existing communication and other data.
Composing an Email in Microsoft Outlook
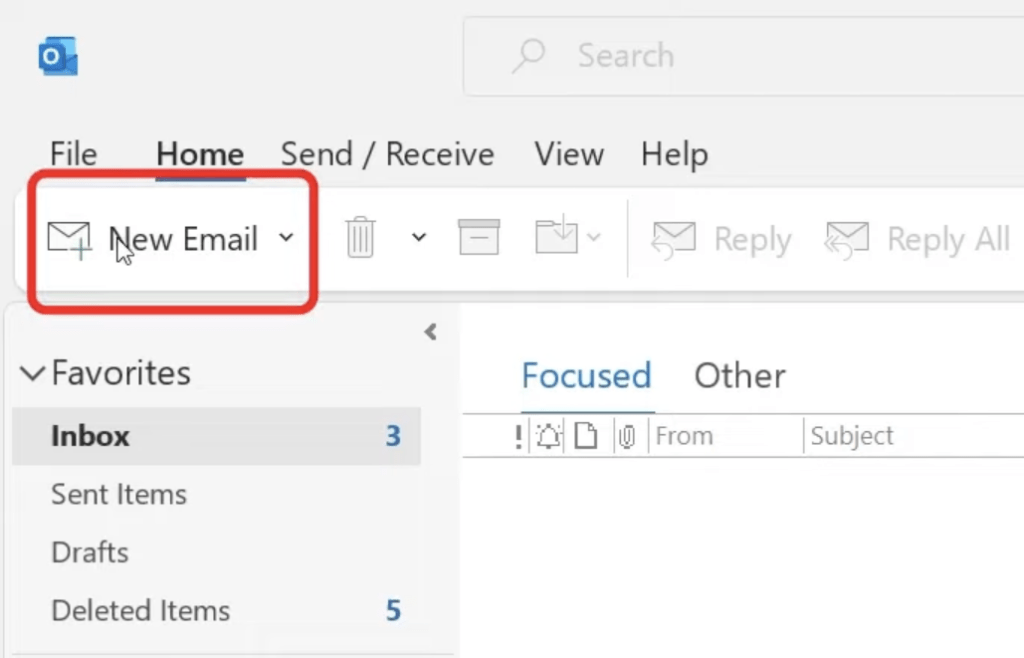
Let’s understand how to compose and send a new email to someone in Outlook. To begin, click on the New Email button on the top left corner of your screen or press Ctrl + N.
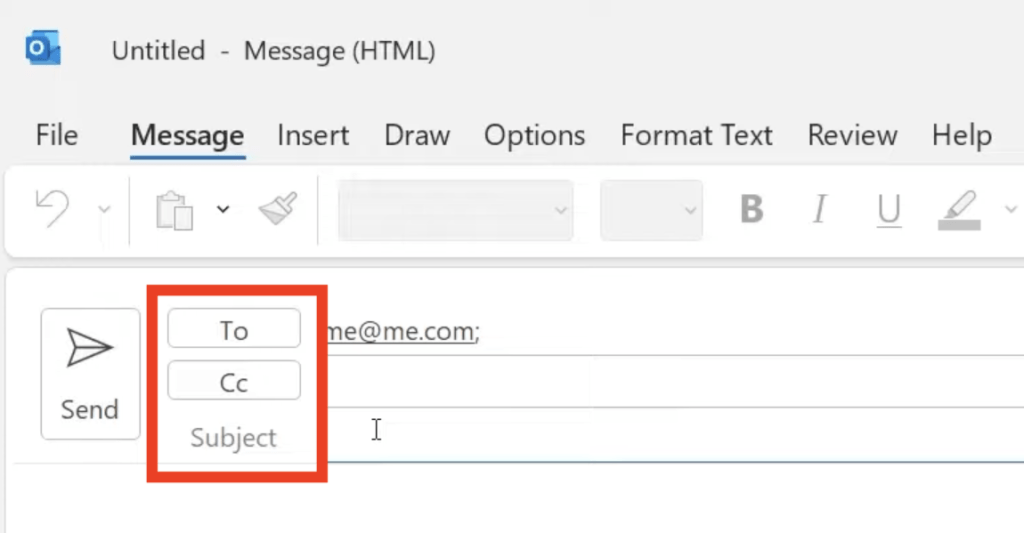
The New Message window will contain the following fields :
- To – Type the email address of the person you’re sending the message to
- Cc – Type the email address of people to whom you want to send a copy of this message
- Subject – Type a brief description of your email
You can also send a blind carbon copy (Bcc) if don’t want the recipients to know who else is receiving the email.
Both Cc and Bcc receive an exact copy of the email. The main difference is that in Cc all recipients are visible to each other while in BCC the original recipient does not know who else is receiving the message.
You can use the BCC option when you want to:
- Secretly send a message to someone else; or
- Send a group message and keep everyone’s mail private
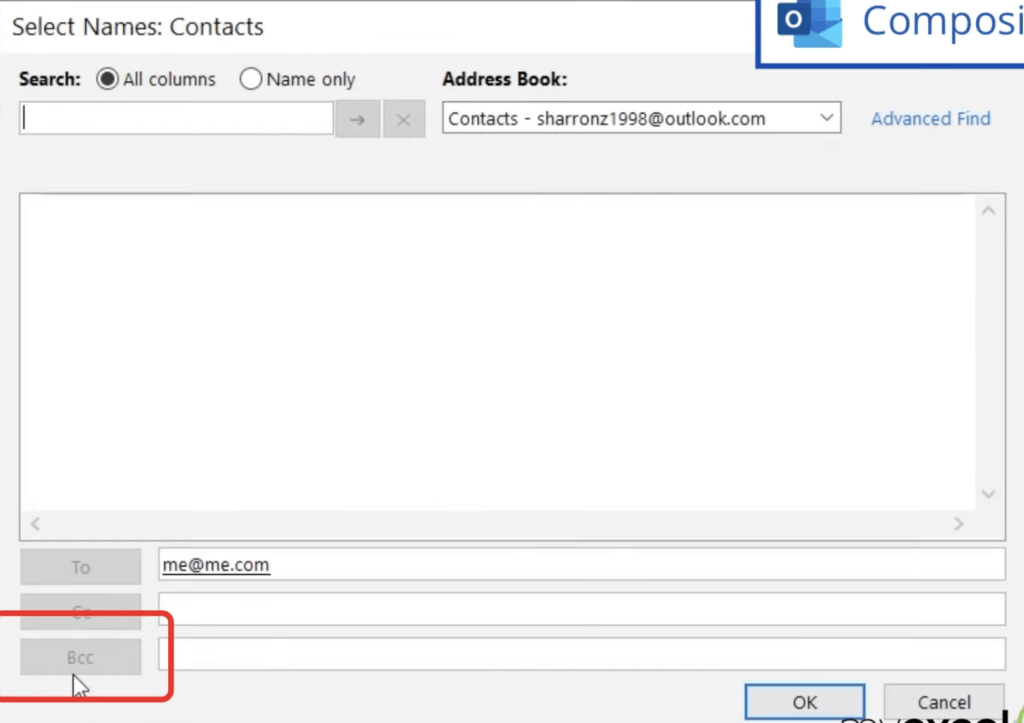
To display the BCC option, click on the CC button. In the dialog box, you will find the BCC option at the bottom left.
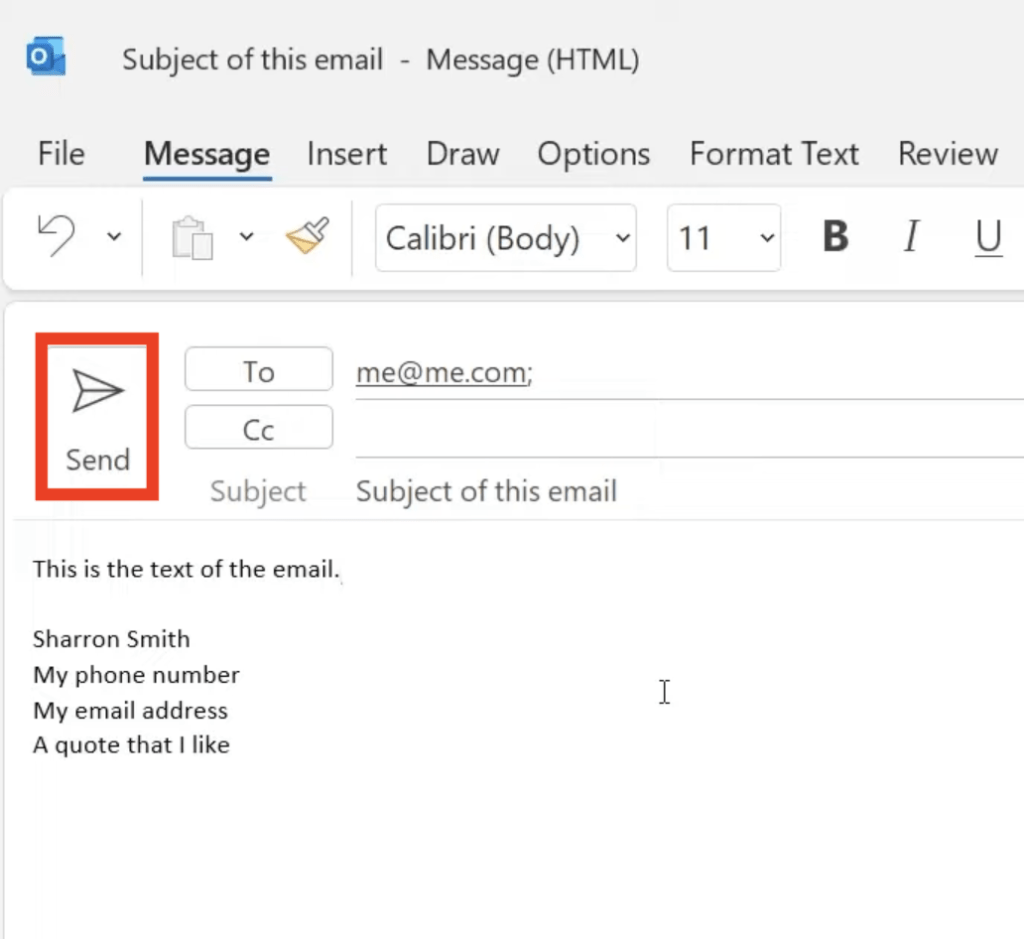
After typing the body of the message, you can simply press the Send button.
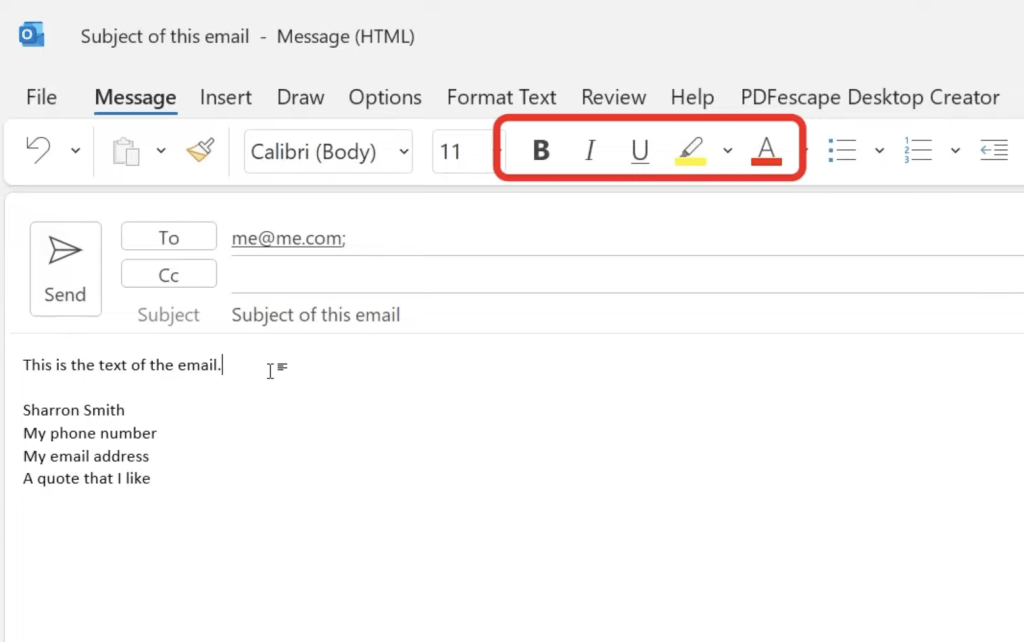
Outlook also provides you with a lot of formatting options that can be used to make your email look really professional.
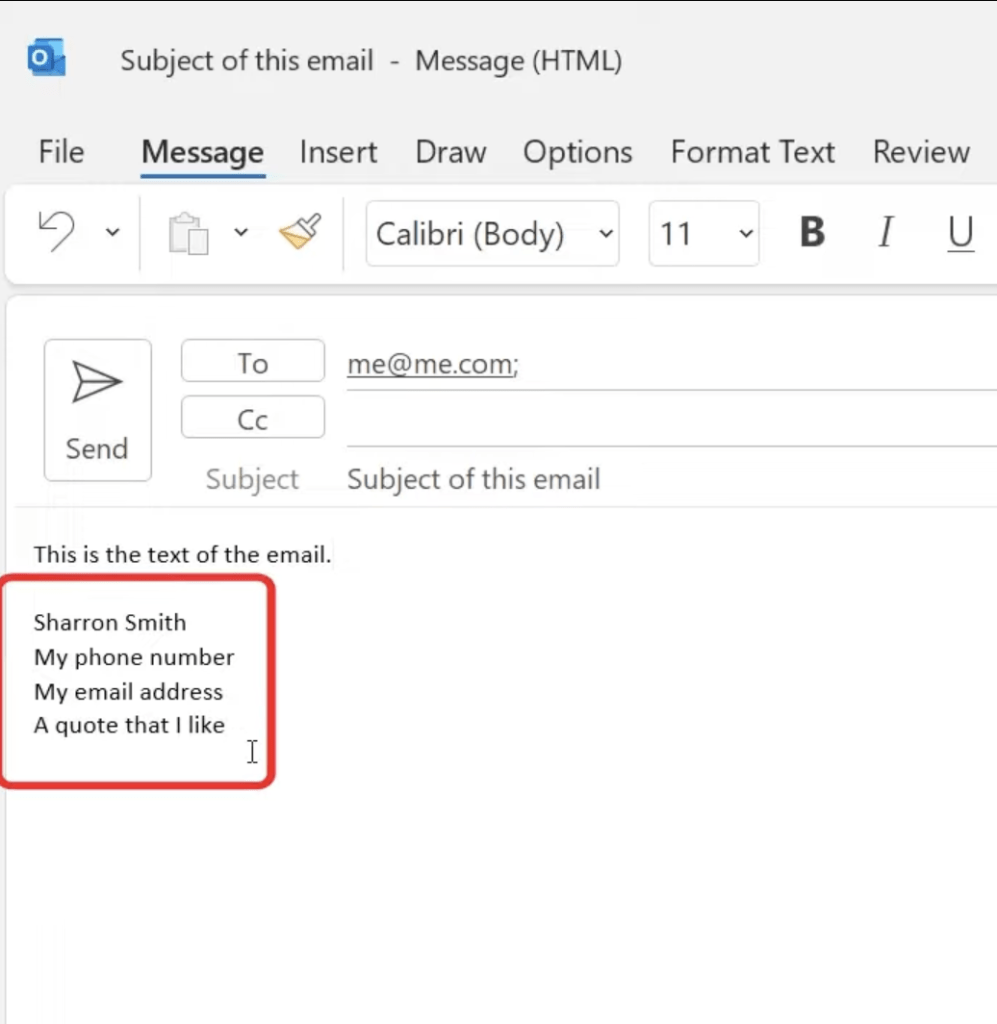
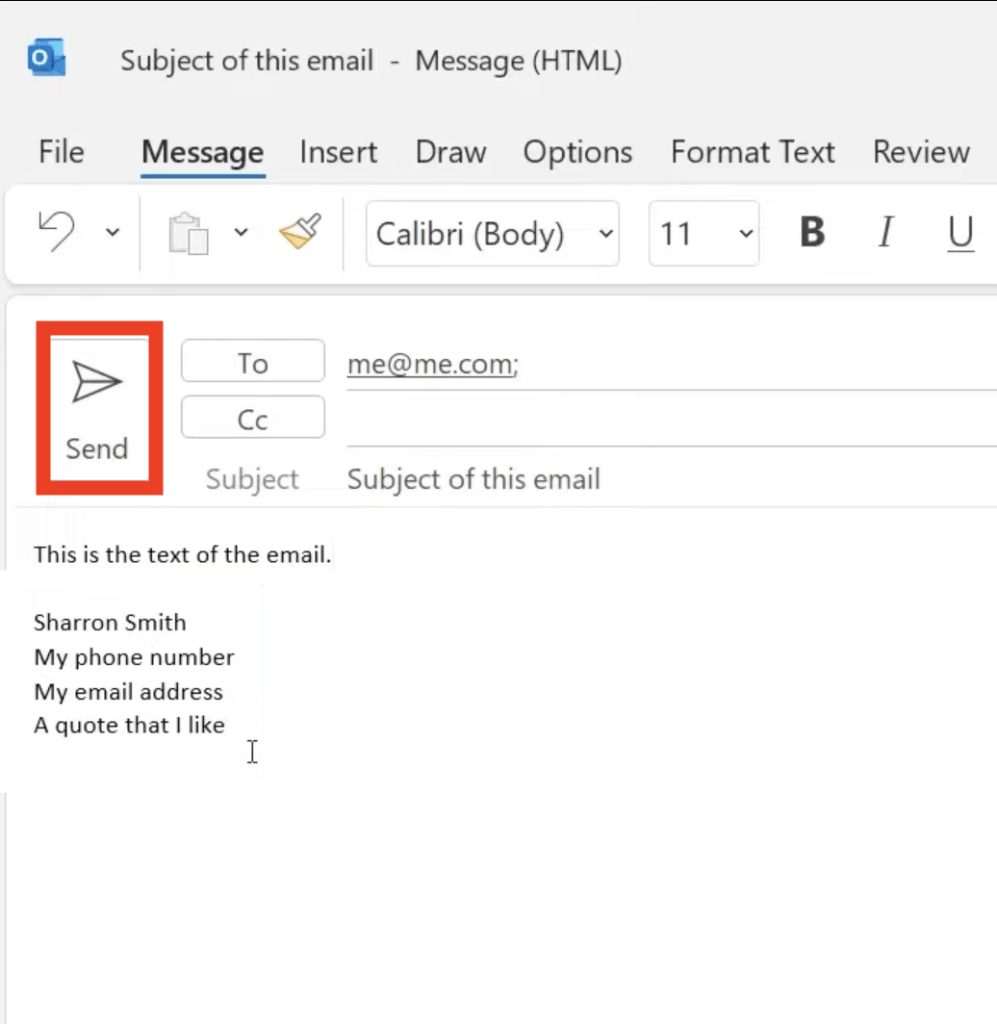
You can also set up personalized signatures on your Outlook account. This signature will automatically to added to all your outgoing messages.
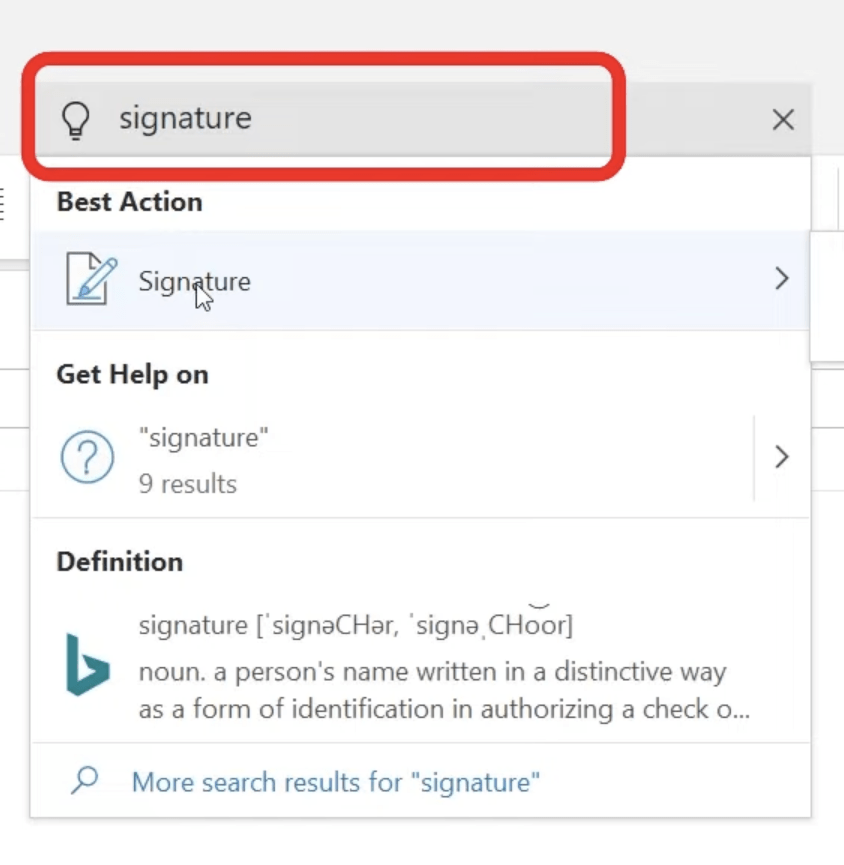
To add a new signature or edit an existing one – Go to the box Tell me what you want to do
Type Signature and then select it from the dropdown
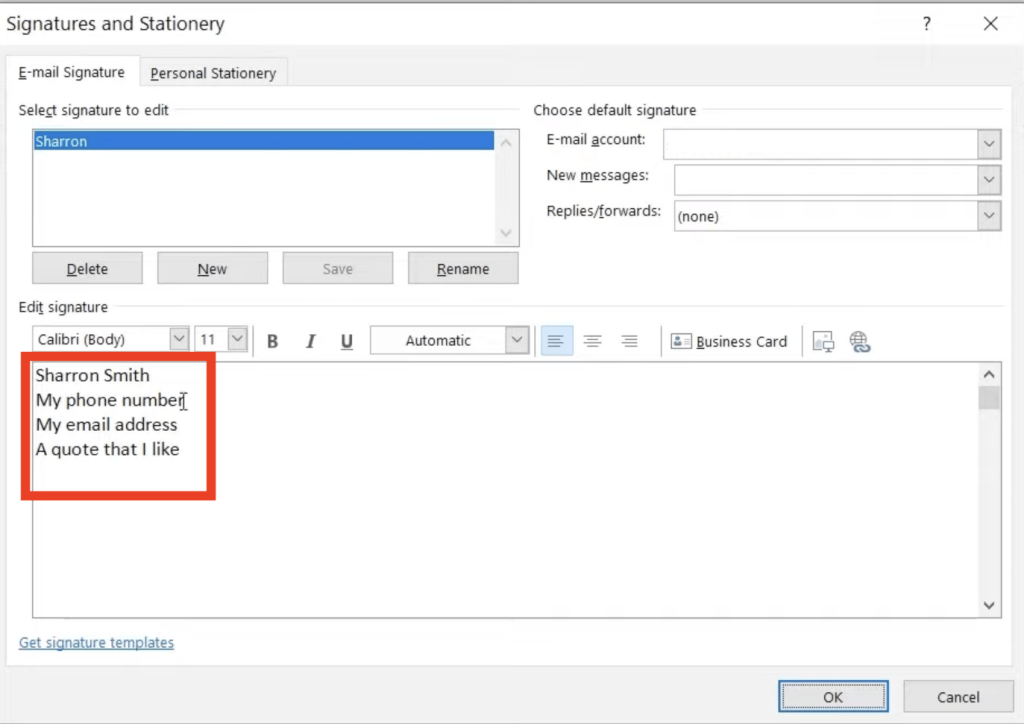
In the dialog box, you can edit or create your signature. You can also change the formatting and make the signature look professional.
Once you are done typing your email, you can simply hit Send to send the email immediately.
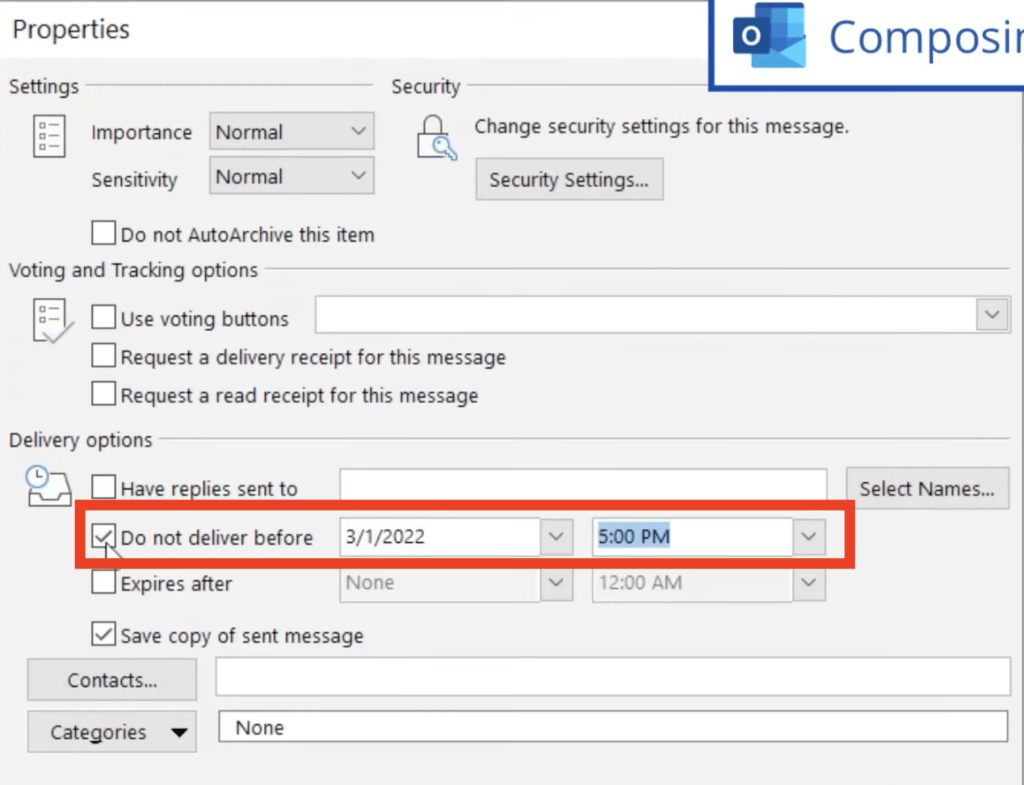
But what if you want to send this email sometime in the future? Outlook provides an option to schedule your email. Let’s see how it can be done.
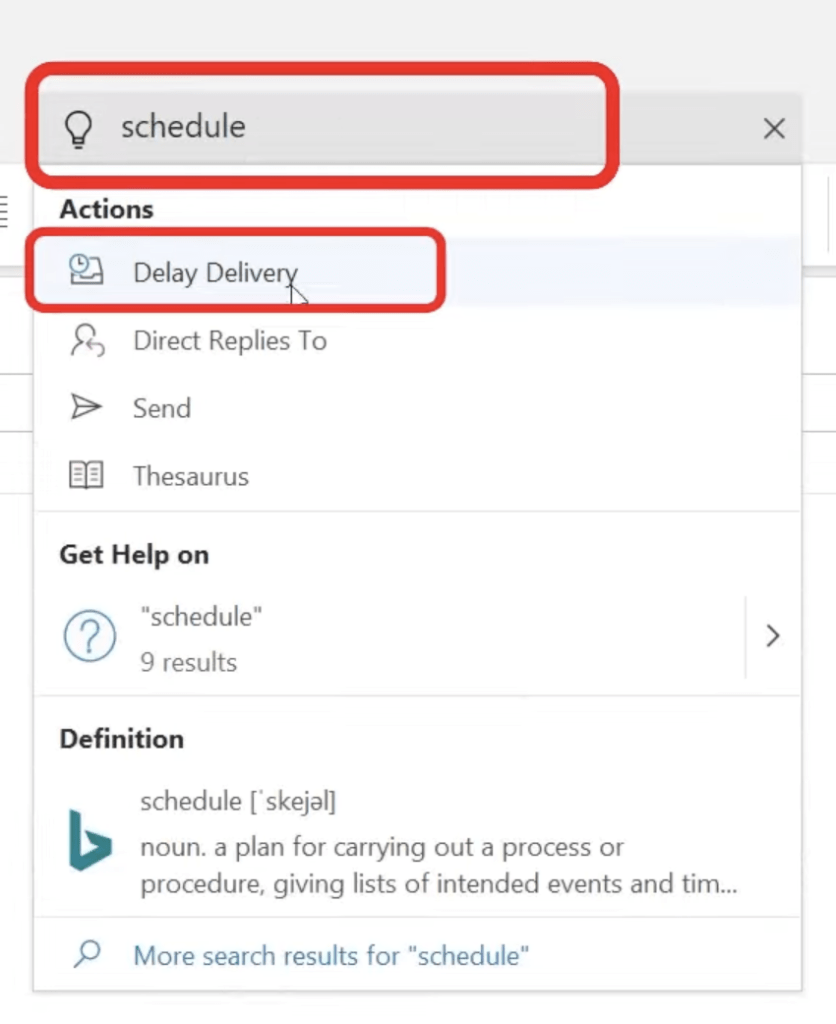
- Go to Tell me what you want to do.
- Type Schedule and select Delay Delivery.
- In the dialog box, check the “Do not deliver before” box and type the desired date and time.
You can use this option to send a reminder for an event a day before that event is scheduled to happen.
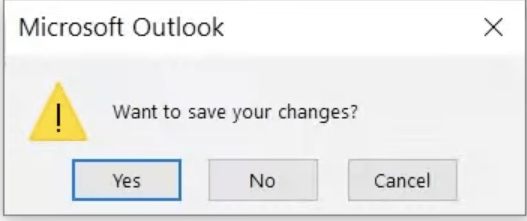
If you do not send the email immediately or schedule it, you can close the email. You will be asked if you want to save the changes.
The email will be saved as Drafts if you select Yes.
You can either send the email or delete it by clicking on the delete icon.
Creating and using Microsoft Outlook folders
A great way to organize your emails in Outlook is to create folders and unclog your inbox. This inbox management technique will help you manage your emails efficiently and help you stay on top of all your tasks.
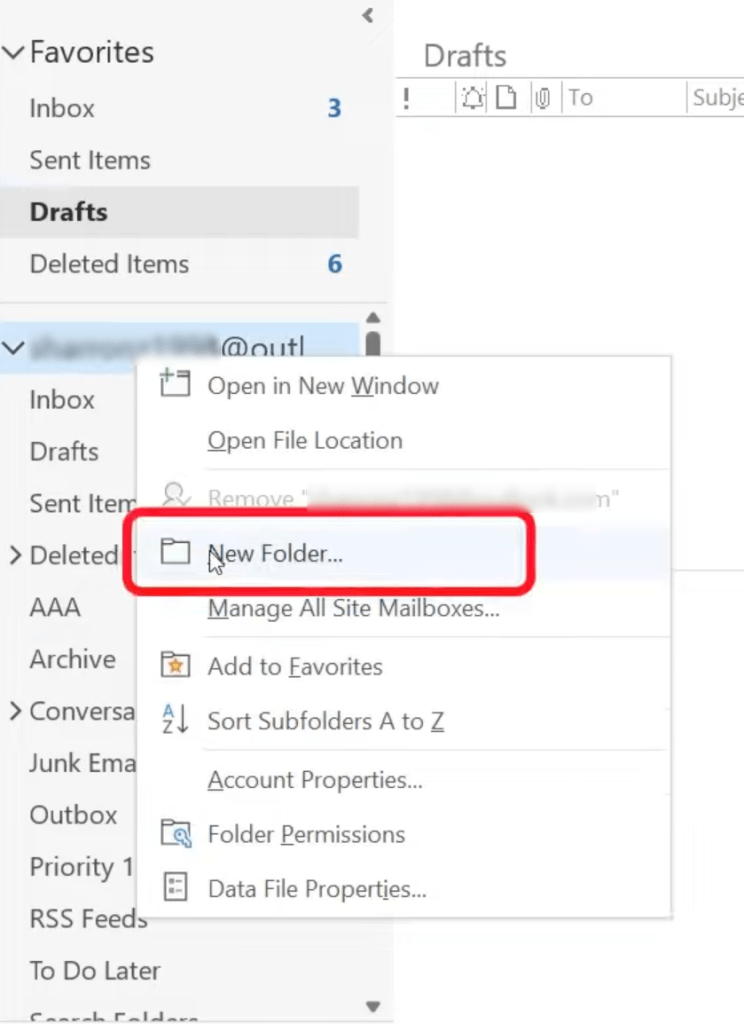
To create a folder in Microsoft Outlook:
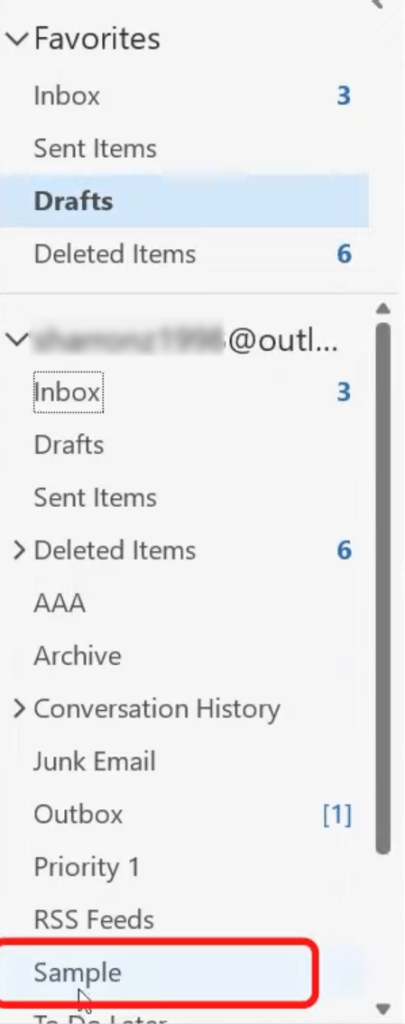
- Right-click and select New Folder.
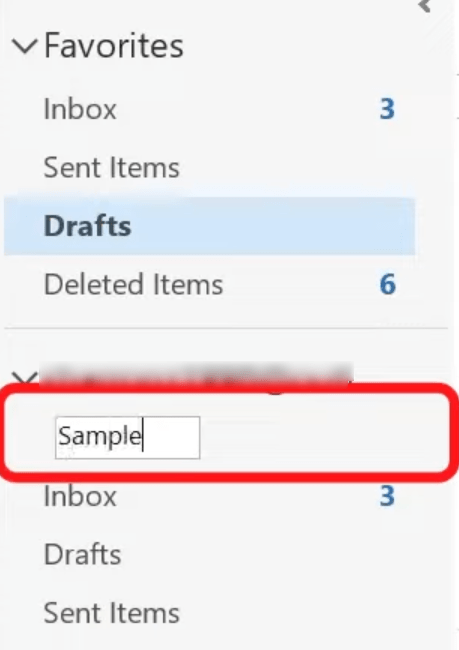
- Name the folder – Sample and hit Enter.
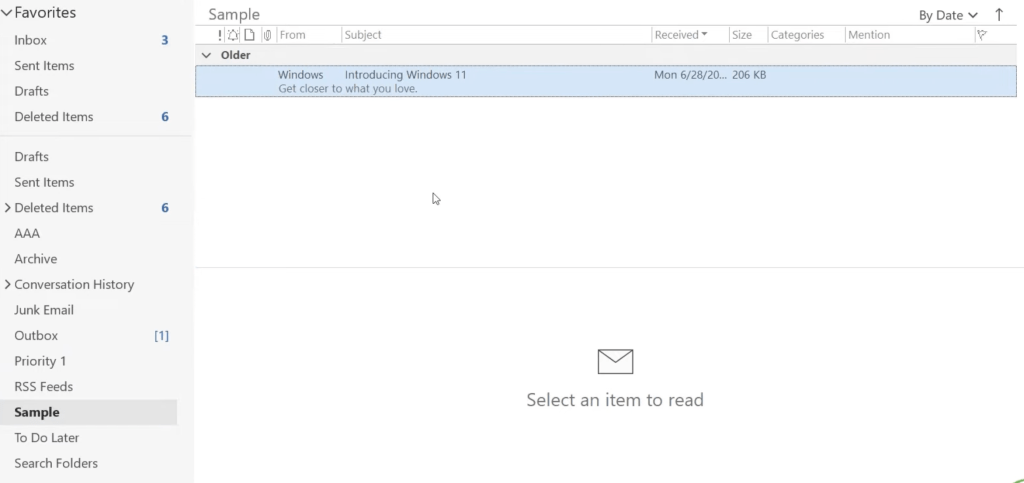
- The Sample folder will now be available on your email list.
- Drag and drop emails into the Sample folder.
In this way, you can create multiple folders and arrange your inbox.
Using Microsoft Outlook Calendar
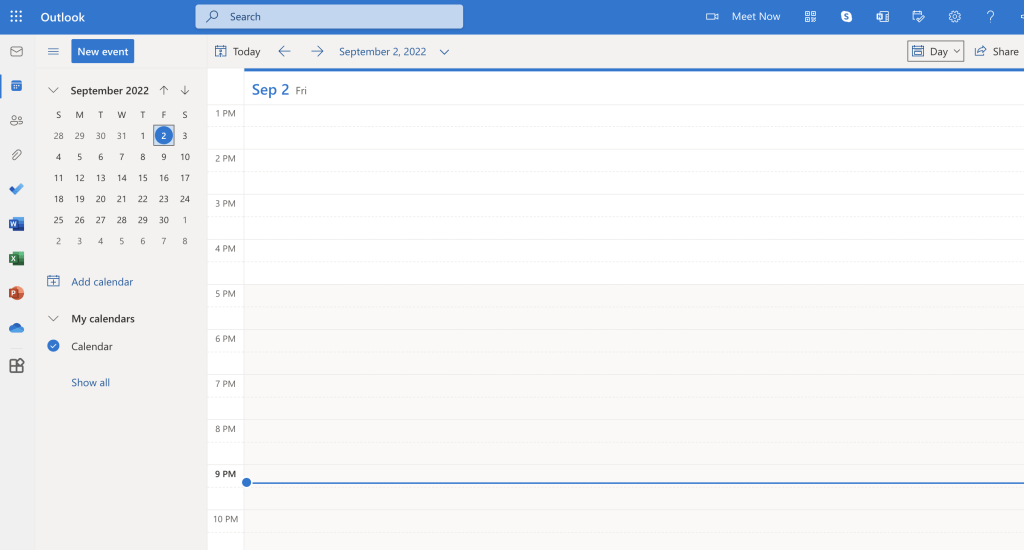
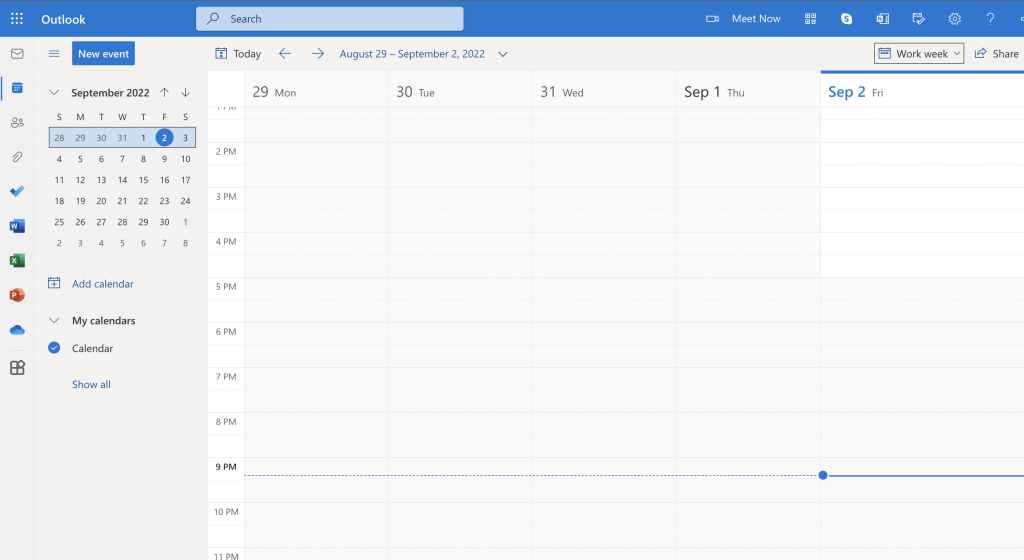
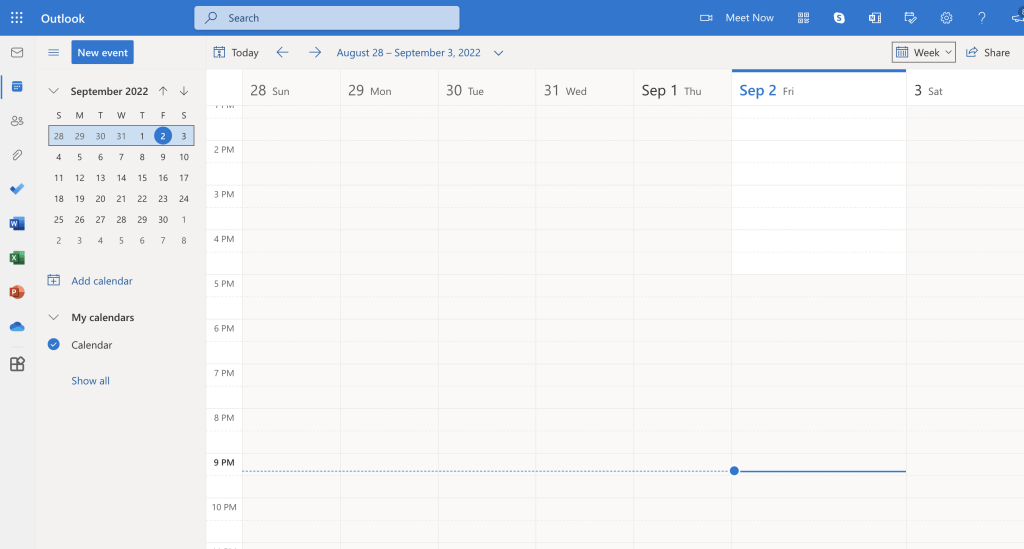
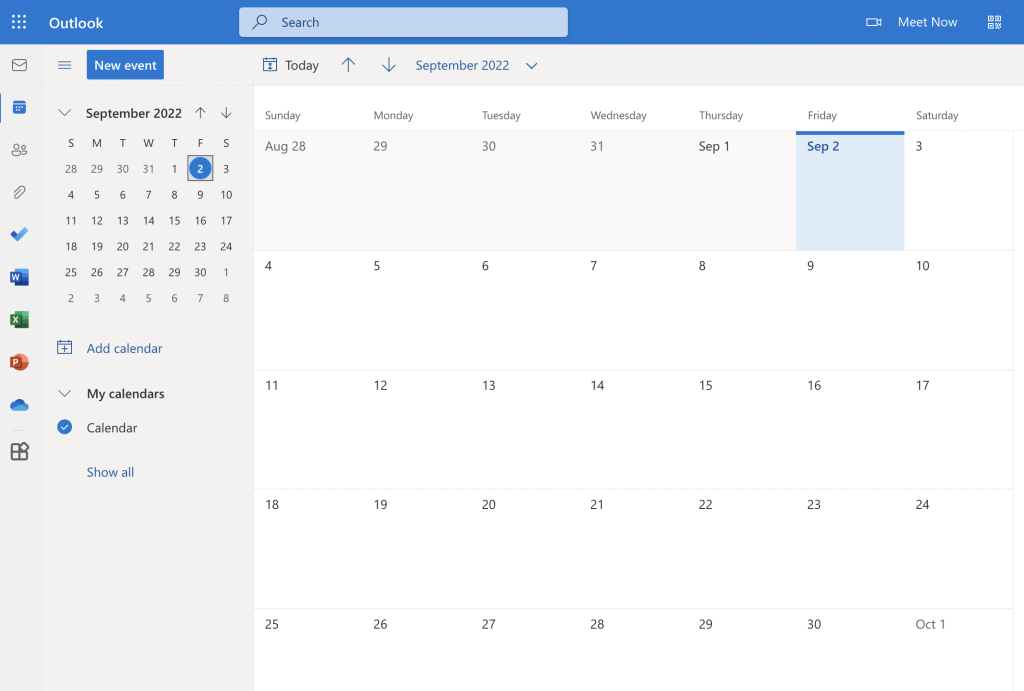
Microsoft Calendar is a great way to schedule events or appointments, create group tasks or organize meetings. Microsoft Outlook provides lots of different views for the calendar –
- Day – View the current day
- Work Week – View 5 days a week; from Monday to Friday
- Week – View 7 days a week; from Sunday to Saturday
- Month – View the current month
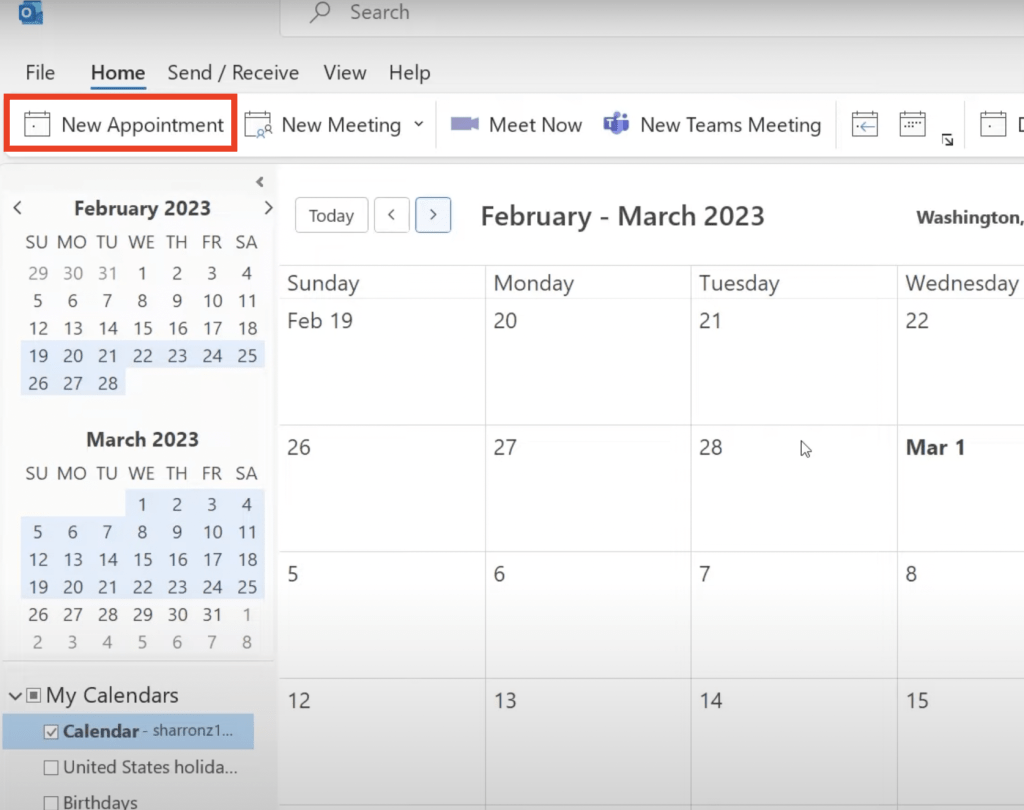
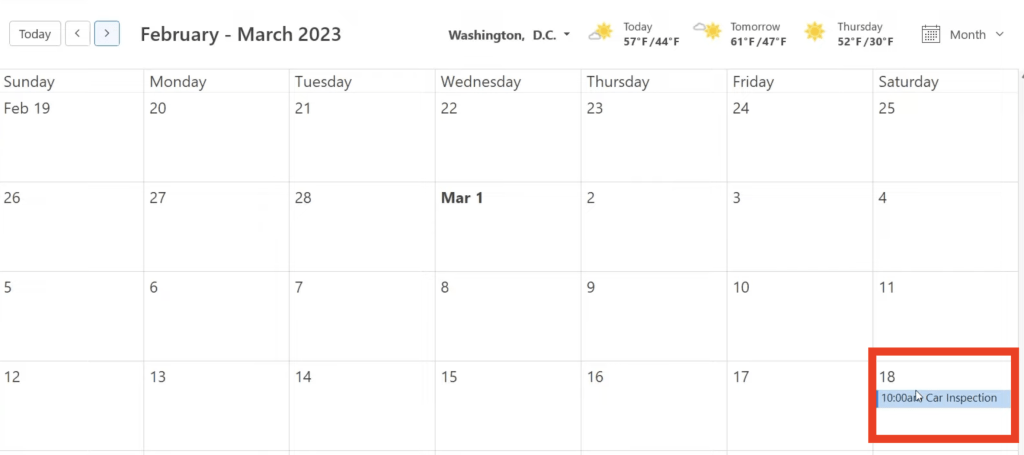
You can use the calendar to add reminders for things you have to do. Let’s say you need to add a reminder for a car inspection before the end of this month.
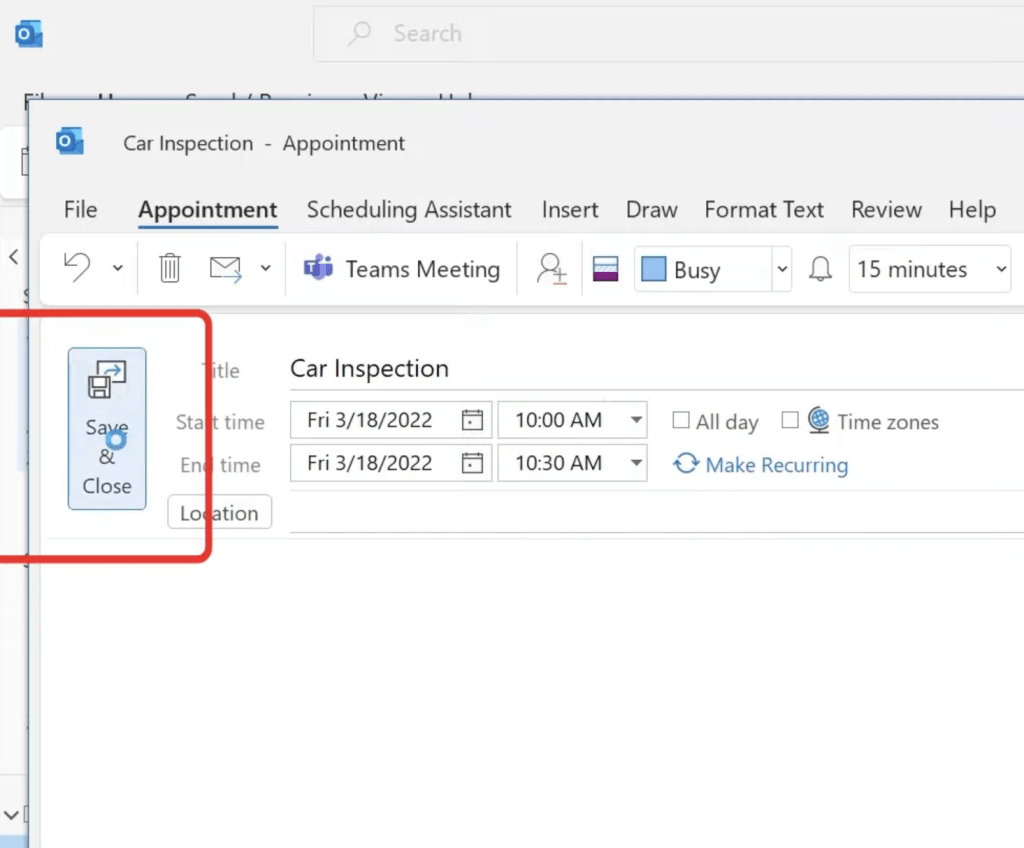
Double click on the date you want to add the reminder and add the following details:
- Type Car Inspection as title
- Uncheck all day and select a particular time
- Hit Save & Close
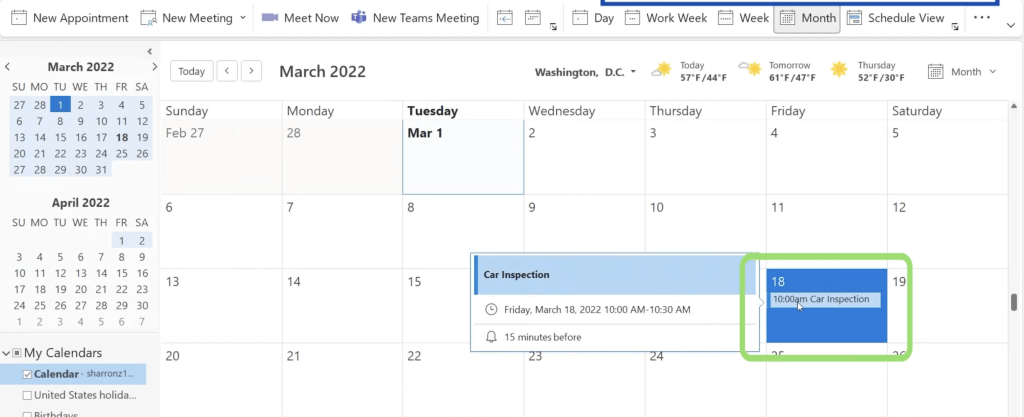
You will see that the event now appears on the calendar.
So, to create a new reminder or appointment you can either click on the date or select New Appointment.
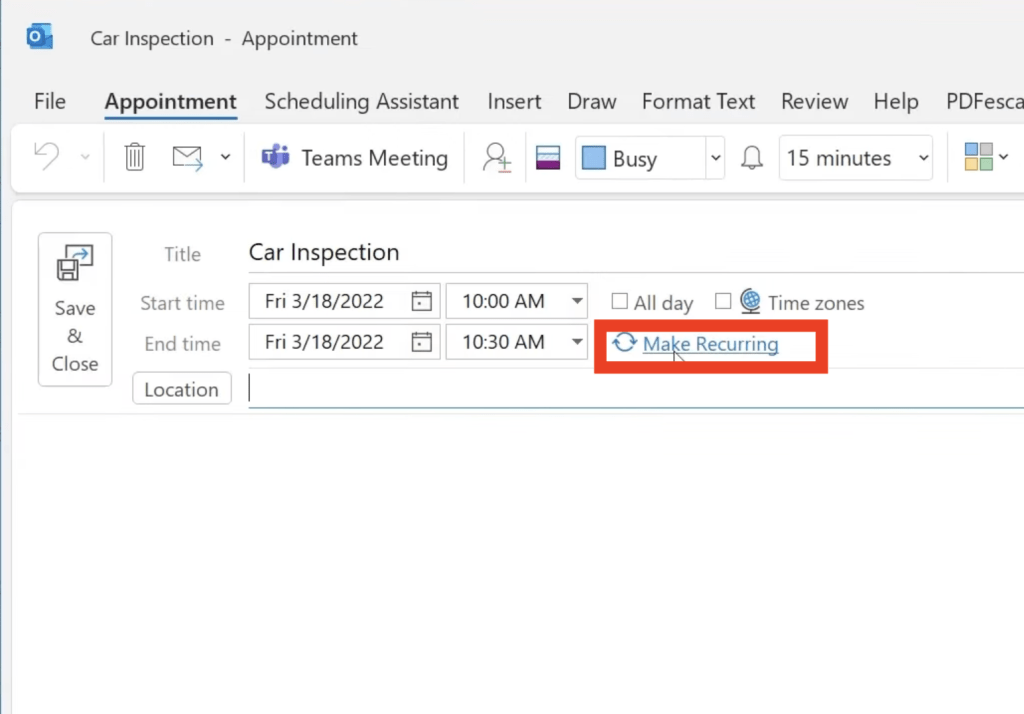
If you wish to get this reminder every year, you can click on the reminder and select Make Recurring.
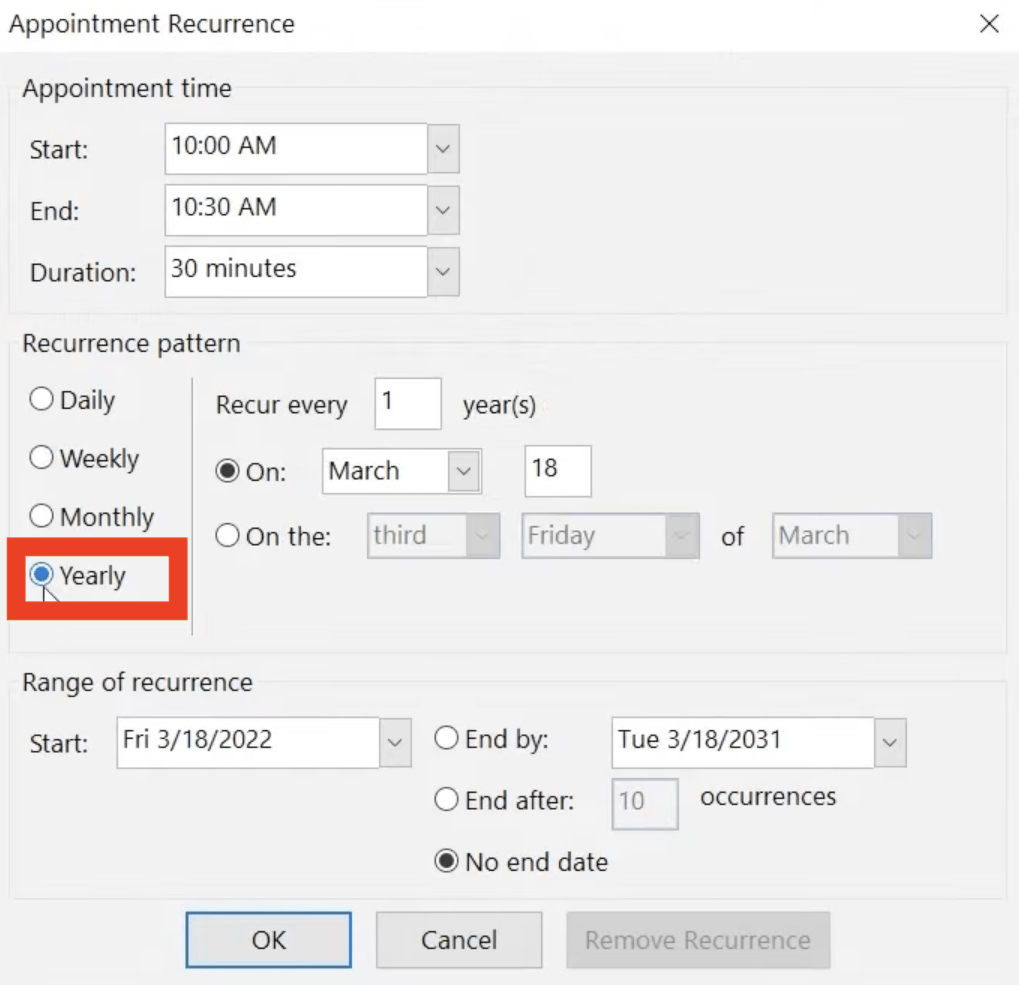
Select Yearly and click OK.
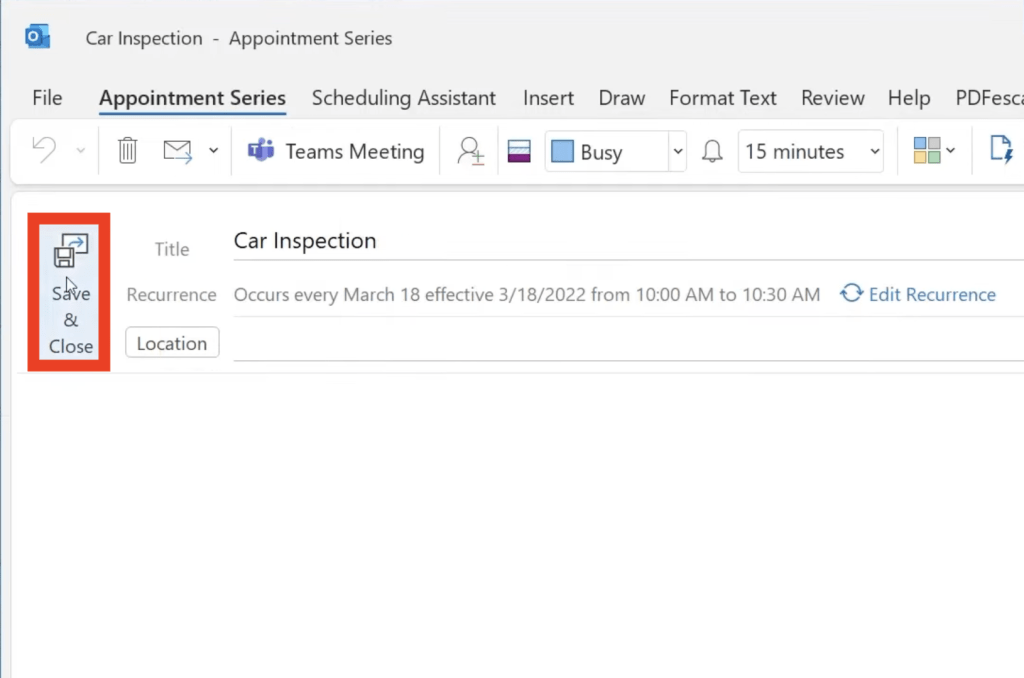
Select Save & Close.
You will see that the same event is displayed for the years 2023, 2024, and so on.
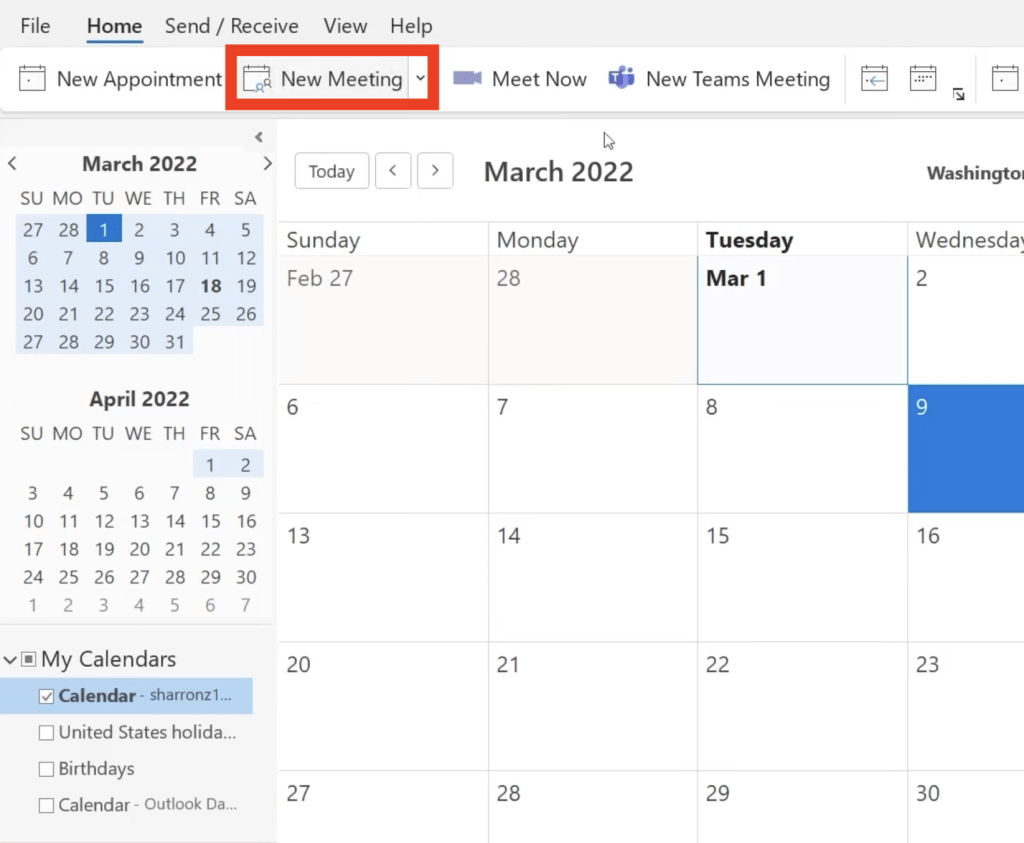
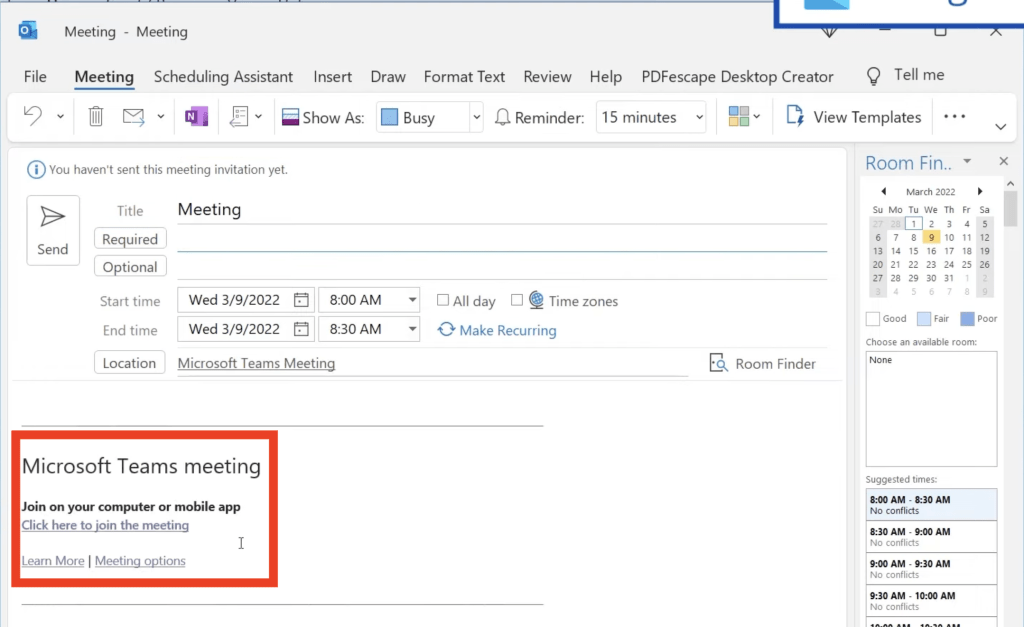
You can also add meetings to your Outlook calendar. To do that – simply click on New Meeting.
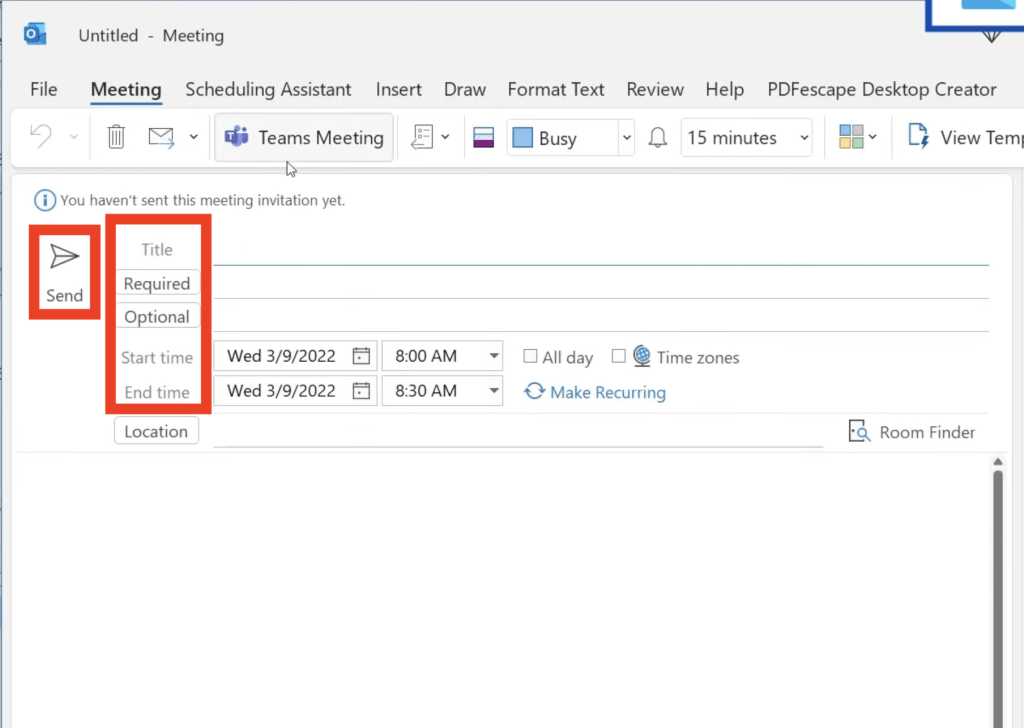
- Type the title of the meeting
- Enter the invitee’s email address who must attend the meeting under the required field
- Enter the invitee’s email address who can optionally attend the meeting under the optional field
- Select Start time and End time
- Hit Send
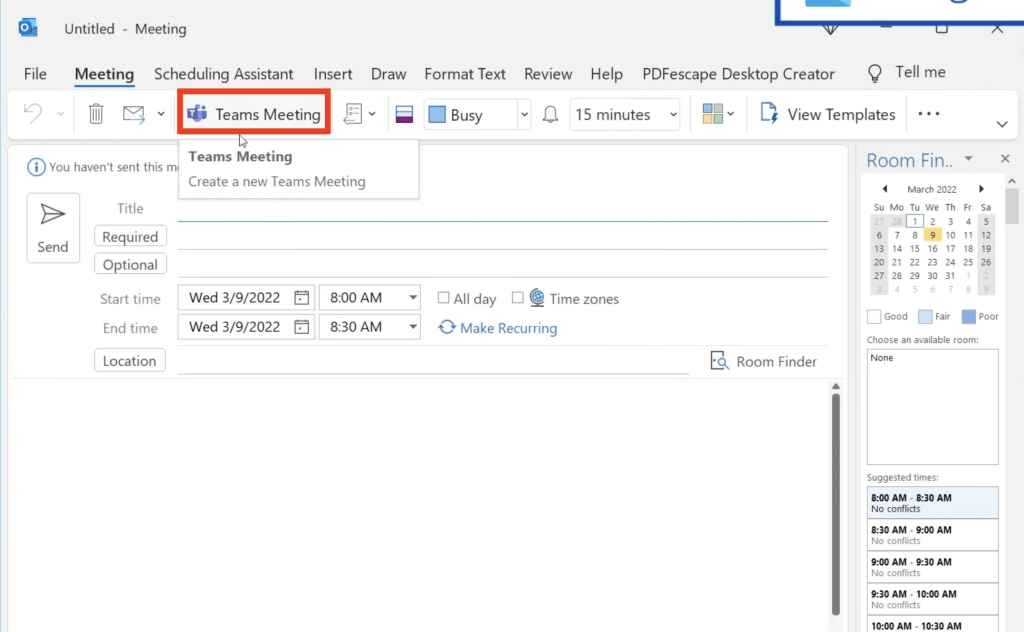
You can also hit the Teams Meeting button.
This will automatically add the Microsoft Teams Meeting link for all the invitees.
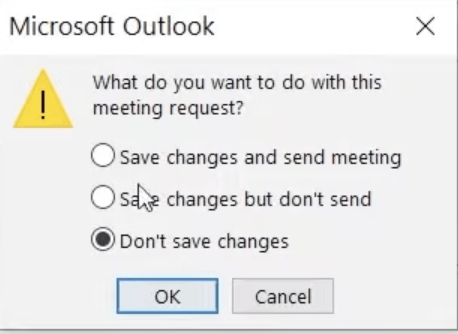
All the invitees will receive a meeting request and it will be added to their calendar. If you close this meeting, you will have the following options:
- Save changes and send the meeting
- Save changes but don’t send – Meeting will save as a draft
- Don’t save changes
Using Microsoft Outlook Contacts
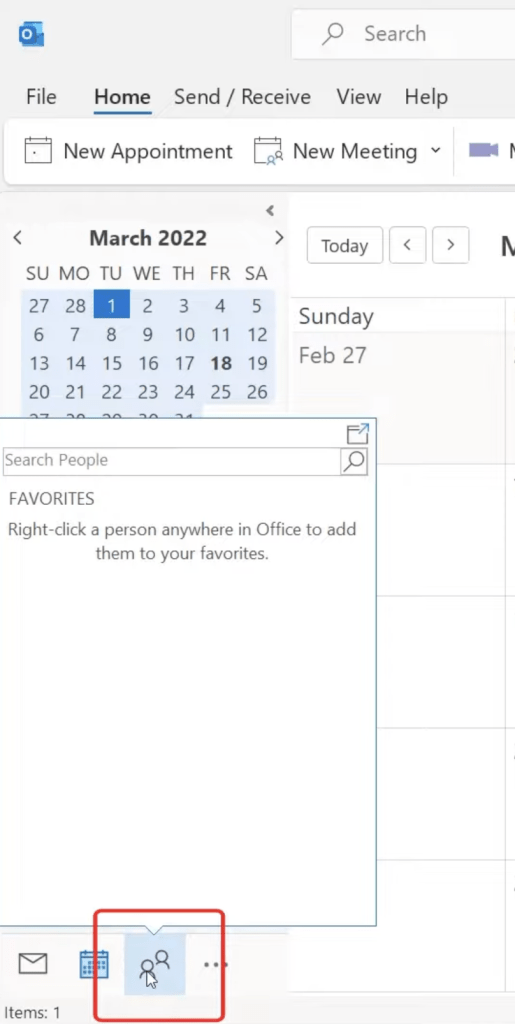
Finally, let’s move to contacts by clicking on the icon below.
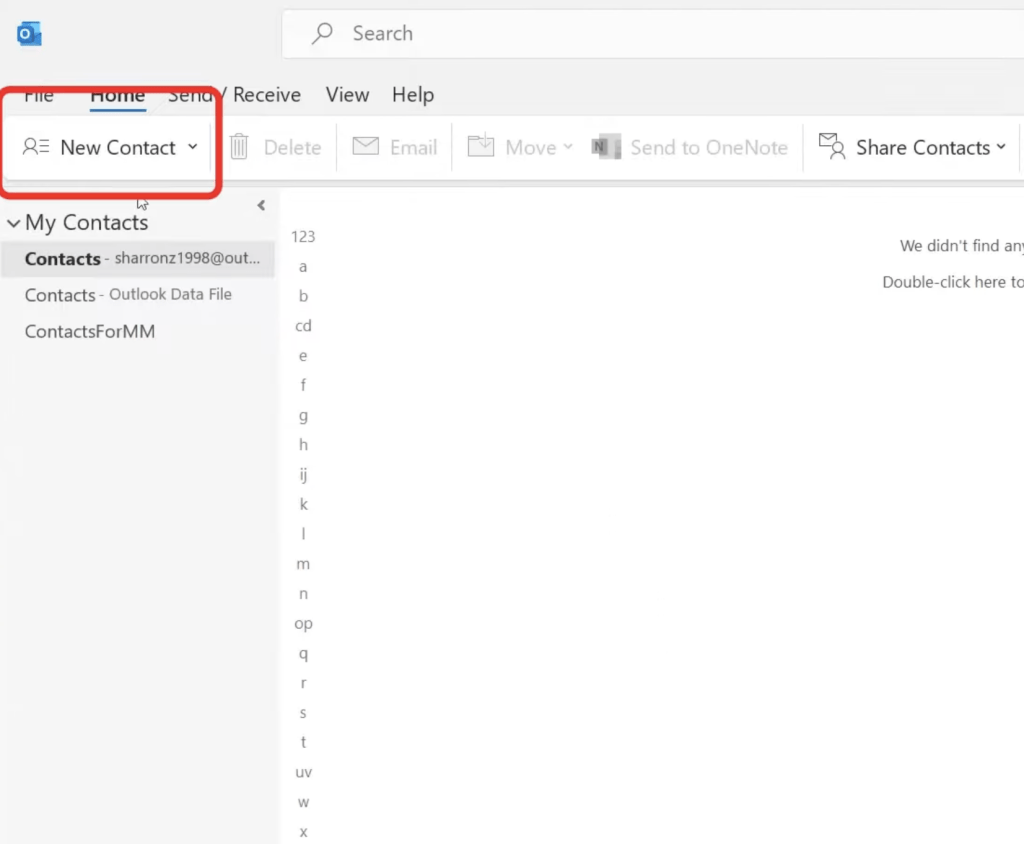
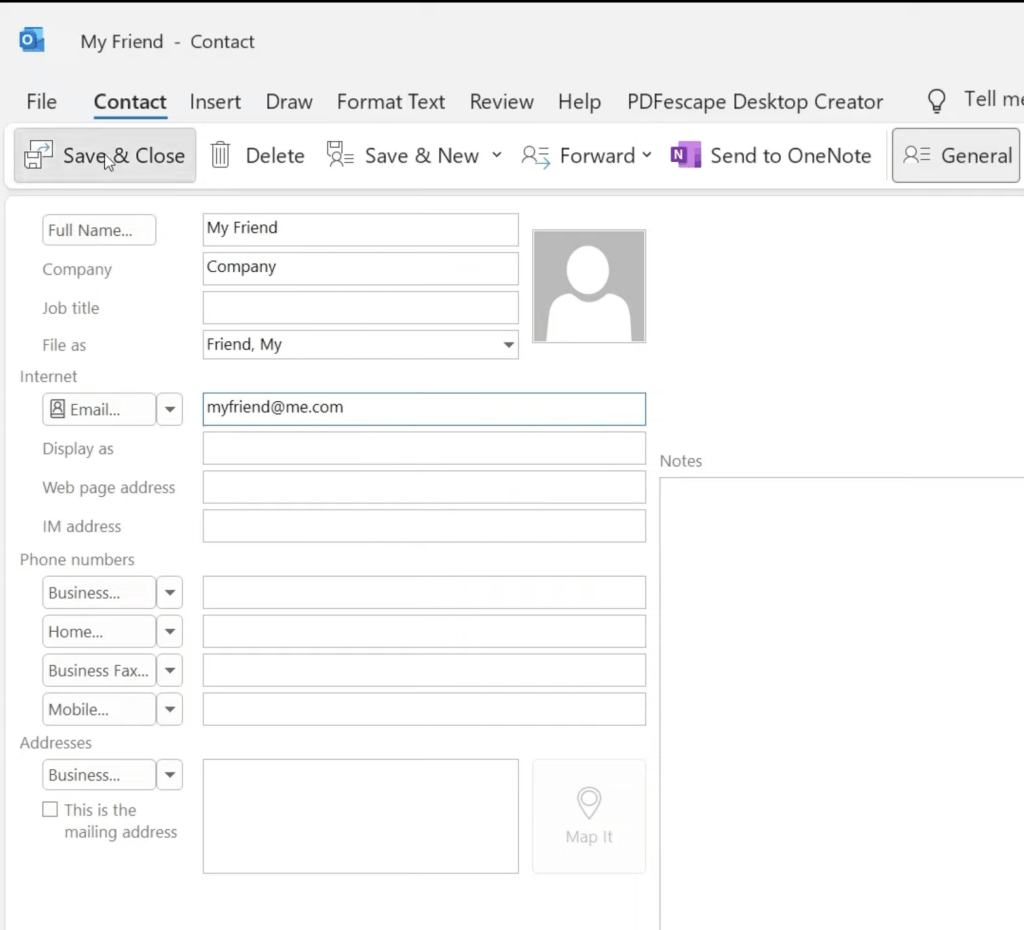
To add a new contact – Select New Contact.
You can fill in details like Name, Company, Email Address, and select Save & Close.
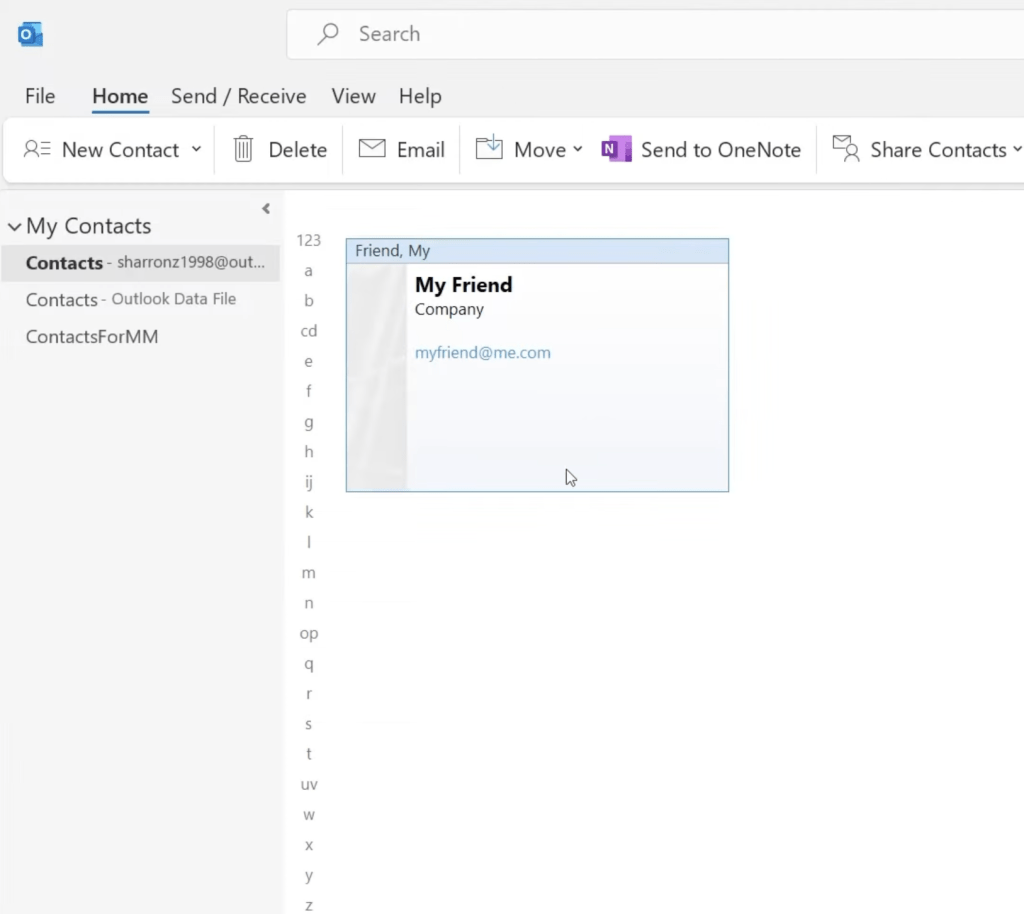
The new contact that you have added will appear in the Contacts list.
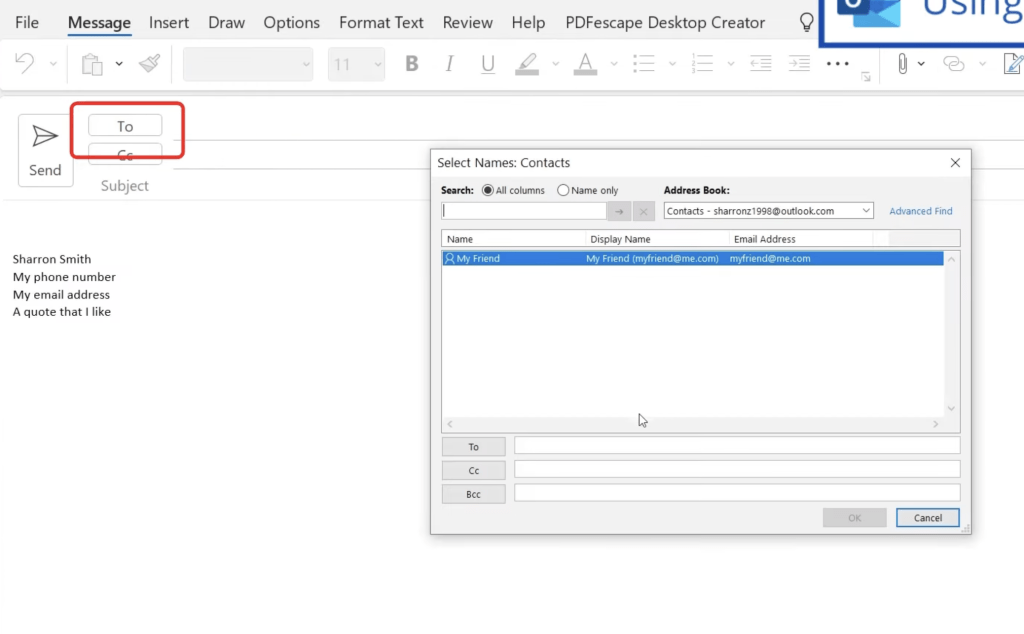
Once you have your contacts added in outlook, you can easily use them when sending emails or meeting invites. While writing an email, click on To to get the entire contact list displayed.
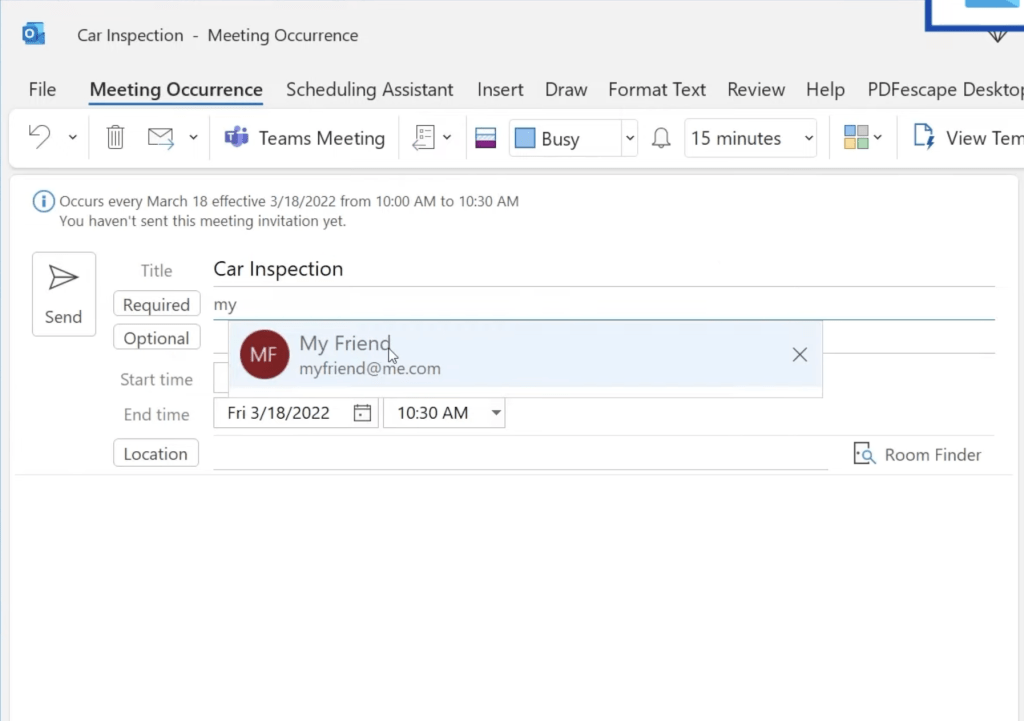
When sending a meeting invite, you can easily use the added contact as well.
Frequently Asked Questions
What is Microsoft Outlook used for?
Microsoft Outlook is an application primarily used for managing emails, calendars, contacts, and tasks. It helps users stay organized by offering tools for scheduling appointments, sending and receiving emails, creating task lists, and managing contacts in one central location.
How do I set up an email account in Outlook?
To set up an email account in Outlook, open the application, go to File > Add Account, and enter your email address. Outlook will automatically detect the email server settings for most popular providers. Follow the prompts to enter your password and complete the setup.
Can I use Outlook to schedule meetings?
Yes, Outlook has a built-in calendar that allows you to schedule meetings and appointments. You can invite participants by creating a meeting request, selecting a time, and sending the invitation directly through your calendar.
How do I organize emails in Outlook?
You can organize emails by creating folders, using categories, and setting up rules to automatically move emails to specific folders. Use the search bar to quickly find specific emails, and archive old emails to declutter your inbox.
What are Quick Steps in Outlook, and how do I use them?
Quick Steps are a feature in Outlook that automate repetitive tasks. For example, you can create a Quick Step to move an email to a specific folder, mark it as read, or forward it to a colleague with one click. To create or manage Quick Steps, go to the Home tab and look for the Quick Steps group.
Hopefully, this article has provided you with an insight on all about Microsoft Outlook, what it is, how to use email, how to organize emails, how to link other email accounts to Microsoft Outlook, how to write an email, how to schedule the sending of emails, how to create a signature, how to use the calendar, how to manage contacts and MORE!
John Michaloudis is a former accountant and finance analyst at General Electric, a Microsoft MVP since 2020, an Amazon #1 bestselling author of 4 Microsoft Excel books and teacher of Microsoft Excel & Office over at his flagship MyExcelOnline Academy Online Course.

