Learn about Excel with our Free Microsoft Excel Online Course!
Key Takeaways
- To create a new OneNote notebook, first log into your Microsoft 365 account, open the OneNote application, and click the “+ New” option to initiate a new notebook.
- In the new notebook creation process, use the “File” menu to select “New,” choose where to save the notebook (preferably OneDrive for synchronization across devices), enter a notebook name, and click “Create Notebook.”
- Once the new notebook is created and optionally shared, OneNote will open it, allowing you to begin entering notes and organizing your information.
What is OneNote and Who Needs It?
OneNote might best be described as a digital binder where you can organize a myriad of details from your daily life. Think of it as a versatile tool that captures notes, doodles, audio recordings, and web clips in an easily accessible format. It’s perfect for students assembling their research, professionals tracking projects, and anyone looking to manage their daily tasks and ideas more effectively. If you’re someone who hops between devices, you’ll appreciate having your notes synced up, ready and waiting for you, no matter where you are or what device you’re using.
Table of Contents
Step-by-Step Guide to Creating Your OneNote Notebook
Navigating to the Right Space
Accessing OneNote is a breeze; simply head to www.office.com and select OneNote from the Office app launcher. If it’s your first time, you may need to sign in with your Microsoft account. This brings you to the hub where you can access recently opened notebooks or create a new one. Remember, it’s essential to be signed in so all your notes sync seamlessly across your devices.
Customizing Your First OneNote Notebook
Creating your first OneNote notebook is an exciting first step towards organizing your digital life. Customize it by giving it a name that reflects its purpose, be it ‘Work Projects’, ‘Personal Journal’, or ‘Study Notes’. With your desired label, the notebook becomes easily identifiable for future reference. As you create it, OneNote also gives you the option to determine where you’d want your notebook saved. Typically, choosing OneDrive as the saving location is your best bet for accessibility and sharing capabilities. Once created, you can dive in and begin your note-taking journey, all within a matter of minutes.
Organizing for Success: Structuring Your Notebook
Adding and Managing Sections Efficiently
Efficiency in OneNote begins with understanding how to add and manage sections. Just like color-coding or tabbing different parts of a physical binder, OneNote lets you create multiple sections for better organization. To add a new section, all you have to do is click “Add Section” at the bottom of your notebook.
You can then name it according to the category of notes it will contain. Want to rearrange them? Simply click and drag the sections into your preferred order. With distinct colors chosen for each section, you can easily navigate through your notebook for the information you need.
Creating Pages and Subpages for Detailed Organization
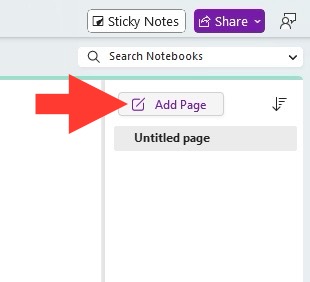
For even finer organization within each section, OneNote allows the creation of pages and subpages. This capability enables you to drill down into the details without cluttering your workspace. To add a page, click on the “+ Add Page” button usually located at the right-hand side or bottom of the section tab. Have a main topic that needs breaking down?
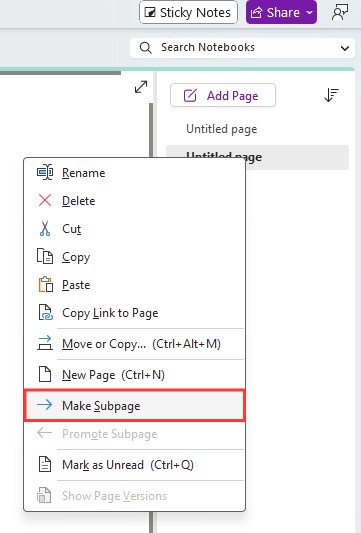
Add subpages by right-clicking on a page and selecting “Make Subpage”. This nests the page under another, creating a collapsible group for better visual hierarchy. Want to move it back out? Just drag the subpage above the main page to ungroup it. This method of organization helps you maintain a clean yet comprehensive digital notebook.
Sharing and Collaboration in OneNote
How to Share Your OneNote Notebook
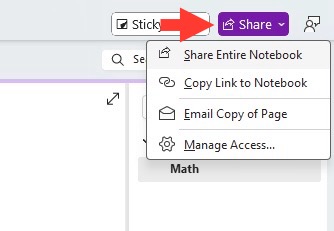
Sharing your OneNote notebook is straightforward and promotes seamless collaboration. To share, simply locate and click on the ‘Share’ button found prominently at the top of your OneNote application. Type in the email addresses of colleagues or friends you wish to invite.
You can manage their access levels—choose between ‘Can View’ for read-only permissions or ‘Can Edit’ for collaborative work. Additionally, you can generate a link that can be distributed for wider access, with options to set expiration dates and passwords for enhanced security. The power of collaboration is just a few clicks away, granting the benefit of collective knowledge and input.
Collaborative Features and Real-Time Editing
OneNote’s collaborative features are a game-changer, supporting teamwork across locations and devices. When you share your notebook and grant editing permissions, team members can dive into the content, adding their input at any time. OneNote’s real-time editing capability means you can actually see others’ contributions as they make them, thanks to the seamless syncing function. This feature eliminates the need for multiple versions of a document and allows for instant feedback and brainstorming. You’ll find that collaboration in OneNote not only brings teams closer together but also leads to more dynamic and engaging workflows.
Tips and Tricks for Advanced OneNote Users
Utilizing Tags and Search Functionality
Mastering OneNote includes making the most of tags and search capabilities. By tagging your notes with customizable icons, such as to-do checkboxes or important flags, you can swiftly categorize and later find the exact type of note you’re looking for. Just go to the Home tab and explore the different tag options available. When it comes time to locate notes, use OneNote’s powerful search function. Click on the magnifying glass icon, type in your keywords, and OneNote quickly scans through your notebooks to find relevant content, saving you from manually sifting through pages. You can specify whether to search through all your notebooks or a single one, making the retrieval process a breeze.
Integrating OneNote with Other Office Tools
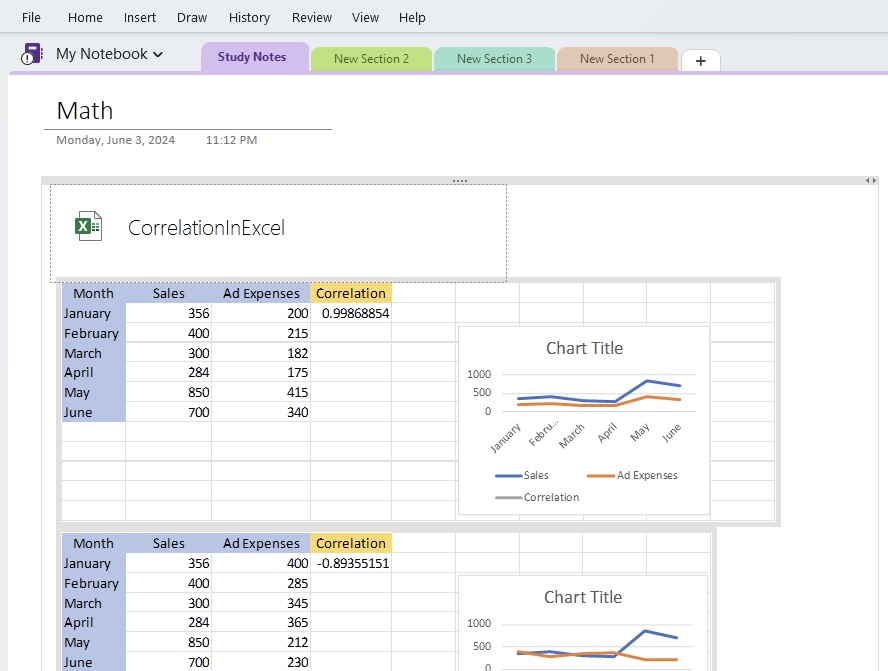
OneNote doesn’t just stand on its own – it’s part of the larger Office ecosystem, designed to work smoothly alongside other applications like Word, Excel, and PowerPoint. You can easily import content such as Excel tables or even embed PowerPoint slides right into your notes. The integration goes both ways; you can also take meeting notes in OneNote and link them to an Outlook calendar event for context. This can dramatically enhance productivity, as it allows you to pull in data from different sources, correlate information, and have one single point of reference that is up to date and comprehensive.
Troubleshooting Common OneNote Issues
Resolving Sync Errors
When faced with sync errors in OneNote, it’s essential to first ensure you’re connected to the internet since a stable connection is crucial for synchronization. If the problem persists, a classic quick fix is to close and re-open your OneNote application. Should sync issues continue, try creating a new notebook from the OneNote web app and then open it in your desktop app. This process can often reset the sync function. If you’re using a university- or organization-sponsored Office 365 account, these may have specific configurations that could affect sync, so reaching out to your IT department might also be necessary. Remember, always check for updates to your OneNote app as patches for known issues are regularly released.
Recovering Lost or Missing Notebooks
If a notebook seems to have disappeared, don’t panic! There are several avenues for recovery. Initially, check your OneDrive recycle bin – your lost notebook might be resting there. If notebooks were deleted from OneDrive or the OneNote desktop app, they could be restored within 30 days. Secondly, inspect other devices where you might have used OneNote; notebooks can sometimes appear missing if they haven’t been set to sync across all devices. Another place to look is the Notebook Recycle Bin within the OneNote app, which stores deleted pages and sections for up to 60 days. If all else fails, contacting OneNote support can be your safety net to recover your valuable information.
FAQ: Quick Answers to OneNote Queries
How Can I Create a OneNote Notebook on Different Devices?
Creating a OneNote notebook is flexible across your devices. On a PC or Mac, launch the OneNote app, go to ‘File’, then ‘New’, and choose a location for your notebook. For mobile devices, open the OneNote app, tap on the ‘Notebooks’ list, then the ‘+’ sign to add a new notebook. No matter where you create it, your notebook will be accessible across all your devices as long as you sign in with the same Microsoft account. Just ensure the OneNote app is installed on each of your devices.
Can I Create Multiple Notebooks within One Account?
Absolutely, you can create as many notebooks as you need within a single OneNote account. Whether for personal, educational or professional use, individual notebooks help keep topics and projects neatly organized and separate. The only limitation you might encounter is storage space on your OneDrive or hard drive, but with OneNote’s efficient file sizes, it’s usually not a concern. Feel free to segment your notes by topic, purpose, or even time periods to maximize organization.
Why I am not able to create a new notebook in OneNote?
If you’re having trouble creating a new notebook in OneNote, check for common culprits like an unstable internet connection or insufficient permissions to save in the selected location. Other reasons might include using invalid characters in the notebook name or exceeding the maximum path length. To resolve this, double-check your connectivity, simplify the notebook name, and ensure you have the necessary write permissions. If the problem persists, try creating your first notebook in the web version of OneNote before opening it in the desktop app, as syncing issues might also be at play.
John Michaloudis is a former accountant and finance analyst at General Electric, a Microsoft MVP since 2020, an Amazon #1 bestselling author of 4 Microsoft Excel books and teacher of Microsoft Excel & Office over at his flagship MyExcelOnline Academy Online Course.


