Creating a checklist can transform how we manage daily tasks, projects, and objectives. I’ve found that using checkboxes in OneNote gives a certain power and flexibility to organizing tasks. These small interactive elements can turn endless to-do lists into structured action plans. By checking off completed items, we not only keep track of progress but also gain a sense of accomplishment that fuels our productivity.
Key Takeaways
- To insert OneNote checkboxes, place the cursor on your page where you want to start your list and type out your tasks.
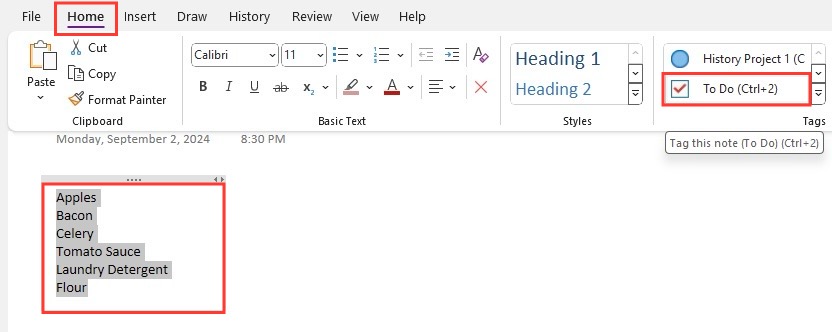
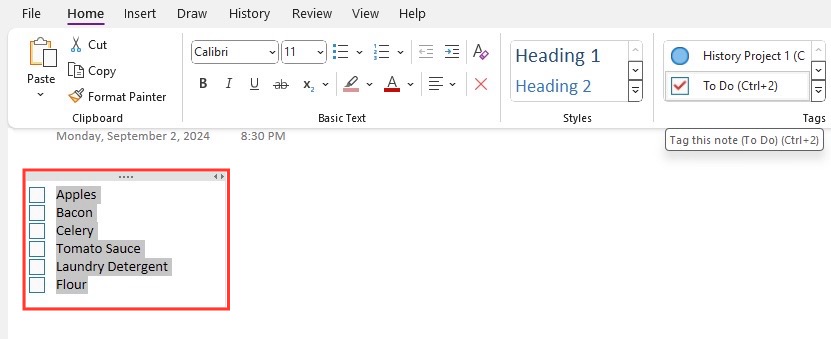
- Highlight the items you’ve listed and press “Ctrl + 1” or click on “To Do” in the Tags section under the Home tab to convert your list into a checklist with checkboxes.
- Add additional checkboxes to your checklist by clicking and dragging the bottom-right corner of an existing checkbox across your tasks.
Why OneNote is More Than Just a Note-taking App
Many people think of OneNote purely as a tool for jotting down notes, but it is indeed far more versatile. What sets OneNote apart is its ability to support varied forms of data: from text to images, and audio to video clips, all arranged in a freeform canvas that supports an individual’s way of thinking and organizing.
When I dive deeper into its features, I find OneNote to be a powerful platform that aids in task management, project collaboration, and even brainstorming sessions. Its capabilities to sync across devices and the freedom to customize the layout make it an essential component of my productivity toolkit. I find it adapts to my needs, whether as a diligent note-taking assistant or as the command center of my to-do lists and checklists.
Table of Contents
Getting Started with Checkboxes
Creating Your First Checklist
Creating your first checklist within OneNote is pleasantly uncomplicated. We start by typing out the list of tasks or items on a new line. Then, by simply highlighting these and clicking on the ‘To-Do Tag’ or pressing ‘Control + 1’, checkboxes instantly appear next to each item. This turns a simple bullet-point list into a fully functional checklist that I can interact with by ticking off items as they’re completed. Alternatively, you can click on the To do Tag, then write your list.
Advanced Checklist Techniques
Turning To-Do Lists Into Pages
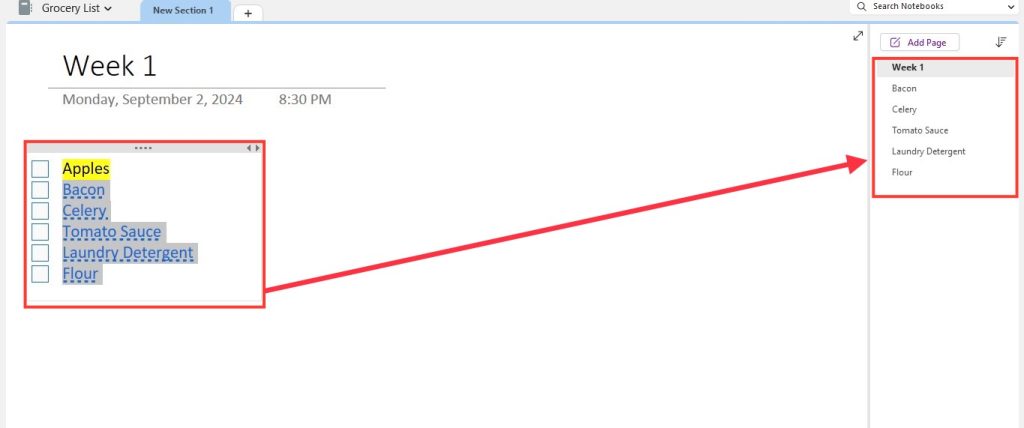
One particularly brilliant feature I use in OneNote is converting a list of to-dos into individual pages. Here’s how I do it: After jotting down a list of tasks, I right-click and select “Link to Pages” from the context menu. OneNote promptly turns each list item into a linked page within a section. Now, on each of these pages, I add detailed notes, supplementary links, images, and custom tags, providing a rich and thorough context around each task. It’s an organized dream!
Customizing Your Checklists
Personalizing the Look of Your Checkboxes
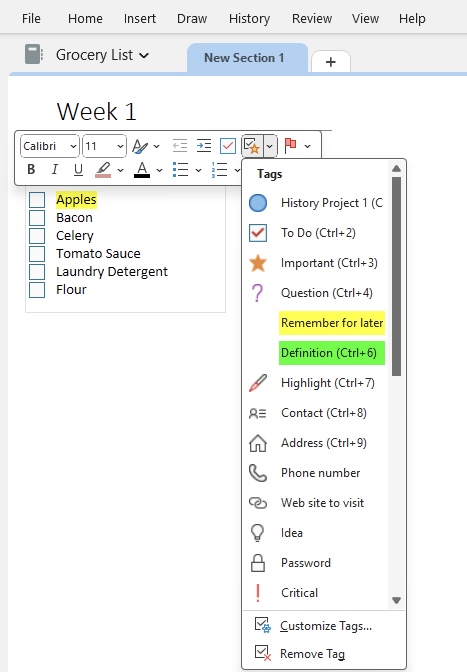
Customizing the appearance of checkboxes in OneNote breathes life into my checklists. I can change the color of the text or the checkbox itself to signify priority, theme, or category. Occasionally, I apply a unique tag to a checkbox for easier identification or retrieval. With these visual cues, my checklists are not just organized; they are highly personalized, making the task management process more visually intuitive and enjoyable.
Organizing Lists with Tags and Categories
When it comes to organizing lists efficiently, I rely heavily on OneNote’s tagging system. By assigning specific tags to checklist items, I categorize them by topic, urgency, or project. This way, I can filter my notes and pull up all the relevant tasks with just a few clicks. Moreover, I can also create custom tags tailored to my workflow, helping me to quickly identify the type, priority, or status of tasks at a glance. Utilizing these tags transforms my checklists into powerful, organized compilations that streamline my daily routine.
Seamless Synchronization and Sharing
Collaborating on Shared Checklists
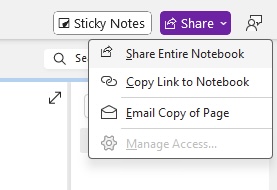
Collaborative checklists are a game-changer for team projects and joint tasks. In OneNote, sharing my checklist is as simple as sending a link to the notebook or using the integrated share function. Multiple users can then edit the checklist in real-time, making updates, ticking off completed tasks, and leaving comments or feedback as necessary. The platform’s ability to merge these edits smoothly ensures that the entire team is on the same page, quite literally, which enhances our collective efficiency and productivity.
Syncing Across Devices for On-the-Go Access
The beauty of OneNote’s checklist function really shines through with its syncing capabilities. I create and update checklists on my desktop and within seconds, I can access the updated content on my mobile device or tablet. This seamless sync function works across all devices where I’m signed into my Microsoft account, ensuring my tasks follow me wherever I go. It’s an invaluable feature for staying on track with tasks when I’m away from my primary workstation, providing convenience and continuity in my work.
Tips and Tricks for Power Users
Keyboard Shortcuts to Speed Up Checklist Creation
As a power user, I’m constantly on the lookout for ways to streamline my workflow, and keyboard shortcuts in OneNote are a definite time-saver. For instance, ‘Control + 1’ instantly converts a line into a checklist item. Using ‘Shift + Alt + D’ to insert today’s date or ‘Shift + Alt + T’ for the current time next to a task helps me timestamp my entries efficiently. This reduces mouse reliance and accelerates the checklist creation process, allowing me to capture tasks on the fly with minimal disruption to my productivity flow.
Linking Checklists to Calendar Events for Timely Reminders
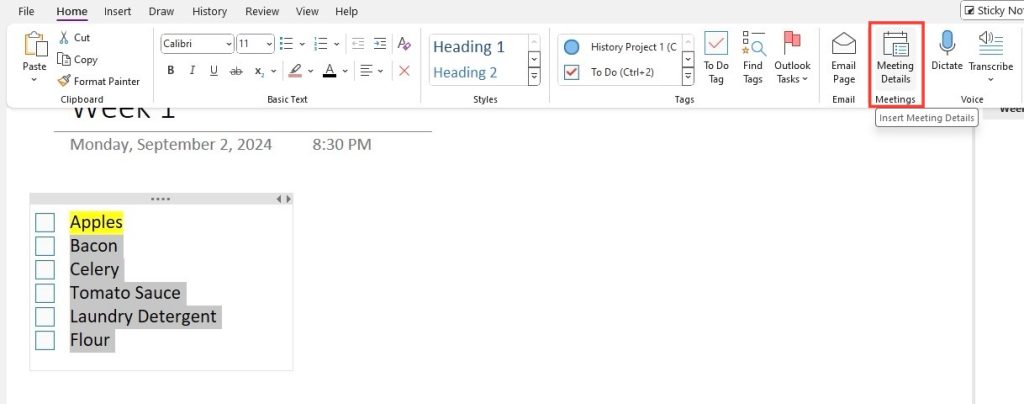
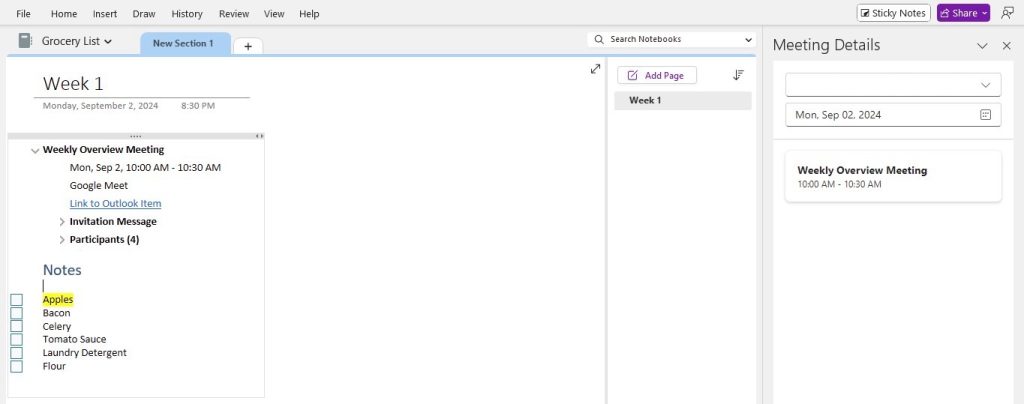
Even though OneNote doesn’t have a native reminder function, I circumvent this by linking checklist items to calendar events. I typically do this by adding a task in OneNote, highlighting it, and then using the ‘Meeting Details’ function in the Home Ribbon to connect it to a scheduled event in Outlook. This ensures I get a timely reminder when a task deadline approaches. Additionally, using third-party add-ins like OneMore can also give my OneNote checklist reminder capabilities, making sure I never miss a deadline.
Frequently Asked Questions
How do I insert check boxes in OneNote?
Inserting checkboxes in OneNote is quite simple. Place your cursor where you want the checkbox, then select ‘Home’ in the navigation bar and click on ‘To Do Tag’. Alternatively, use the keyboard shortcut ‘Ctrl + 1’ to add a checkbox instantly.
Can I create checklists on OneNote’s mobile app?
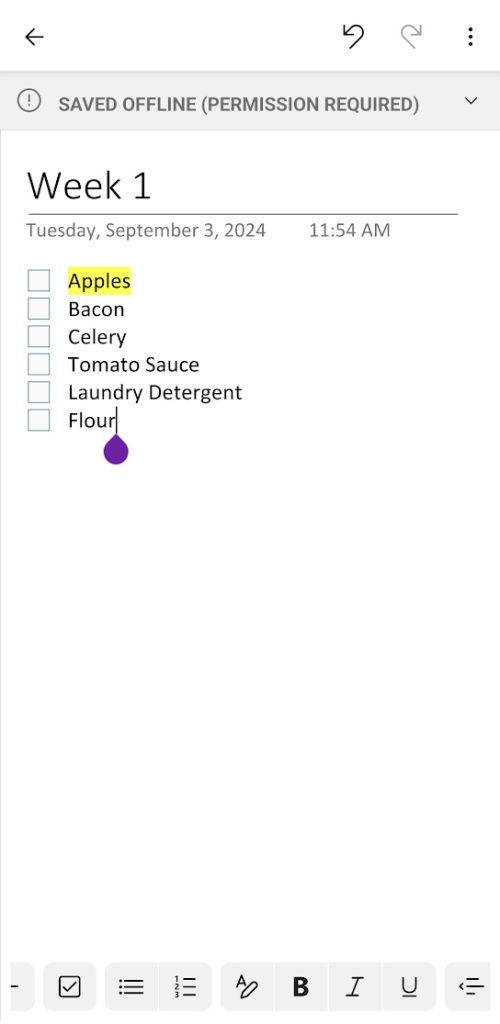
Yes, absolutely. To create checklists on OneNote’s mobile app, enter your list items, then tap the checkbox icon or select ‘To Do’ from the menu to add checkboxes next to each item.
How can I track progress using checklists in OneNote?
Tracking progress in OneNote is straightforward. As you complete tasks on your checklist, click or tap the checkbox to mark it as done. Over time, you’ll visually track your progress through checked off items.
John Michaloudis is a former accountant and finance analyst at General Electric, a Microsoft MVP since 2020, an Amazon #1 bestselling author of 4 Microsoft Excel books and teacher of Microsoft Excel & Office over at his flagship MyExcelOnline Academy Online Course.

