Microsoft Outlook has an out-of-office messages feature that lets you automatically send replies with relevant information when you’re on vacation or don’t have access to your mail. There are several ways to customize Outlook’s automatic reply feature. You will be surprised how handy this is!
Key Takeaways:
- Stay Professional and Responsive: Automatic replies ensure that anyone contacting you receives a prompt, professional response, even when you’re unavailable.
- Customizable Messages: Outlook allows you to create personalized messages for internal and external contacts, ensuring the tone and content match your audience.
- Flexible Scheduling: You can set specific start and end times for your automatic replies, ensuring they activate and deactivate automatically during your absence.
- Rules for Advanced Control: Outlook lets you create rules alongside automatic replies to manage incoming emails, such as forwarding messages to a colleague or flagging important ones for review.
- Works Across Devices: Once configured, automatic replies function seamlessly across all devices where your Outlook account is active, maintaining consistency in communication.
Table of Contents
Introduction to Outlook Automatic Reply
An Automatic reply email is a triggered response based on email received or an autoresponder email message. The purpose is to inform the customer that a company has received their inquiry.
It is used when you won’t be able to respond or read emails because you’re absent from work for a specified period.
It’s a proper business etiquette to set up an out-of-office reply any time you’re unable to check emails during regular work hours. They tell your contacts why your response will be delayed and how to get the information or whom to reach out to while you are away.
Turning on Automatic Reply in Desktop Version
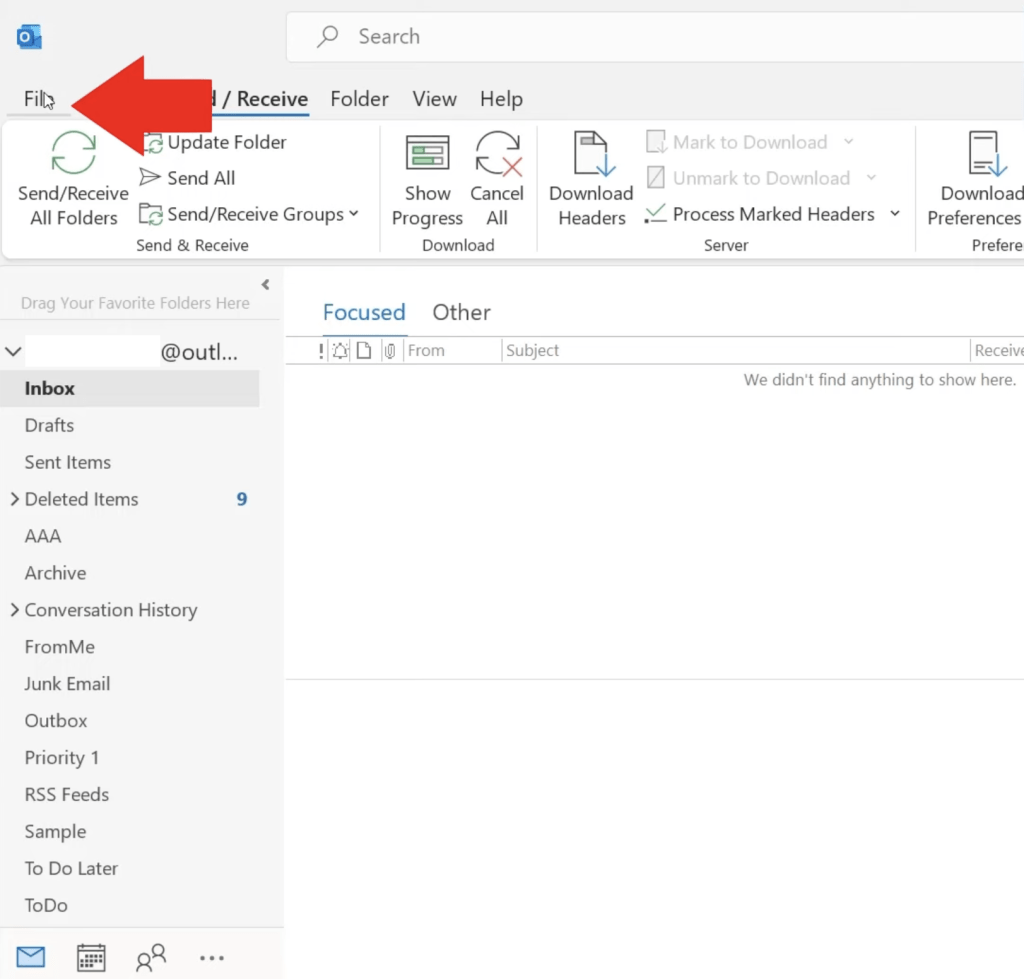
- Go to File
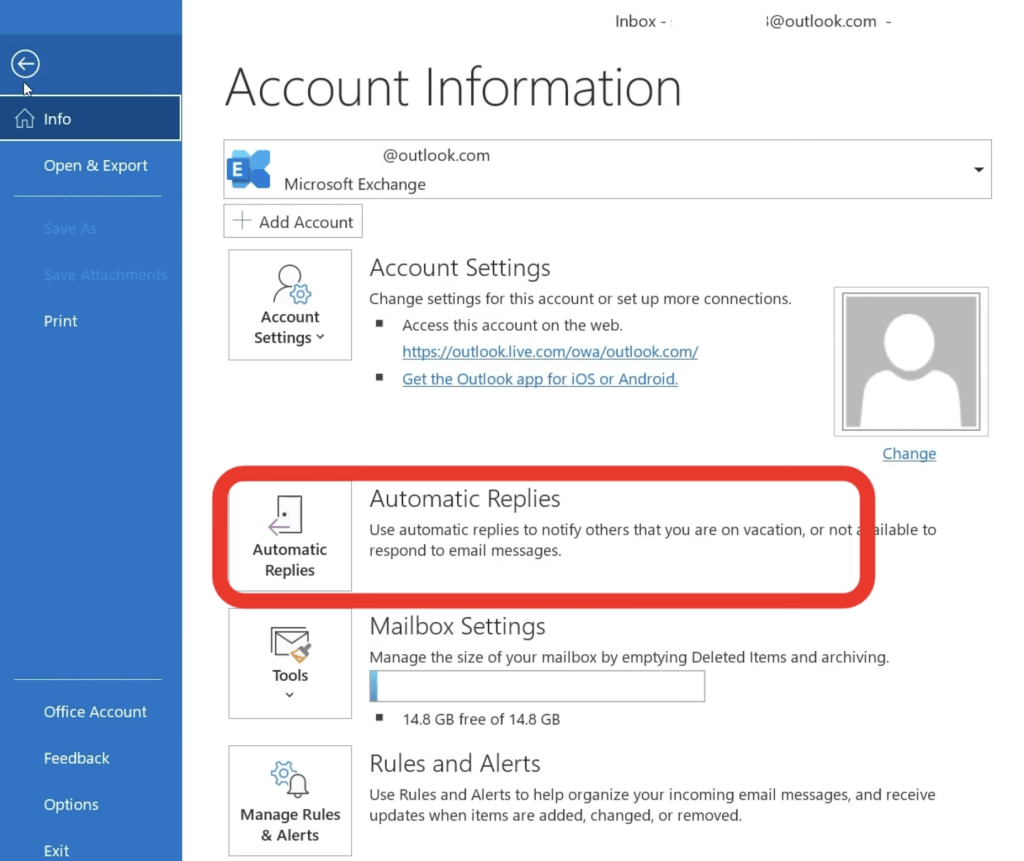
- Select the Automatic Replies box
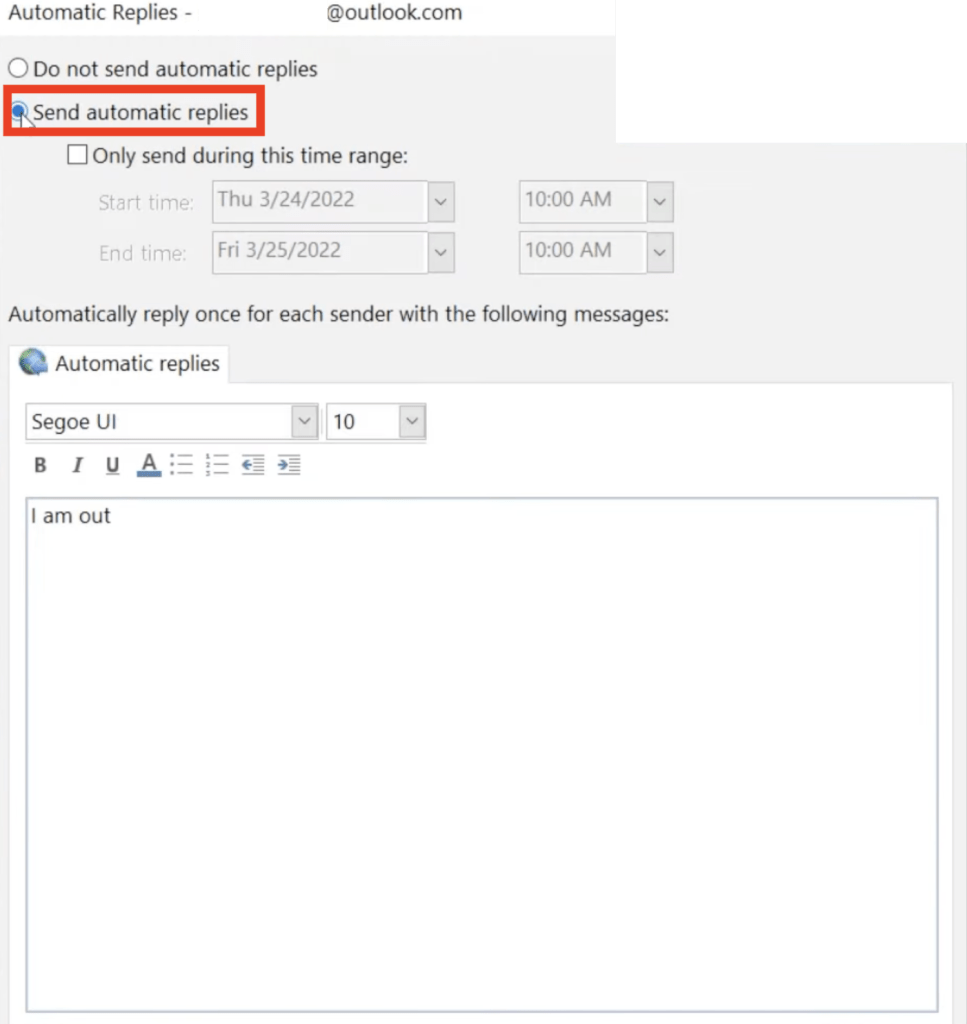
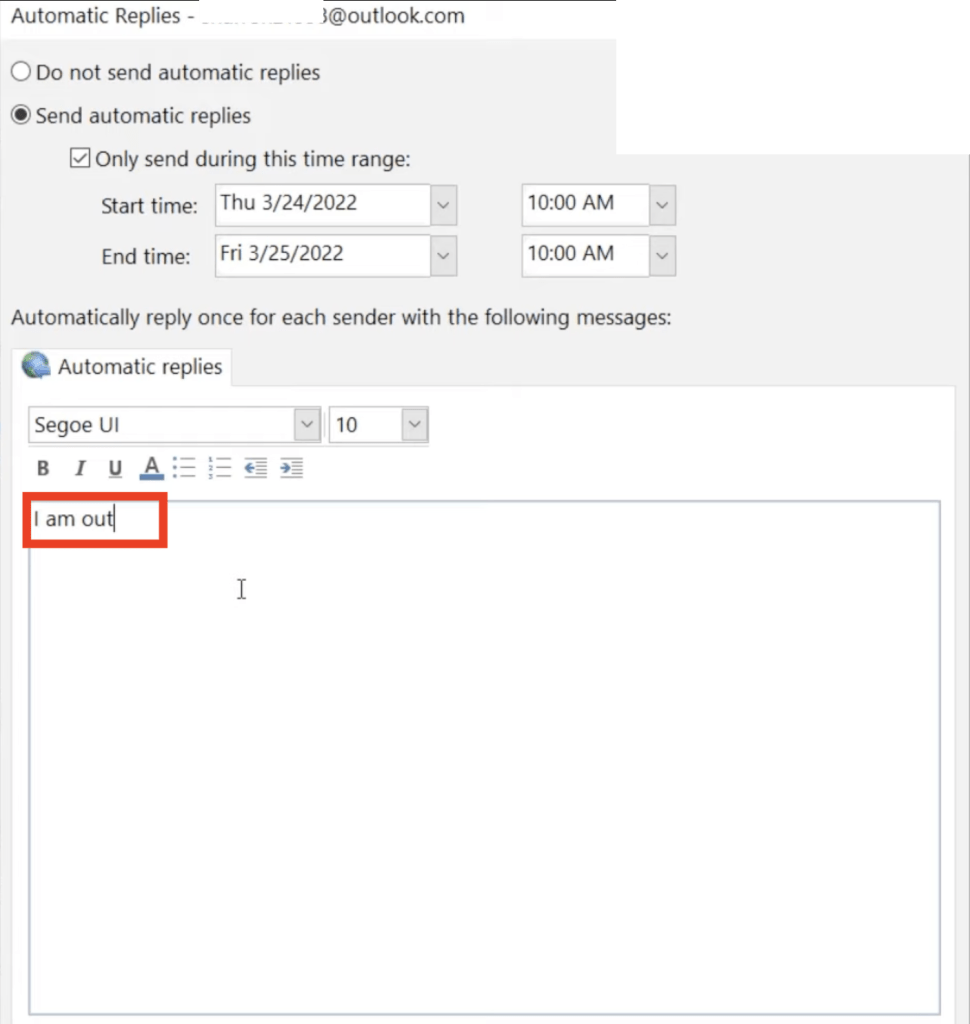
- In the dialog box, select Send automatic replies
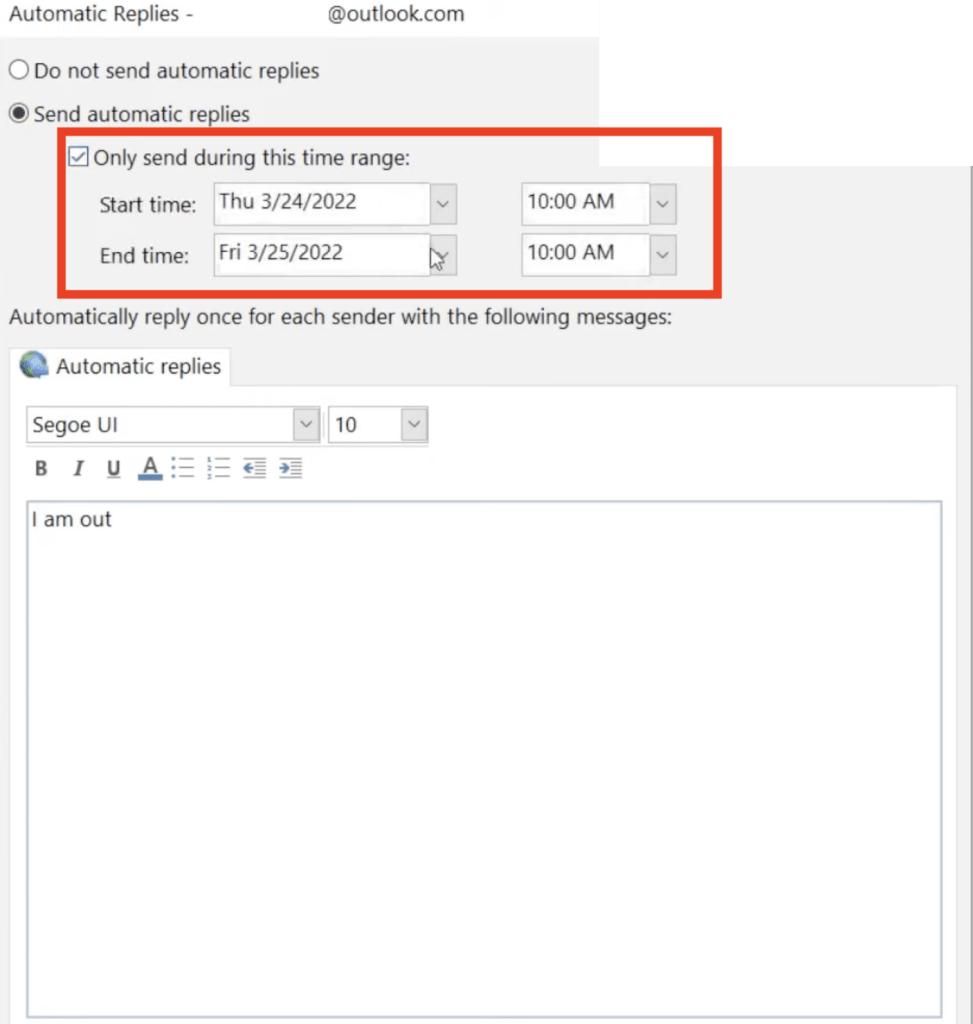
- Check Only send during this time range box and enter the start time and end time.
This will ensure that the out of office message is sent only during the time frame mentioned. - Type in a message
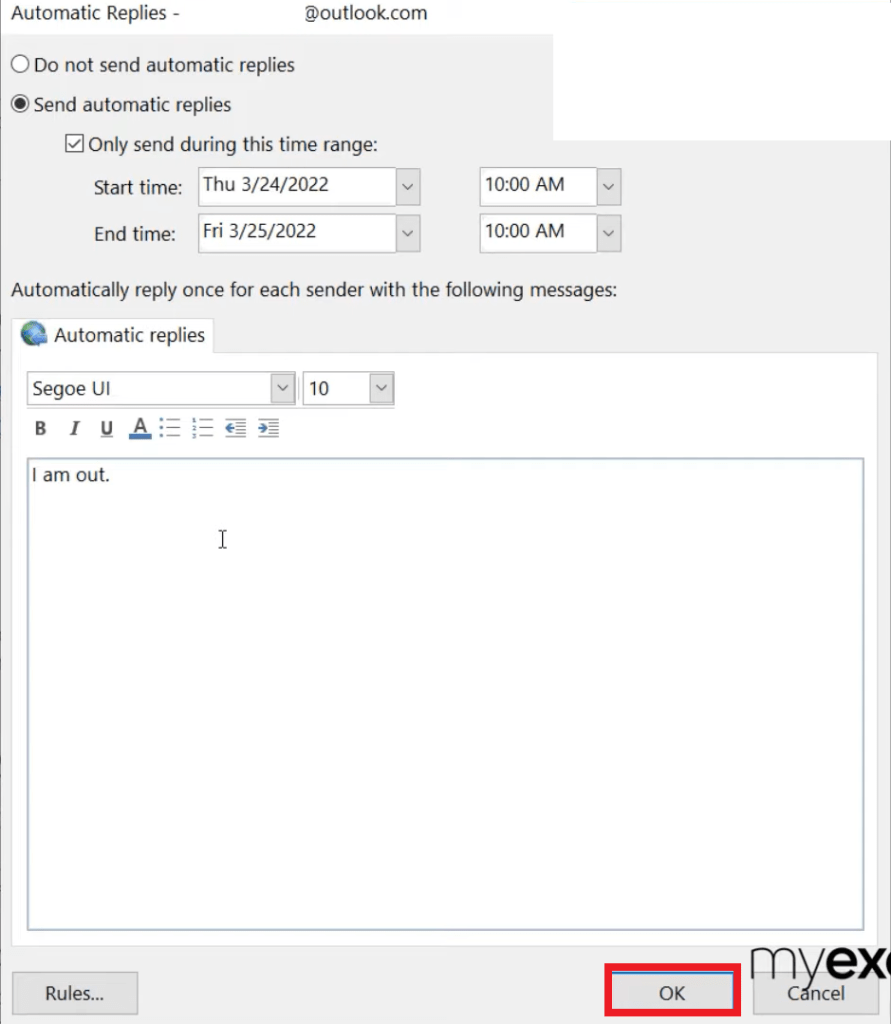
You can format the text using the toolbar to customize the appearance of your automatic reply. - Select OK
Setting Custom Reply Rules
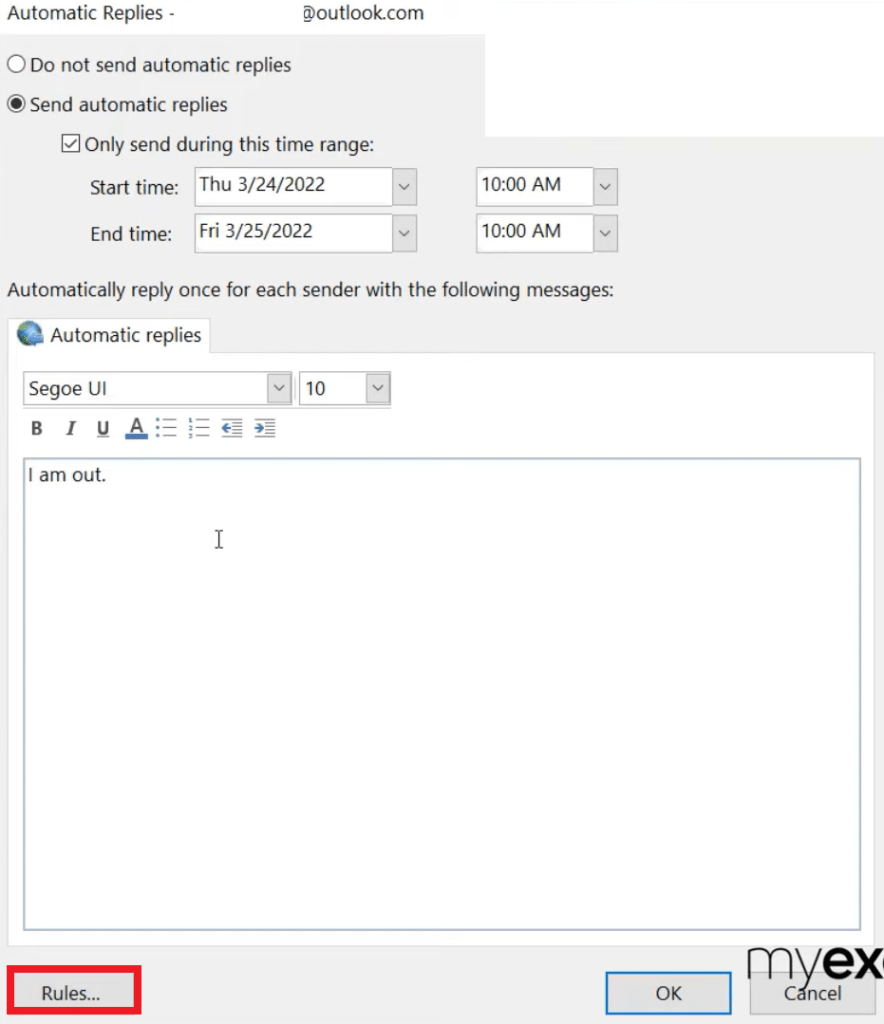
Using Microsoft Outlook, you can create rules to reply automatically to incoming messages while you are out of the office. After you have typed a message in the automatic replies text box, then:
- Select Rules
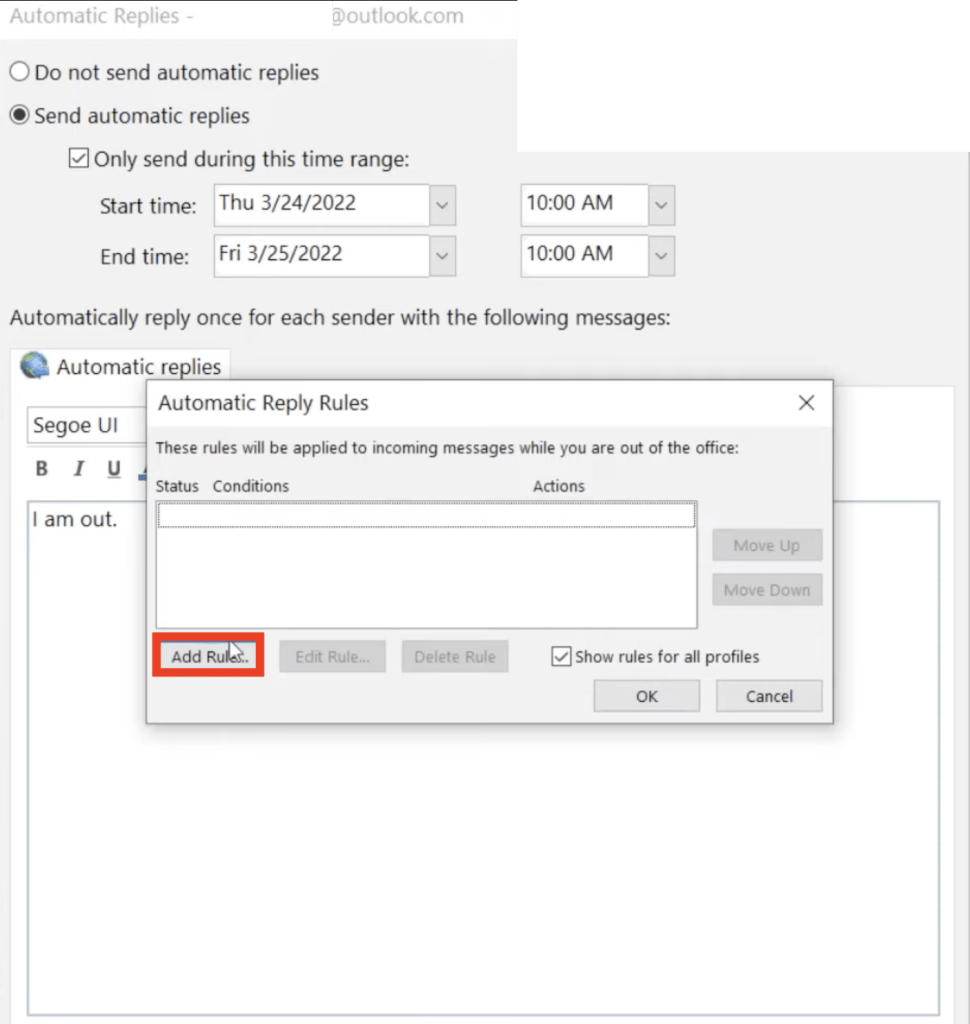
- Click on Add Rules
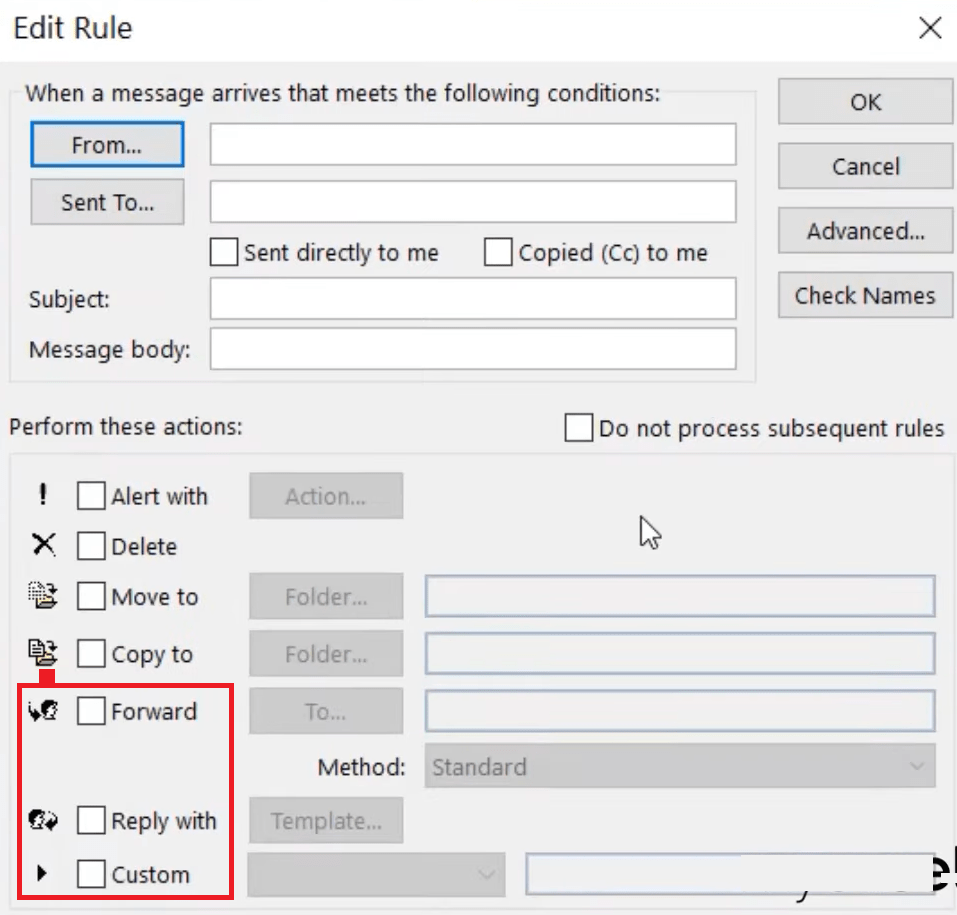
- In the Edit Rule box, one can create custom rules or exceptions for a few people in your Automatic reply
- In the Perform these actions section, select –
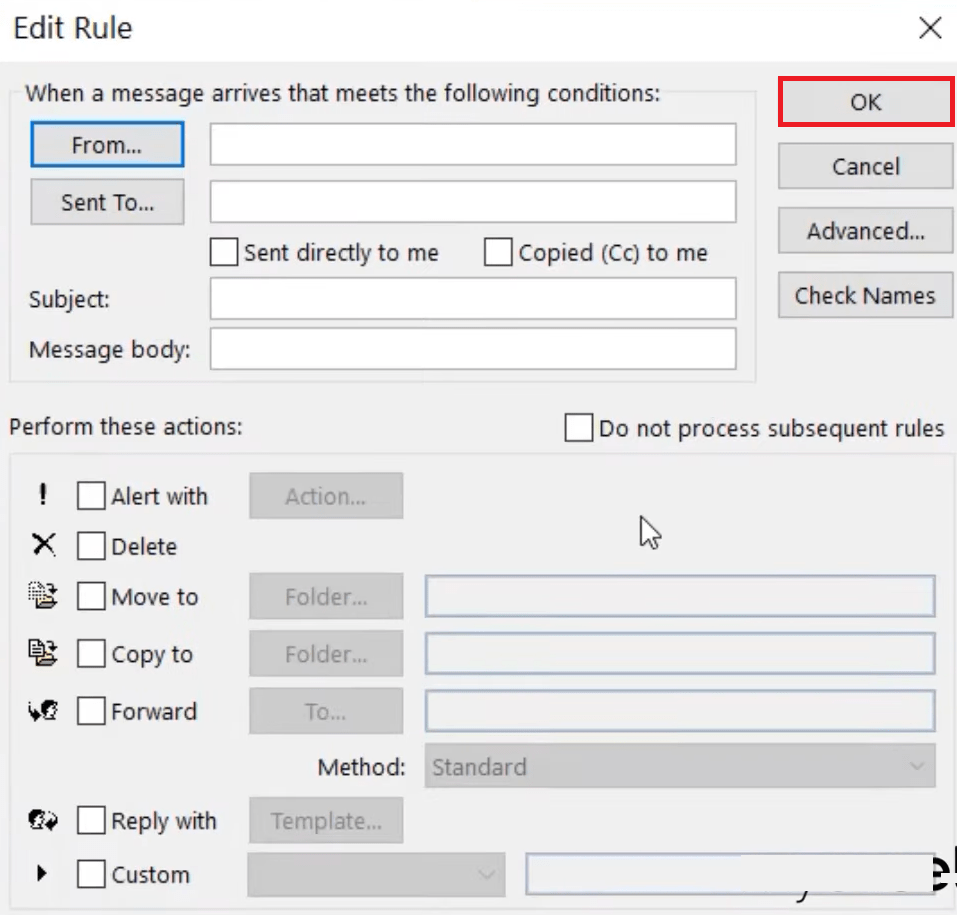
- Click OK
Toggling Between Turning Reply On and Off
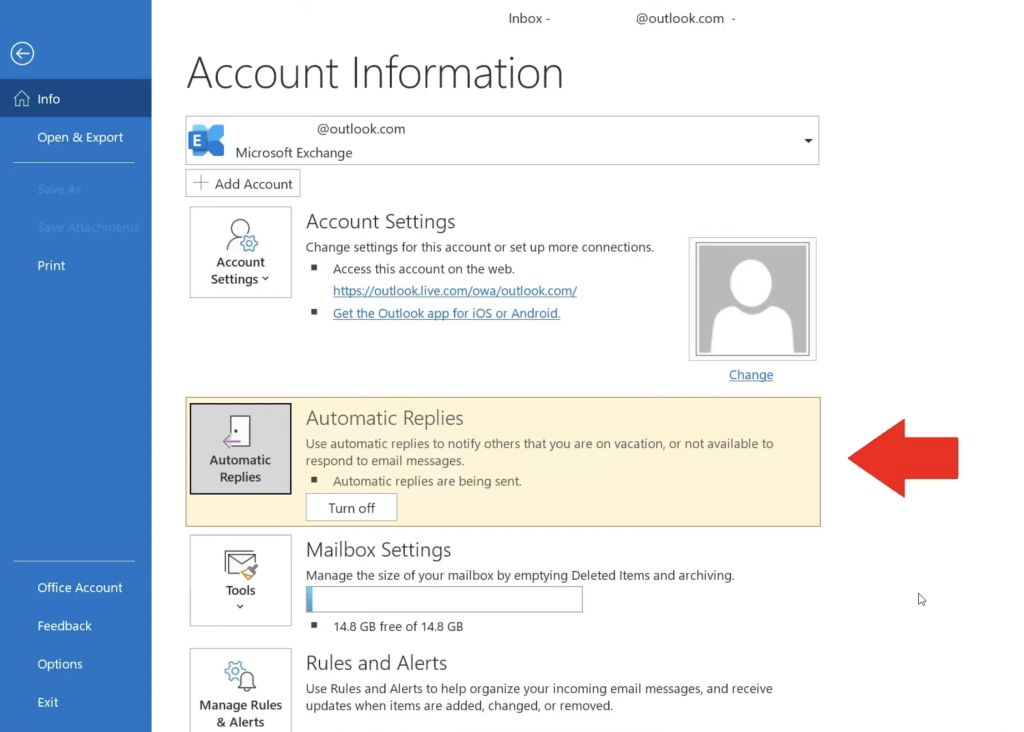
Once you have set your automatic reply, you will see that the Automatic Replies section is highlighted in yellow.
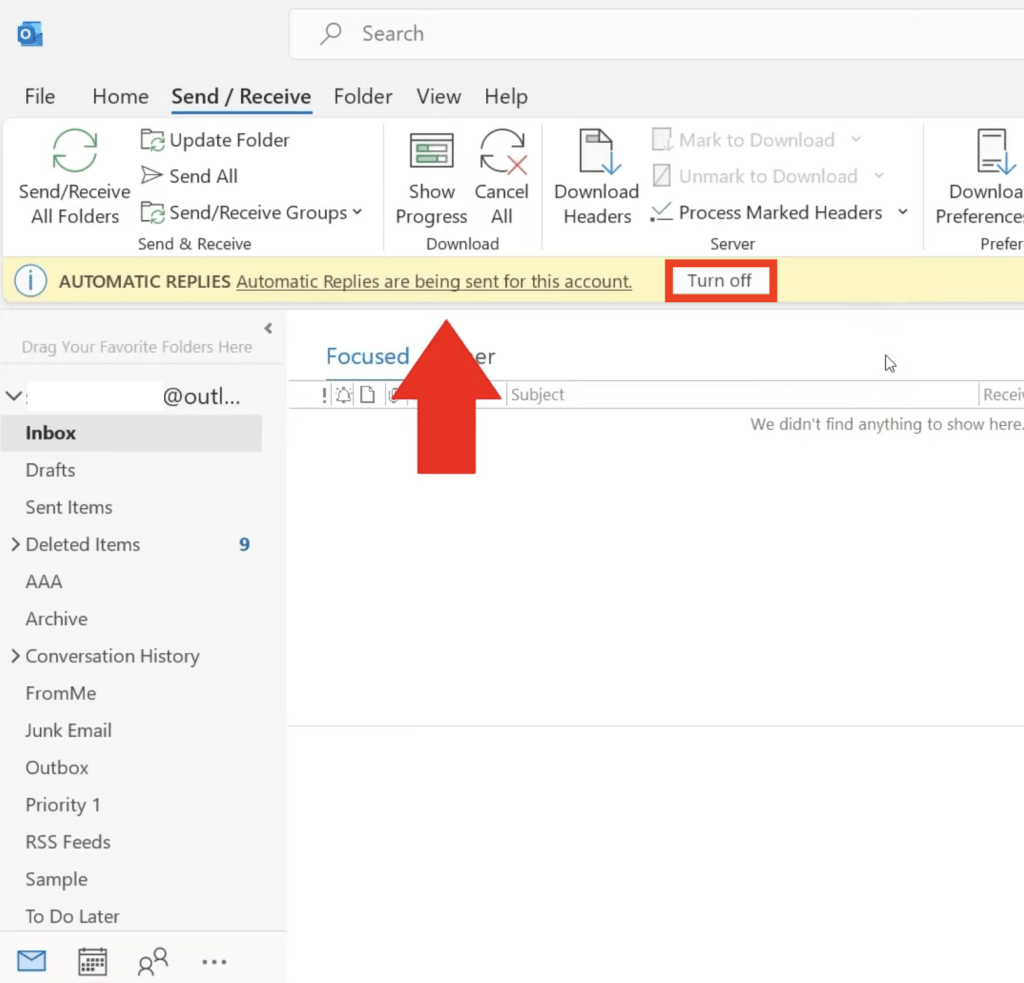
You will also find a message under the Outlook ribbon stating that the automatic reply feature is turned on. This will remind you to disable the automatic reply option once you are back in the office.
Simply, click on the Turn off if you no longer want to send an automatic reply.
Testing Automatic Reply
To check whether your automatic reply message is working or not –
- Open any other mail account of yours (eg. Gmail account) and compose a mail.
- Send this mail to your Outlook account.
- Check your inbox of your other mail account.
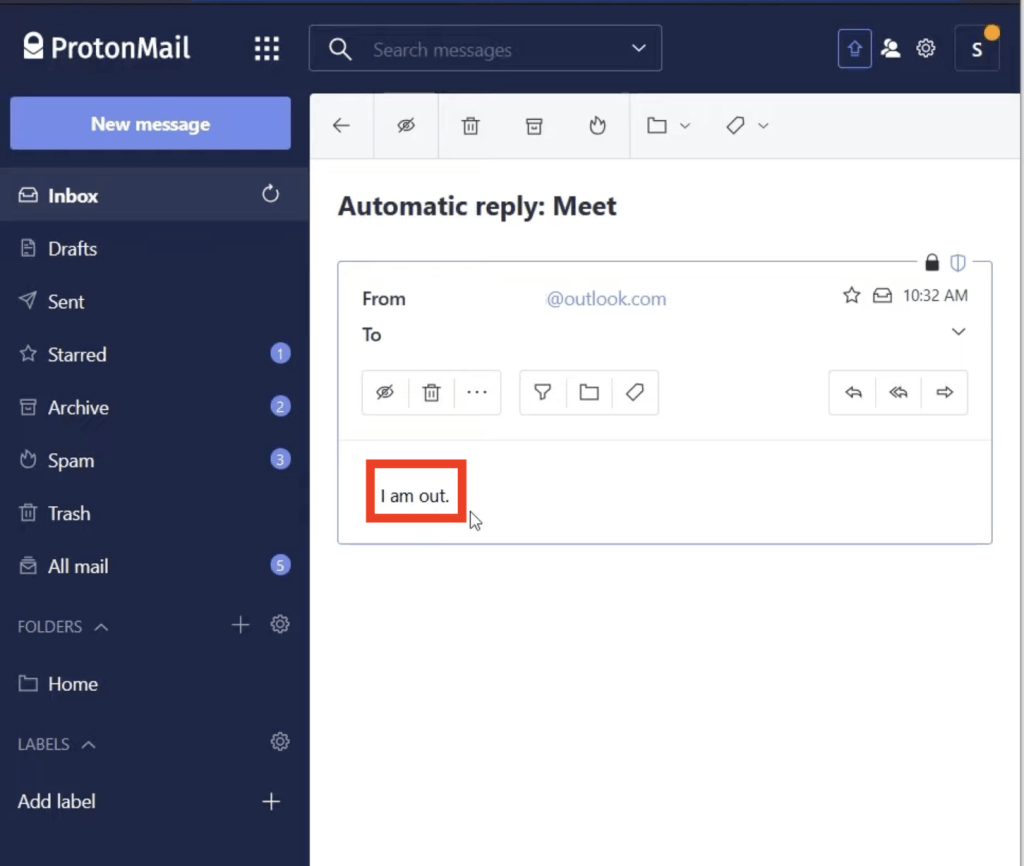
- You will see a new message in your inbox. Once you open it, you will find the same text message you have composed as your automatic reply message in your Outlook account.
This shows that your Automatic reply is working perfectly in your Outlook account.
Microsoft Outlook.com Online Version of Automatic Replies
We can use Automatic replies not only Desktop version of Outlook but also on the online version at outlook.com.
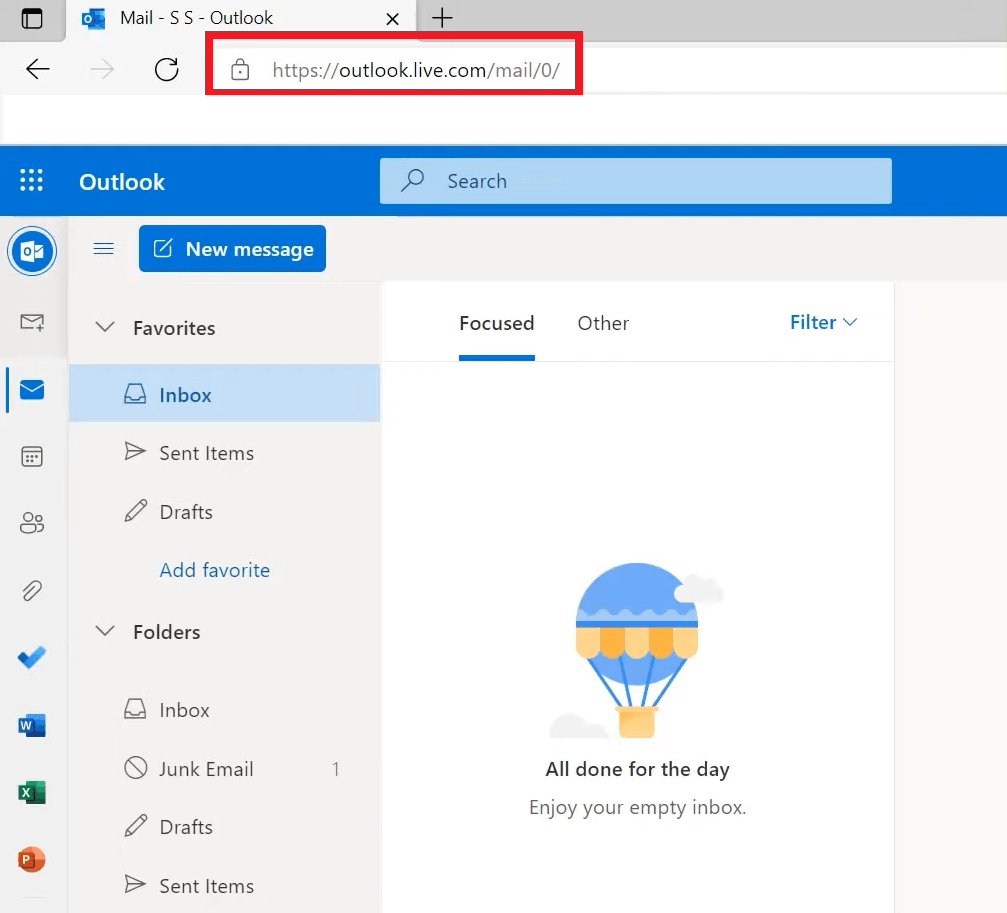
- Open the Website – https://outlook.live.com/
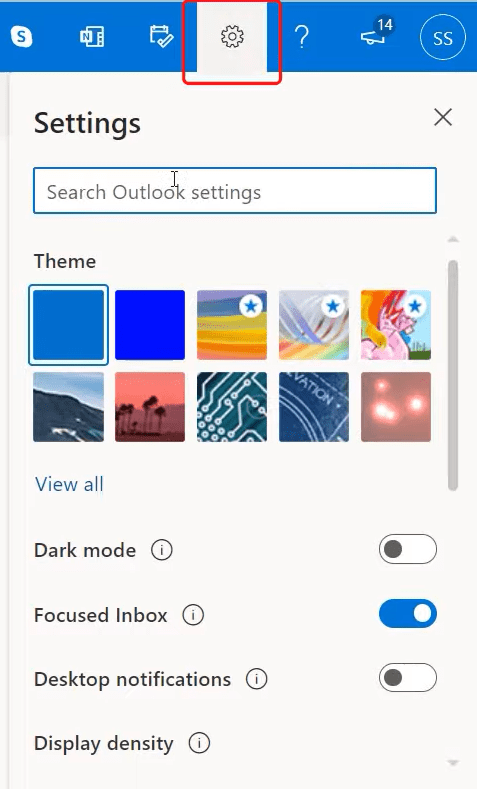
- Click the cog button in the top right of the toolbar to bring up the Settings menu.
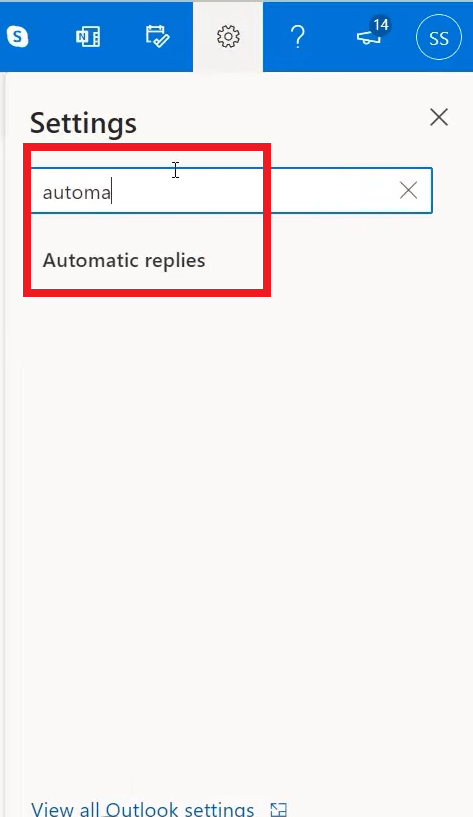
- Type Automatic replies on the Search tab of the setting menu and click on Automatic replies
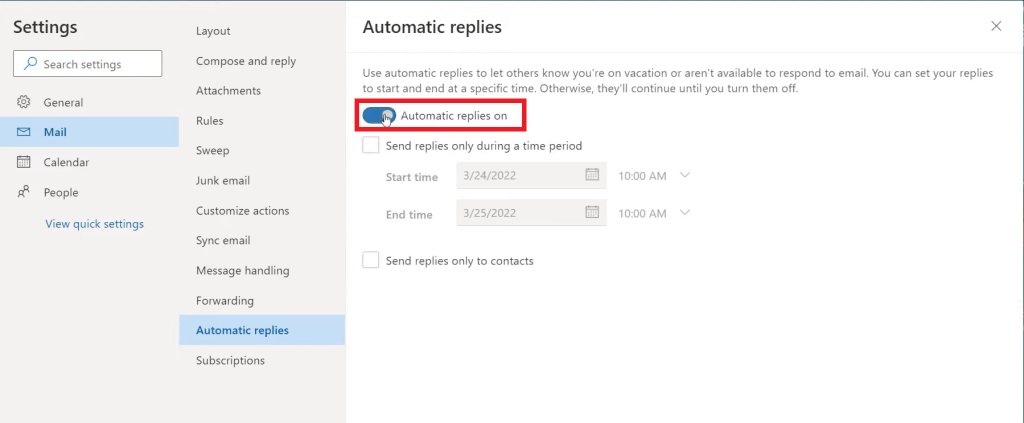
- Once the Automatic replies dialogue box is open, turn on Automatic replies
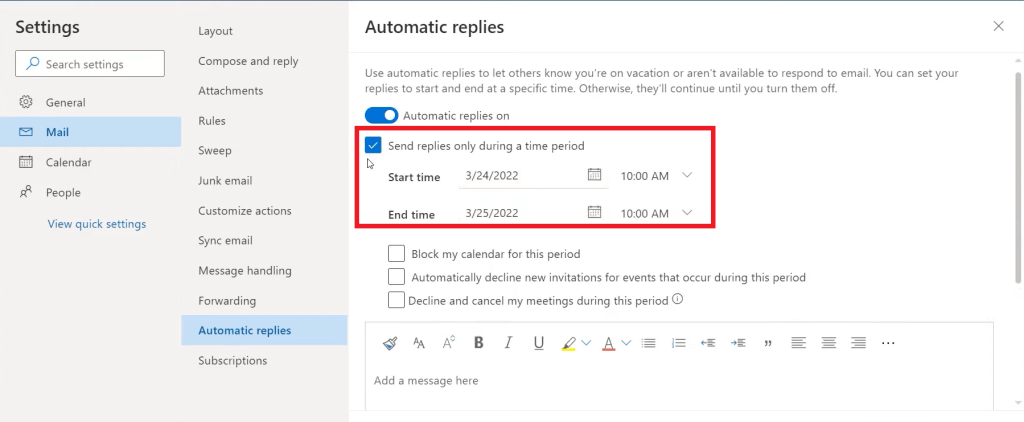
- Click the box Send replies only during this time period and fill in the start date and end time for the time you will be away from the office and won’t be able to check your emails.
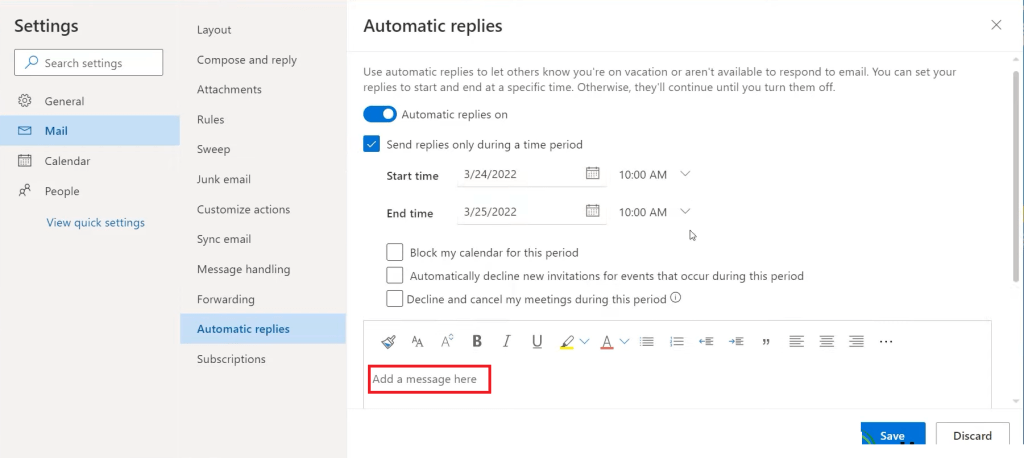
- Create a message which you want as an Automatic reply in the “Add a message here” dialogue box.
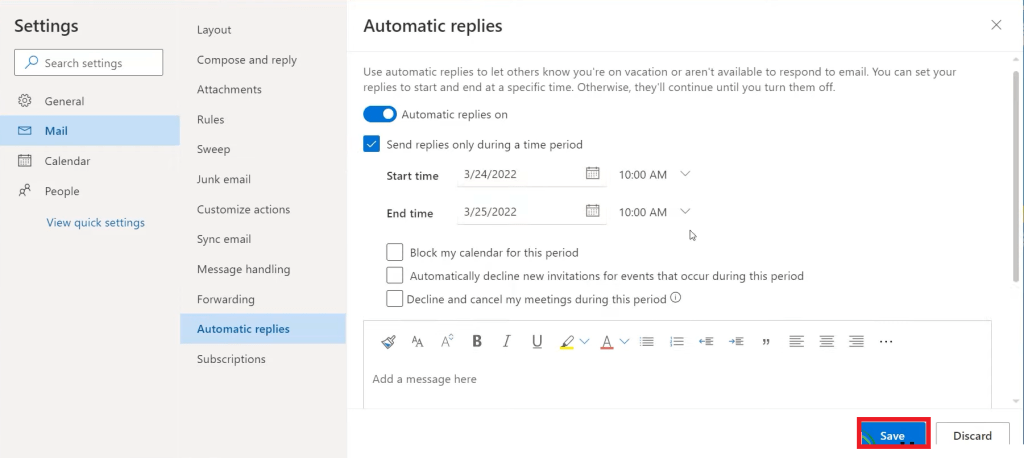
- Click on Save and your automatic replies setting will be saved
Options in Microsoft Outlook.com Not Available in the Desktop Version
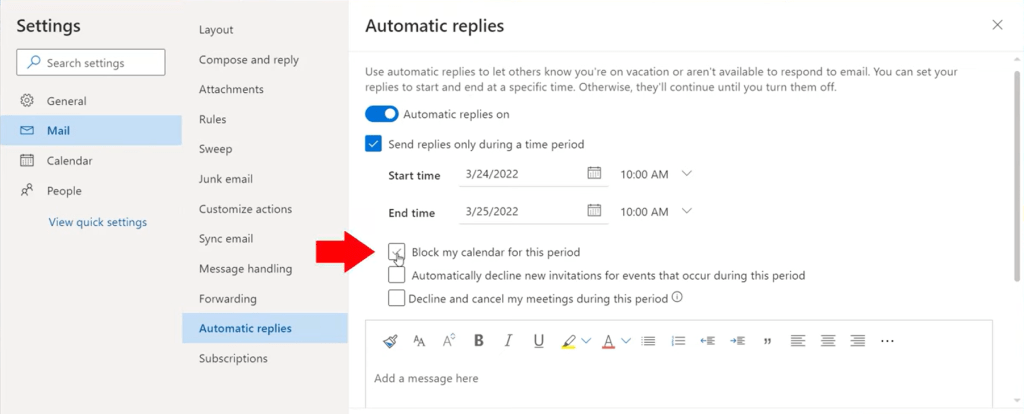
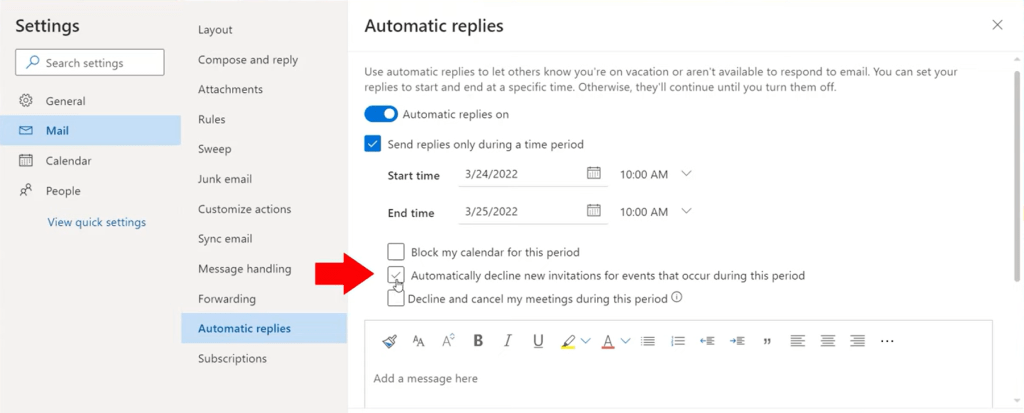
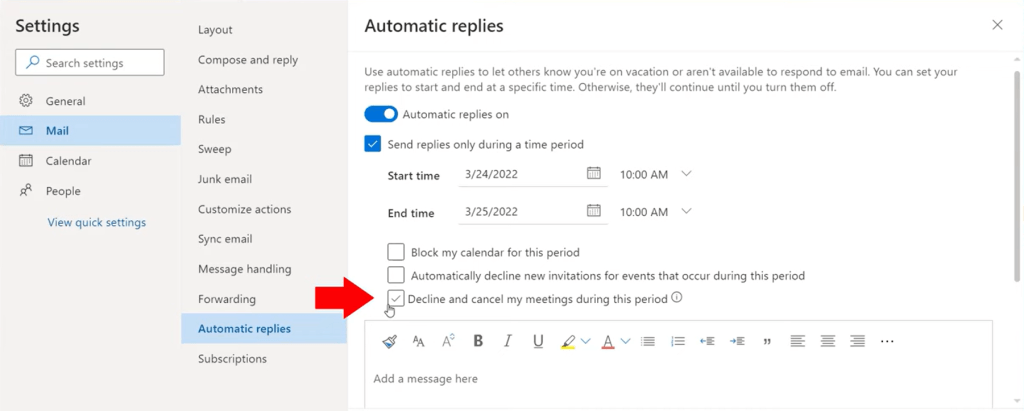
There are a few extra features available on Outlook online version compared to the outlook desktop version. Once you have turned on the Automatic reply option and you have selected your time period, the following are the extra options available:
- Block my calendar – You can click this option if you are sharing your account with someone else, so people will know that you are out of the office.
- Automatically decline new invitations – By clicking on this option, all new invitations that you receive during this period will be declined automatically. So, you will not have to worry about responding to any of the requests or meetings, or events you are receiving emails for.
- Decline and cancel my meetings – You can automatically decline or cancel any request for meetings scheduled during the period you are out of the office.
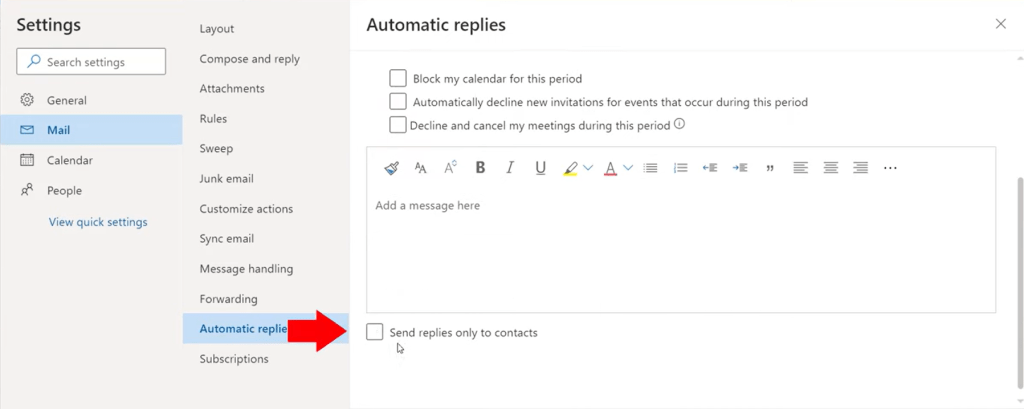
- Send replies only to contacts – Below the message box, there is an option of sending replies only to people in your contact list. By clicking on this option, your automatic reply will only be sent to those emails which you have received from your contact list while you are out. And if you are receiving messages from outside your contact list, then your automatic replies will not be sent to those people.
Frequently Asked Questions
How do I set up automatic replies in Outlook?
To set up automatic replies, go to the File tab and click Automatic Replies (Out of Office). In the dialog box, select Send automatic replies, then set your start and end dates (optional) and type your message. Click OK to save your settings.
Can I create different messages for internal and external contacts?
Yes, Outlook allows you to customize separate messages. In the Automatic Replies dialog box, use the Inside My Organization and Outside My Organization tabs to create different responses tailored to your internal team and external contacts.
Do automatic replies work without setting a specific time frame?
Yes, you can enable automatic replies without a time frame. However, they will remain active until you manually turn them off, which may result in unnecessary replies if not deactivated.
Can I use automatic replies with a shared mailbox?
Yes, you can set up automatic replies for shared mailboxes if you have the necessary permissions. Open the shared mailbox in Outlook, follow the same steps to enable automatic replies, and customize the message accordingly.
Do automatic replies work when Outlook is closed?
Automatic replies will work even if Outlook is closed, as long as your account is on an Exchange server or connected to Office 365. For non-Exchange accounts (like Gmail or IMAP), the computer must be online and Outlook must be running.
Conclusion
In this article, we have learned how to set up Microsoft Outlook Automatic Reply & Out of Office Messages and send an automatic email reply to the email sender if you are out of the office or sick. We have also learned where to set Automatic Reply, set a custom reply for a specific person, how to turn automatic reply off, how to set Automatic Reply in the online version, and much more.
John Michaloudis is a former accountant and finance analyst at General Electric, a Microsoft MVP since 2020, an Amazon #1 bestselling author of 4 Microsoft Excel books and teacher of Microsoft Excel & Office over at his flagship MyExcelOnline Academy Online Course.

