Free Practice Workbook
Microsoft Copilot can be used to generate charts, dashboards, summarise information, or provide answers to your data. But the output generated may not always meet your requirements. You can personalize Copilot’s output by giving instructions and providing examples. In this article, you will learn how to personalize Copilot output in Excel.
Key Takeaways:
- Copilot personalization helps you get results that match your preferences.
- You can save preferences in Copilot settings.
- Workbook rules are made for a specific Excel workbook.
- Make sure that the prompts mentioned in Copilot are short and clear.
- You can customize formats, formulas, charts, and responses.
Table of Contents
What is Copilot personalization?
Copilot personalization is the instructions that you give to Copilot to tailor the output. You can tell it how you want the output once, and it will follow the instructions every time. You can set rules for number formats, dates, table styles, formulas, charts, PivotTables, and even the tone of Copilot’s replies.
Excel provides personalization settings that allow you to save these preferences. You can also use specific prompts and workbook rules to guide Copilot.
Let’s look at the different ways to personalize Copilot output in Excel.
How to Personalize Copilot Output in Excel
1. Use Personalization Settings in Copilot
Excel has a Personalization feature that allows you to save your preferences for Copilot. These preferences are saved to your Microsoft account and apply across your workbooks and Copilot sessions. You do not have to repeat the same instructions every time you open a new workbook.
Follow the steps to personalise the output in Copilot:
STEP 1: Open an Excel workbook and select the Copilot button.
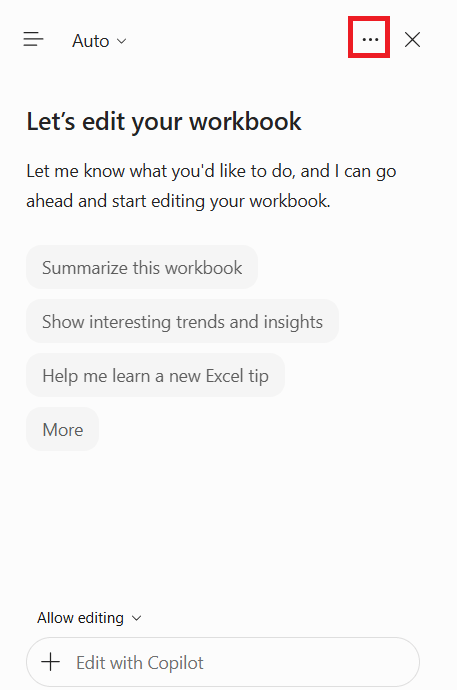
STEP 2: In the Copilot pane, go to the upper-right corner and click the three-dot menu.
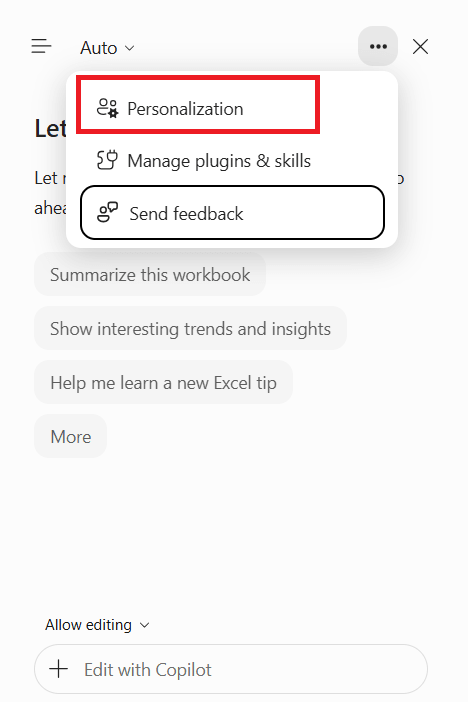
STEP 3: Select Personalization from the menu.
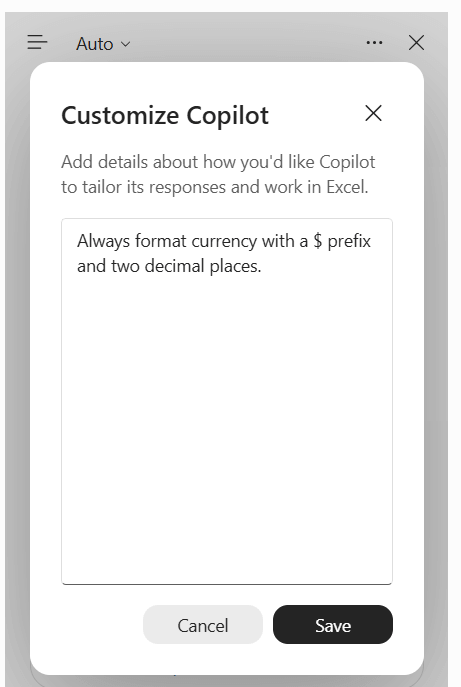
STEP 4: Enter your preferences in the personalization dialog box.
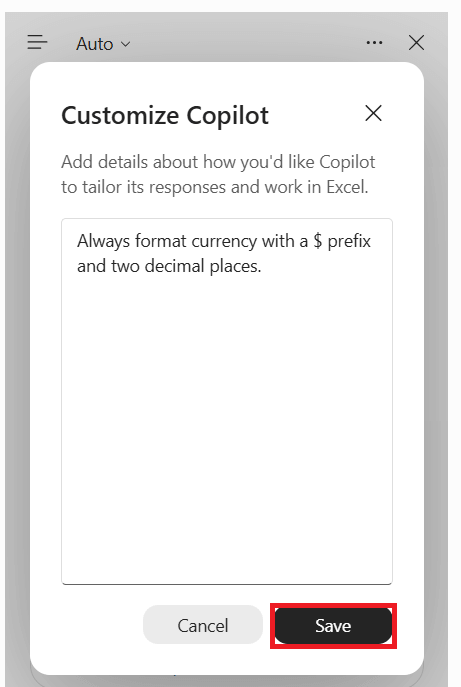
STEP 5: Click Save.
2. Create Workbook Rules
Workbook rules are the instructions that tell Copilot how to work with Excel. You can mention any specific format or formula that you want to follow when making changes to the file.
STEP 1: Open the Excel workbook where you want to set rules.
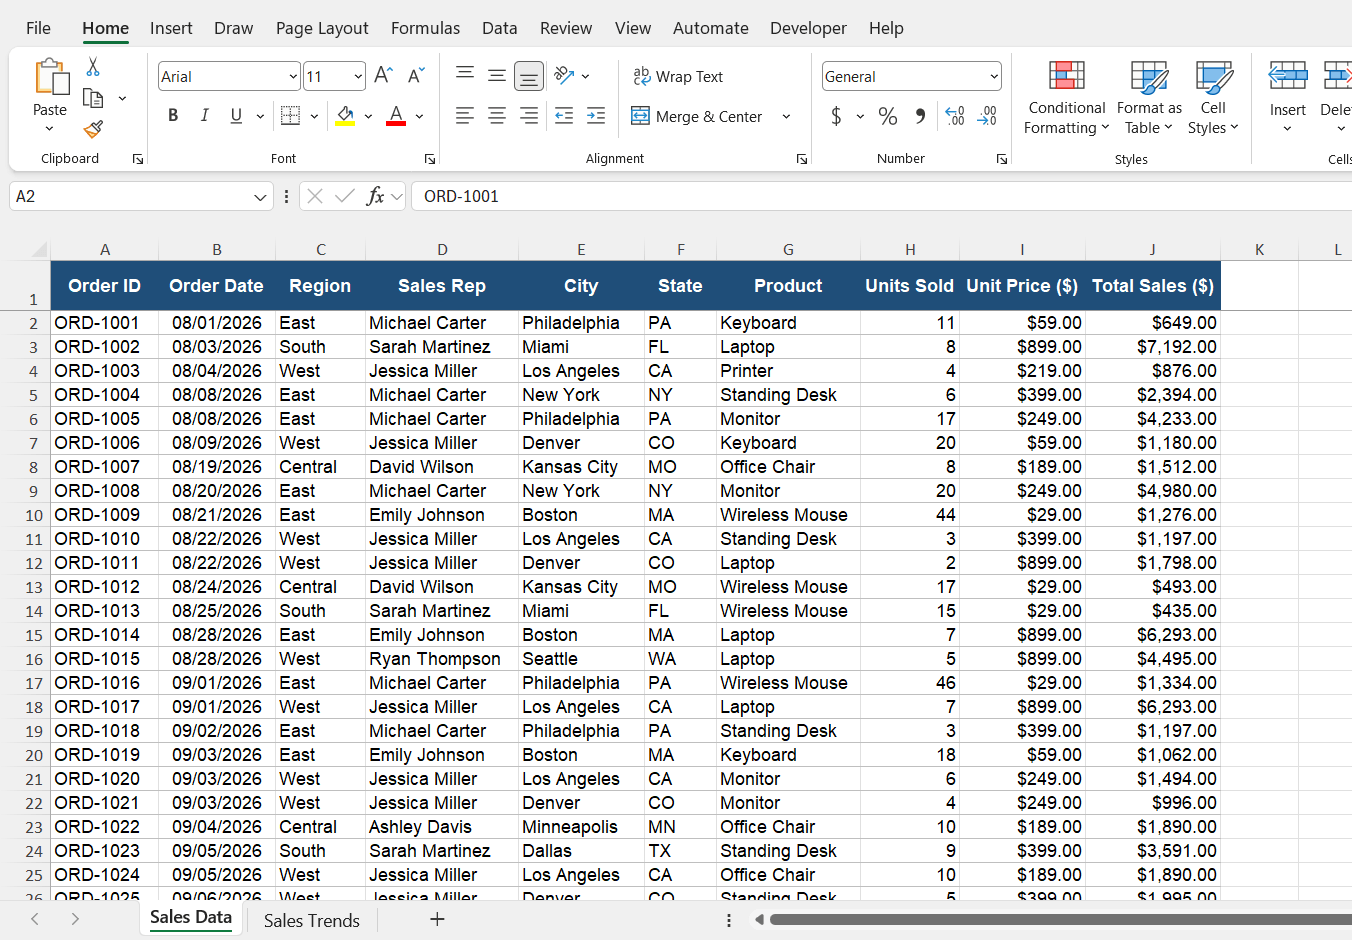
STEP 2: Go to the Home tab and select the Copilot button.
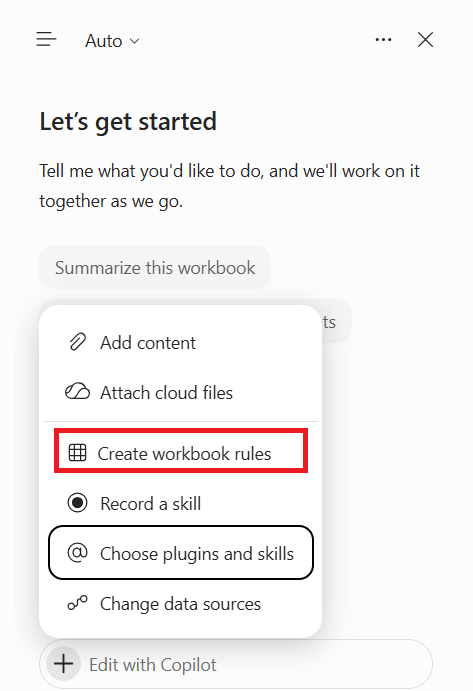
STEP 3: In the Copilot pane, click on the Add (+) menu and select Create workbook rules.
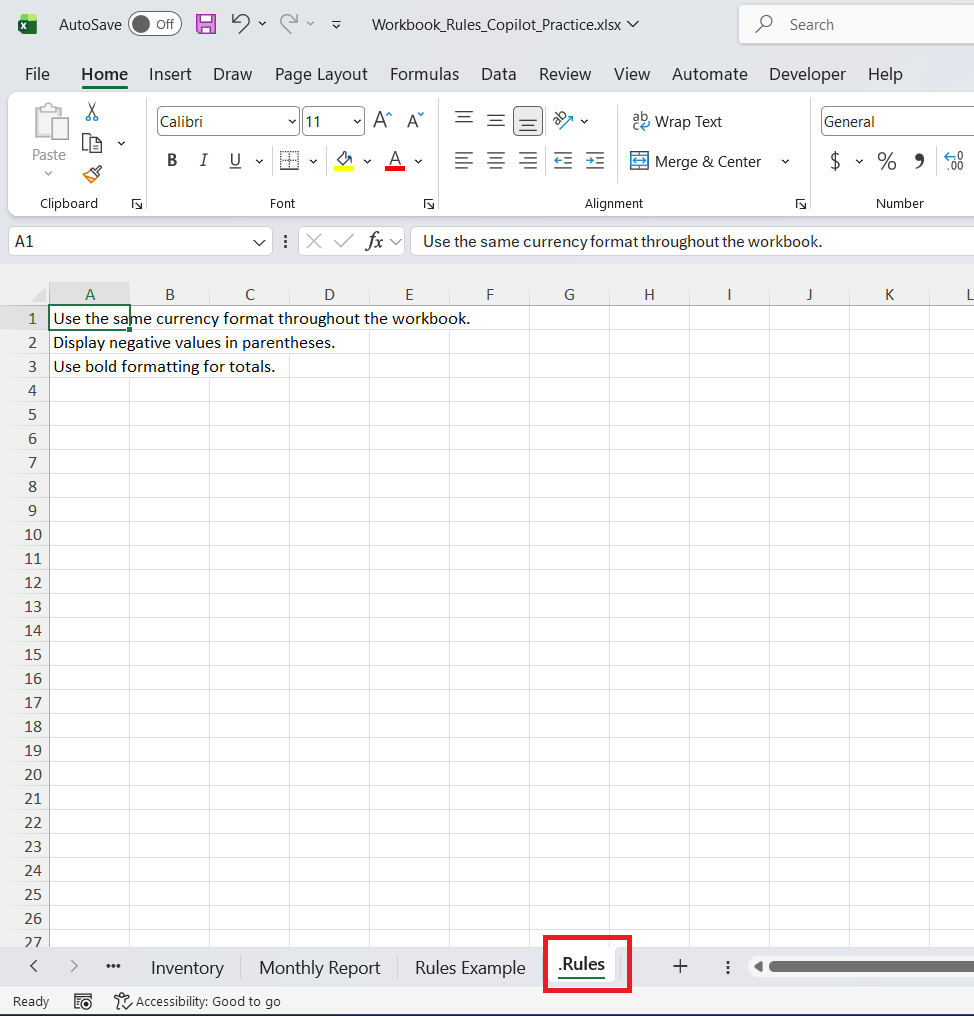
STEP 4: A worksheet will open with suggested rules. You can review and make changes as per your requirements.
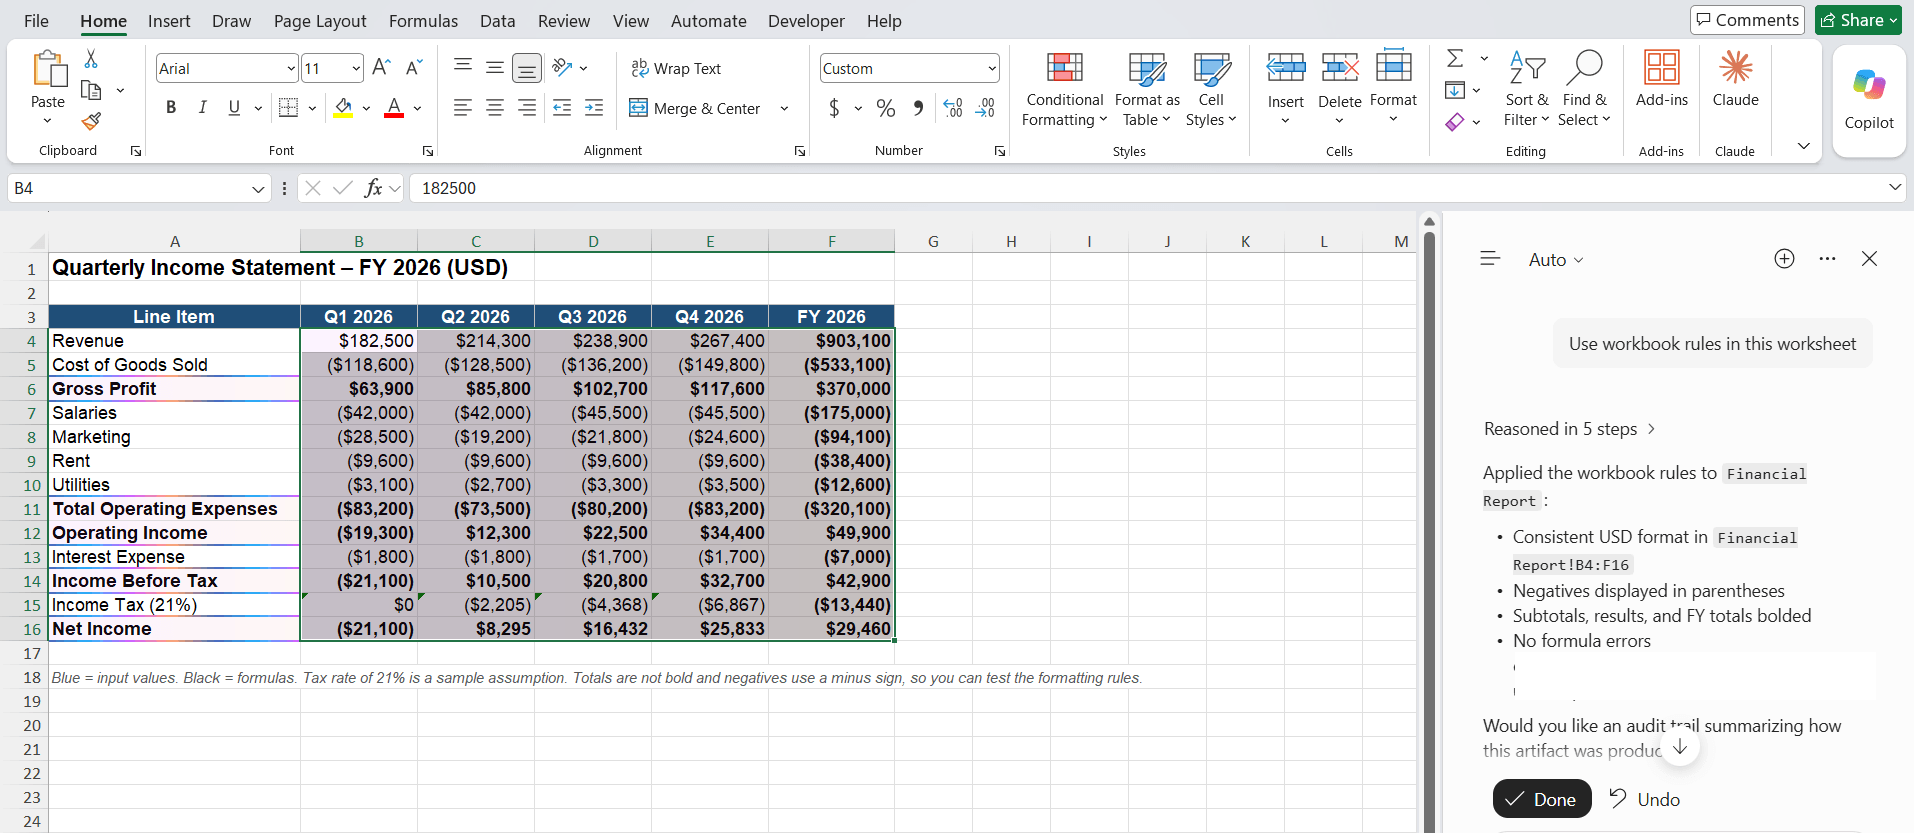
STEP 5: After setting up the rules, test them using Copilot.
3. Use Specific Prompts
If you want to create a personalization for a specific task, you can clearly mention it in the prompt. If your prompt says something different from a saved preference, the prompt wins. For example, say your saved preference shows numbers with a $ sign and two decimal places.
If your prompt asks Copilot to round to whole numbers, it rounds to whole numbers for that task.
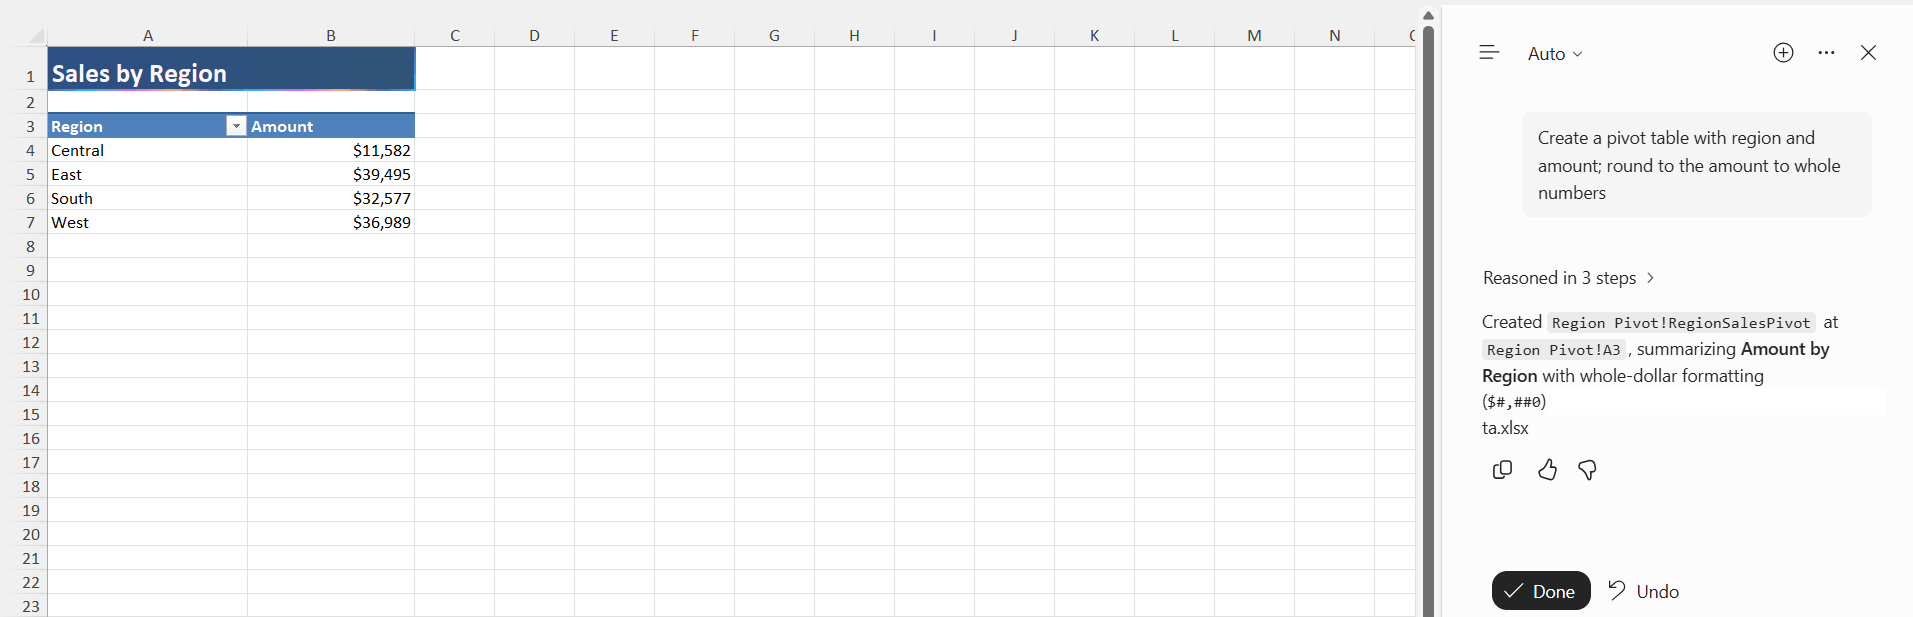
Your saved preference still applies to your next prompt.
FAQs
1. What is Copilot personalization in Excel?
It allows you to customize Copilot output using your preferred instructions.
2. Do Copilot personalization settings apply to all workbooks?
Yes. Saved preferences apply across your workbooks.
3. What are workbook rules in Excel?
Workbook rules are instructions that you can give to Copilot. They tell Copilot how to work on the Excel workbook.
4. Can I change Copilot’s output using prompts?
You can provide instructions to be followed for a specific task by mentioning it in the prompt itself.
5. Do custom prompts override saved preferences?
If you have saved preferences and a specific prompt describing a different setting for a task, specific prompts will take priority.

John Michaloudis is a former accountant and finance analyst at General Electric, a Microsoft MVP since 2020, an Amazon #1 bestselling author of 4 Microsoft Excel books and teacher of Microsoft Excel & Office over at his flagship MyExcelOnline Academy Online Course.

 30 Days - Full Access