In this article, we will cover the following topics in detail –
Download the Excel Workbook below to follow along and understand How to Use Power Query in Excel –
download excel workbookPower-Query-in-Excel.xlsx
Introduction to Power Query in Excel
It simplifies the process of importing, transforming, and cleaning data, making it an invaluable tool for data analysis or reporting. You can import data from different data sources, transform it as per your requirements, and then load it back to the data worksheet.
Power Query accesses, cleans, and transforms all that messy data and displays it in a way that Excel loves and can work with. So no more formulas, text to columns, trim spaces, VLOOKUP, find & replace, etc.
Once the query has been set, you can simply refresh it every time you want to run the steps again. So when you need to create the same report with updated data, a simple REFRESH will transform the report. It helps you save hours of time and reduce the risk of manual errors.
Power Query empowers users to focus on deriving meaningful insights and making data-driven decisions.
Enable Power Query
Power Query is available as a free add-in for Excel 2010 and 2013 users. Once you install it, you will see the Power Query tab in the Excel ribbon.
Click to see a tutorial on how to install Power Query in Excel 2013
Click to see a tutorial on how to install Power Query in Excel 2010
For Excel 2016 and later versions, Power Query is built into the application.
- Open the Excel application, and click on the Data tab in the Ribbon.
- Look for the Get & Transform group. This group contains all Power Query tools.
Power Query Workflow
When working with Power Query in Excel, the entire process is divided into 4 main steps –
STEP 1 – Import Data
You can import data from multiple sources like Excel, CSV, web, pdf files, etc. This step eliminates the need for manual data entry and ensures a seamless integration of external data.
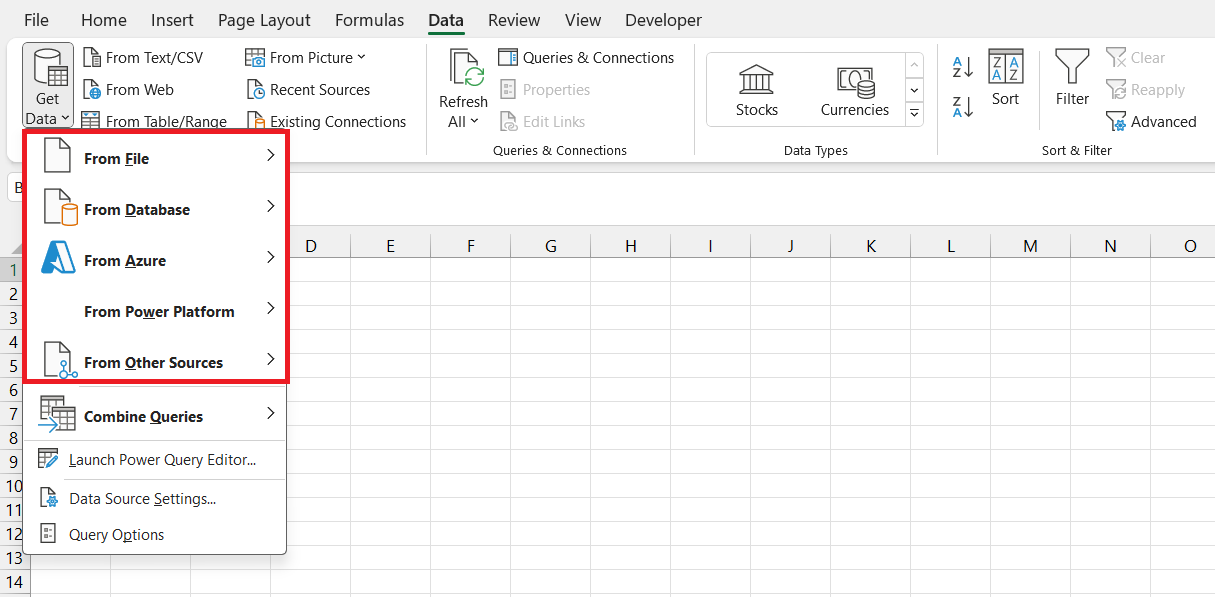
To import data, go to Data > Get Data and select the required option.
STEP 2 – Transform Data
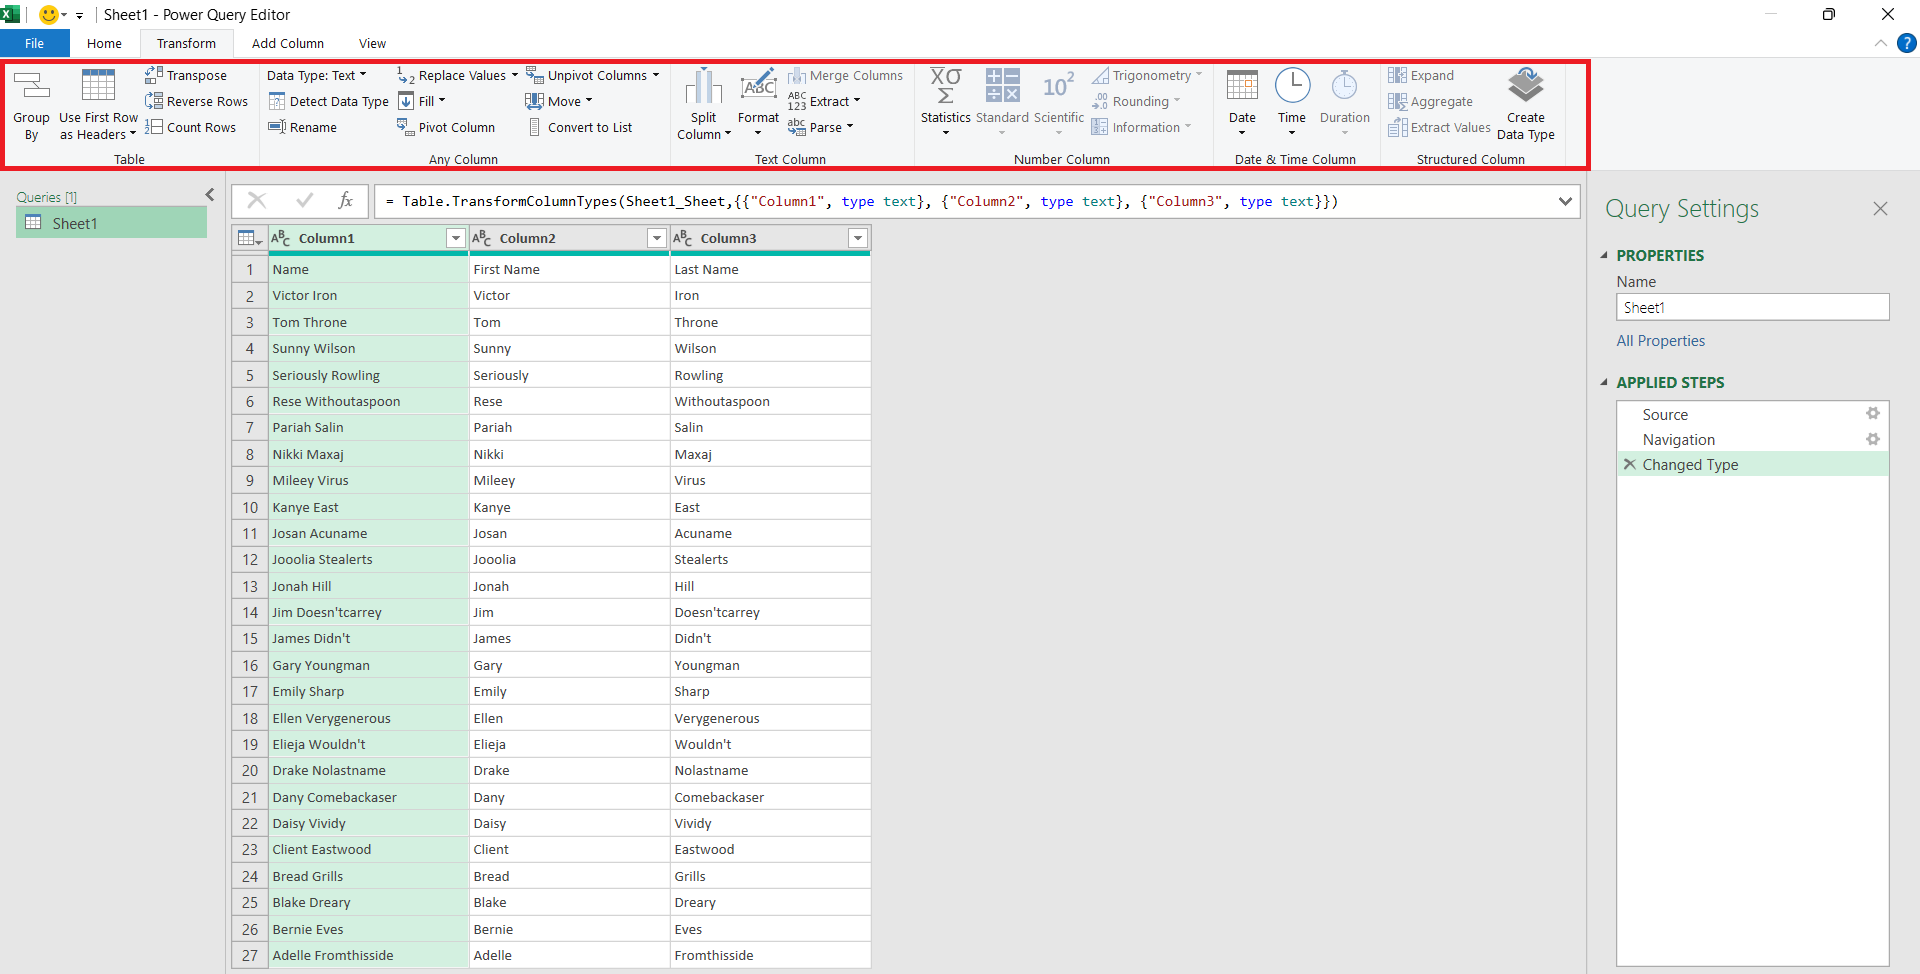
Once you have the data in the Power Query window, you can easily use the vast range of built-in data cleaning and transformation tools like removing duplicates, changing cases, transposing, unpivoting data, splitting text, filtering records, and much more.
Click here to learn 50 different things you can do with Excel Power Query.
STEP 3 – Load Data
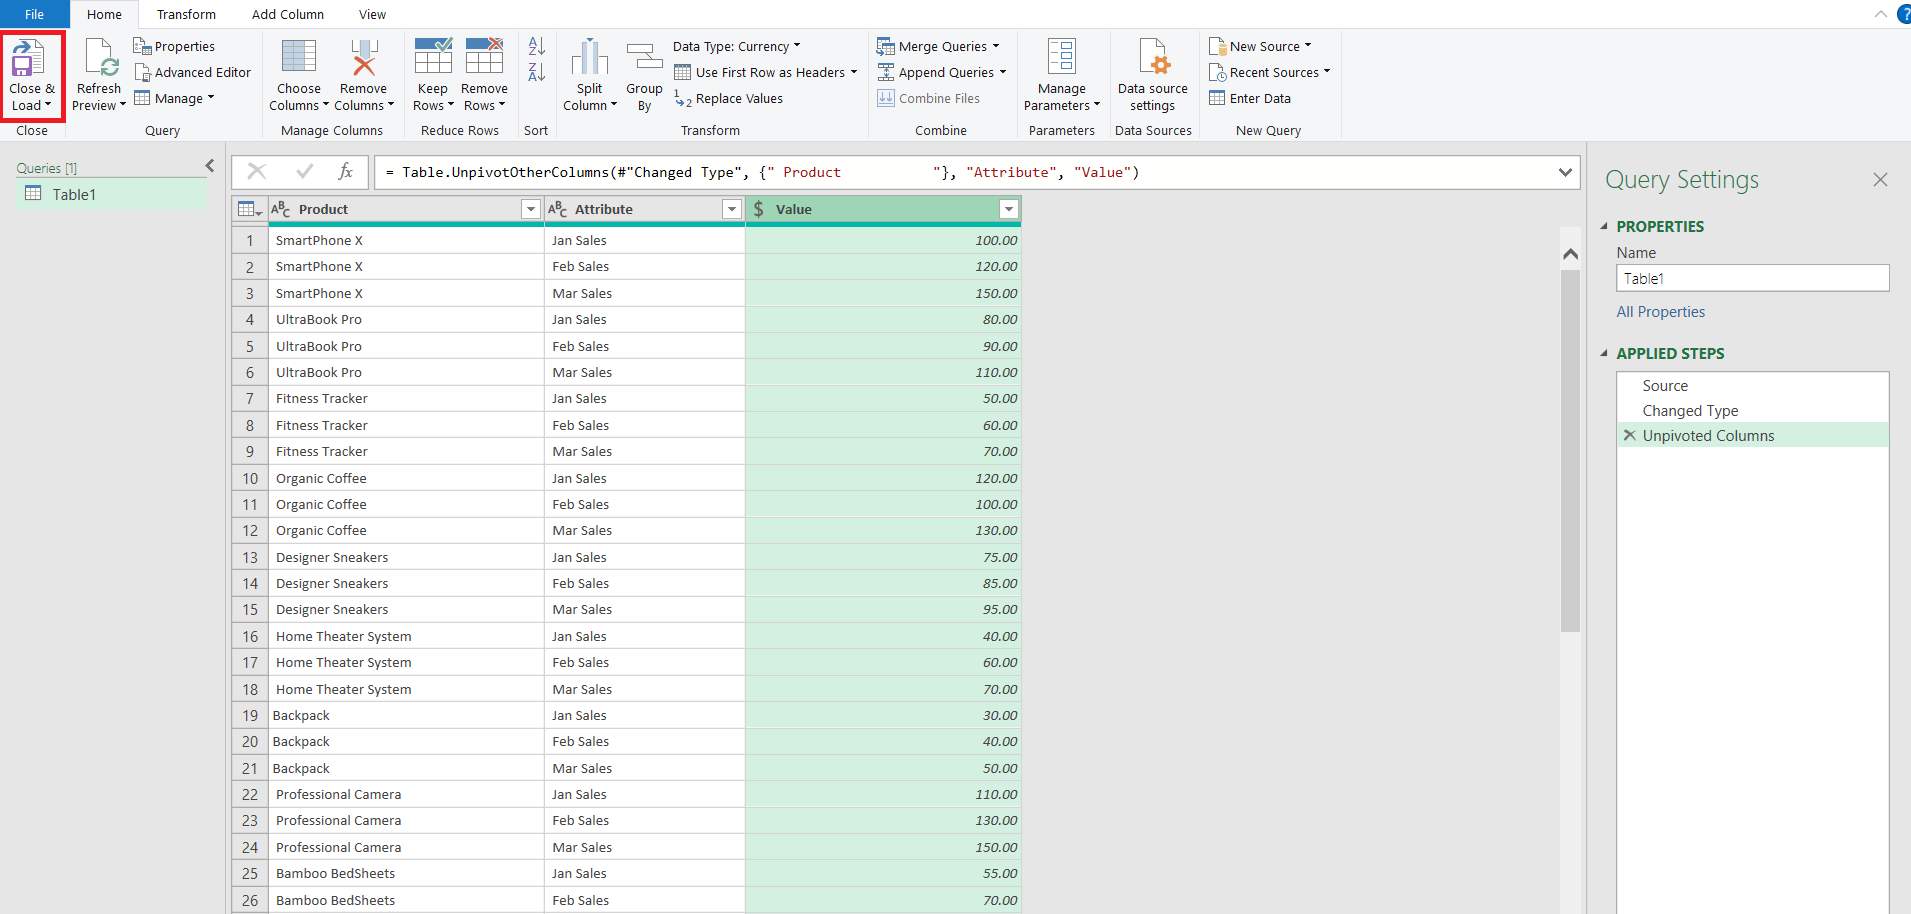
Once the data has been imported and transformed, the final step involves loading it back into Excel to create reports. To load the data, simply click on the Home tab > Close & Load
Let us look at an example to understand better.
Example of Power Query
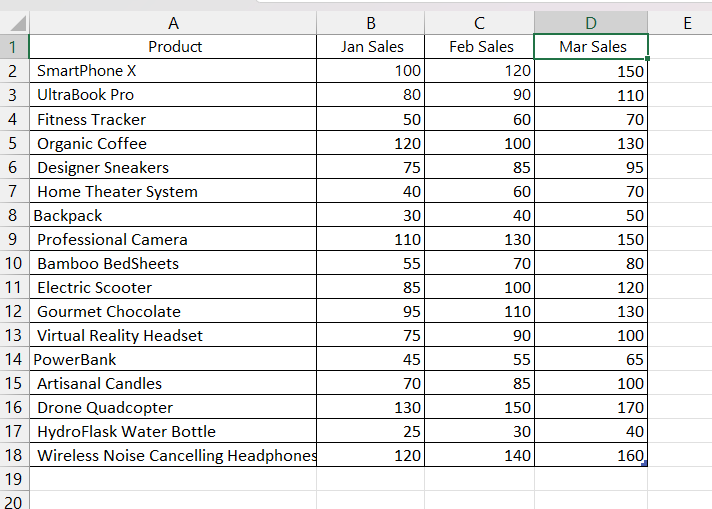
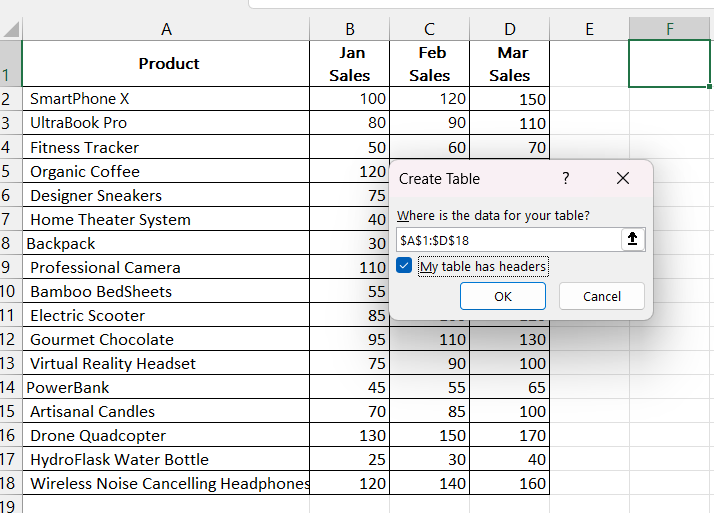
Suppose you have the product names in one column and their 3 months’ sales in the next 3 months as shown below.
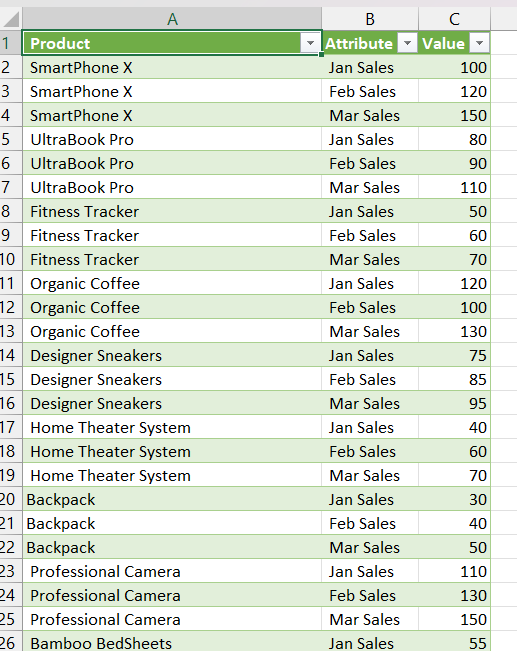
Now, you want to change this crosstab format to a tabular one, where you have the product name in 1st column, month in 2nd column, and sales in 3rd.
This is called unpivoting data where you convert columns into rows. Each row now represents a unique combination of a product, a month, and the corresponding sales figure. It is particularly useful when you need to analyze or visualize data to create pivot tables.
Changing this format manually can be time-consuming and can lead to errors as well. So, the best approach for this is to use the unpivot option available in the power query. Follow the steps below to achieve the result –
STEP 1: Go to Data > From Table/Range.
STEP 2: Select the range and press OK.
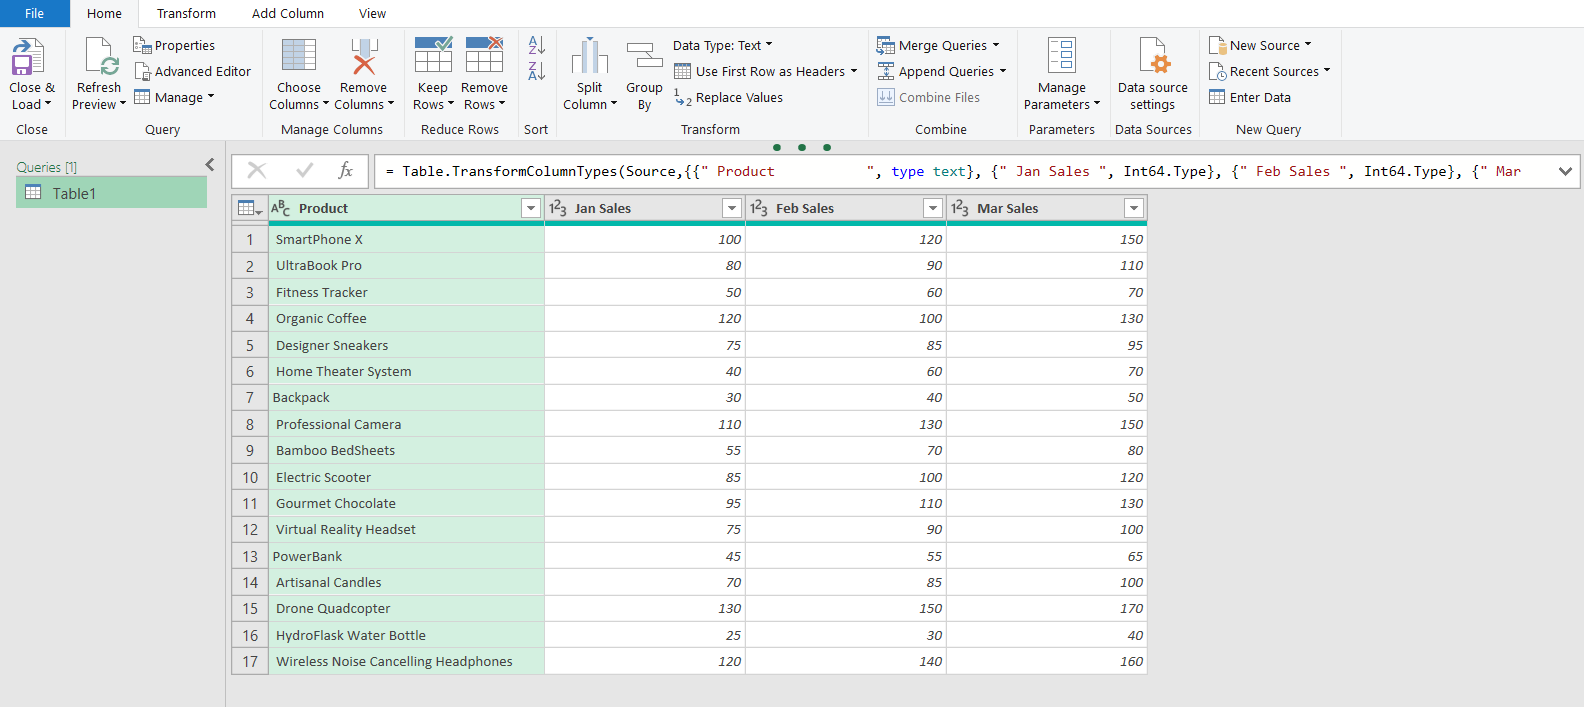
The table will be loaded in the Power query window.
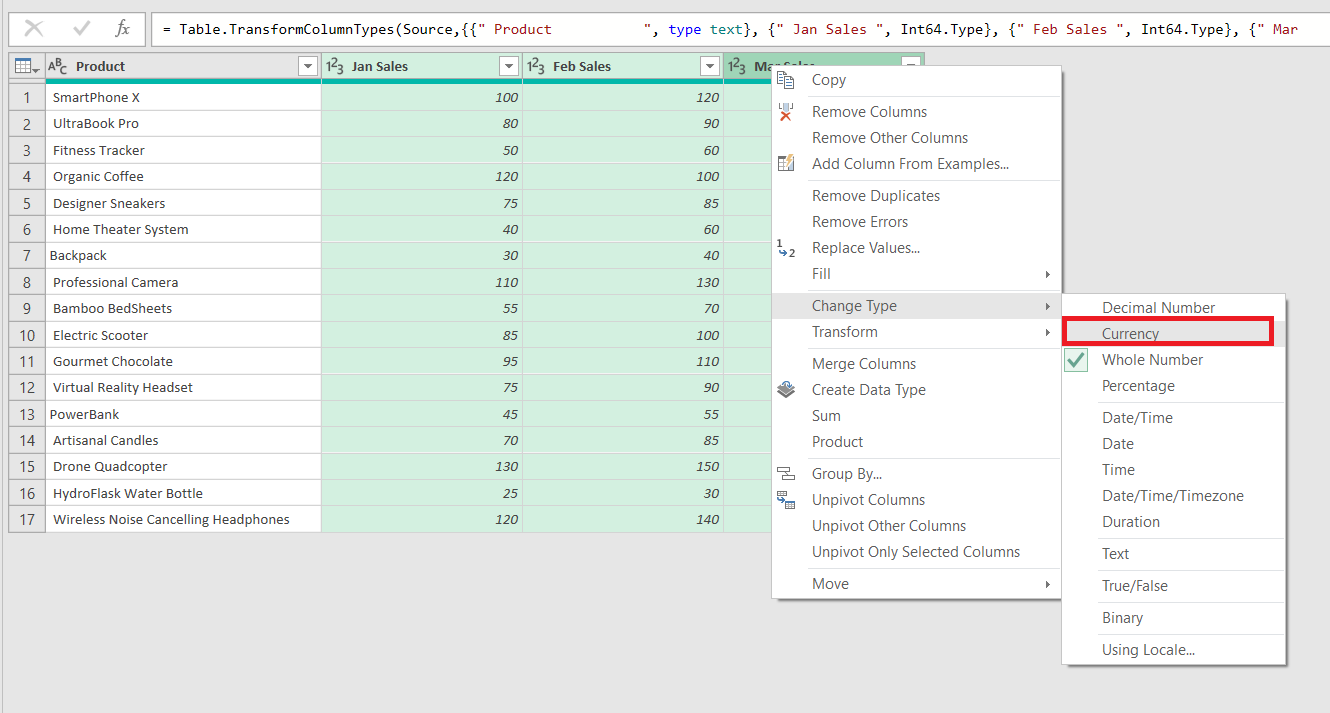
STEP 3: Highlight the sales columns, right-click, and select Change Type > Currency.
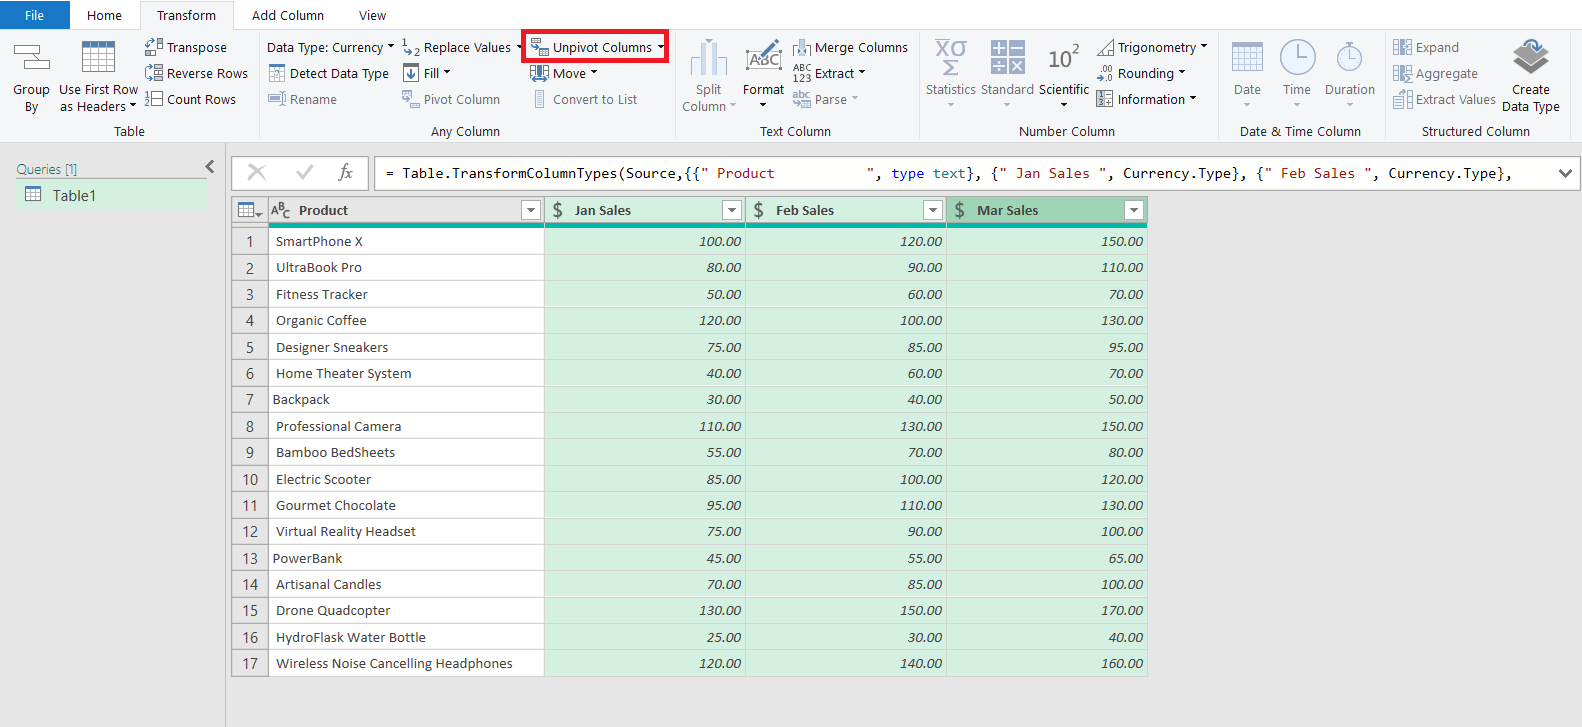
STEP 4: Highlight the sales column and go to Transform > Unpivot Columns.
The format of the table will be changed.
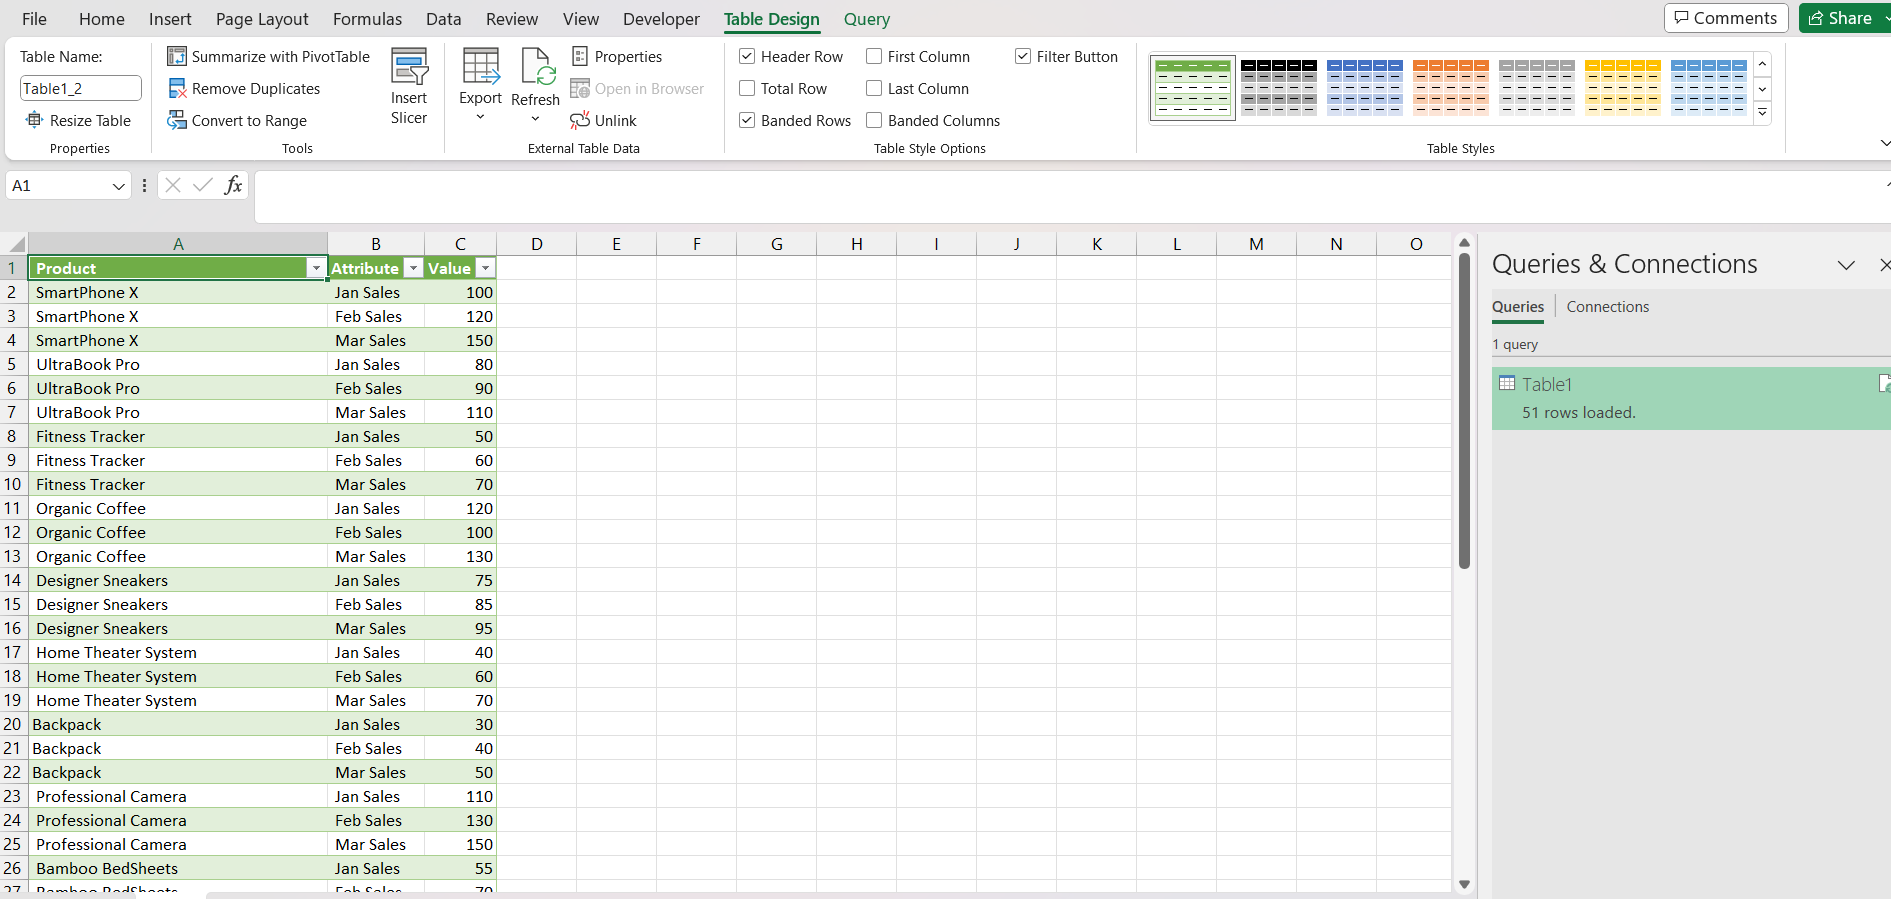
STEP 5: Simply go to Home > Close & Load to get the data back to your Excel Worksheet.
This is how the data will look in Excel.
Power Query stands as a powerful asset in Excel, streamlining data analysis by simplifying the import, transformation, and cleaning processes. In this article, we have covered topics like enabling Power Query, understanding the workflow, and providing a practical example to showcase its transformative capabilities.
Click here to learn all about Power Query in Excel!
John Michaloudis is a former accountant and finance analyst at General Electric, a Microsoft MVP since 2020, an Amazon #1 bestselling author of 4 Microsoft Excel books and teacher of Microsoft Excel & Office over at his flagship MyExcelOnline Academy Online Course.


